.png "Powered by vBulletin")
The quality of the work on this site never ceases to amaze.
Nice work, Lars.
-
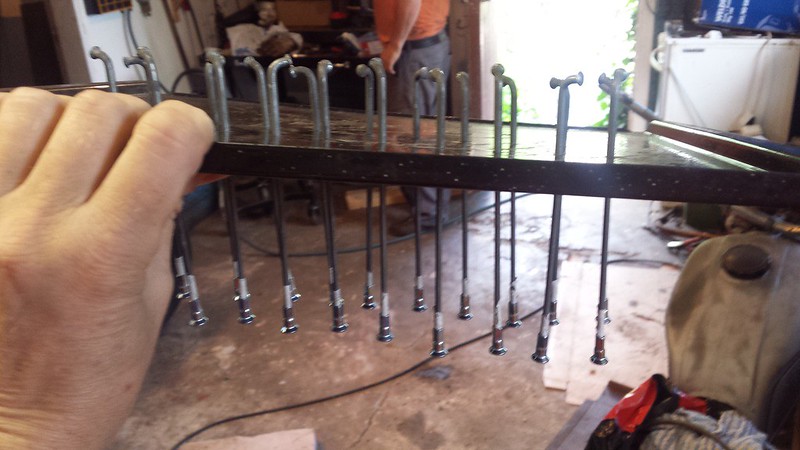
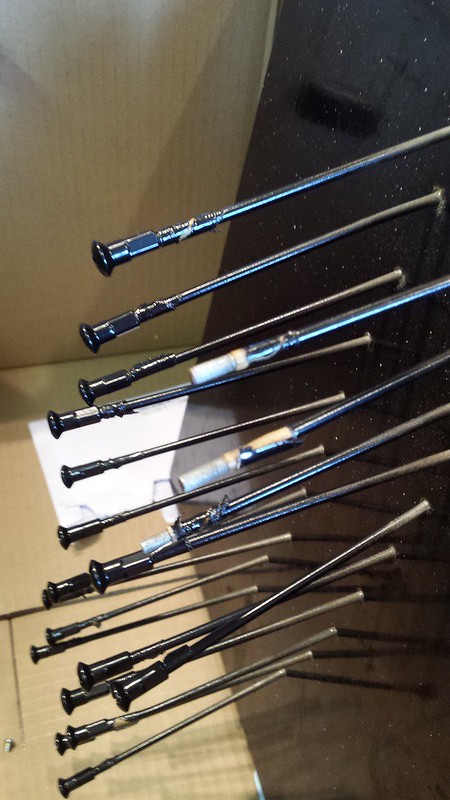
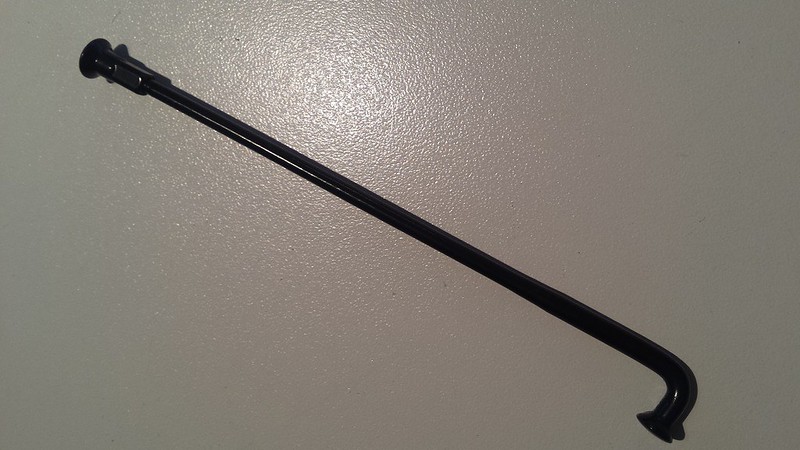
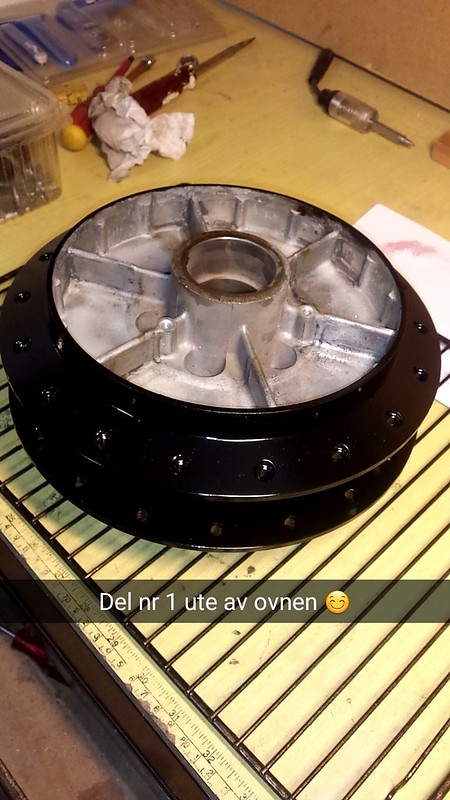
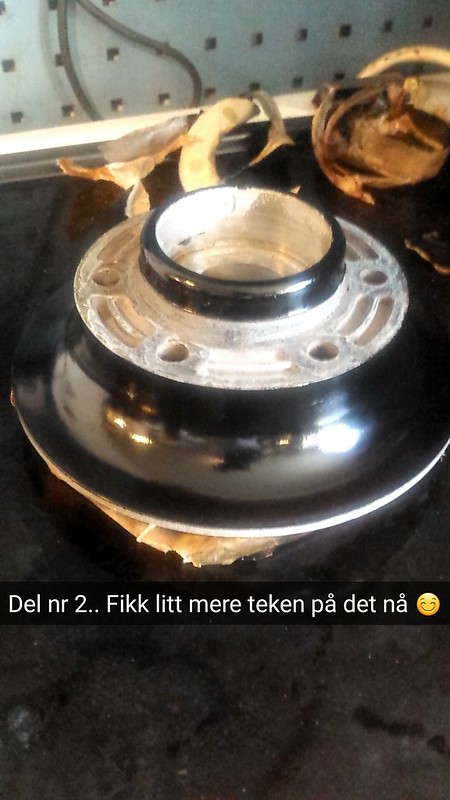
Had the time to powdercoat the spokes and nipples today. Covered half of the threads on the old spokes with masking tape and screwed the new nipples on them so the nipples would get completely covered in powder. Coated the new spokes by them selves. The finish was as smooth as the rim I ordered with professional powdercoating. The hub I did a couple of weeks ago didn't get quite as nice, and I understand now that it was because I didn't heat it enough before the baking. This causes the powder to not float properly.
Anyway, here are the pictures:
 20160707_133821_zpsx0ns4jgx by Lars Krogh-Stea, on Flickr
 20160707_145214_zpsppwflcp1 by Lars Krogh-Stea, on Flickr
 20160707_212122_zpsp8rix6ty by Lars Krogh-Stea, on Flickr
Leave a comment:
-
First try with the powdercoating equipment. Next up will be the spokes and nipples.
 Snapchat-8548424895810138590_zpshz6x3crk by Lars Krogh-Stea, on Flickr
 Snapchat-5750727464801896914_zps9h60mojs by Lars Krogh-Stea, on Flickr
 Snapchat-3550012378084688016_zpshtswbcoz by Lars Krogh-Stea, on Flickr
 Snapchat-207582542816693880_zpszzjh0kdu by Lars Krogh-Stea, on Flickr
Last edited by LarsKroghStea; 01-29-2018, 03:44 PM.
Snapchat-207582542816693880_zpszzjh0kdu by Lars Krogh-Stea, on Flickr
Last edited by LarsKroghStea; 01-29-2018, 03:44 PM.Leave a comment:
-
ThanksOriginally posted by Rensdw View Post Looking forward to the result. Will post a picure of mine when the welding is done.
Leave a comment:
-
 Guest repliedMan, how you are making that seat just gave me the confidence to go and make my own like that, thanks a lot!
Leave a comment:
-
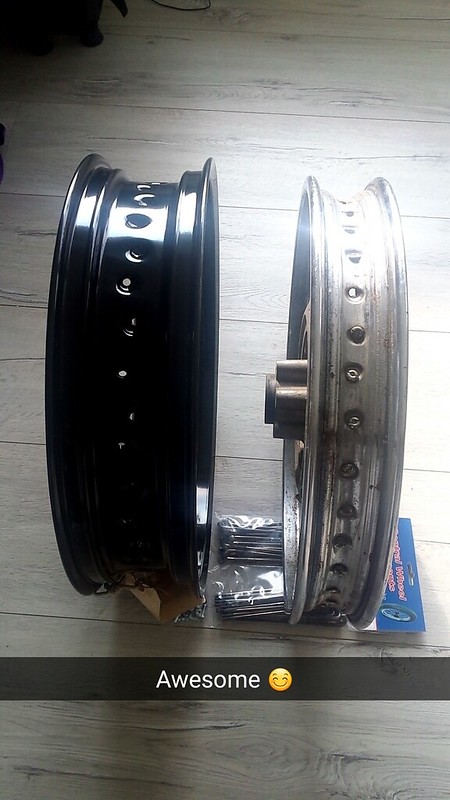
Original rear wheel with new powdercoated rim by the side.
 Snapchat-8854658473716042179_zpsjeazhfri by Lars Krogh-Stea, on Flickr
Last edited by LarsKroghStea; 01-29-2018, 12:16 PM.
Snapchat-8854658473716042179_zpsjeazhfri by Lars Krogh-Stea, on Flickr
Last edited by LarsKroghStea; 01-29-2018, 12:16 PM.Leave a comment:
-
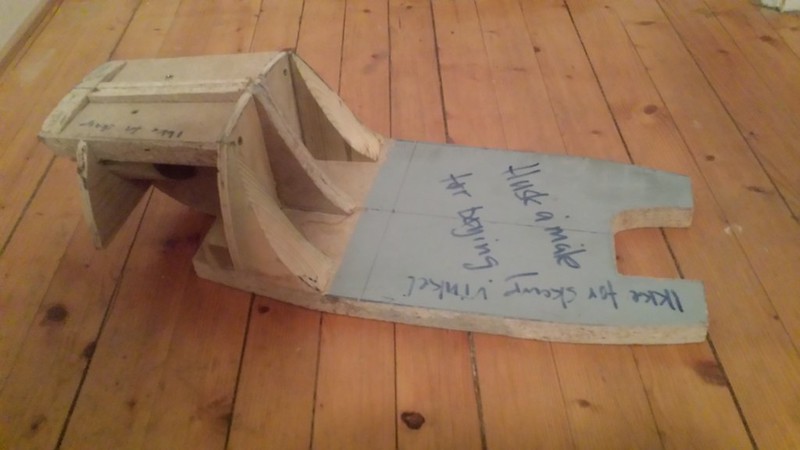
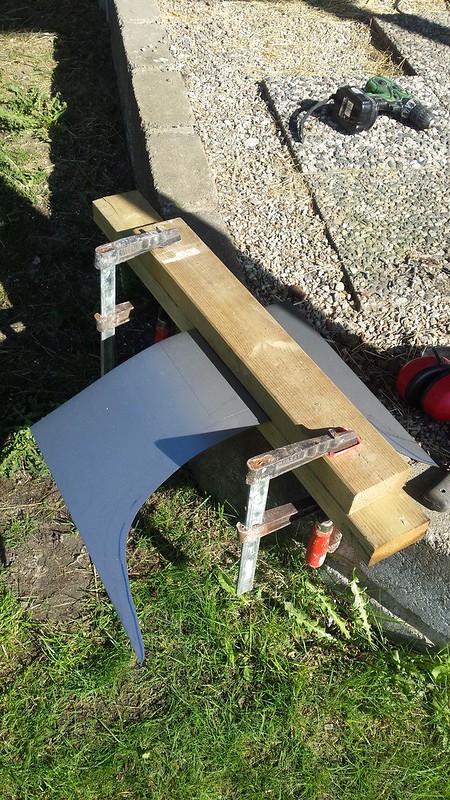
Took some tries to get the buck the way I wanted, but this is the final iteration:
 20160529_194812_zpsc9rkobar by Lars Krogh-Stea, on Flickr
Hard to bend the metalplates by hand, but I'm not going for the perfect look anyway. The result is okay by my standard.
Bendingtool no 1:
 20160525_174046_zpsq6sclfem by Lars Krogh-Stea, on Flickr
Bendingtool no 2:
 20160525_174040_zpssrtje3v8 by Lars Krogh-Stea, on Flickr
Bendingtool no 3:
 20160525_171654_zpsnjxyx8cd by Lars Krogh-Stea, on Flickr
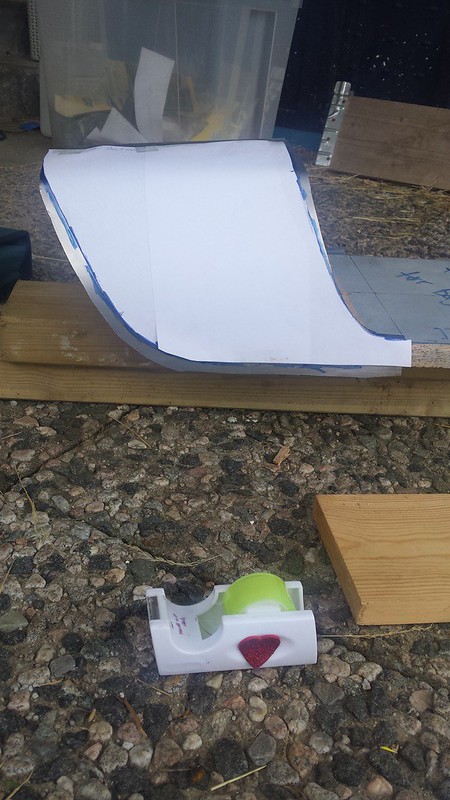
Result ready for final adjustement. Taped a stencil on the top along the middle to so that I could flip it back and forth and get both sides equal:
 20160529_155158_zpslwvsr8q0 by Lars Krogh-Stea, on Flickr
Last edited by LarsKroghStea; 01-29-2018, 12:12 PM.
20160529_155158_zpslwvsr8q0 by Lars Krogh-Stea, on Flickr
Last edited by LarsKroghStea; 01-29-2018, 12:12 PM.Leave a comment:
-
I should have my top clamp from Bullit Custom Cycles in a few days, so I'll let you know if my measurement method was at all accurate
Leave a comment:
-
Will do it as you decribe the manual way. The drill is mainly used for making signs and do not have DRO.Originally posted by JonnyC View Post
-LarsLeave a comment:
-
I just measured my top clamp, and I used a straight piece of rod and did a lot of adding/subtracting. With the clamp installed and the fork tubes raised above it, I laid a piece of drill rod across the tubes and used calipers to measure from it to the start of the middle hole. Knowing the diameter of the fork tube, the drill rod, and the steering stem hole, you can determine the offset.Originally posted by LarsKroghStea View Post
Heck, if that mill you used has a DRO, couldn't you just use that? That thing is sweet.
Excited to see where this build goes!Leave a comment:
-
HahaOriginally posted by rapidray View Post Not really, just needed something to do on the computer while the wife was watching Sons of Anarchy
  The bikebuilding is as important as the riding and I like learning new stuff and new ways to do things
Leave a comment:
-
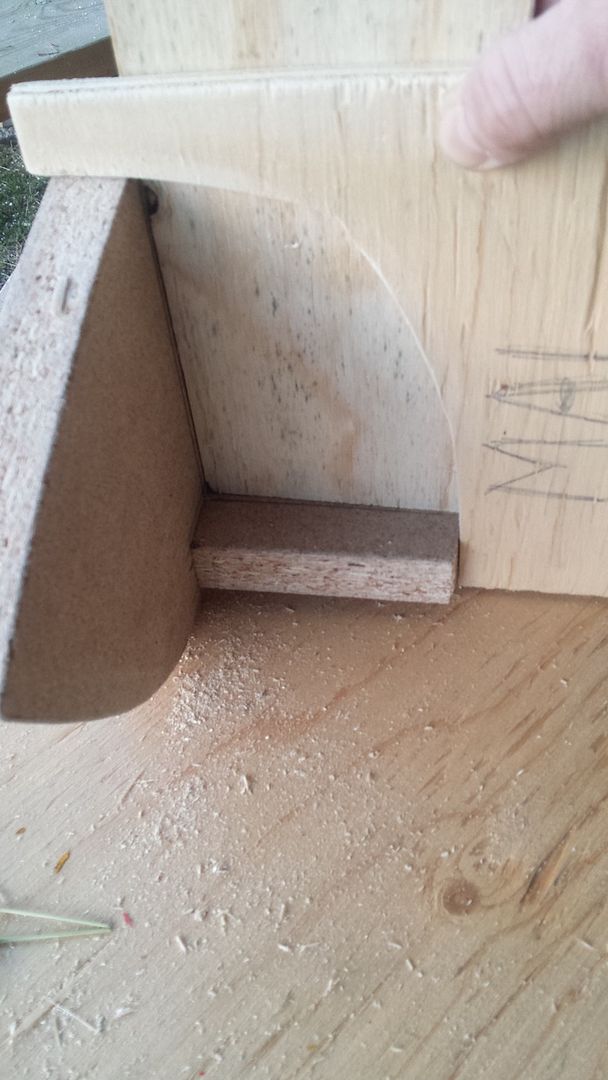
A couple of images from the building process. This shows how I'm making the buck.
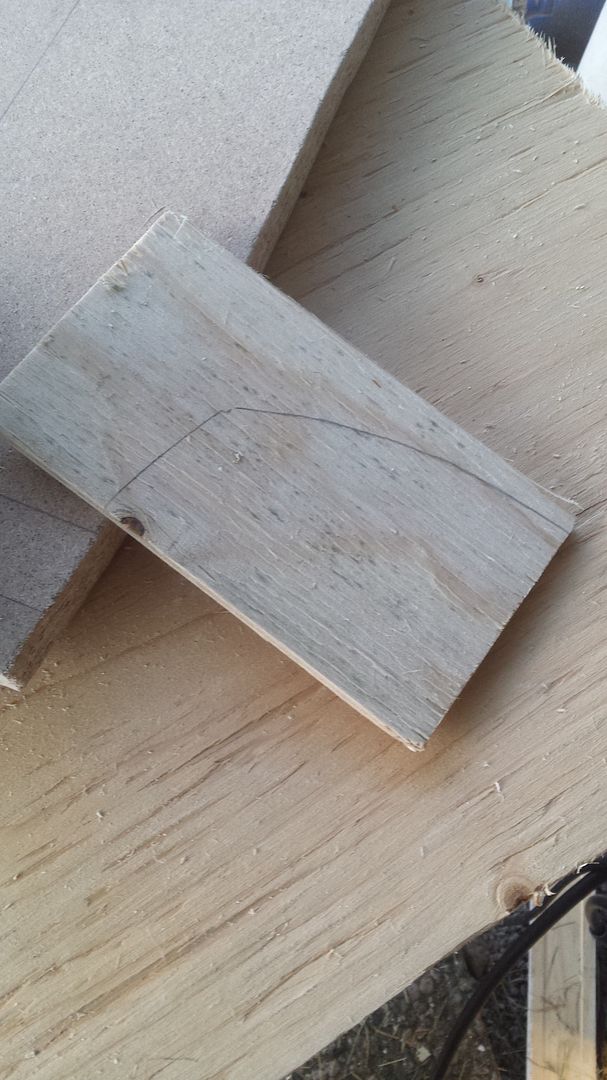
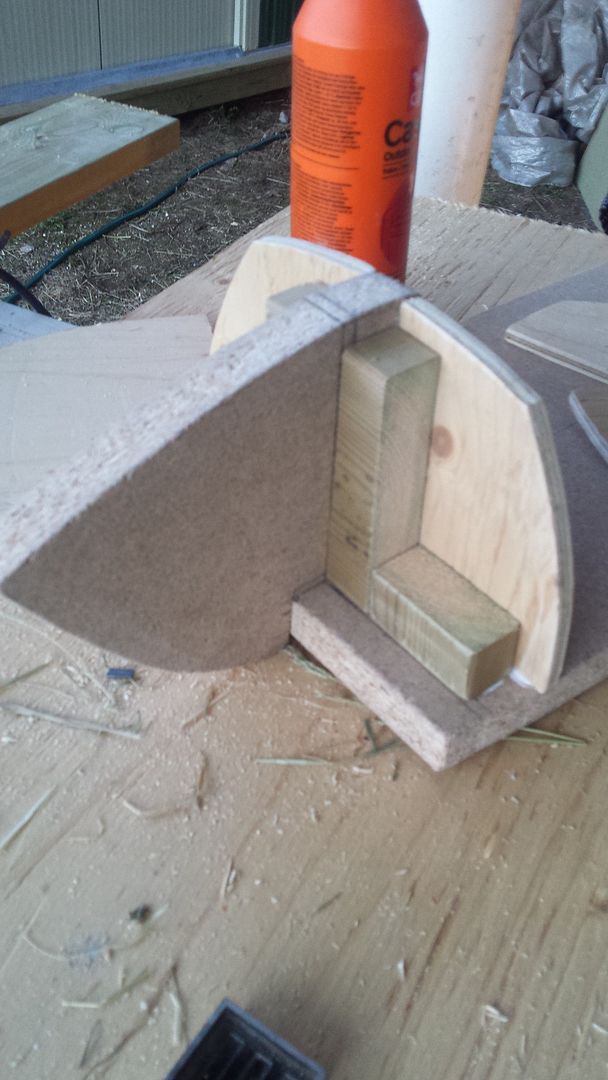 Last edited by LarsKroghStea; 01-29-2018, 10:53 AM.
Leave a comment:
-
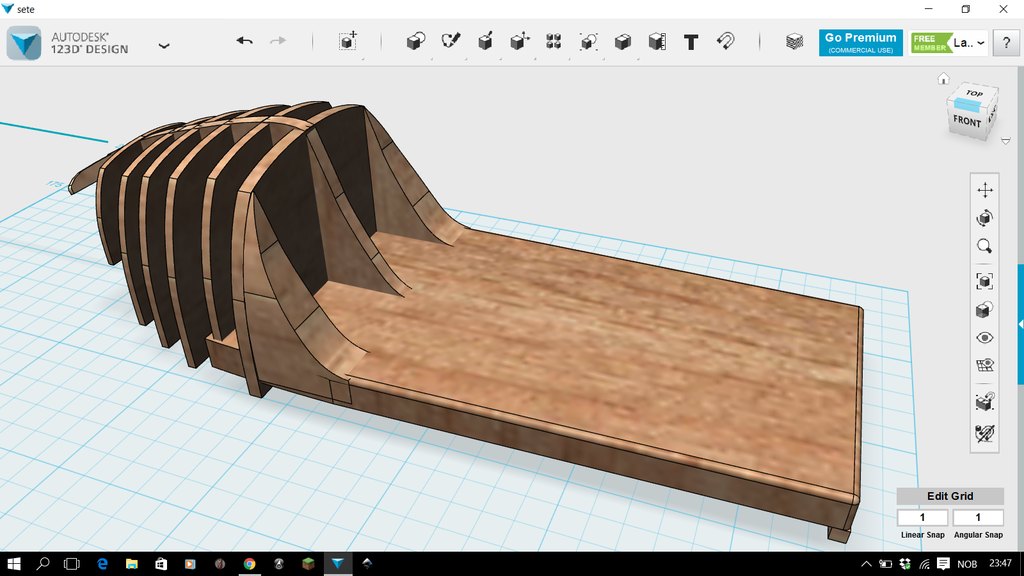
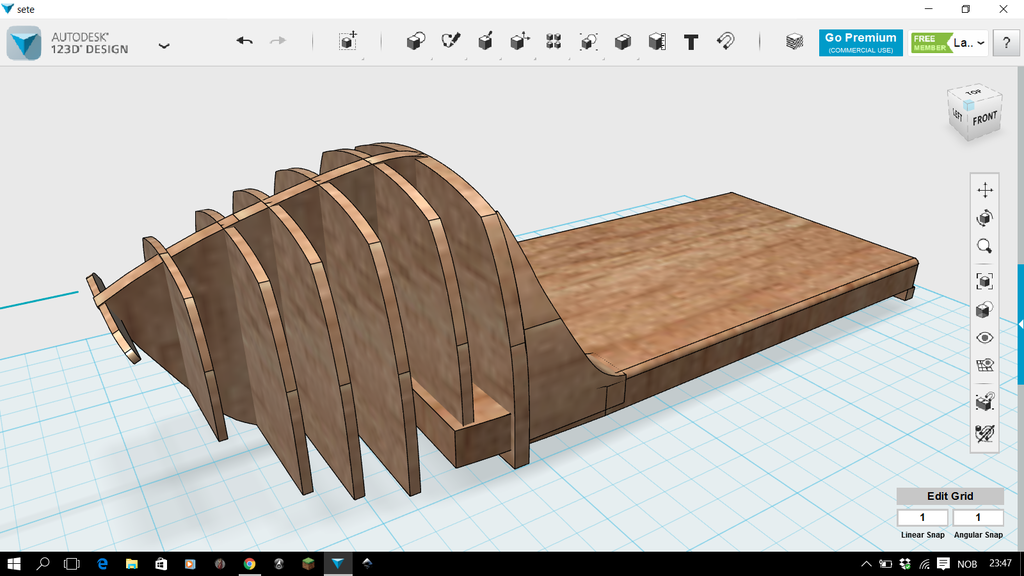
I've started on the buck for the metalshaping of the seat, but I needed to visualize it on the computer before finishing it.
Leave a comment:
-
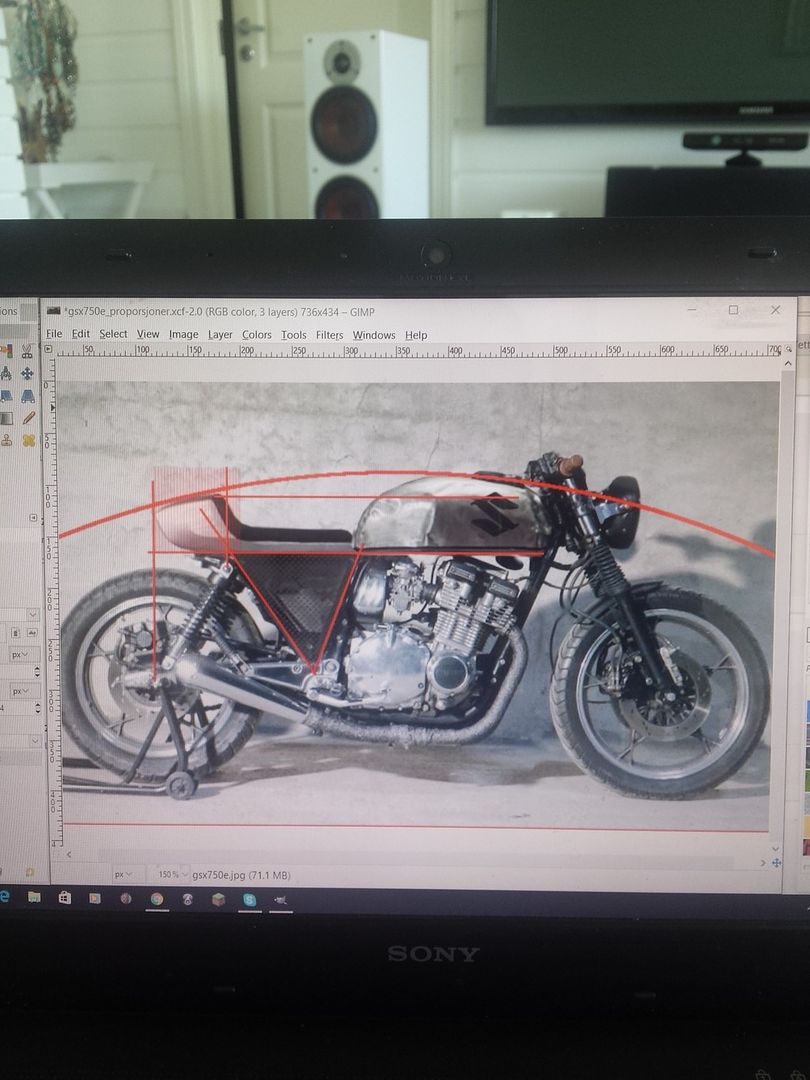
Today I had som extra time and sat down to make at 1:1 scale blueprint of the seat.
First I checked the proportions and measurements in Gimp:
When I had all the coordinates I drew the seat up in three planes:
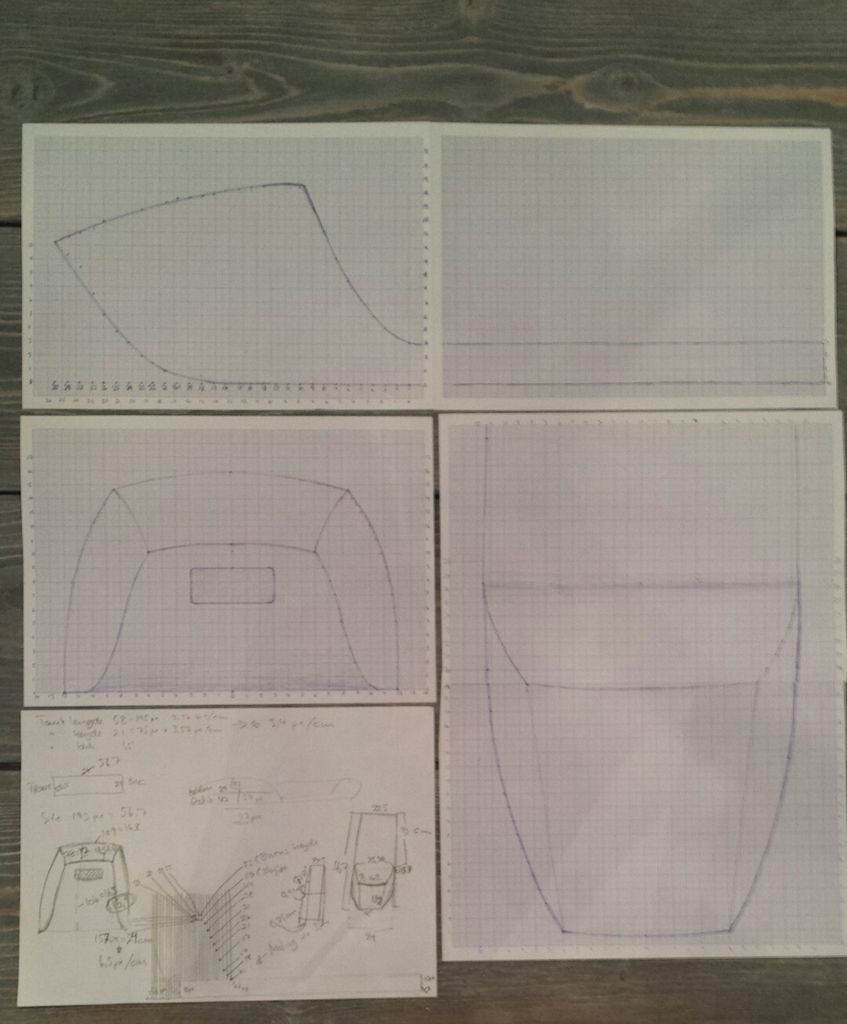
Tomorrow I'll try to make the framework somehow. The plan was to cut it out in MDF-wood and glue/screw the pieces together, but I see people also weld together a wireframe first, then weld the sheet metal to the frame. I'll spend some time with Google and see what I come up with.Leave a comment:


Leave a comment: