• Required reading for all forum users!!!

    Welcome!
    Register to access the full functionality of the GSResources forum. Until you register and activate your account you will not have full forum access, nor will you be able to post or reply to messages.

    A note to new registrants...
    All new forum registrations must be activated via email before you have full access to the forum.

    A Special Note about Email accounts!
    DO NOT SIGN UP USING hotmail, outlook, gmx, sbcglobal, att, bellsouth or email.com. They delete our forum signup emails.

    A note to old forum members...
    I receive numerous requests from people who can no longer log in because their accounts were deleted. As mentioned in the forum FAQ, user accounts are deleted if you haven't logged in for the past 6 months. If you can't log in, then create a new forum account. If you don't get an error message, then check your email account for an activation message. If you get a message stating that the email address is already in use, then your account still exists so follow the instructions in the forum FAQ for resetting your password.

    Have you forgotten your password or have a new email address? Then read the forum FAQ for details on how to reset it.

    Any email requests for "can't log in anymore" problems or "lost my password" problems will be deleted. Read the forum FAQ and follow the instructions there - that's what we have one for...

  • Returning Visitors

    If you are a returning visitor who never received your confirmation email, then odds are your email provider is blockinig emails from our server. The only thing that can be done to get around this is you will have to try creating another forum account using an email address from another domain.

    If you are a returning visitor to the forum and can't log in using your old forum name and password but used to be able to then chances are your account is deleted. Purges of the databases are done regularly. You will have to create a new forum account and you should be all set.

Jennifer's Makeover

  • Thread starter Thread starter Flyboy
  • Start date Start date
Hey all, was looking at the calender ad it has been a month over a year ago I started on the road to restore Jennifer back to her former glory, and as those that have taken the time to stop by and have a look at my little thread will know, for all of that year and a month, it has been nothing but stripping, cleaning, refurbishing, painting and prep work, not a single bolt or nut has gone back together yet.......Jeeezzzz, apart from Pete, that has to be some kind of record.
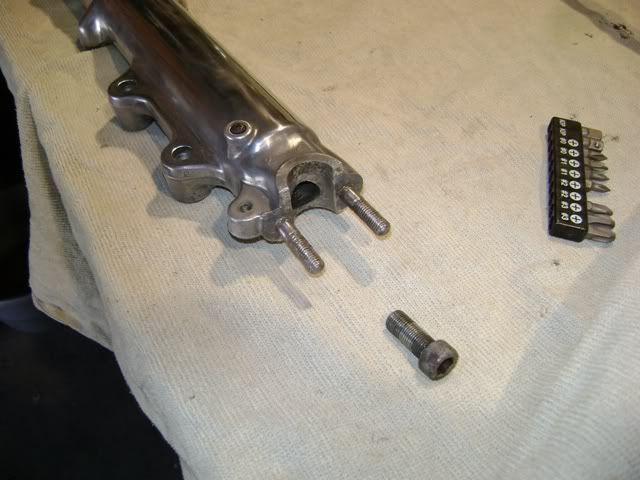
Anyway, last weekend that all changed and I turned the corner, when I drove the new bearings into the steering stem and bolted in the triple clamps. :dancing:
I must have looked like a right tool, just sitting there on the back wheel, beer in hand with this goofy look on my face just staring at and admiring this bare frame with a set of triple clamps mounted to it.. ah, but all was good with the world so I don't give a rats azz....:lol:

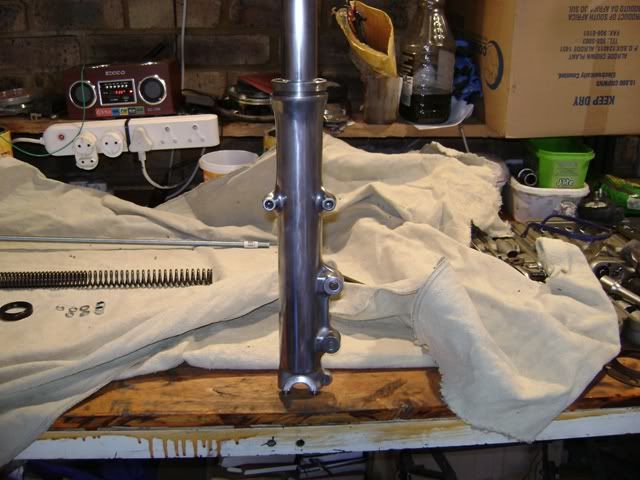
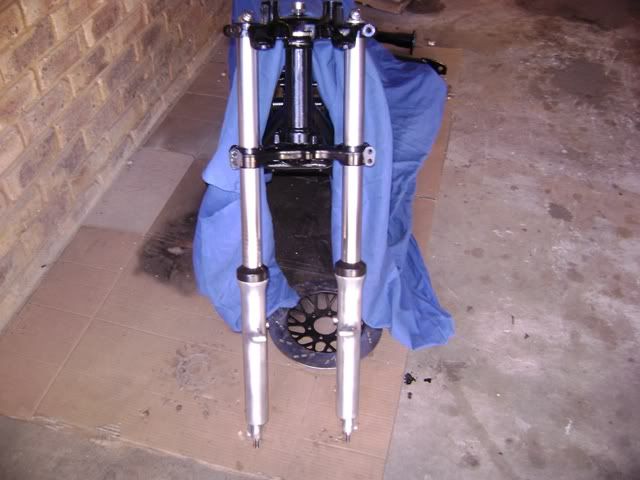
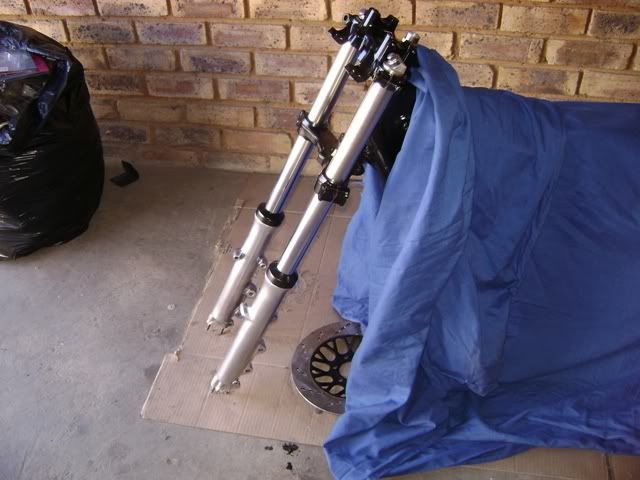
Of course that just lit tha fire under me to get Jennifer back on her wheels ASAP, so after a final bit of shopping for one or two things, today I got the forks together.
With that said, the pics are not eye candy, but we like pics, so......
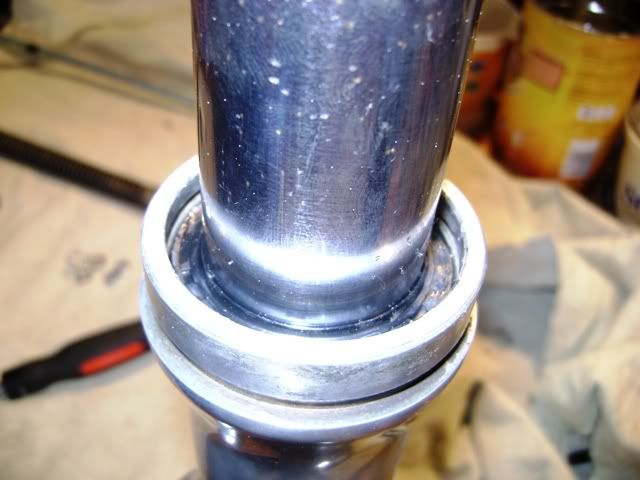
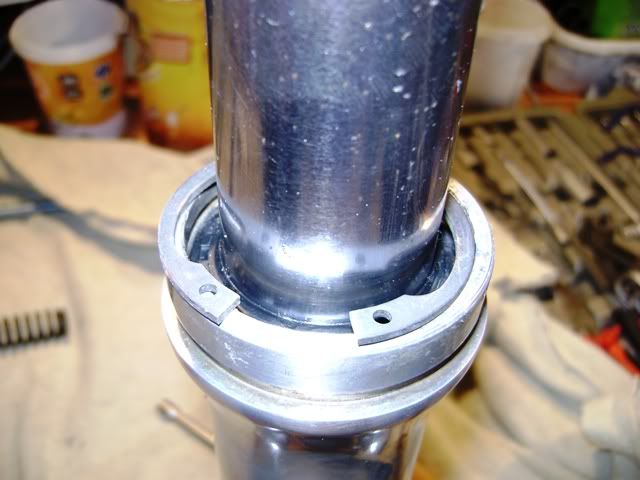
I am going to post what seems like quite a few pics for a relatively simple job, but one which I see questions on qute often in the forum, so maybe a step by step blow might help some one in the future who may be unsure and has never put forks back together again, or needs clarity, nothing like a picture being a thousand words.....I hope so.
Ok, enough yadda yadda, herewith the pics..........

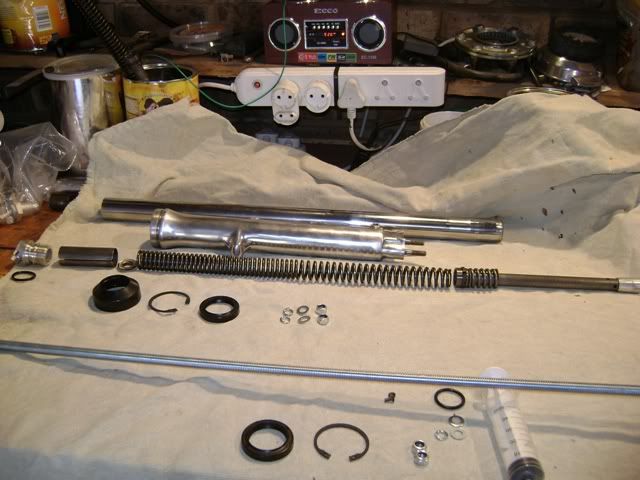
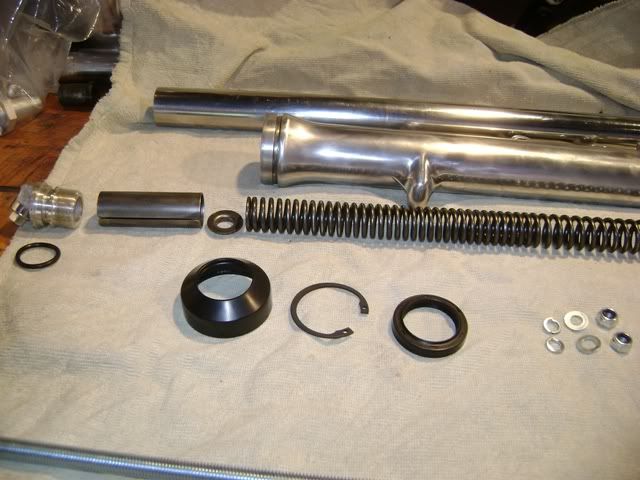
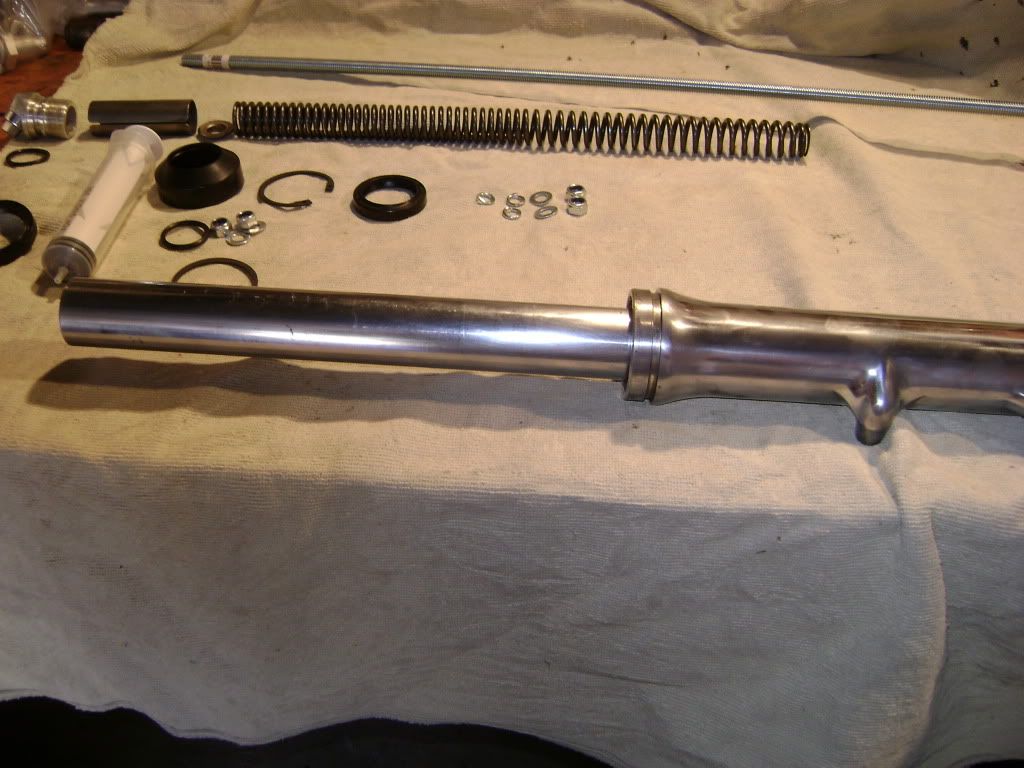
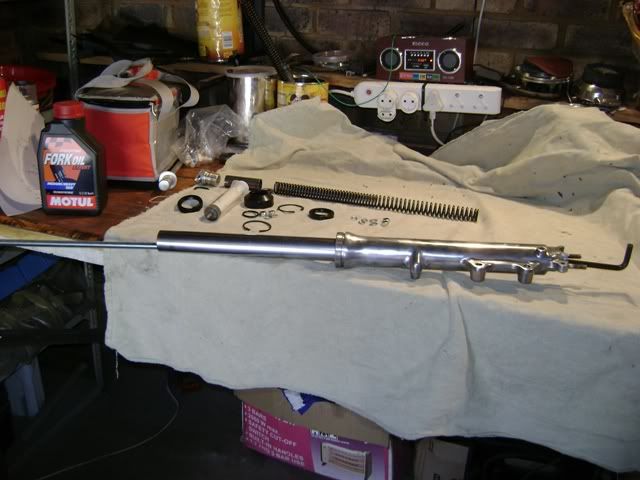
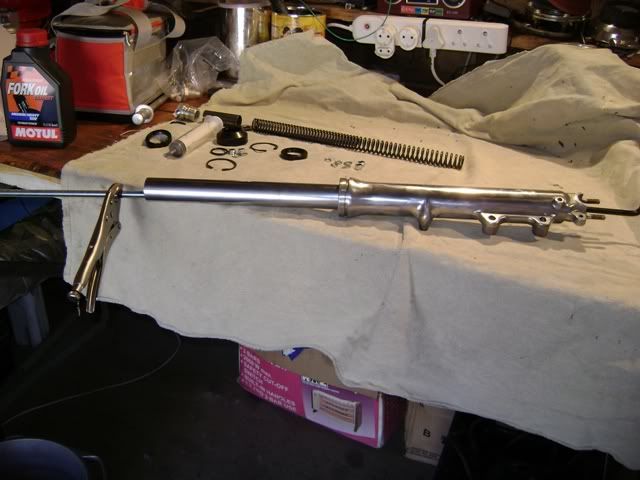
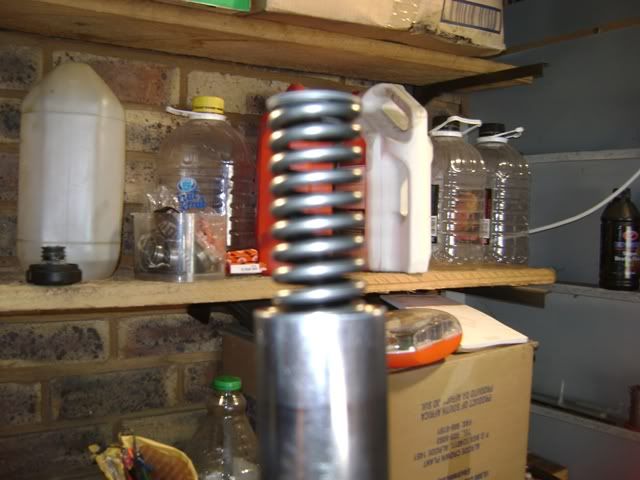
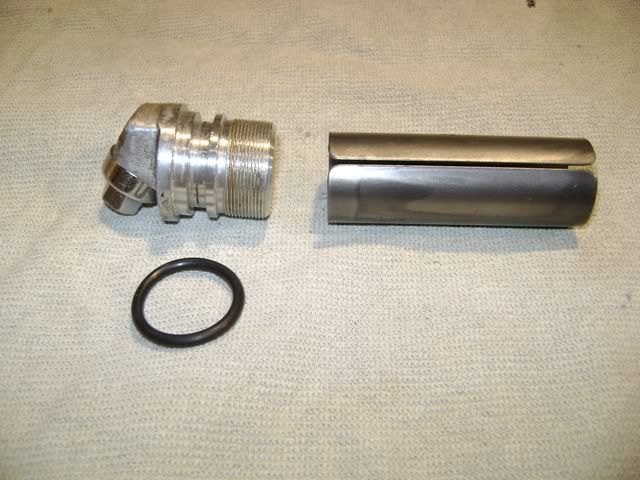
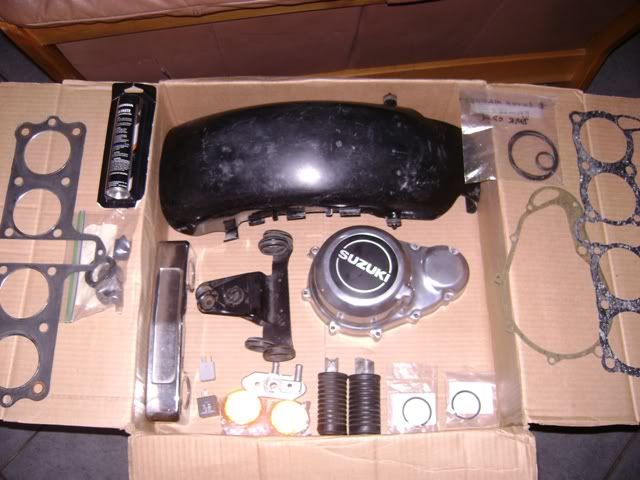
Layed everything out before assenbly, to check that everything had been cleaned and no pieces had gone AWOL......yep, looks like we have a game.
DSC02311.jpg


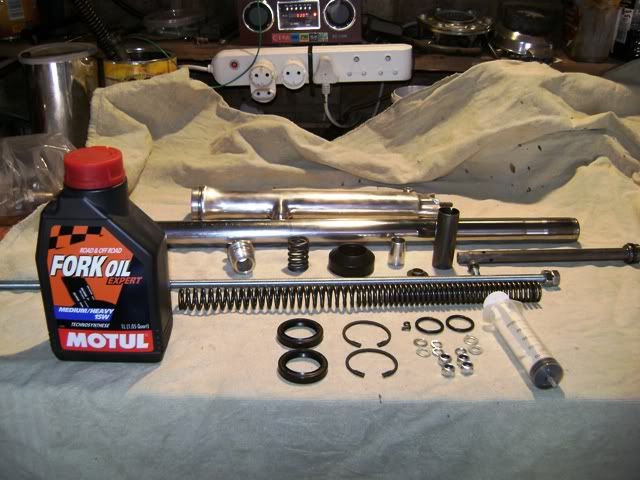
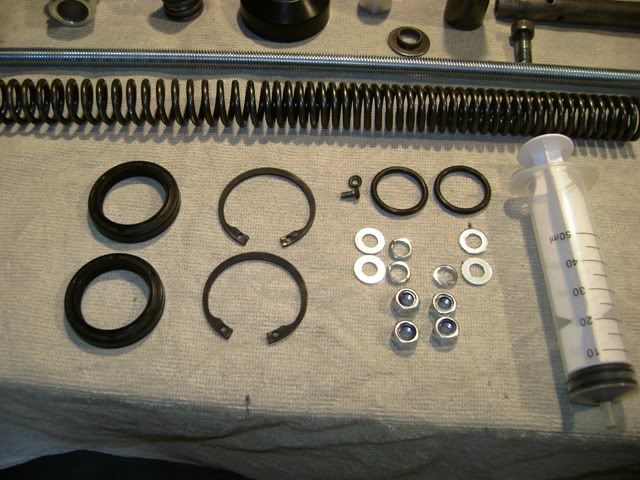
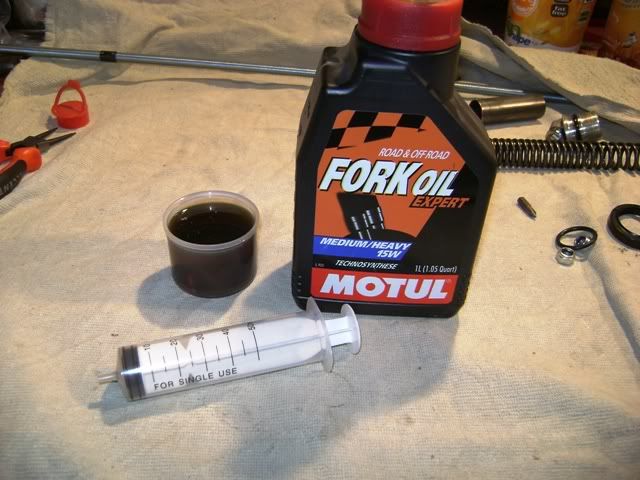
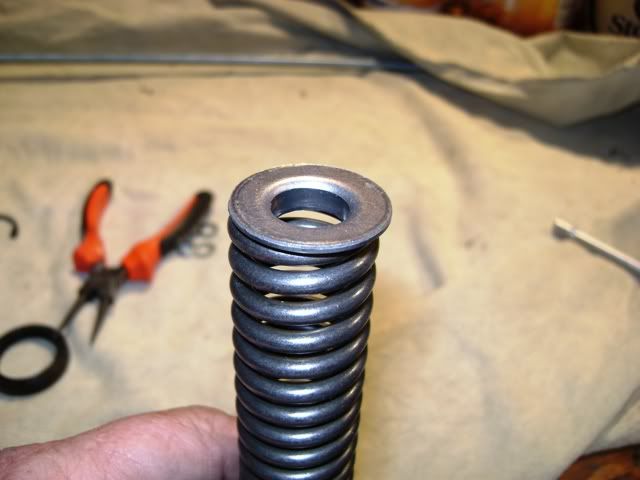
Some new seals, new circlips to replace those stupid, dodgy wire retainers Suzuki used, some shiny new hardware for the cups that carry the axle, a litre of 15w fork oil (1000G is heavy and I am a big boy) and a nice big syringe to measure it.
DSC02315.jpg


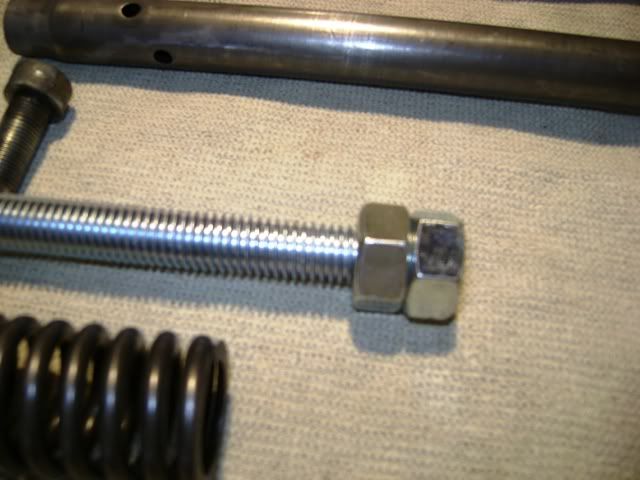
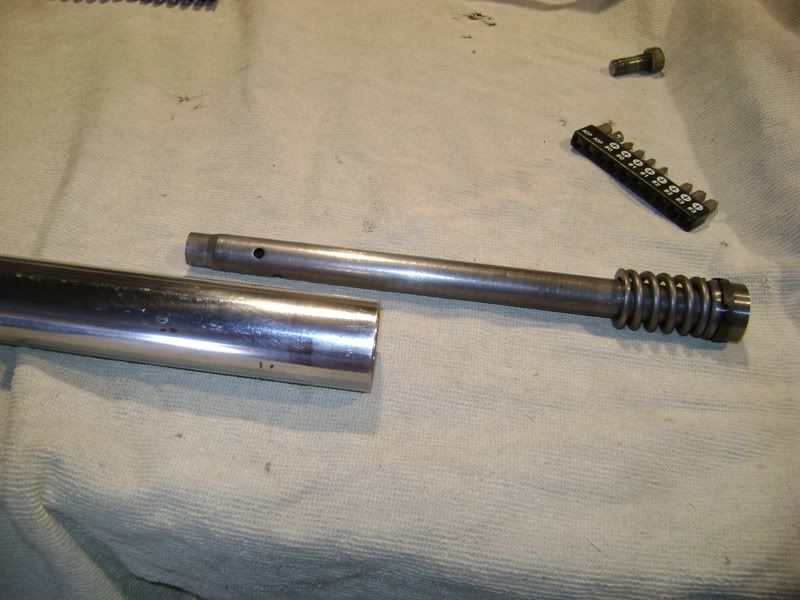
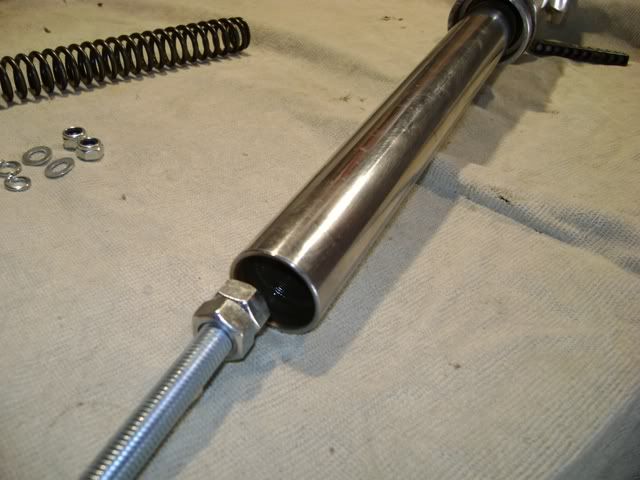
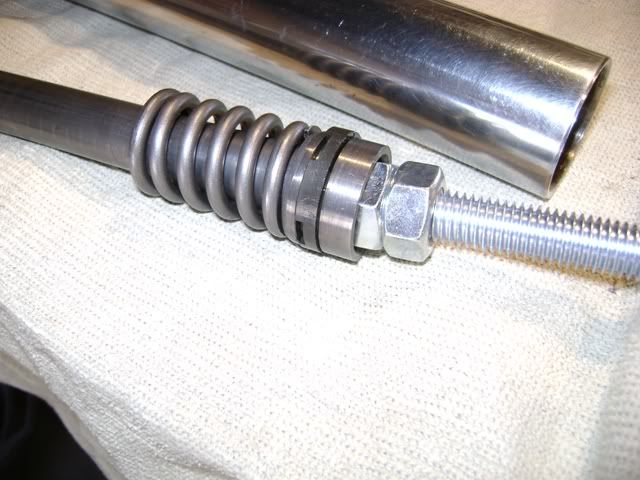
Poor man's special tool to hold the damper while tightning the bottom allen bolt, simple piece of threaded rod and two 19mm nuts, I guess you could build it for $2
DSC02313.jpg


You did take pics and draw a pic of how it all goes back together when you stripped it right.......right????
DSC02312.jpg


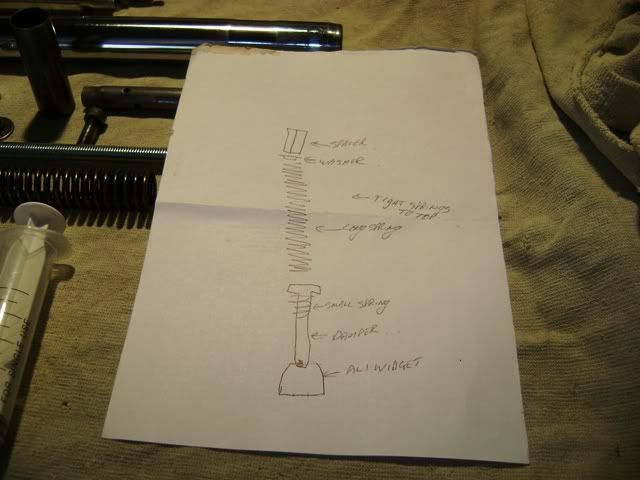
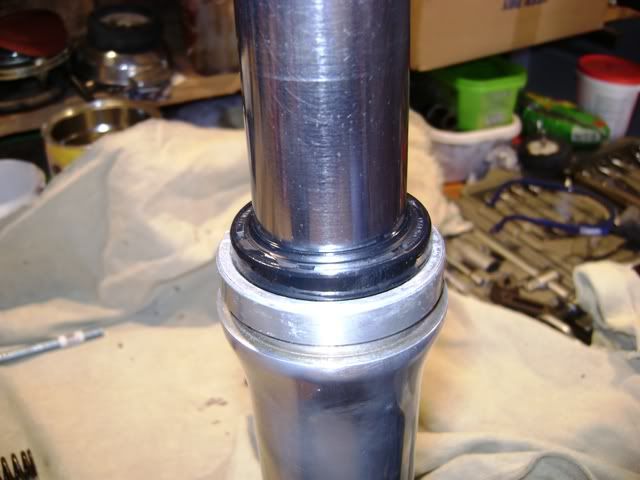
First thing I did was lay everything out in order of assembly, consult your picture/pics....you drew a picture / took pics....right????
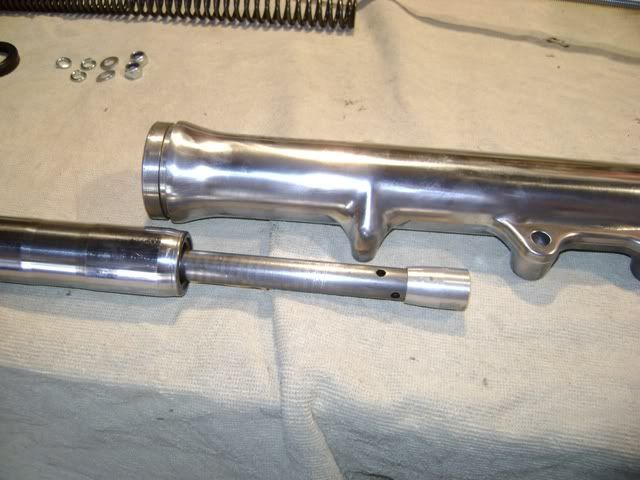
DSC02319.jpg


Top End
DSC02317.jpg


Bottom End
DSC02318.jpg
 
Notice tightly wound coils of the spring go to the top of the fork.

First thing to do was place the small spring onto the damper rod and drop the damper rod into the upper stanchion sanchion only goes into the lower one way.
DSC02323.jpg


Damper rod inside stanchion
DSC02325.jpg


Then fit little aluminium widget thingy to bottom of damper rod, and slide the whole shooting match into the fork lower leg.
DSC02326.jpg


DSC02327.jpg


DSC02328.jpg


Now you get to use your $2 special tool
Slide it down the inside of the stanchion like so
DSC02330.jpg


And it will locate in the top of the damper rod like so.........
DSC02324.jpg


Fit bottom allen bolt
DSC02329.jpg


And tighten, holding threaded rod with vice grips
Here is what it looks like
DSC02331.jpg


DSC02332.jpg
 
Looking good! Nice clean and shiny parts!:)
Remember myself being there not so long ago!
Enjoy!
 
Time to drive the seal in
DSC02339.jpg


DSC02334.jpg


I used a small hammer and a soft drift with a flat point
I guess yu could also fit the seal before securing the stanchion in the fork lower, use a piece of PVC pipe with a diameter slightly smaller than the OD of the seal to drive it home.

Make sure the seal is all the way home, and fit circlip
DSC02340.jpg


DSC02342.jpg

Fit dust boot.

Making sure the fork is all the wat down, measure and add oil
DSC02347.jpg


241cc or 140mm from the top of the fork stanchion
Simple measuring tool.
DSC02348.jpg


Finally, drop the spring into the fork, fit washer, then pre-load spacer and tighten the cap down, call it done.
DSC02346.jpg


DSC02344.jpg


DSC02345.jpg


And of course..............
DSC02350.jpg
 
Last edited:
DSC02351.jpg


And my parts from the States hit the water today...............yeeeeeeha
FirstShipmentfromUSA.jpg
 
Last edited:
Don't mean to be a spoil sport, but where's the copper gasket that seals the allen bolt?
DSC02329.jpg
 
Too sharp Dale, no worries, it is in there, brand new as well, I just hadn't scratched it out of its packet yet, you will notice there are oly 3 spring washers fror the cups at the bottom as well, the fourth one is in hiding, a cat would loose her kittens in my garage right now, man, I need to clean up in the worst kind of way.:eek:
 
Great work Flyboy... have done this myself (again) this weekend, but it's still nice to see someone else's pics of the process... :)
 
Thanks man, yeah, I just thought that a bunch of picks may help someone some day, I know I need to have pictures drawn for me, 'cause me not too bright.......:-s
 
Last edited:
a cat would loose her kittens in my garage right now, man, I need to clean up in the worst kind of way.:eek:
As you have seen a picture of my garage, that would make both of us needing to tidy up a bit.

Nice work on the polishing! it makes the pain of bloodied fingers worth while.
 
Now THAT'S progress! She's looking good and wonderful attention to detail.
 
Nice work Stan! Started on my Ikon springs tonight after all that ranting... haha

You gotta be happy to see that front end coming together... get a wheel on there and a rear wheel on and you'll be doing the "vroom vroom" sounds before you know it!
 
Fantastic work, Flyboy! Really nice tutorial of fork rebuild. Jennifer is going to be one sexy lady when done!

Are you keeping record of where you bought all your parts? Something like that will be handy to know here, where sources are getting scarce - although I think you will have more available up there than we do down here!

What's all in the box? Can't wait to see!

Keep up the steady progress.
 
Thanks for the kind words guys, slowly slowly I will eventually get it done, just wish I had more time to work on her.:(

Ya, I am compiling a full resource where I got everything from, not so simple as it used to be, 20years ago you just walked down Main St. in JHB and there were 100 bike shops where you could get anything under the sun, no more I am afraid.
I can't wait for the box either, lots of good stuff in there, off the top of my head, a stator cover from Nessim, a rear fender from Chef, and a whole bunch of good stuff from Rustybronco who has been kind enough to pack it all up and send it to me, should be here in 3 weeks if all goes well.:dancing:
 
I hear ya on the time thing Stan, loud and clear!

I apparently have a box on the way from Boulevard at the moment too, it's always nice to arrive home to a box on the dining room table that you know will contain wonderful bits and pieces...
 
This morning I took a ride down to the post office to clear the post box and check for post, and guess what I found................................................................................................................. A box from across the water
DSC02352.jpg


Wooooo Hoooo Wooooo Hoooo Wooooo Hoooo

packed full of nice goodies
DSC02355.jpg


Rear fender from Chef
Stator Cover and emblem from Nessim
And all the other goodies from RustyBronco......many, many thanks Dale.
DSC02356.jpg


So tomorrow, I may even get the front end onto Jennifer, as was waiting for the Chrome trim that goes over the lower triple before I could bolt the forks in, I can't wait, unfortunatly today is out, girlfriends birthday, so I guess taking her out for dinner is in order....oh well only one more sleep.
 
Wow!!!!!!!!!!!!!!!!!!!!!!!!!!!!! two weeks door to door!!!! I never would have guessed it would be that quick.

I suspect you feel like a kid on Christmas morning? :D

at first glance how do things look? good I hope!

Tell your Girlfriend I said happy birthday. she's like what 29 or so? ;)
 
Last edited:
All looks good Dale, many thanks, will have to spend some time on the fender, but not the end of the world, I am just wondering why I don't have a trim piece for the triple and had to get this one, since I have owned the bike for most of it's life, only thing I can think is that at some point I took it off to mount the S fairing, will have to revisit it and see if it interfers with the fairing or not, as I would like to mount the S fairing back on.
Everything else looks great, can't wait to get her on her wheels now, and I know exactly where those felt covers are going...........

Not too sure how old :-$
 
Last edited:
I didn't know if you could make the felt work or not, so I sent them along just in case you could. the two o-rings in the package with the aftermarket cylinder o-rings probably won't fit, but again, like the felt, they were light enough not to matter. it all comes down to shipping those things you miss the first time. that tends to get a bit costly if you miss a thing or two. I think it best to send out more than not.... especially on your dime! ;)

I straightened the headlight ears as best I could. there still is a little bit of wave to the metal on one of them, so you may have to put and extra coat of primer before you block them out prior to painting.

the base gasket is a extra I had gotten from nessism (Ed) and the foot pegs are from Sedelen (Steve). we like to have a bit of the USA on bikes in the RSA when we can get away with it. :)
 
Last edited:
Back
Top