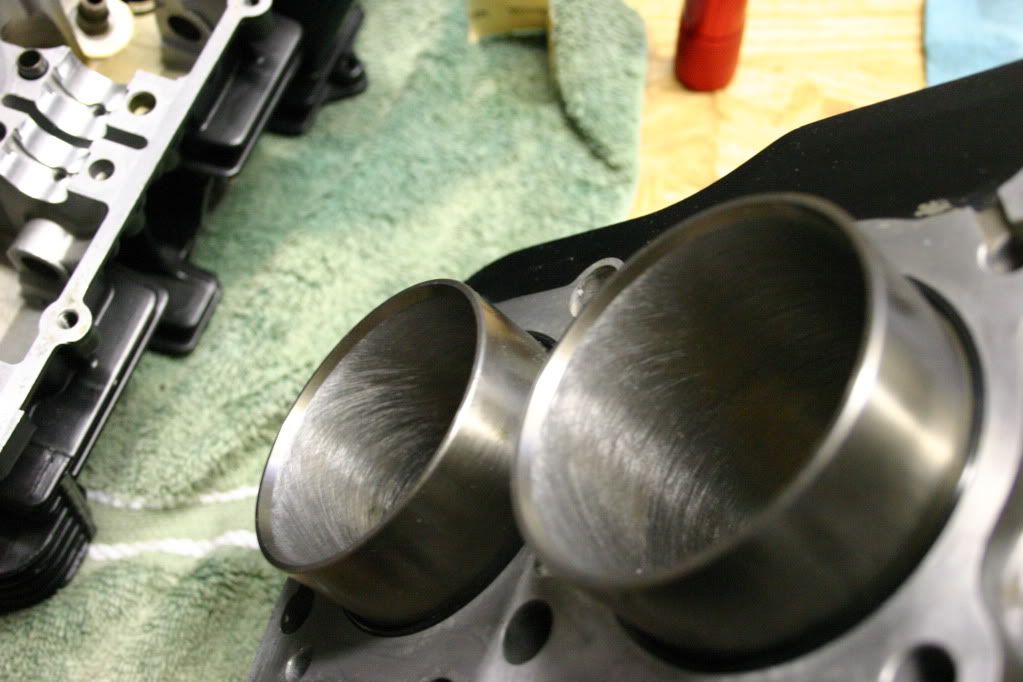
Sorry if this sounds critical but I don't like the look of that hone job. The hone marks need to be crisscross pattern - at 45 degrees. Also, I'm not a fan of heavy oil on the rings. Hope the hone is better than the photos show otherwise I'd pull the cylinder back off and get a proper ball hone in there.
-
Required reading for all forum users!!!
Welcome!
Register to access the full functionality of the GSResources forum. Until you register and activate your account you will not have full forum access, nor will you be able to post or reply to messages.A note to new registrants...
All new forum registrations must be activated via email before you have full access to the forum.A Special Note about Email accounts!
DO NOT SIGN UP USING hotmail, outlook, gmx, sbcglobal, att, bellsouth or email.com. They delete our forum signup emails.A note to old forum members...
I receive numerous requests from people who can no longer log in because their accounts were deleted. As mentioned in the forum FAQ, user accounts are deleted if you haven't logged in for the past 6 months. If you can't log in, then create a new forum account. If you don't get an error message, then check your email account for an activation message. If you get a message stating that the email address is already in use, then your account still exists so follow the instructions in the forum FAQ for resetting your password.Have you forgotten your password or have a new email address? Then read the forum FAQ for details on how to reset it.
Any email requests for "can't log in anymore" problems or "lost my password" problems will be deleted. Read the forum FAQ and follow the instructions there - that's what we have one for...
-
Returning Visitors
If you are a returning visitor who never received your confirmation email, then odds are your email provider is blockinig emails from our server. The only thing that can be done to get around this is you will have to try creating another forum account using an email address from another domain.
If you are a returning visitor to the forum and can't log in using your old forum name and password but used to be able to then chances are your account is deleted. Purges of the databases are done regularly. You will have to create a new forum account and you should be all set.
You are using an out of date browser. It may not display this or other websites correctly.
You should upgrade or use an alternative browser.
You should upgrade or use an alternative browser.
T
Turtleface
Guest
Sorry if this sounds critical but I don't like the look of that hone job. The hone marks need to be crisscross pattern - at 45 degrees. Also, I'm not a fan of heavy oil on the rings. Hope the hone is better than the photos show otherwise I'd pull the cylinder back off and get a proper ball hone in there.
I'm in agreement with Nessism, but all my engine building experience is with high performance small block Fords and Chevys, so take anything I have to say with a grain of salt.
 Always used a ball hone, and usually got pretty good results the first time around. I like to keep it moving up and down the bore fairly quickly, relative to the speed of the rotational movement of the hone. That 45 degree crosshatch pattern is fairly crucial to proper ring sealing during initial break-in.
S
Smokinapankake
Guest
Ima pull it apart and do it again (hopefully Monday).
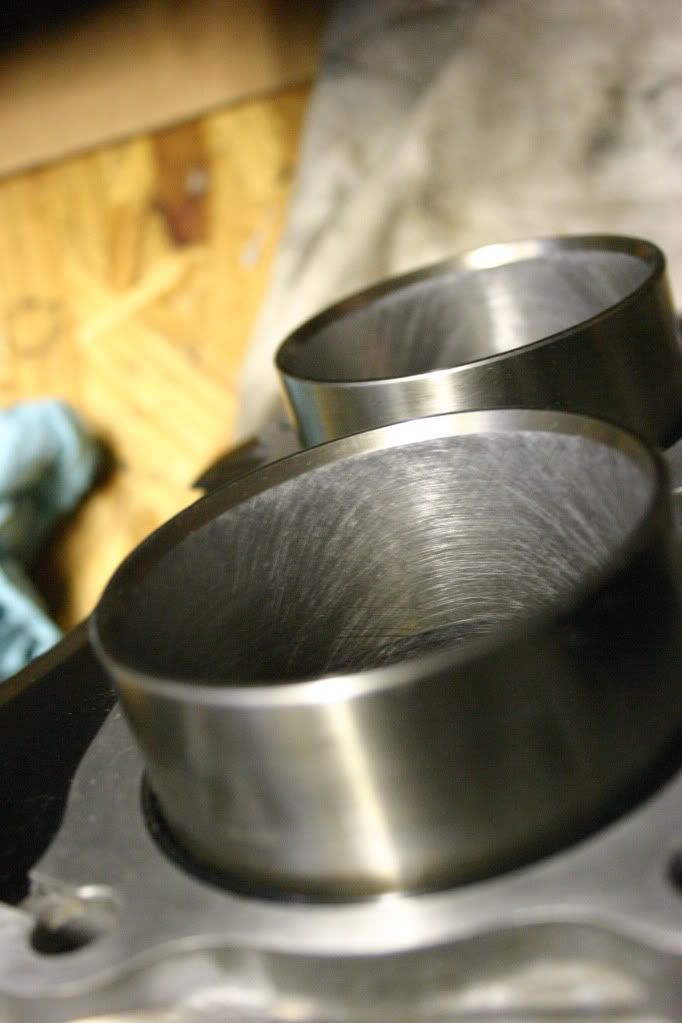
Didn't notice the hone isn't at more of a 45 degree crosshatch.
Didn't notice the hone isn't at more of a 45 degree crosshatch.
Ima pull it apart and do it again (hopefully Monday).
Didn't notice the hone isn't at more of a 45 degree crosshatch.
Bite the bullet and get a ball hone. You need to use a medium-slow drill and move it in and out quite quickly to get the proper 45 degree pattern. When doing this you should never allow the hone to stop while it's inside the cylinder. Also, don't hone any more than necessary to get the proper surface finish you need. A 240 grit hone is about right for our GS engines so don't get anything rougher than this.
Some good info here... http://www.enginehones.com/technical.html
S
Smokinapankake
Guest
My neighbor and I redid the hone yesterday evening. Got a ball hone on the way home from work from Russel Auto parts. I slowed my rpm way down this time. Pics don't look like its all that great, but it is much better in person.
The horizontal marks appear to be a holdover from the first hack hone job, I'm concerned about going much deeper.
Any thoughts?
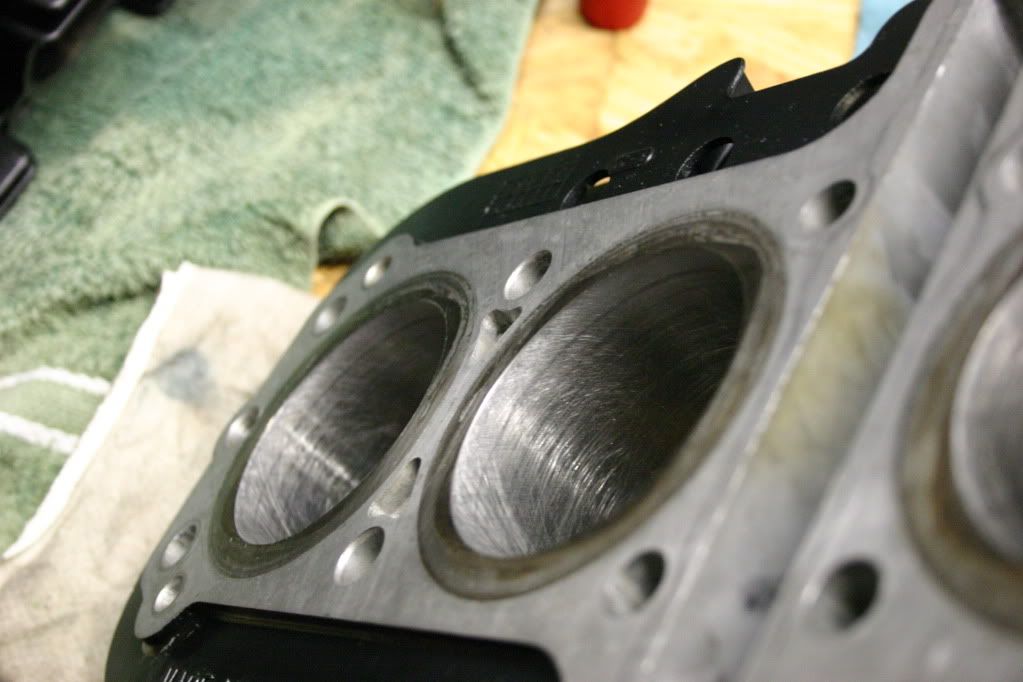
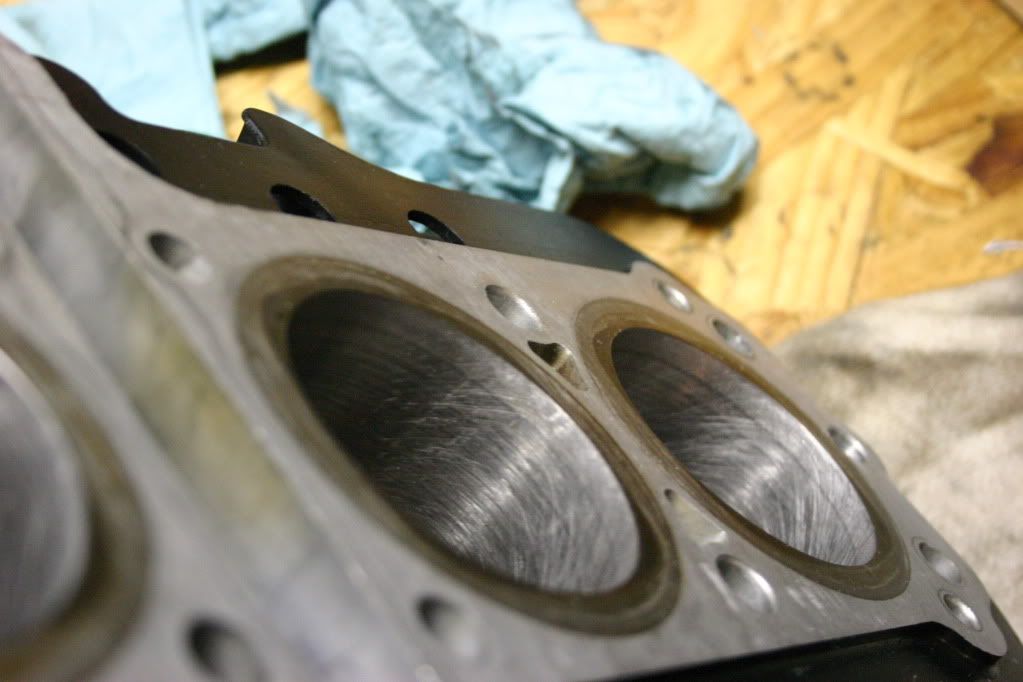
The horizontal marks appear to be a holdover from the first hack hone job, I'm concerned about going much deeper.
Any thoughts?
Last edited:
Looks a little rough but better than before. What grit is that ball hone? You don't want to keep hammering away indefinetly with the grinding grit but please make sure there is a semi-consistent cross-hatch pattern to the grooves. When you put the pistons back in I'd skip any oil on the rings like you guys did the first time.
S
Smokinapankake
Guest
The selection at the parts store was limited to fine, medium, and coarse. I chose the medium, fearing too much material removal. Why no oil on reassembly?
You already oiled the rings before so no need for anything further. Some people treat ring and cylinder lubrication like religion, and frankly I'm not convinced it matters all that much, but that said, I like to install everything dry to assure the rings bite into the cylinder wall when you first start up the engine. I also don't believe in elaborate ring break in routines like some do; simply take the bike out and ride it aggressively though the city with lots of acceleration/deceleration, no lugging, and no sustained low throttle position constant rpm's. Loading the rings will make them seat, don't baby the engine, but no need to go crazy like the mototune guys claim. http://www.mototuneusa.com/break_in_secrets.htm
Last edited:
G
Guest
Guest
Check your ring gap to make sure it's not maxed out.
S
Smokinapankake
Guest
Ring gaps were well within specs....
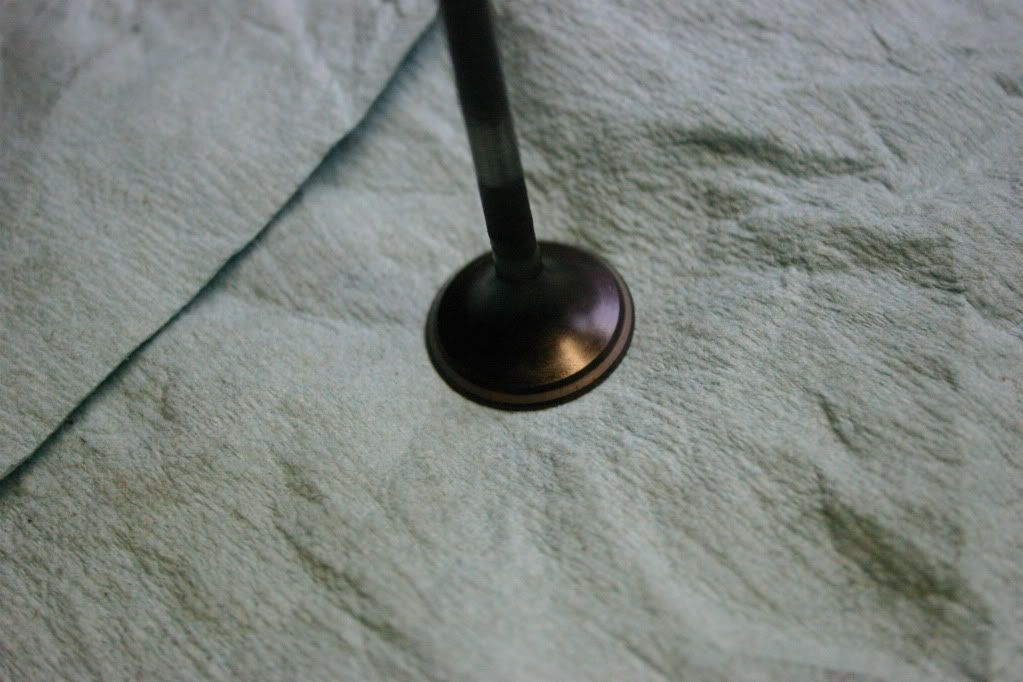
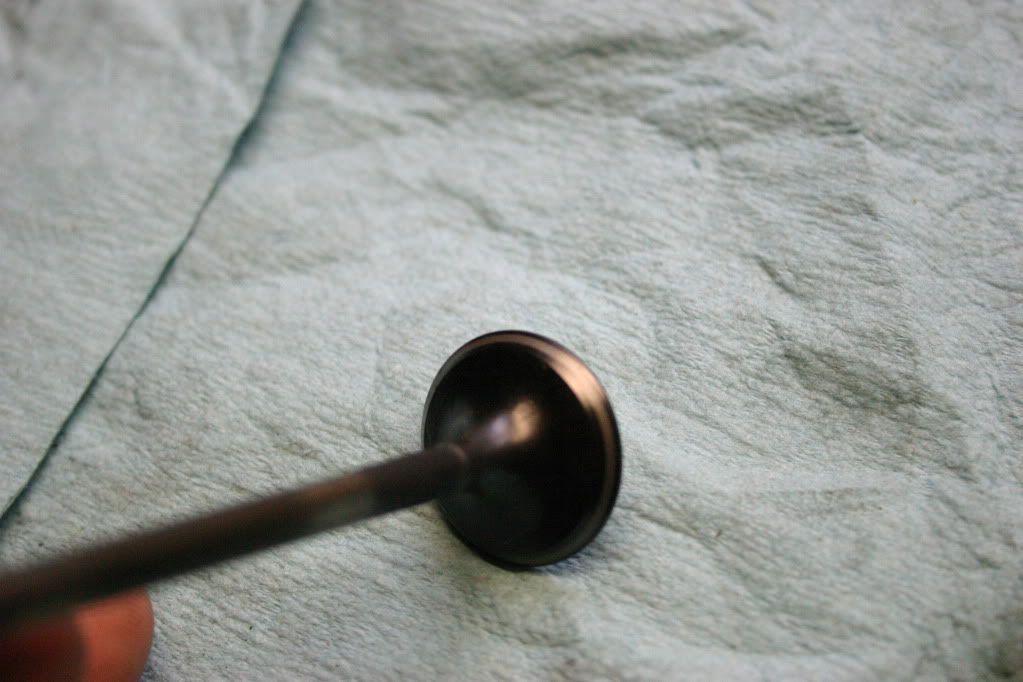
So on to valve installation:
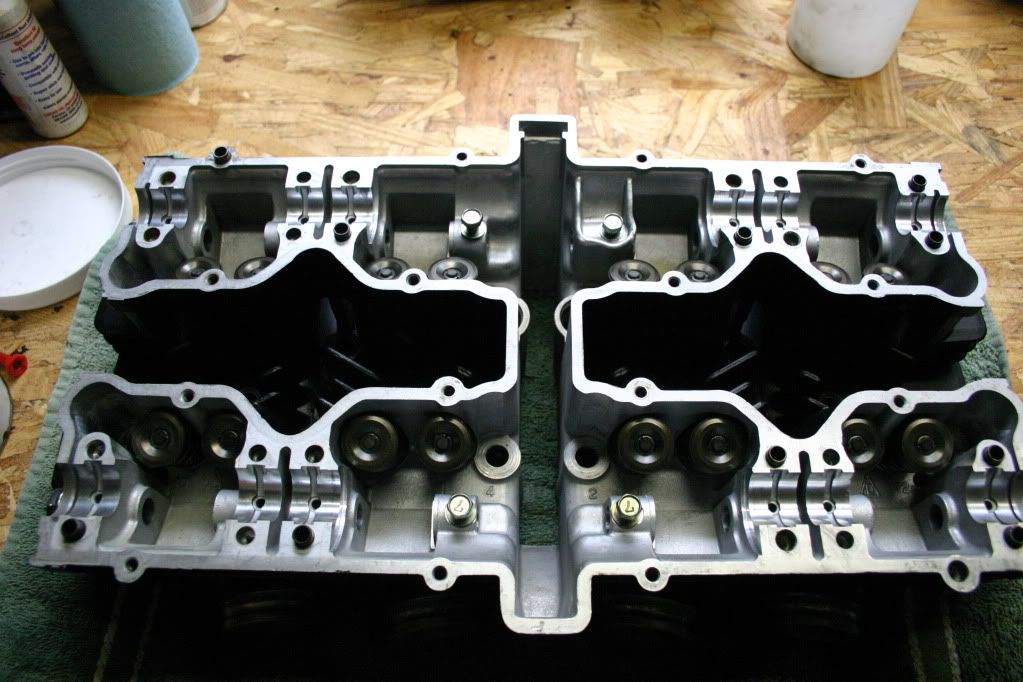
Here they are after hand lapping - all 16 looked just like this one:
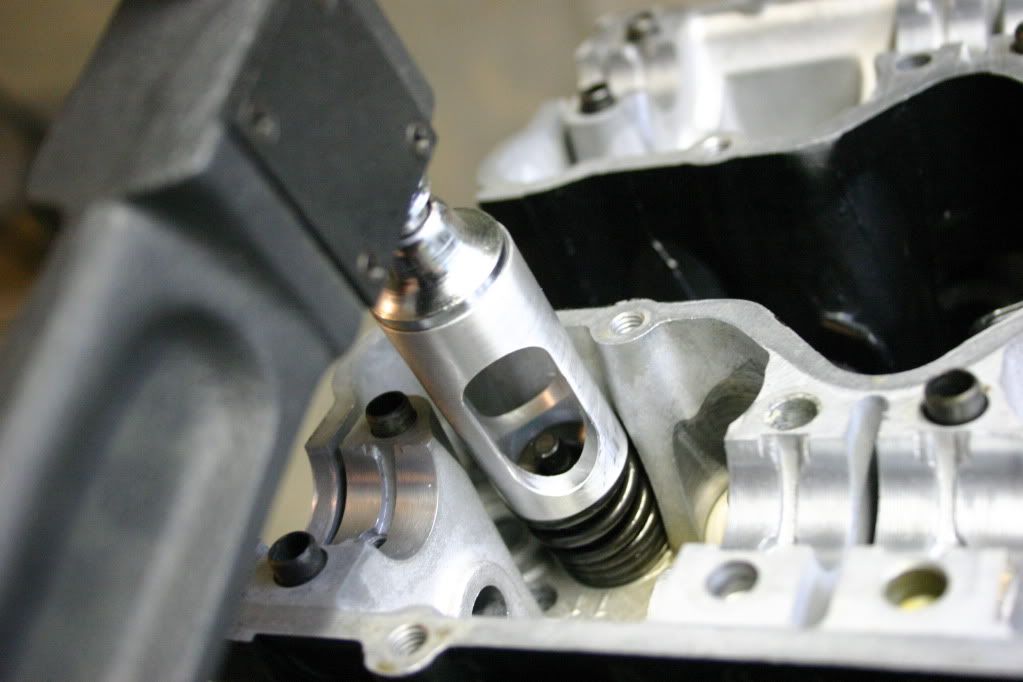
Valve spring compressor tool(s) in action. This set up worked really well:
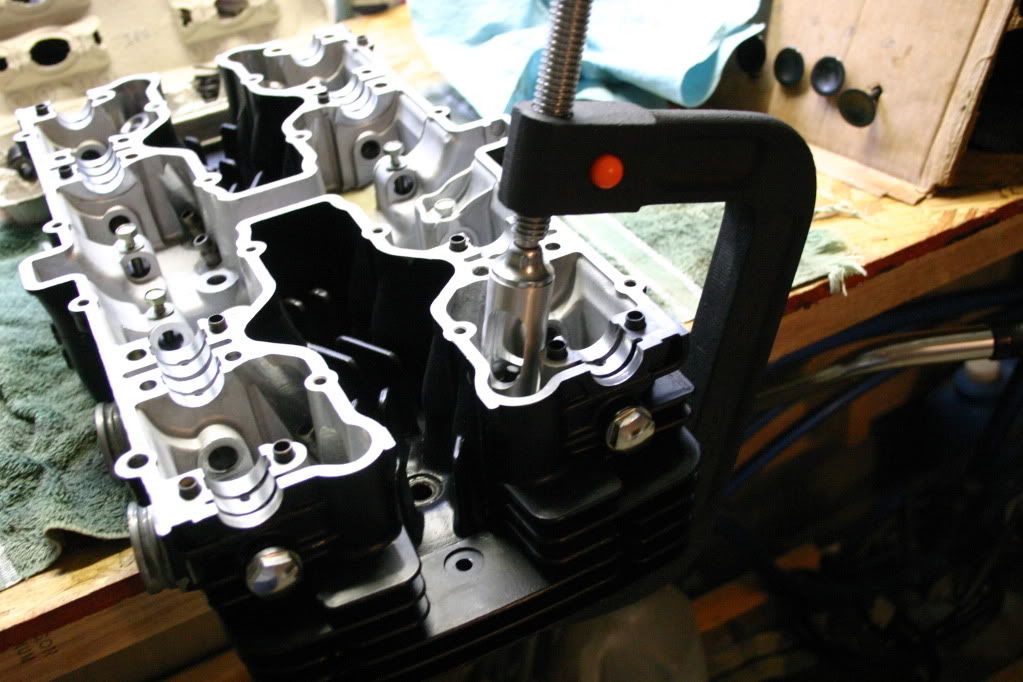
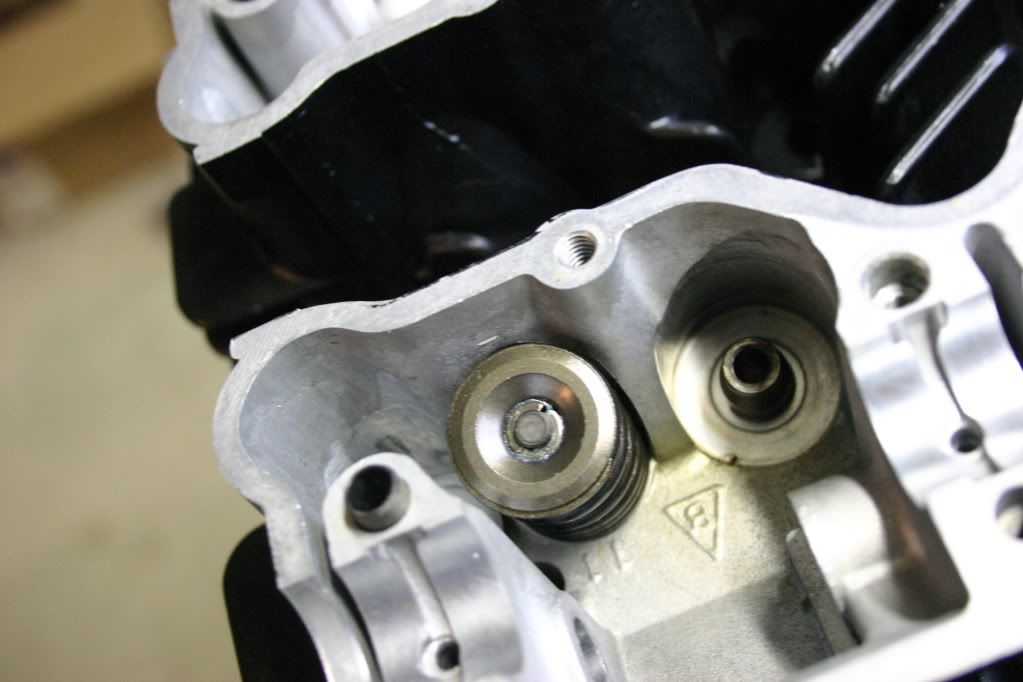
Valves all snuggled in tight:
I used just a dab o' grease to hold the retainer clip thingies onto a cotton tipped applicator stick, then lowered the retainers gently into postition, then using another wooden handled cotton tipped applicator (think Q-tip with long wood handles) I held them in place to allow the spring compressor to be released. Only fussed with a few before they slipped right in place, then as I released the spring compressor, the taper drew the retainers into position nicely. Did all 16 valves in a matter of an hour or so.
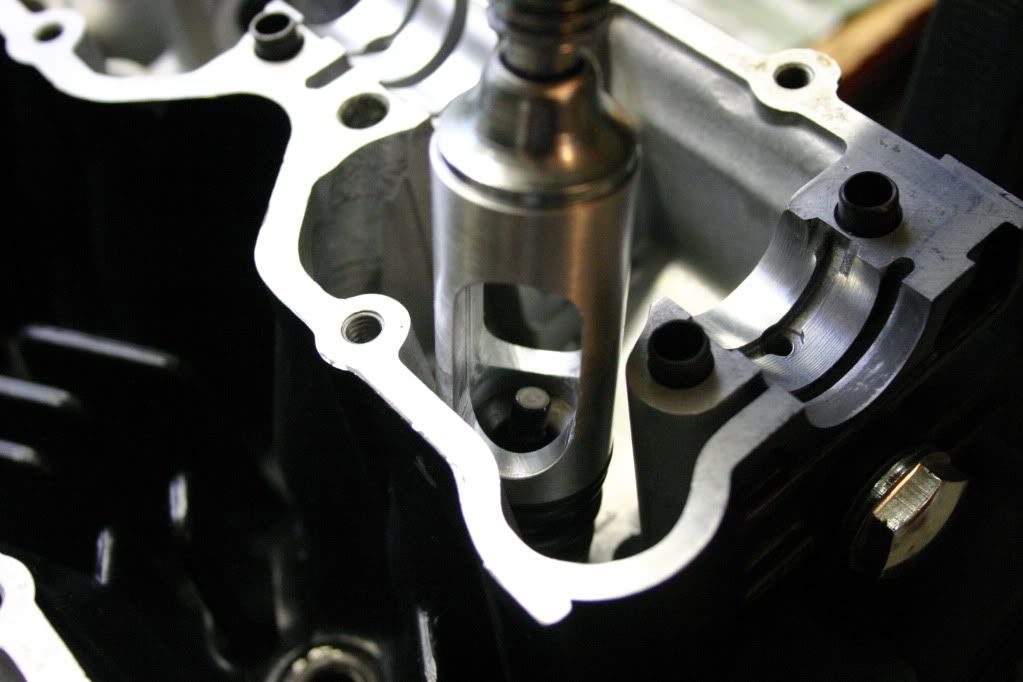
I installed new stem seals, and also lubed the valve stems with assembly lube. I cleaned all the valve guides with degreaser on aforementioned applicators, then cleaned a second time with acetone to remove any degreaser. Hopefully it was clean enough to not affect the assy lube.
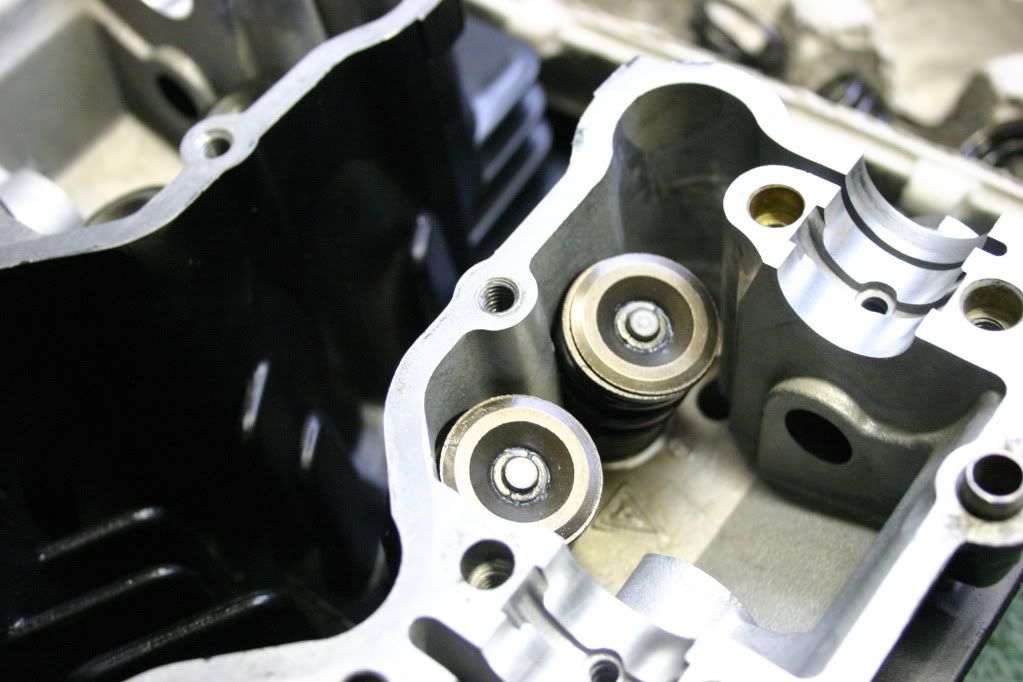
I then greased the rocker arm shafts and rockers with assy lube and slipped those right in. One of the exhaust rocker arm shafts (left exhaust, to be precise) gave me hell going that last little bit until I realized the spring between the rocker arm and the head casting was getting hung up in a groove on the shaft. After remedying that, it slipped right in.
Next step is installing head, cams, and timing this thing. My friend Matt is coming tonight to do this with me.... Unless the rain drives him away.
So on to valve installation:
Here they are after hand lapping - all 16 looked just like this one:
Valve spring compressor tool(s) in action. This set up worked really well:
Valves all snuggled in tight:
I used just a dab o' grease to hold the retainer clip thingies onto a cotton tipped applicator stick, then lowered the retainers gently into postition, then using another wooden handled cotton tipped applicator (think Q-tip with long wood handles) I held them in place to allow the spring compressor to be released. Only fussed with a few before they slipped right in place, then as I released the spring compressor, the taper drew the retainers into position nicely. Did all 16 valves in a matter of an hour or so.
I installed new stem seals, and also lubed the valve stems with assembly lube. I cleaned all the valve guides with degreaser on aforementioned applicators, then cleaned a second time with acetone to remove any degreaser. Hopefully it was clean enough to not affect the assy lube.
I then greased the rocker arm shafts and rockers with assy lube and slipped those right in. One of the exhaust rocker arm shafts (left exhaust, to be precise) gave me hell going that last little bit until I realized the spring between the rocker arm and the head casting was getting hung up in a groove on the shaft. After remedying that, it slipped right in.
Next step is installing head, cams, and timing this thing. My friend Matt is coming tonight to do this with me.... Unless the rain drives him away.
Last edited:
S
SKD
Guest
if you do ever decide to whip up a batch of those spring tools let me know please, i'll take 2..
G
Guest
Guest
Those valves are a thing of beauty!
S
Smokinapankake
Guest
Thanks Chef; I've never lapped valves but after a few Youtube videos I felt confident to tackle it myself.
Quick update - engine is assembled and installed into the chassis! Tim came up Friday night and we manhandled it in. Everything went really smooth and we were installed, timed and buttoned up in about 3 hours.
For any further updates follow my resto thread here:
http://www.thegsresources.com/_forum/showthread.php?t=152706&page=12
Thanks again for all the help and encouragement - keep watching for more family fun!