• Required reading for all forum users!!!

    Welcome!
    Register to access the full functionality of the GSResources forum. Until you register and activate your account you will not have full forum access, nor will you be able to post or reply to messages.

    A note to new registrants...
    All new forum registrations must be activated via email before you have full access to the forum.

    A Special Note about Email accounts!
    DO NOT SIGN UP USING hotmail, outlook, gmx, sbcglobal, att, bellsouth or email.com. They delete our forum signup emails.

    A note to old forum members...
    I receive numerous requests from people who can no longer log in because their accounts were deleted. As mentioned in the forum FAQ, user accounts are deleted if you haven't logged in for the past 6 months. If you can't log in, then create a new forum account. If you don't get an error message, then check your email account for an activation message. If you get a message stating that the email address is already in use, then your account still exists so follow the instructions in the forum FAQ for resetting your password.

    Have you forgotten your password or have a new email address? Then read the forum FAQ for details on how to reset it.

    Any email requests for "can't log in anymore" problems or "lost my password" problems will be deleted. Read the forum FAQ and follow the instructions there - that's what we have one for...

  • Returning Visitors

    If you are a returning visitor who never received your confirmation email, then odds are your email provider is blockinig emails from our server. The only thing that can be done to get around this is you will have to try creating another forum account using an email address from another domain.

    If you are a returning visitor to the forum and can't log in using your old forum name and password but used to be able to then chances are your account is deleted. Purges of the databases are done regularly. You will have to create a new forum account and you should be all set.

1980 GS1000S Reluctant Rebuild

Kiwi Canuck

Forum Mentor
Past Site Supporter
Edit, If you have just found this thread and cannot see the pictures you can install this add-on if you are using chrome and you will be able to view the pictures.

https://chrome.google.com/webstore/detail/photobucket-embedded-imag/ogipgokcopooepeipngiikdkpmcpkaon

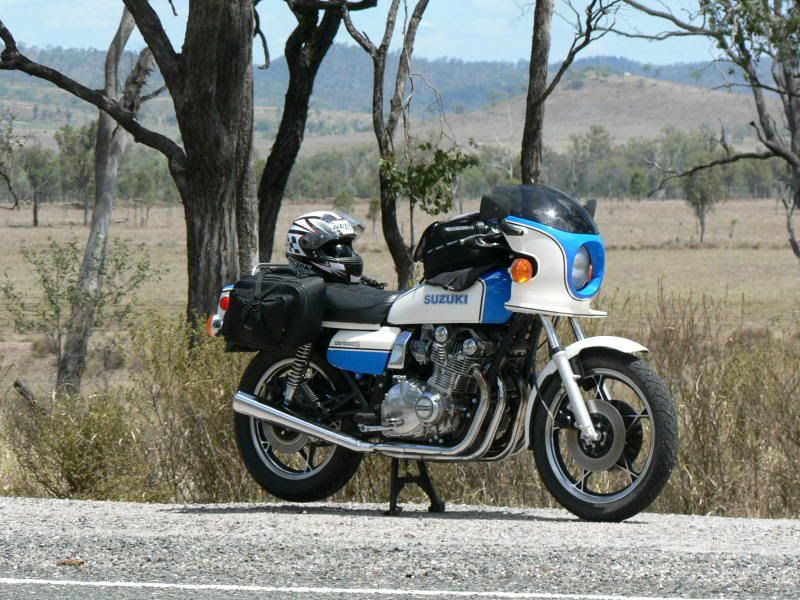
I was full of hope and excitement to take delivery of my newly acquired GS1000S.

At the time of delivery I was still finishing up two other GS’s and needed to make some room so I could work on the “S”. As it turned out two of the guys who looked at the GS1150EF had spare parts for an “S” and kindly offered the parts for free, that was when things started to look more promising.
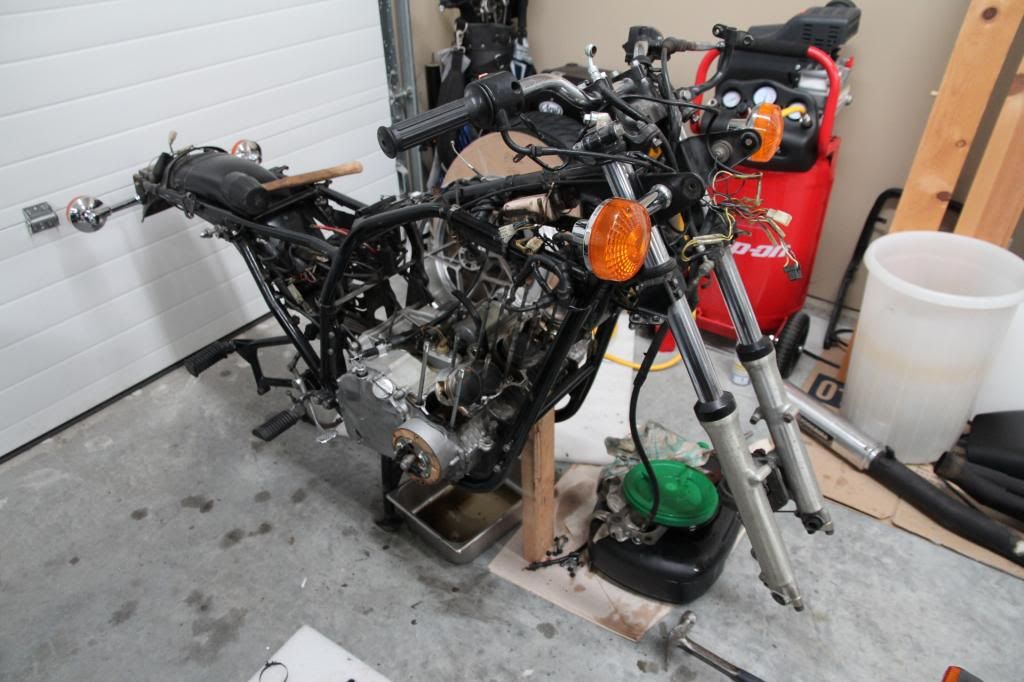
Once I had more room to get to work on the “S” I made the decision to take it all the way down to the frame. Wow they sure come apart fast, think it was only a few hours and I had the entire bike apart and another hour or so to remove the engine.
Now a normal bright guy would grab his camera and take a lot of shots of the bike as it came apart, well I was not normal or bright as it seems, I didn’t take many pictures that will help with the reassembly, so I have a 2000 piece jigsaw puzzle that has an added twist to the conventional puzzle, with a motorcycle when you forget to install some piece, you don’t just put it in place, you pull the entire thing apart because it will always be the one piece that goes in first. Ask me how I know this?
Well now that it’s all apart and scattered all over the floor of my garage, I got busy and ordered up a bunch of parts from Z1 & Boulevard, Vintage Connections etc. Chain, Sprockets, Headlight Bucket & Trim, Brake Caliper Rebuild Kits, Rubber Grommets, various Screws, Bolts and Washers and anything that was damaged or mangled and there was plenty.
Why use a socket or ring spanner on that nice chromed nut when a set of channel lock pliers works perfectly well? Who knew some of the bolts for the side covers were different lengths, doesn’t really matter does it? they all fit sort of if you tighten them enough.
I’m very familiar with the name Heli-coil and now have an extensive collection of sizes.
I am also on a first name basis with Brent (parts guy) at Boulevard Suzuki as I was placing an order every week or so and it took a few calls to get the online ordering sorted, with my Canadian CC and a US shipping address.
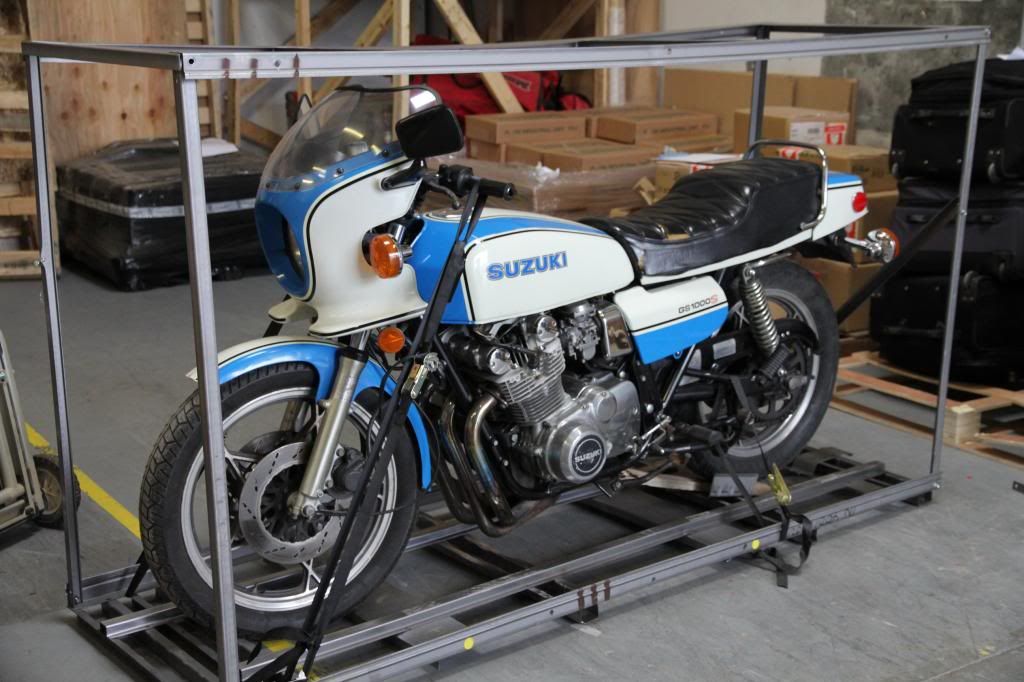
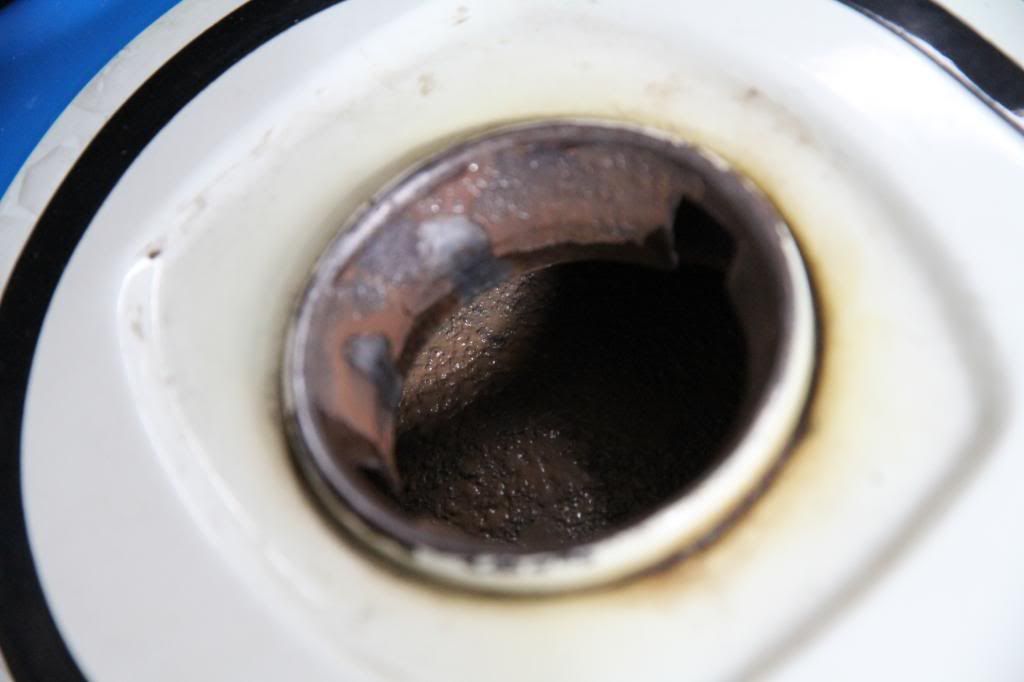
Here’s a few pictures from delivery and some random pictures the bike in pieces and some of the damaged parts I found during disassembly.
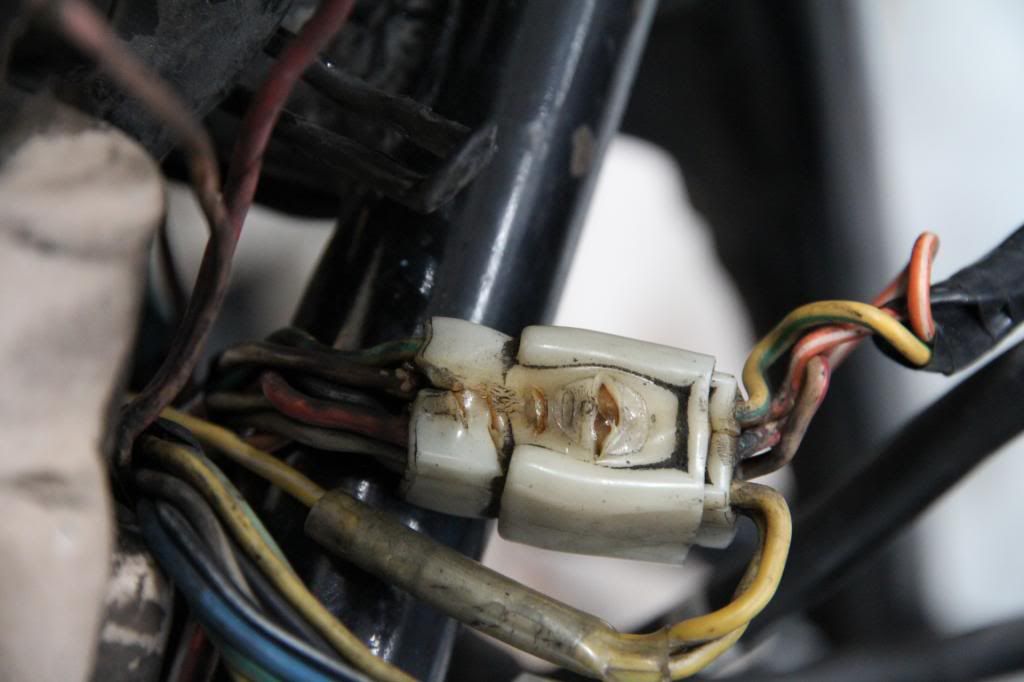


Melted wires :(


Very Rusty Tank :(
 
Last edited:
I haven't read any of your posts lately and I'm glad to see your on task.
 
So, how far do I go with this restoration/rebuild, I ordered quite a few parts that were nice to have but not absolutely necessary, like the Rear Fender and the Footrests, and a few other parts (oh yes, the new Left Mirror) but I was in spending mode and nothing was going to get in my way of making this the best I can make it.

Until the reality of how much this could cost and how much work this is to do at a high level. I now have even more respect for the guys who are doing these massive rebuilds and staying with it even after more than a year or so.

Even though I do enjoy working on the bike, it is a bit daunting some days just looking at the bike laying in pieces and in boxes all over the garage.

It may not seem like a big deal but many of the parts sold by Suzuki listed with substituted part numbers are similar but not same as the original. Example, the emblems for the engine side covers, new ones now come with silver background and gold lettering, (original is black background and sliver raised lettering). The footrests are square topped rather than rounded and a few other items I got have the wrong colour finish, and as I’m trying to keep it as original as possible, I will probably just stay with the original parts and clean them up a bit, not sure about the engine side cover emblems though as nothing will look right except the orginals and mine are rough.


A disassembled dirty engine, should have cleaned it better before I pulled it apart, now how do I clean it without spending the entire day on it and getting grit all in the engine?
After 2 weeks of procrastenating I ended up bagging the top of the motor and using Simple Green and a stiff plastic brush and then power washing it.


Here's the result after 2 applications of Simple Green applied full strength.


After a good cleaning, some new paint on the oil pan, VHT SP127 and a new gasket fitted.
 
Last edited:
Got me a Metal Polisher

Got me a Metal Polisher

I got a bunch of parts vapour blasted, engine side covers, valve cover, wheel spacers, rear wheel hub, chain adjusters and forks.
When I got them home I gave the side covers a coat of Clear Satin VHT (SP115). After a day or so they really darkened up and didn't look too good, so I bought a polisher and gave them heck for a while, here's what one of them looks like now.


I bought some VHT Clear Gloss (SP730) which is actually caliper paint and used it on the forks and it looks great. I will try spraying the polished parts with the Gloss to see how it looks.

Also got a few goodies from Vintage Connections to replace the melted connectors and butchered wiring and also ordered some of their 3M black tape, it works awesome and leaves a very professional looking job. Anyway I am happy with the look of it and it was easy to work with.

 
Excellent, another rebuild to follow.
When you say the cover darkened up after a couple days, was it just the paint curing or do you think the soda blasting may have altered the surface?
 
Looking good David. I feel your pain about staring at what feels like an eternity of work but in time it will all pay off and start to feel like you're actually getting somewhere. If you find a clear coat that holds up to gas you let me know, I've tried several different ones that I can get here and no luck yet.
 
Excellent, another rebuild to follow.
When you say the cover darkened up after a couple days, was it just the paint curing or do you think the soda blasting may have altered the surface?

The vapour blasting which uses very fine glass bead in a water slurry leaves a very fine finish and makes rubber and plastic look new again. The aluminum has a very fine texturered finish which masks any scratches so i thought satin clear would work better, not sure why it went dark, but when I used gloss clear on the forks it looks more like the factory finish and didn't darken at all.

I will post some pictures in one of my next updates to see both samples.
 
A picture of the parts that I had Vapour Blasted after I had sprayed the valve cover and the rear hub with VHT SP115 Satin Clear. (the top cap was painted with SP127 silver) See how it's quite a bit darker than the side covers, I sprayed them later and they went even darker, so I stripped them with paint stripper and then gave them a good polishing.


Here's the side cover decals, any ideas as to where to find a set of original Black & Sliver?
 
Only place to find those black decals is ebay now, unless someone on here has one.
 
Starting the reassembly, received a nice batch of parts, I first painted the frame where it had a few wear spots and around the battery holder, the acid had damaged the paint, I sanded with 280 Wet & Dry and then 600 Wet & Dry to give it a nice finish. After cleaning it and drying it with a blow dryer I painted it with VHT Roll Bar & Chassis Paint, Gloss Black SP670) It was a perfect match.
Then installed the new rear fenders and then the turn signals and the new License Plate Holder (still on the floor in this picture) thanks to MS Kiwi who sent it to me, I painted with VHT SP671 Satin Black and it looks like an excellent match to the original finish.

I love VHT paint, but I always use a new can for final finishing as it seems to come out better the first few times I use it.


Next I fitted the rear light assembly after throughly cleaning it and replacing the lens with a new one.


Making progress, installed the handle bars and the left and right switch controls, both new as the old ones had melted wiring and evidence of bodged repairs so I would rather not deal with that, also installed the front turn signals.
I placed the tank and one side cover on just so it looks like I'm making progress, makes me feel better when I walk in the garage and see it's almost finished. :D

 
Last edited:
Nice project old mate .
Mine was much more piggly than yours . It cost me heaps more than I expected before it was finished (I stopped keeping track about half way through 'cause it was freaking me out) .
Worth it though .
You'll end up with a very classy classic that's a whole $hitload of fun to ride and , reliable those old girls .
I do an annual 10 to 12,000 kilometre ride (to Phillip Island) . Broke a clutch cable , ... once , and got a flat tyre , ........ once .

I know it's a bit of a wank putting a pic of my bike in your thread , but , inspiration ? You'll see that she's not perzactly correct but the bits I need will turn up one day . I'd put the incorrect Cover Decals on while you keep an eye out for the correct ones .

phillipisland08081.jpg


Have fun .

Cheers , Simon .
 
Last edited:
Fitted the tires

Fitted the tires

Got a set of Road Riders from SW Moto in Arizona, 3.25-19 Front & 4.00-18 Rear, cleaned up the rims best I could without spending a whole day on each, my arms just about seized up from so much work.

I think the PO had used rebar as a tire iron as there was so much damage to the rims, I used simple green and 320 Wet & Dry on the rims to try and take down the sharp gouges and clean up the grime.

I fitted the new tires without needing to use tire irons, just hands and the heal of my boot to get the last part in.
I was pleased, guess all those years of changing tires when racing has paid off.
Even the valve on the tube just popped out the hole, I used a HD tube on the rear as that was all I had and I applied some lube to the tire and rim and pumped it up to about 60 PSI to seat the bead.

 
Last edited:
Nice project old mate .
Mine was much more piggly than yours . It cost me heaps more than I expected before it was finished (I stopped keeping track about half way through 'cause it was freaking me out) .
Worth it though .
You'll end up with a very classy classic that's a whole $hitload of fun to ride and , reliable those old girls .
I do an annual 10 to 12,000 kilometre ride (to Phillip Island) . Broke a clutch cable , ... once , and got a flat tyre , ........ once .

I know it's a bit of a wank putting a pic of my bike in your thread , but , inspiration ? You'll see that she's not perzactly correct but the bits I need will turn up one day . I'd put the incorrect Cover Decals on while you keep an eye out for the correct ones .

phillipisland08081.jpg


Have fun .

Cheers , Simon .

Hello Simon, Very Nice, she's looking mighty fine, I see you have a different front fender, what is that off?
 
My carbs are a mess

My carbs are a mess

Well this is one job I may consider farming out, does Chuck still rebuild carbs for members? and I know he is looking for a left hand mirror......
I know they are 34MM and I will need to re-jet as the bike came with a POS 4 into 1 and I wil lbe running stock pipes.

There is a sticky note in the manual that indicates stock is 107 whatever that means. (Main Jet ?) The GS1000S supplement is from the 1979 model so it has no useful info regarding the carbs.

Well I can't find a picture of my carbs so I'll post one later. (but I'm sure most of you have seen a set of old carbs before)

Ok I show you the console instead, it's been waiting patiently stored on top of my tool chest just waiting for the day it gets to go back on, that reminds me I'll need to clean that up as well before I re-install it as it's just filty underneath.

 
I don't know what the front guard is off .
It came with it .
I've been looking for one that still has the original paint . The rest of the paint is original and I don't want to have to paint the whole bike just to match the guard .
Old mate Matchless recommends doing your gauges with black boot polish . So do I . Put heaps on , rub it in and polish .
Beautiful .
That's going to be a mighty fine ride when you're done .

Cheers , Simon .
 
Installed Swing Arm

Installed Swing Arm

Sent out the swing arm to get one of the bearings out, I had worked on it for 30 mins and made no progress, so it was a no brainer to get help.
Because they needed to used heat which damaged the paint they sand blasted it as well, so I dropped off a few other parts including the battery box to get blasted as well and paid $45.00 to have everything done, awesome deal I thought.
I painted it with the same paint as I used on the frame. VHT Gloss (SP670) then installed it before the paint had fully hardened and managed to get a small scratch in the paint. (Thinking to myself "maybe I should have had it powder coated")
Sometimes I get a bit impatient and rush things a bit, but it's probably not a big deal in the whole scheme of things.
Now I have to start the rebuild on the calipers and figure out what I'll do with the carbs, as those are 2 jobs I have procrastinated on for quite a while.

Opps no time to download pictures, I'll update next time in a few days.
 
Well this is one job I may consider farming out, does Chuck still rebuild carbs for members? and I know he is looking for a left hand mirror...

I'm sure Chuck would be more than happy to help you out. You should shoot him a PM with what you need.

Also, where did you get your Vapor Blasting done? I haven't been able to find many places that do it, and I'm interested in your experience with them and what they charged.
 
Back
Top