-
Required reading for all forum users!!!
Welcome!
Register to access the full functionality of the GSResources forum. Until you register and activate your account you will not have full forum access, nor will you be able to post or reply to messages.A note to new registrants...
All new forum registrations must be activated via email before you have full access to the forum.A Special Note about Email accounts!
DO NOT SIGN UP USING hotmail, outlook, gmx, sbcglobal, att, bellsouth or email.com. They delete our forum signup emails.A note to old forum members...
I receive numerous requests from people who can no longer log in because their accounts were deleted. As mentioned in the forum FAQ, user accounts are deleted if you haven't logged in for the past 6 months. If you can't log in, then create a new forum account. If you don't get an error message, then check your email account for an activation message. If you get a message stating that the email address is already in use, then your account still exists so follow the instructions in the forum FAQ for resetting your password.Have you forgotten your password or have a new email address? Then read the forum FAQ for details on how to reset it.
Any email requests for "can't log in anymore" problems or "lost my password" problems will be deleted. Read the forum FAQ and follow the instructions there - that's what we have one for...
-
Returning Visitors
If you are a returning visitor who never received your confirmation email, then odds are your email provider is blockinig emails from our server. The only thing that can be done to get around this is you will have to try creating another forum account using an email address from another domain.
If you are a returning visitor to the forum and can't log in using your old forum name and password but used to be able to then chances are your account is deleted. Purges of the databases are done regularly. You will have to create a new forum account and you should be all set.
You should upgrade or use an alternative browser.
Guest
Guest
I have a plan which involves some steel plate I have here and some rod to make a pin. Basically one hole in the leg and two holes in the plate, one locks the leg forwards to stop it being kicked out, and the other hole to lock the leg back against the door so it can shut.
It's a bit hard to explain but hopefully I can get it done on the weekend and hopefully it works.
Guest
Guest
I'll use a "redder" red as this one's a bit off but it's pretty much the scheme I'm going for.
I was initially thinking just a black seat but the KA guys are right that a two tone seat is part of the visual appeal of the Kat, so I'll be sticking with a red seat too.

Big Rich
Guest
http://lazonenoire.blogspot.com/2016/01/tattooed-katana-gyuszi-gulyas-artwork.html?m=1
")
SVSooke
Guest
Guest
Guest
Rich, that's some serious skill there! Well beyond me but thankfully I'm not keen on that on my tank

Guest
Guest
No photos of the pins to help hold the compressor room door/workbench legs in place yet as there's still too much crap up that end to open it, but here's the shelves and peg board at least:


I've been able to move everything from the work bench in the garage back to those shelves now so I should have some room to get going on the tail light again.
Guest
Guest
Gave it a big clean out and got some whiteboards and cork board up.
Here's the pins in the compressor room door hinged legs to make it a workbench. With these in I can lock the legs back real easy:


And the whiteboards/cork board I picked up from KMart...

Unfortunately my skills with applying sheets of contact are not so good... this was $3 so I can tear it down and do it again if the bubbles/creases are too annoying, but it's a real good size:

That should mean today is steering head bearing day provided my phone doesn't keep ringing like it has so far this week...
Guest
Guest

30 minutes in the oven for the bearing, freezer for the lower triple clamp, Bob's your aunty.
Got a bit of organisation done in the shed...

Means I have room now to do this...

One of the fellas on the KA forum has made a spacer to replace the speedo drive, just have to collect that hopefully on Saturday morning.
Guest
Guest
And yes, she already has a fan...

Guest
Guest

And one of the very generous fella's from KA handed me the holy grail of spacers Saturday morning:

Seems to be a pretty spot on fit:

And my excitement level went up a notch when I got to wheel her out of the shed very easily...

I don't think I'll be putting the indicators back in the stock location but that depends what happens with my headlight idea at present... I just put them there for the moment because I could
The only thing I'm missing for a complete roller right now is actually the swingarm bearings which I keep forgetting... they're a standard roller/needle bearing so one of the KA folk will have the numbers for me.
Now it's time for me to pull my finger out and finish some things I've started like the battery tray and tail light!
Guest
Guest
I found some small projector headlights in the UK that are E marked so good for rego and safety certificate here in Aus.
When I had them mocked up underslung on the front cowl in place of the shark fins, there just wasn't going to be enough clearance. The Kat fork travel is 150mm and while they're shorter than the fins and therefore in theory have more clearance, the fins are out to the sides whereas the lights are much further into the centre, so effectively leaving only about 100mm for fork travel which means the front guard will be hitting them before the forks bottom out. Not good!
So I figured I'd see what they looked like if I had the bottom of the lights in line with the bottom of the cowl. It results in the top of the lights impinging on the stock headlight area, but that's not an issue as I wouldn't run an oil cooler that's full height in there anyway as it would probably be too effective at cooling.
Here's how it ended up looking:

And after a bit of time in the GIMP this morning, here's an idea of what it would look like with the screen and an oil cooler:

While I love the idea of it, I just don't think it will look right... a bit too bug eyed with the lights up on top there I think.
Of course with it all painted a nice glossy black it will change how it looks a bit, but my imagination and skills with the GIMP don't stretch quite that far unfortunately...
So I'm still undecided to a certain extent but leaning towards abandoning it at this point...
No progress on the battery tray as I decided to wait until today or tomorrow when I break out the jigsaw to cut the aluminium.
PS: No front cowls were harmed in the making of this mock up...
ptegsotic
Forum Mentor
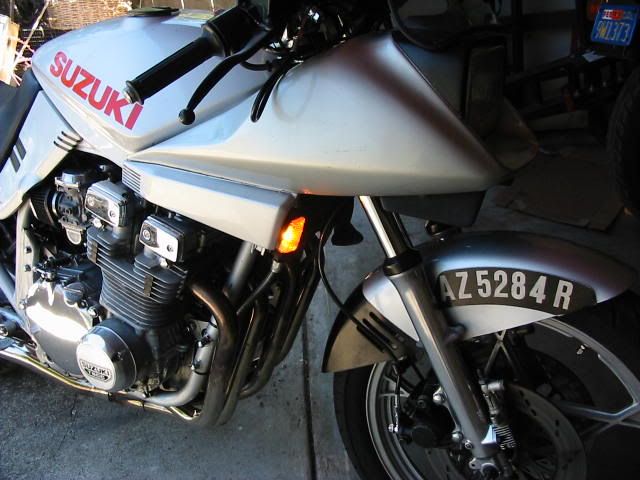
I don't think I'll be putting the indicators back in the stock location
yea, tuck 'em in tight, yet still functional / observable (esp @ night) ...
(it's a 'gap' just wanting to be filled!)
Tim Tom
Guest
Good to see a bike out of the shed. Get to it!
nvr2old
Forum Sage
In any case that's what I'll be doing on my XR 41 replica: http://www.thegsresources.com/_foru...000-engine-in-GSXR-1100-first-gen-frame/page2
Guest
Guest
Ptegsotic/Tim Tom... just to be clear these are headlights not the indicators
I do have the stock fake oil cooler grill mounted at the moment between the side covers where those indicators are in Ptegsotic's photo. I haven't really thought about indicator location yet as I figure that will partially be determined by what I do with the headlight.Larry, it's growing on me... although a suggestion has been made by the KA guys to try the headlights on top of the oil cooler which I hadn't thought of so I'll see how that looks. I think the bottom works better but we'll see. And you're spot on, it all depends on how well I could blend it in with the stock cowling. I don't want it to look like a hack!
John, do you have a mock up or something of what you're planning? Had a look through your project (very cool btw) and can see the headlights at the end but that's about it...
Guest
Guest
I did however get some good progress on the battery/electrics tray.
Got it cut out on Saturday and after a good suggestion I used a small round file to relieve the corners where the bends were going to happen, and I reckon it made a big difference. In future I'll drill a small hole in the corner before cutting the shape out.

And it seems to sit in reasonably nicely:


I do have some tidy up work to do though. While I took into account the width of the aluminium while bending, I didn't take it into account enough when laying it out in the first place. So when the bends were done, the electrics tray sides end up being a little taller than I intended, and the sides of the battery tray are also a little longer than I intended. Nothing a bit of trimming won't fix easily but a good lesson for me to learn for next time.
Once I trim it to size properly I'll attempt to braze it and see how that works out.
I've updated my thread but the holes in the fairing are not done yet...Cheers for the feedback guys!
John, do you have a mock up or something of what you're planning? Had a look through your project (very cool btw) and can see the headlights at the end but that's about it...