• Required reading for all forum users!!!

    Welcome!
    Register to access the full functionality of the GSResources forum. Until you register and activate your account you will not have full forum access, nor will you be able to post or reply to messages.

    A note to new registrants...
    All new forum registrations must be activated via email before you have full access to the forum.

    A Special Note about Email accounts!
    DO NOT SIGN UP USING hotmail, outlook, gmx, sbcglobal, att, bellsouth or email.com. They delete our forum signup emails.

    A note to old forum members...
    I receive numerous requests from people who can no longer log in because their accounts were deleted. As mentioned in the forum FAQ, user accounts are deleted if you haven't logged in for the past 6 months. If you can't log in, then create a new forum account. If you don't get an error message, then check your email account for an activation message. If you get a message stating that the email address is already in use, then your account still exists so follow the instructions in the forum FAQ for resetting your password.

    Have you forgotten your password or have a new email address? Then read the forum FAQ for details on how to reset it.

    Any email requests for "can't log in anymore" problems or "lost my password" problems will be deleted. Read the forum FAQ and follow the instructions there - that's what we have one for...

  • Returning Visitors

    If you are a returning visitor who never received your confirmation email, then odds are your email provider is blockinig emails from our server. The only thing that can be done to get around this is you will have to try creating another forum account using an email address from another domain.

    If you are a returning visitor to the forum and can't log in using your old forum name and password but used to be able to then chances are your account is deleted. Purges of the databases are done regularly. You will have to create a new forum account and you should be all set.

1984 Katana 7/11

  • Thread starter Thread starter Guest
  • Start date Start date
Warning!!!!

The following pictures may disturb some people. Viewer discretion is advised.

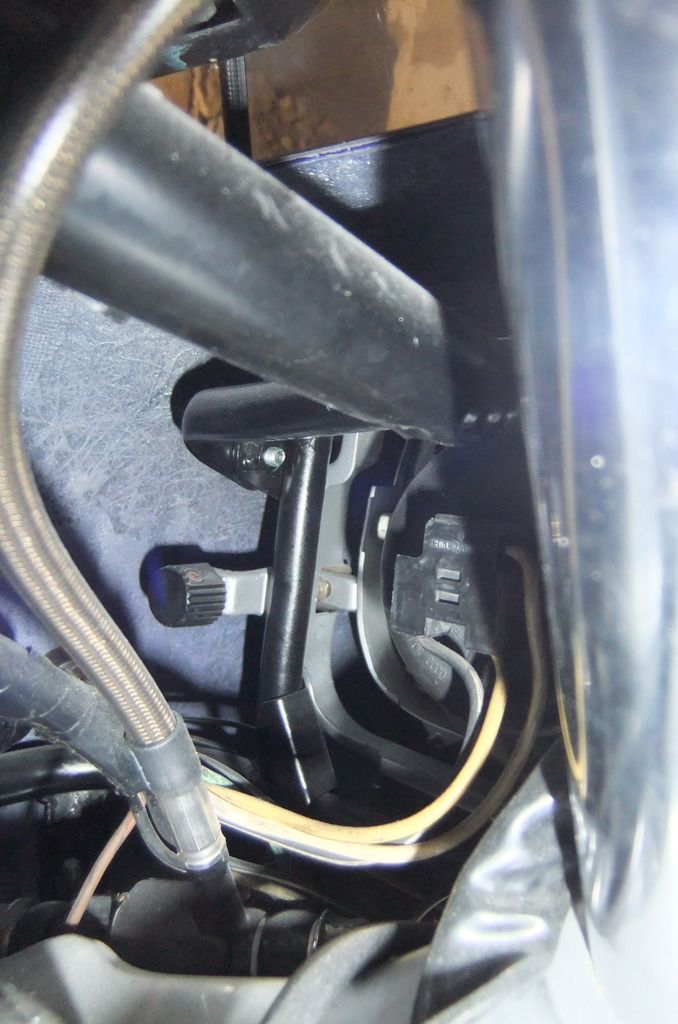
Yep, I've been welding again :D

The ignition switch is about 95% done aside from some paint.

I still need to find a P clamp to suit the frame rail so I can finish that bit of the mounting off and I need to cut two small rectangular holes so I can reuse the plastic cover off the bottom of the stock switch.


The switch mechanism sits in nicely and is screwed in securely.


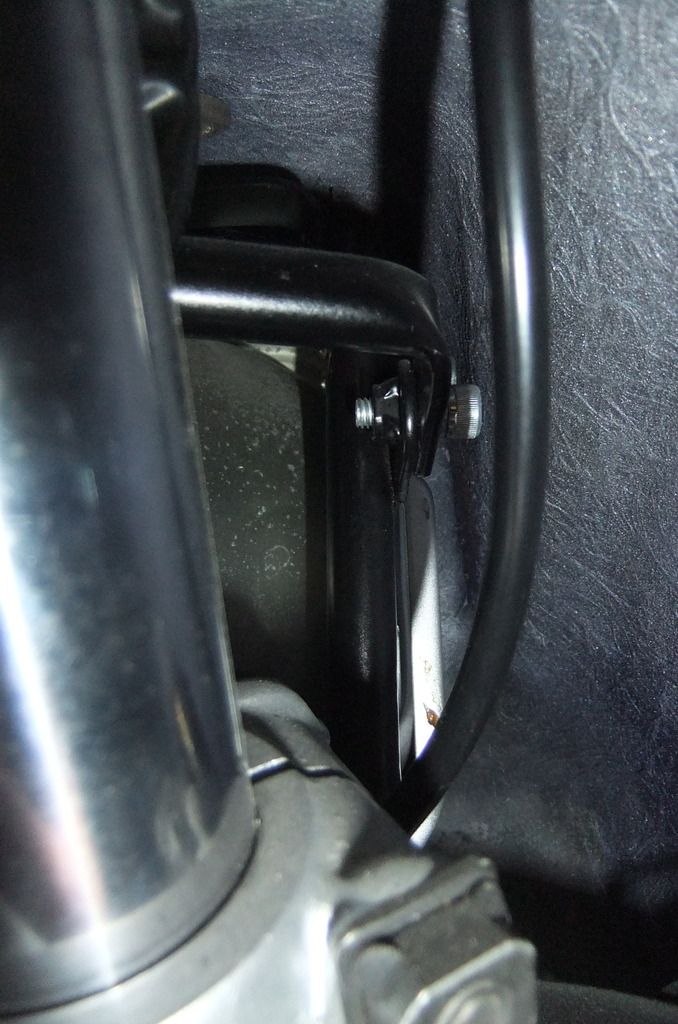
I enlarged one of the roll pin holes on the barrel to enable an M3 screw to fit in it then tacked a nut on the outside so once it's screwed in securely it locks it in place.

Obviously I need to find a much shorter M3 screw!


It ends up protruding a little more than I intended from the side cover but I can extend the hole in the mounting bracket so it can slide a couple of mm's forward easily enough.


All in all aside from the crappy welding I'm pretty happy with the result. It was a bit of a marathon effort and if I could've found steel tubing of the right size it would've been a lot easier.
 
Cheers Rich! True, but I'd prefer it if I could get to the point where I'm spending more time welding than grinding... :D
 
Cut the two little mounting holes yesterday so the plastic cover for the bottom fits on nicely now.

I also elongated the mounting hole so I could slide it a little further forward to tuck in a bit better.


Bit blurry but definitely tucks in a lot better.


Still need to get a slightly smaller P clamp to get the front mount sorted but aside from that now it just needs some paint.

I'm hoping to get back on the seat pan mould today.
 
Doesn't look like much but spent a fair bit of time yesterday trimming all the finger pricking sharp bits back and sanding. Also screwed on some timber to make a solid base.

I had to give the shed a good clean up to get rid of all the loose strands and crap too.

Then finally started cutting chunks of foam to form the pillion area part of the mould.

Once I get that close to shape I think I'll seal it up and add a couple of layers of fibreglass over the top just to make sure all the mould prep work as such is done to fibreglass rather than foam. I think that will give me a better result.

 
I decided I'd best get the mounting holes for the headlight housing sorted yesterday so I could figure out what room I have inside the front cowl for the headlight relays and dash etc.

However, now that I have the proper cushions in place and have the new cushion and nut on the bottom of the assembly, it just will not fit in.

With the new nut/cushion on the bottom of the assembly, the shoulders of the housing interfere with the bottom of the arms on the subframe.


And in addition, it doesn't fit between the arms with the cushions in place in the arms either.


I just don't understand what's going on here. Going by the stamped numbers on the assembly it's for a Kat, and I know the subframe is right, but WTF? I'm so confused...

The simple way is to bend the arms out a touch and grind off a couple of mm's from the bottom, but it's brand new and I really don't want to do that.

I could buy the outer part of the assembly new for about $40 but I don't know now if that will match up correctly with the rest...

Any clue anyone?

Anyway, I moved on and trimmed up the front of the inner guard/rear tray and drilled the holes so it could mount to the front inner guard. Ignore the bolts, I'll use some neater stainless ones when it's all done.


I got the P clamp sorted on the frame rail for the ignition switch the other day, so had to get a profile photo of how neat it sits in, very happy with that!


And last but not least I got the ol' Selley's Kwik Grip out and glued on all the foam so I can start shaping the pillion area of the mould.

 
I'll try to get some pictures for you.
I suspect the headlight is not for the Katana?
Here are the pictures.
I didn't take the fairing off so it's not too clear but I have added pictures of a headlight that does NOT fit the Kat.

DSCF7072_zpsplgcazv3.jpg
DSCF7074_zpskh6qoq0b.jpg

DSCF7079_zpsxkvhs3wu.jpg

DSCF7080_zps5uphfzd0.jpg

DSCF7081_zpsmwl0k6jd.jpg

DSCF7082_zpsgccz11qb.jpg

DSCF7083_zps9evqfr1y.jpg
 
Last edited:
Cheers John... the thing is all the stamped in numbers match what at least one other guy has on his Kat headlight assembly. I guess that still doesn't mean 100% that it's right but it should be...

It does look more like what's on your Kat there, but doesn't fit right.

This came from the UK whereas the subframe is brand new from locally here, so I wonder if there was some slight variation there somewhere? I haven't heard of anything like that but I'm no guru on Kats either so I'm a bit stumped.

Thanks for taking the time to get the photos too.
 
I reckon the wiring diagram's pretty much done now. I'm still lacking the technique to make it look neat but I can work with it.

I've ended up running half up each side of the bike. This way it reduces the number of colours required and also when you take the derating numbers into account for bundling the wires together, it means I can stick with the 3mm (20A) size for all the wires.

The derating cuts the current rating to about half when 6 or 7 wires are bundled together, so they effectively become 10A. Running the highest current circuits (ignition and headlight) up either side is the best way I could figure to deal with this.

I've yet to finish labelling the colours on the diagram, but aside from that it should be done.


And here's the draft of the relay and fuse box label I'll locate just behind the electrics tray.

The fuse sizes haven't had a lot of thought yet.

 
Haha cheers Charlie! As long as it works and becomes functional art then I'll be happy :D

And as for the headlight... I now know what's wrong at least.

Comparison photo... the new subframe's mounting ears are notably lower than another one...

The scaling's not perfect but close enough to see the difference.

Hmmmm...

 
My little brain's having an issue processing how to get the pillion area foam to a suitable shape, so stuck that in the back of my mind to ponder and sorted a couple of other things out instead.

Firstly, I must have measured the cut out for the chain guard incorrectly when making the rear inner guard, so the chain guard was hitting it before the shock is fully compressed.

Simple fix for that, clears nicely now:


Then I managed to squeeze the headlight assembly in enough to determine how much room I have for the headlight relays and dash.

Bit hard to see but I can easily mount the relays off the right side of the subframe and there's a conveniently placed bolt just above them where the short top part of the subframe attaches to the larger part.


And plenty of room for the Acewell in the cowl as I previously worked out, but also enough room to have a gear position indicator and charging indicator on a dash there as well.


Started on the left side of the dash, just need to bend the aluminium now.


I won't start the right side of the dash until I decide what charging indicator I'll go with.
 
I made an embarrassing discovery last night...

When I received the headlight assembly, I thought the nut for the bottom mount was underneath the cushion instead of on top.

I've put it back in that way... the nut actually goes *on top* of the cushion...

The annoying thing is I had to look at the fiche to order the parts, so I should've seen the correct way. Such a rookie mistake!
 
awesome project I'm looking forward to the completion.

I'm more than a little envious, my project a '84 gs1150ef was my brothers, he traded in his first year Katana for it. I love the GS but I'd much rather have had his Katana.
 
Cheers mate, yeah we do learn from our mistakes, just wish they weren't so embarrassing sometimes!

Definitely nothing wrong with an 1150EF but yeah I understand that... the Kat has a certain magical appeal... just nothing quite like a Kat!
 
Had a reasonably successful morning yesterday.

Bolted the engine mounts together ready to finish up.


After a bit of time on the bench grinder then finishing up with a hand file they seem to be a pretty good replica of the template.


And in fact they seem to work pretty good! Just need powder coating along with the rest of the engine brackets and frame.


Then I drilled and tapped the holes in the headlight housing, seem to be in the right location.


The headlight still seems a little low but now that I have seen others I'm not so concerned.

Looks a little left of centre in this photo but that's easy sorted also.

The location's the same whether I use my cowl needing repair or the loaner one.

 
10 colours of 10m rolls of 3mm x 20A wire arrived yesterday along with 2m each of red and black battery cable and another micro relay base.

 
Haha cheers Larry!

Gotta get back on the seat this weekend.

Once I get the seat pan done it will open up a whole new avenue of progress... and actually being able to finish some things up.
 
Back
Top