• Required reading for all forum users!!!

    Welcome!
    Register to access the full functionality of the GSResources forum. Until you register and activate your account you will not have full forum access, nor will you be able to post or reply to messages.

    A note to new registrants...
    All new forum registrations must be activated via email before you have full access to the forum.

    A Special Note about Email accounts!
    DO NOT SIGN UP USING hotmail, outlook, gmx, sbcglobal, att, bellsouth or email.com. They delete our forum signup emails.

    A note to old forum members...
    I receive numerous requests from people who can no longer log in because their accounts were deleted. As mentioned in the forum FAQ, user accounts are deleted if you haven't logged in for the past 6 months. If you can't log in, then create a new forum account. If you don't get an error message, then check your email account for an activation message. If you get a message stating that the email address is already in use, then your account still exists so follow the instructions in the forum FAQ for resetting your password.

    Have you forgotten your password or have a new email address? Then read the forum FAQ for details on how to reset it.

    Any email requests for "can't log in anymore" problems or "lost my password" problems will be deleted. Read the forum FAQ and follow the instructions there - that's what we have one for...

  • Returning Visitors

    If you are a returning visitor who never received your confirmation email, then odds are your email provider is blockinig emails from our server. The only thing that can be done to get around this is you will have to try creating another forum account using an email address from another domain.

    If you are a returning visitor to the forum and can't log in using your old forum name and password but used to be able to then chances are your account is deleted. Purges of the databases are done regularly. You will have to create a new forum account and you should be all set.

1984 Katana 7/11

  • Thread starter Thread starter Guest
  • Start date Start date
Cheers Steve, and yep I can only agree :D

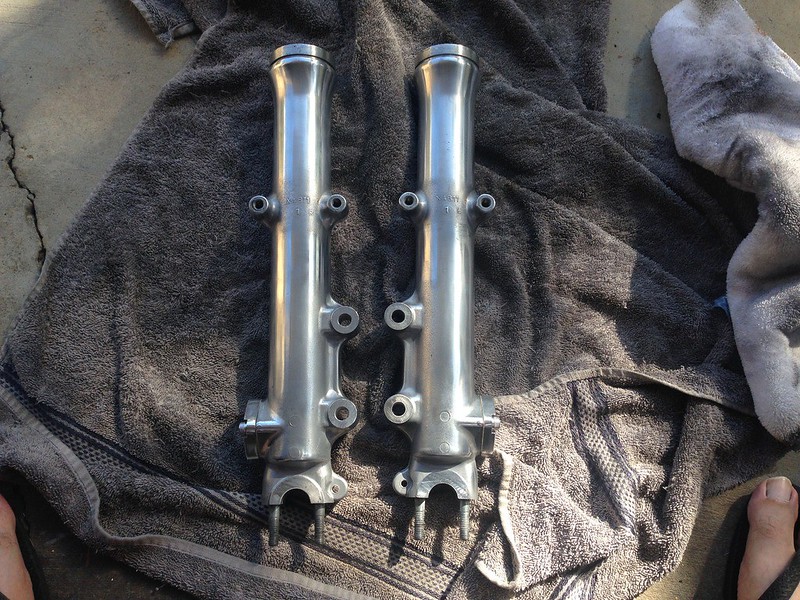
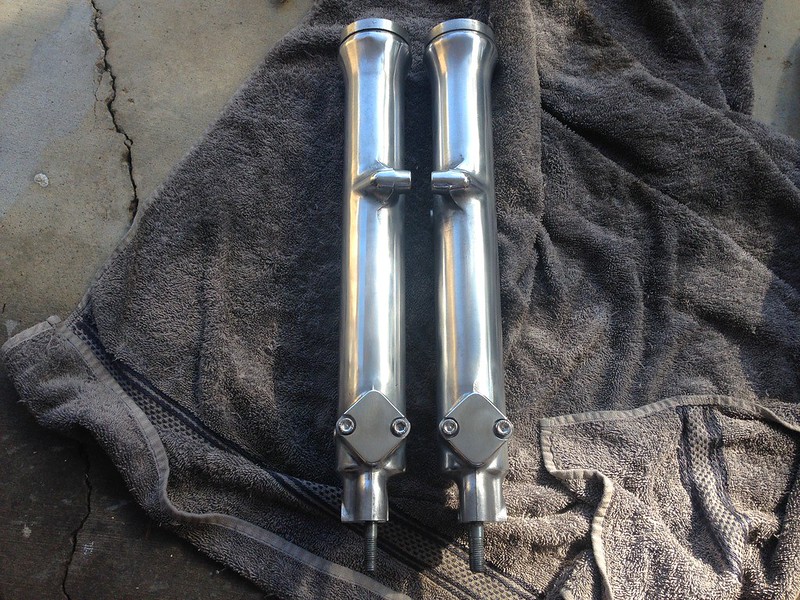
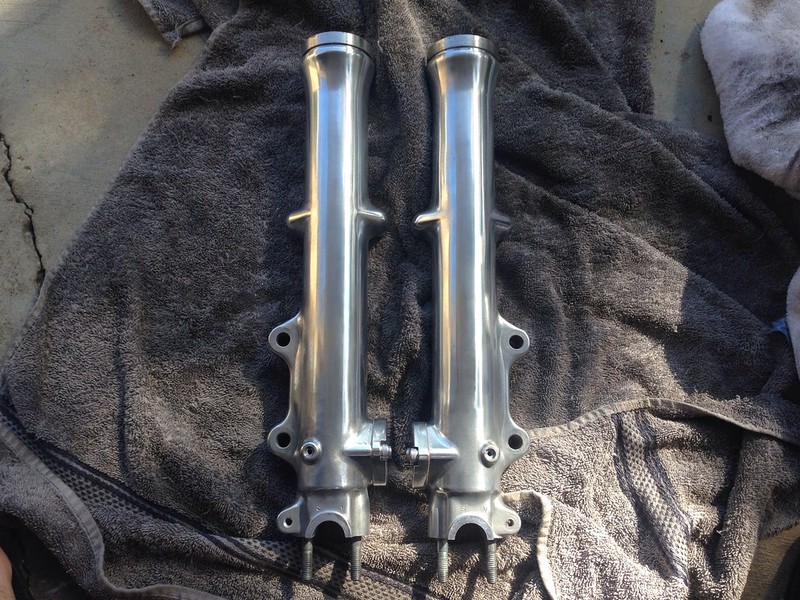
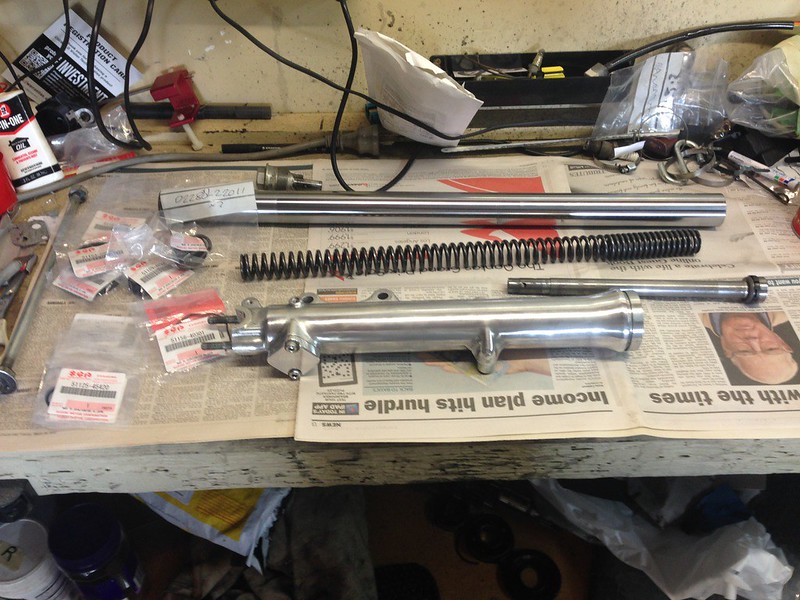
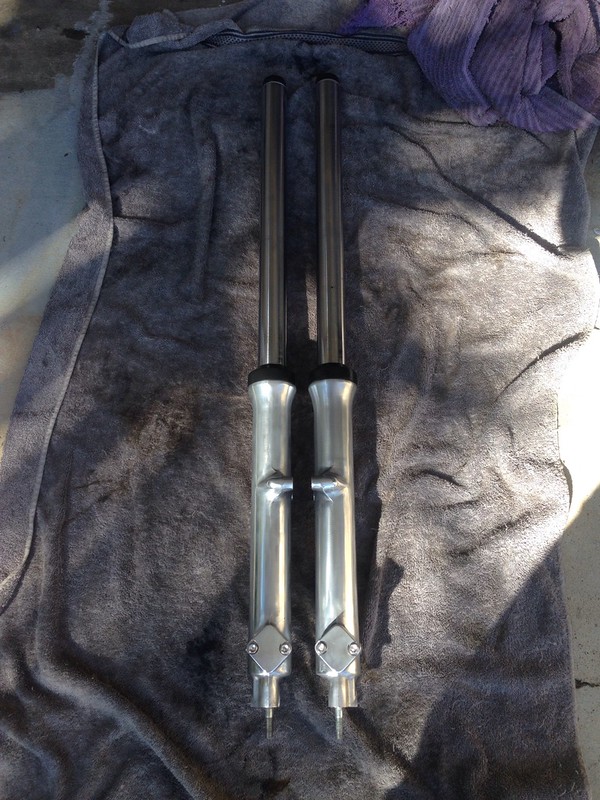
I got some time to start pulling the forks apart yesterday, but not quite enough time to attack the damper rods just yet.

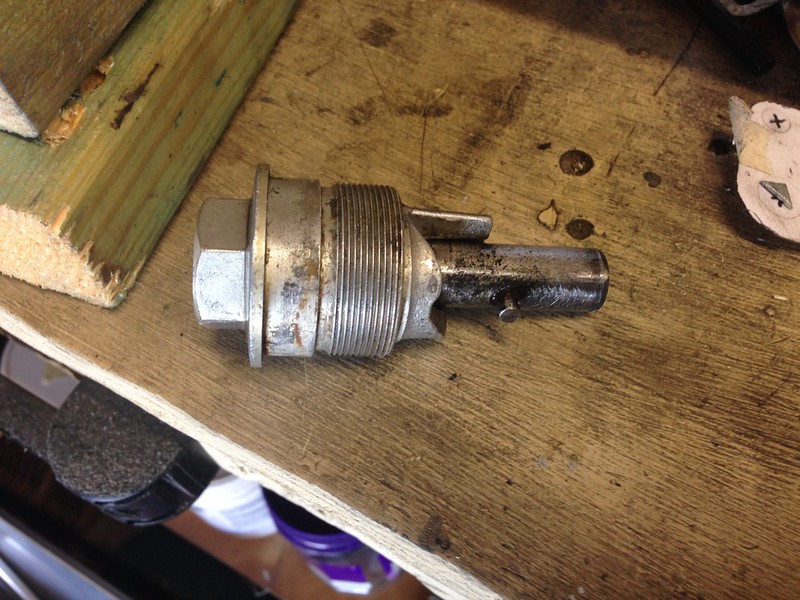
I suspect the rubbers have been missing from the tops of the fork legs for quite some time as the preload adjusters don't move so easily, and the right has some definite corrosion in there which will need cleaning up with the wire wheel. I can't even get it to slide enough to sit in the number 1 position.

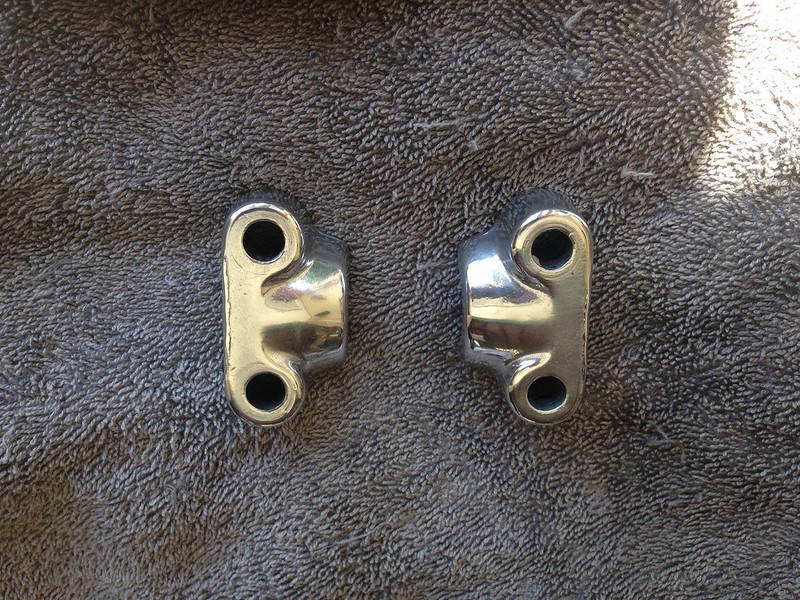
Is it normal to lubricate these when they're installed? Thinking just rubbing some fork oil on them will help a bit.


Got a chance to get the damper rods out of the forks.

As I'd anticipated, the fork stanchions seem nice and straight and everything inside looks pretty good to me so I've ordered all the O rings, seals, etc. to get them rebuilt.


I also received a set of headers yesterday but haven't unwrapped them yet to check if they fit the 1100. Hopefully I can get that done on the weekend.
 
I got the headers somewhat mounted up yesterday to see how the fit is... hmmmm a little close!

With no base or head gasket the collector *just* touches a couple of the fins on the very right side of the sump cover, so that will be a bit more of an issue once the engine's assembled properly.

At this point I reckon it could work by using a mount for the pipe at the rear that holds it down just enough to clear the sump. Worst case I could trim a couple of mm's off the two right most cooling fins of the sump cover which wouldn't really adversely affect cooling, but is a little drastic of course.

It'd be a shame if I couldn't use these as they're actually in really good shape aside from needing some cosmetic touches. I've squirted a bunch of WD in them to help preserve them for the time being also.

There's also plenty of room to retain the centre stand with this which is a key point for me.


I also gave the swingarm and fork lowers a good scrub with brake cleaner and degreaser. I didn't want to go down the fully polished path but I think I'm going to have to at least break out the sisal rope buffing wheel and cutting compound with a small amount of buffing/polishing to get the 30+ years of wear and tear out of them. I just want them to look neat really.

 
Looking good as always Pete!

How rare are the sump covers? If it were me, I'd shave down the offending fins to clear the exhaust..... but I would make sure a replacement was available first.
 
Cheers Rich! The good thing is they're not that rare (yet anyway) as the GSX1100's share the same cover, so if I need to trim a couple of fins I'm not too concerned about it.
 
I got a start on the anti-dive block off plates yesterday.

Used my dirty finger to imprint the shape onto a piece of paper.


Then cut and drilled a bit of steel as a template.


And started shaping the first one out of some 10mm thick aluminium I got for this. It's not particularly pretty but some filing and dremel work should have it good, then I need to make the other one.


All the fork bits arrived from Mick Hone the other day so as soon as I get the outers cleaned up and anti-dive block off plates made I can get them rebuilt.

I have to ask, what is the purpose of blocking off the anti dive system
 
Basically the anti dive system is renowned for feeling like crap and adding extra complexity to bleeding the brakes. From what I understand the jury's still out as to how much it even helps with front end dive under braking.

The forks I got didn't come with the anti dive units so I'm simply blocking it off as it's not worth the effort locating replacement units.

The catch is you can't just block it off with a solid plate, you need to leave a channel for the fork oil to flow otherwise you end up in the anti dive state permanently.
 
I cut out the second anti-dive block off plate yesterday and pretty much finished the channel on both but lots of filing to go yet. The channel's not quite symmetrical in both so I might do a little tidy up of that yet.


And I definitely want to recess the sides where the bolts go otherwise no matter how neat I make them they're going to look like a chunk of alloy stuck on the front.


I also started tidying up one of the fork legs.

I tried the sisal wheel with cutting compound on the bench grinder but it seems there is some yellowing clear coat on there which didn't want to move, so I ended up with 240 grit wet and dry sandpaper instead.

I had to stop as I only had about half a sheet of the sandpaper left so I need to get some more, but it still ended up much neater and cleaner.


I reckon once that's done on both the cutting compound will do the trick and I'll just give them a quick buff as well, not looking for a full polished finish.

I'll get as close to the same finish as I can on the anti-dive block off plates too.
 
Forgot to post this yesterday but I finished getting the fork legs cleaned up on the weekend as well as mostly cleaning up the anti-dive block off plates.

I did end up having a little paint stripper left which I thought was all gone but that did the trick on the other fork leg.

Then got most of the road rash out with some 240 grit paper again followed by the cutting then buffing compound.

I'll probably give them a quick hand polish but that's about it, I don't want to create myself a nightmare of having to keep them all polished up.


All I've done with the anti-dive block offs is sand them, no point in anything else until I've been to visit a mate so I can end mill some recesses for the bolt heads.

 
Looking great, i am always amazed what you are able to achieve with basic tools. No laser cutting, lathes and mills.
Well done, the plates look excellent.
 
Cheers mate! Although there will be a mill involved soon... a mate has offered the use of the milling attachment on his lathe to use to recess the bolt holes in the anti-dive plates so they're a bit neater.

Gotta say I like your signature! :D Got a pic of that Kat?
 
I had a trip down to a mate's place during the week where we got some milling done, and then during the weekend I finished them up with a little more filing and sanding then a run on the cutting and buffing wheels.

7858992F-23F7-4699-A128-E8CCB9CAA5FF by starpoint73, on Flickr

B8A84917-1925-4CB2-B54F-6D6535055747 by starpoint73, on Flickr

He also kindly provided an offcut of pig skin gasket material which I cut two gaskets from.

AEBDB860-07A6-4899-8AA5-75BBBEB3DC1E by starpoint73, on Flickr

Then I applied some blue loctite and bolted them in place followed up by a quick once over with the Mothers polish.

3FC6DDAC-E13D-47AE-939D-0086144E8F42 by starpoint73, on Flickr

447FB6BA-5618-4951-8D40-23CC3154C446 by starpoint73, on Flickr

83618F11-296F-4B67-8188-0F2BA8F958F6 by starpoint73, on Flickr

I got the right preload adjuster cleaned up so it moves properly now into all four positions and got everything ready to assemble.

D2431909-1E55-4B3C-A000-2335D6F009C4 by starpoint73, on Flickr

DF9903EC-3F9A-4042-881D-DB3CB6F124FD by starpoint73, on Flickr

Then I realised... can't use a big socket to drift the fork seal into place because the damper rod and stanchion go in first.

What trick do you guys use to get these in safely? That's the only thing holding me up now...

2097EA5C-56CD-47E4-8D41-BC76692367C7 by starpoint73, on Flickr
 
Last edited:
I found a piece of PVC pipe the exact right size for the fork seals and the copper washers for the damper rod bolts showed up during the week so I was able to finish the forks off yesterday.

Pretty happy with the end result, nice and clean and tidy.

3DC0A0F3-F8B6-419B-8AF2-31A1BE58D380 by starpoint73, on Flickr

And I remembered to the do the fork caps as well.

C9A130E6-135C-4828-9BB4-F5952A39170E by starpoint73, on Flickr

I spent a while on the shock mount bushes on the swingarm but no matter what I did they would'nt budge at all.

I soaked them in Inox then found a pretty perfectly sized socket with a large one for the back side.

I tried both the bench vise and bolt through the middle methods, and all I managed to do was break the bolt and bend the bench vise arm with the breaker bar.

As the bushes are rubber I wasn't game to try heat, so I think my only choice at this point is to cut the rubber to get the inner metal ring out, then carefully cut the outer metal ring to allow it to shrink a bit and release. Not pretty but I'm out of ideas on any other way at the moment.

Once I get those sorted I want to assemble the basic roller again and use a pro-tip I got and use a spirit level to confirm my frame/forks/swingarm are all pretty straight.
 
Last edited:
I had three things I wanted to achieve yesterday... get some parts so I can make a press for the shocky bushes in the swingarm, get the basic roller put together so I can do the quick and dirty check for straightness, and clean the wheels up so I can see if I need to paint them or not.

I assembled the basic roller... if only that frame was powder coated and this was final assembly...

Made sure it was on a level part of the shed floor then started moving the spirit level around the frame, and all good. I didn't notice a difference at any point from front to back or across the swingarm.

I also checked the front and rear tyres vertically and they were good too, so I'm pretty happy I don't need to worry any more about that.

I know it doesn't check front to rear alignment and while I didn't string line it, line of sight definitely shows the front/rear tyres aligned which is enough for me to proceed.

DE4682A2-014C-4F80-965B-B03197BF7DA2 by starpoint73, on Flickr

8FEC25C5-5D86-4674-B9BB-A2B857457B49 by starpoint73, on Flickr

0729E797-DCF0-488E-819D-0390FC0EA2D6 by starpoint73, on Flickr

Then I managed to get some steel, threaded rod, etc. to make the press, but got back too late to break out the angle grinder to start cutting, but at least I have the parts and a plan now.

I still did manage to get the wheels out and give them a good soak in degreaser and a rub down with a scrubbing brush. They're not perfect but they'll work as is for what I want. At least if I change my mind down the track they can pretty easily be removed and painted later.

9143E7D5-6C58-4BD0-B036-C505C76EE14C by starpoint73, on Flickr
 
Last edited:
After losing last Sunday to work, I finally got to finish my press off to a useable state yesterday.

It's not the prettiest thing in the world but it seems to be useable and functional which is all that matters.

The only suitable steel I could find was two U sections welded together back to back to form a H section, so I had to tack some plates on to give a flat surface to press on.

I tacked some nuts on the back of the plates so I could bolt down the sockets to keep them in place also.

The only suitable thing I could find handy was some timber to somewhat clamp the jack in place, just mainly to stop it moving around.

Hopefully I can use this as somewhat of a metal brake for next time I need to bend some sheet steel or aluminium too.

7A8EAD0B-315A-4382-B4D7-6300617F2BD5 by starpoint73, on Flickr

I still had to apply heat to the swingarm but getting the bushings out wasn't that big a deal once I was able to use the press.

180D2250-86C5-4218-989A-91276D047BA6 by starpoint73, on Flickr

Getting the new ones in was even easier after 30 minutes in the freezer and then using the press again.

A66A2D70-F762-4E0E-B0FE-11C820D96AA7 by starpoint73, on Flickr
 
Last edited:
Looks like I'm ending up with Flickr rather than Mediafire for my photo hosting... gonna be some time before I go back and fix the thread but at least new stuff will be good.

I'm hoping to get some time off work late in July, so it's time to finalise prep to get the frame and other bits powder coated.

I smoothed off the 7/11 engine mounts yesterday and realised I still need to get one shock spring back off again.

I'm really not happy with my original shock spring compressor so I hacked it up and made a new one which is a lot easier to use.

The long bolt runs through the clevis mount and the hooks simply pull the spring down away from the locking ring, very simple.


Then I decided to fix the front chain guard mount on the swingarm which involved aluminium welding.

All things considered it didn't turn out as ugly as I expected and it seems to be nice and firm on there, obviously I need a much shorter bolt and it needs a lot more cleaning up yet.

 
I finally spent some time last night mocking up the colour scheme. I'm not good at this, but a little imagination should give you an idea... the engine will be black is the main difference and this is a photo I found on the interwebs, so the red on the frame isn't quite right compared with the seat colour.


Mock Up 1 by starpoint73, on Flickr
 
I like it, reminds me of the colour scheme on the 1150es that dbcustoms posted up.

I see you have switched to FlicKr
 
Back
Top