• Required reading for all forum users!!!

    Welcome!
    Register to access the full functionality of the GSResources forum. Until you register and activate your account you will not have full forum access, nor will you be able to post or reply to messages.

    A note to new registrants...
    All new forum registrations must be activated via email before you have full access to the forum.

    A Special Note about Email accounts!
    DO NOT SIGN UP USING hotmail, outlook, gmx, sbcglobal, att, bellsouth or email.com. They delete our forum signup emails.

    A note to old forum members...
    I receive numerous requests from people who can no longer log in because their accounts were deleted. As mentioned in the forum FAQ, user accounts are deleted if you haven't logged in for the past 6 months. If you can't log in, then create a new forum account. If you don't get an error message, then check your email account for an activation message. If you get a message stating that the email address is already in use, then your account still exists so follow the instructions in the forum FAQ for resetting your password.

    Have you forgotten your password or have a new email address? Then read the forum FAQ for details on how to reset it.

    Any email requests for "can't log in anymore" problems or "lost my password" problems will be deleted. Read the forum FAQ and follow the instructions there - that's what we have one for...

  • Returning Visitors

    If you are a returning visitor who never received your confirmation email, then odds are your email provider is blockinig emails from our server. The only thing that can be done to get around this is you will have to try creating another forum account using an email address from another domain.

    If you are a returning visitor to the forum and can't log in using your old forum name and password but used to be able to then chances are your account is deleted. Purges of the databases are done regularly. You will have to create a new forum account and you should be all set.

1984 Katana 7/11

  • Thread starter Thread starter Guest
  • Start date Start date
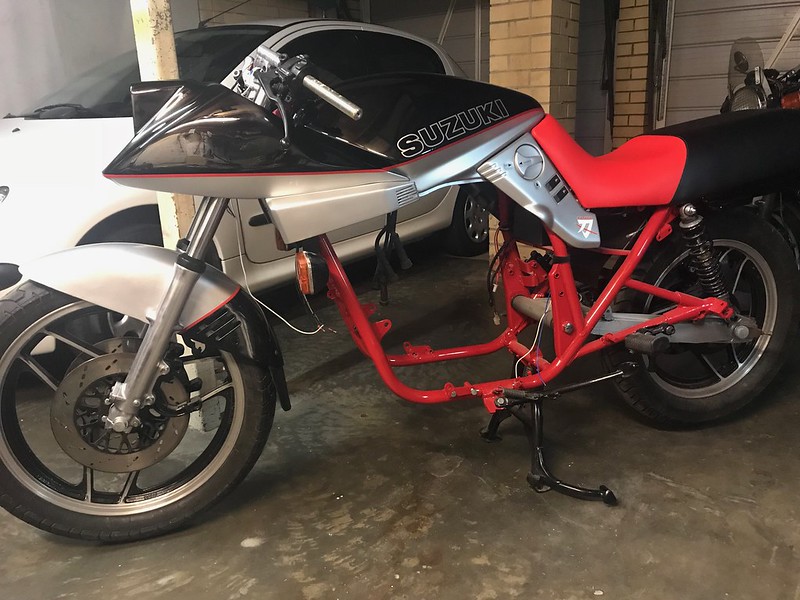
Cheers Larry, yeah definitely happy with that pinstripe as the separator, definitely works spot on like that. You're the second person to mention the front mudguard missing the stripe to me today... I actually had it on my original mock up but decided it was a bit too much so I left it off. Now I agree the front is missing a bit of red without it, so I added it as you'll see below.

I contemplated red braided brake lines for the front as well, but I think that really may be too much and I think I'll stick with black for those.

I won't be clearing over the details Greg, not because it's not a good idea, but more due to the fact I don't really know what the lifespan of the pinstriping is, and the tank decals are only rated for 5+ years with UV exposure. It seems the vinyl they make these things out of now doesn't have the same life as the original decals, so I figure if I'm likely going to need to replace them, then better off not clearing over the top and avoid that nightmare.

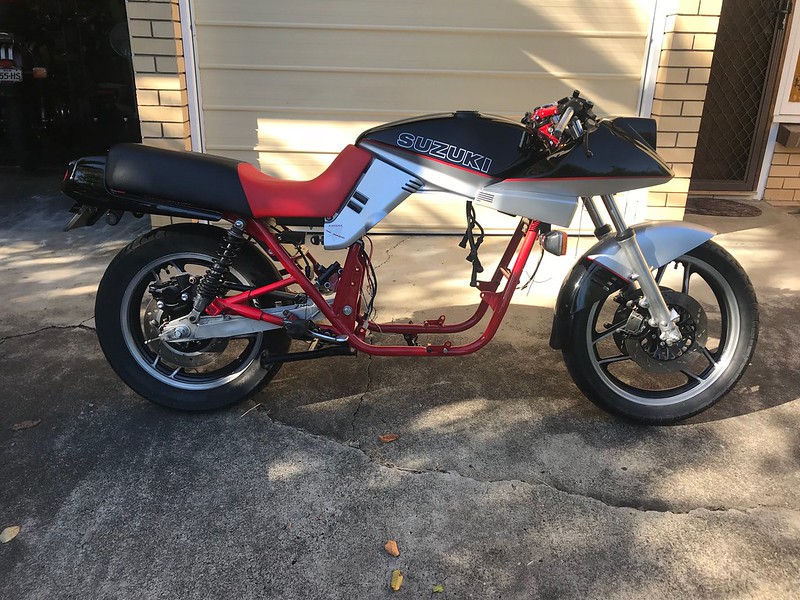
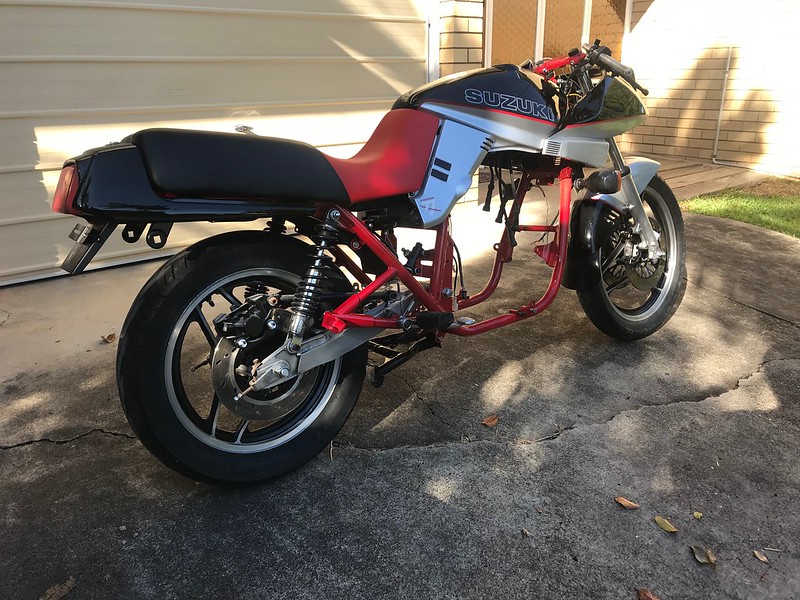
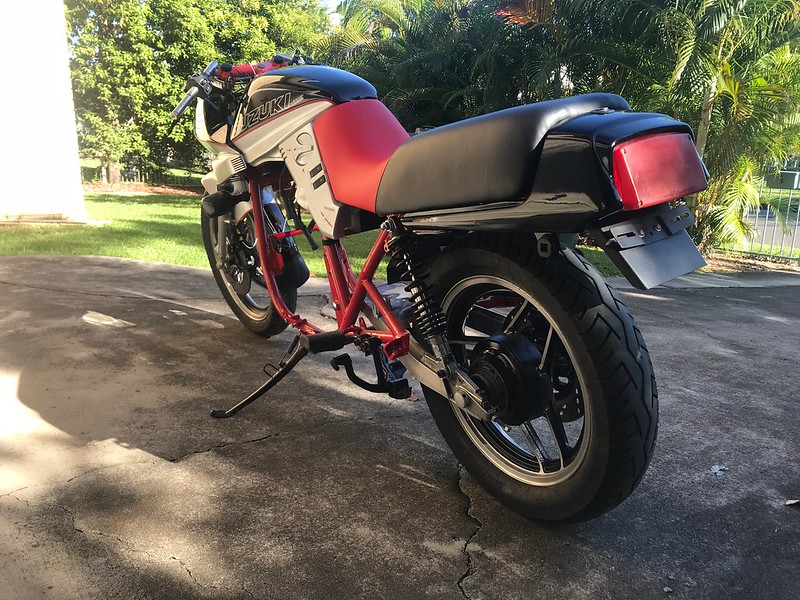
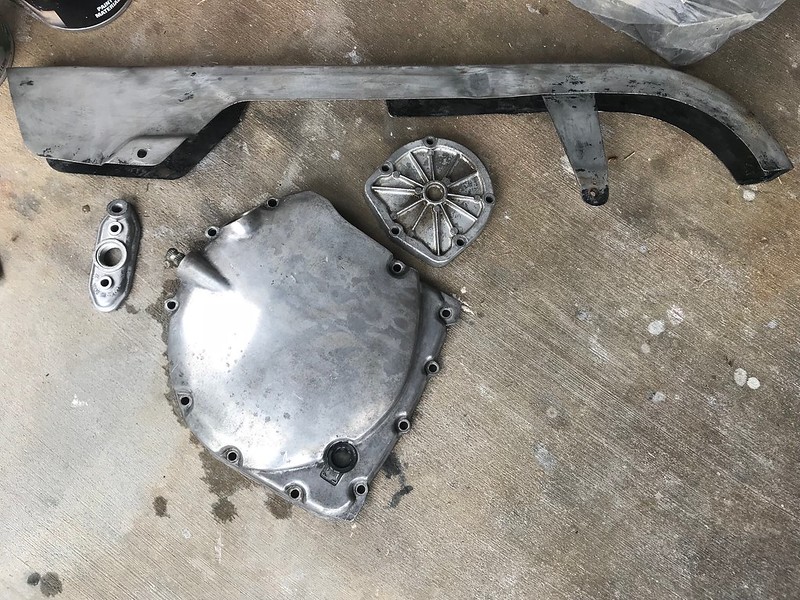
I need to start with a question (although I suspect only a Katana aficionado will be able to answer)... anyone tried to apply the three black stripe decals to the side covers and found they don't seem quite right?

The indents on my covers are pretty straight and much shorter than the decals. I'm thinking just trim off the bent end of the decal and apply the straight part only, but figured I'd raise the question first in case someone else has a better idea.

Good chance these covers aren't genuine Suzuki and are aftermarket too (not that it bothers me).

Untitled by starpoint73, on Flickr

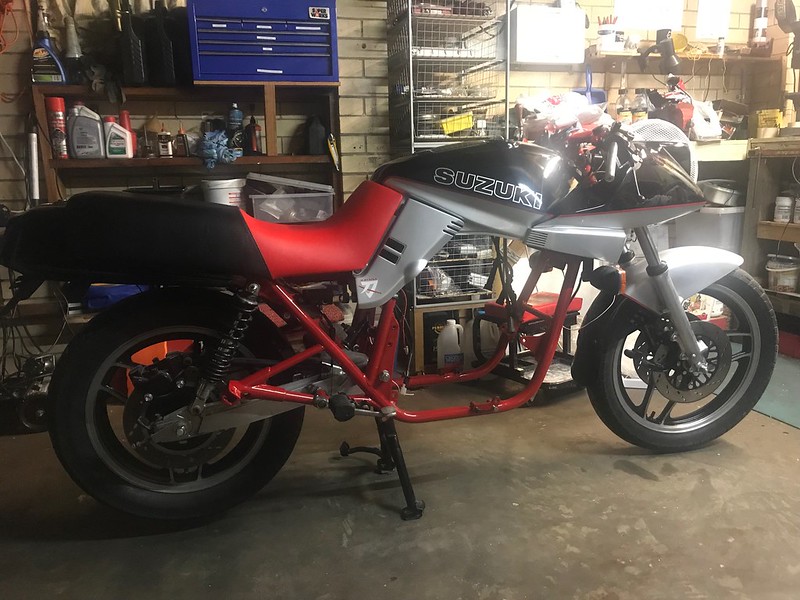
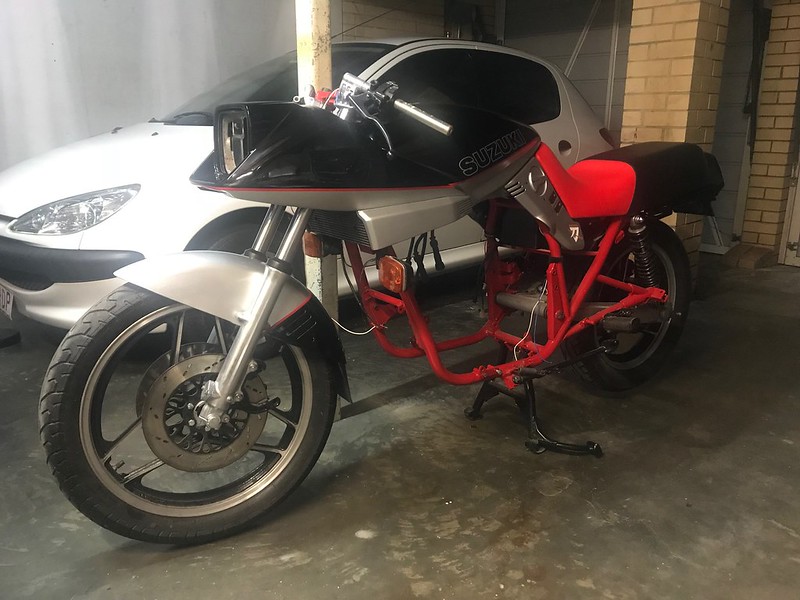
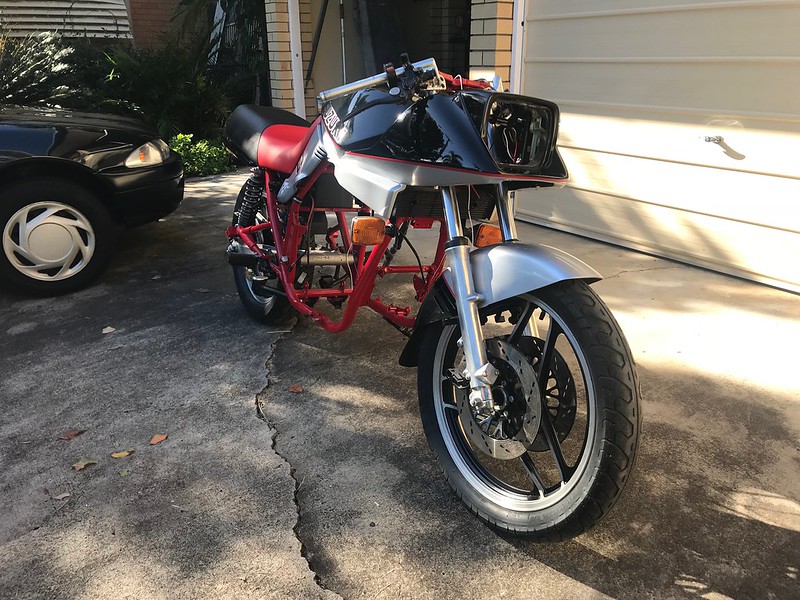
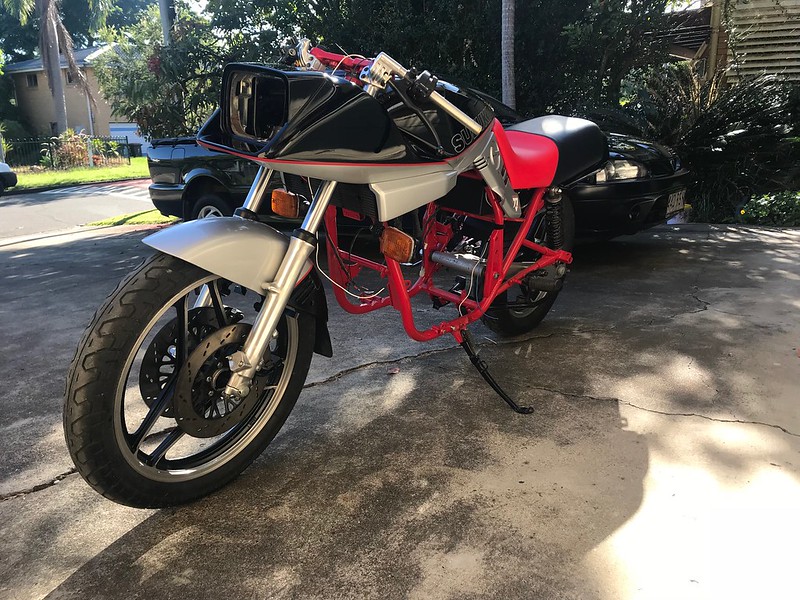
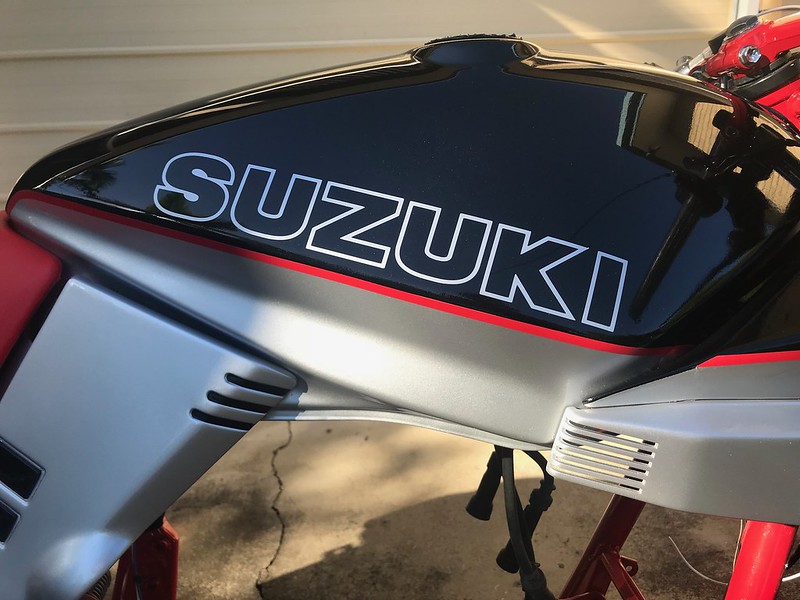
So aside from those stripes, I got the rest of the decals on tonight, including adding a red pinstripe to the front mudguard.

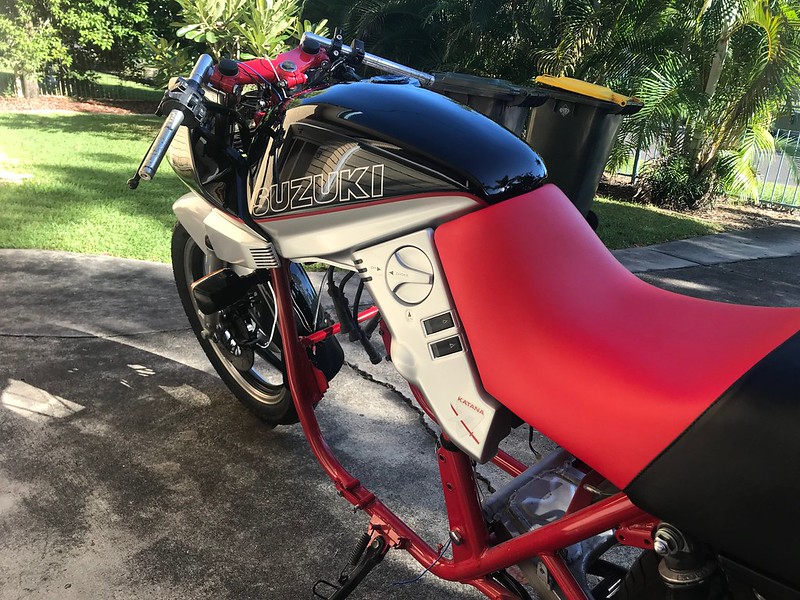
I reckon I fluked an awesome result with the tank decals too, that silver is so close to the 13L and looks pretty spot on.

I did have an issue applying the left one though when I let it slip letting the U and K partly apply when I wasn't ready. I corrected them as best I could but I didn't want to risk damaging them, don't think it's terribly noticeable.

Oh, I know the original Katana sidecover stickers didn't have "KATANA" at the top, but I sorta like it like that so I didn't trim it off. Nice to see the background of those stickers is a nice confirmation that the PPG 13L paint formula is spot on too!

Untitled by starpoint73, on Flickr

Untitled by starpoint73, on Flickr
 
The little black stripes for the side covers, wrap them around the back side of the cover.
Less chance of that end of the decal trying to peel up.
Mine are trying to peel from the visible end after 15 years, so that's a pretty good lifespan.
 

Attachments

  • image.jpg
    image.jpg
    16.8 KB · Views: 0
Last edited:
The red pin stripe on the fender is just what it needed to tie it all together. Looks nice, Pete. I agree the red brake lines would've been a bit blingy. I really like the see-thru tank decals. For the side cover indents, maybe just masking those off and spraying a light coat of satin black instead of trimming the decals to fit those rounded corners. Just throwing out an option.
 
Cheers guys! Yeah very happy with the results and I'm liking the satin of the red pinstripe even more, although it could be just "growing" on me as I keep looking at it... we'll see when I get a chance to get it outside, hopefully there's some sun on the weekend.

I think I've figured out the black stripe issues... I think I'm holding it upside down, with the long part going in the indent and the bent part wrapping around the front. Yep Greg by all reports they do need to wrap around the front there. 15 years is pretty good too!

I did momentarily contemplate spraying some black in there Larry, but I'm pretty sure I know what the issue is now so I'll stick with the decals (pun fully intended :D)
 
Looking good Pete!

As for the black stripes / trim, not sure what you are using....but you can always make some out of black Contact (you know - the stuff you cover books with). It's kind of satin / matt and being vinyl is easy to work with.

I went crazy with it some years ago and "zebra'd" my old fighter....

ZX9During.jpg~original
 
Hahaha cheers Dogma! Definitely chuffed how she's working out though :D

Good to hear from you Hillsy! I still reckon you oughta get that 450 going... the black indent decals are the stock Suzuki item, but contact would probably look just about the same I reckon, got it sorted tonight thankfully though. That fighter's certainly a different look! Looks like it worked out pretty well actually...

Yep, I had the decals upside down. Flipped them over and let them wrap around the front of the indents and all sorted.

All the decals are now on.

Last of the dodgy garage lighting photos hopefully, but I'll try to get some good sunny ones on the weekend as I'm really keen to see how the pinstripes and Suzuki decals look in the true light of day.

Untitled by starpoint73, on Flickr

Untitled by starpoint73, on Flickr
 
Sunny photos! Well, sort of anyway... I was expecting cloud and showers so I rolled the Kat out early this morning and got the best ones I could.

I'm super happy with the red pinstriping and the silver Suzuki decals, going to leave it all just as it is, definitely stoked with how good she's looking!

Untitled by starpoint73, on Flickr

Untitled by starpoint73, on Flickr

Untitled by starpoint73, on Flickr

Untitled by starpoint73, on Flickr

Untitled by starpoint73, on Flickr

Untitled by starpoint73, on Flickr

Untitled by starpoint73, on Flickr

I dismantled the cover for the oil pressure switch and noticed it looks like it may have a temperature sensor in it as well? Looks suspiciously like it anyway... no idea how/if it works but something to keep in mind as it could come in handy.

Untitled by starpoint73, on Flickr

Untitled by starpoint73, on Flickr

Then I ran some paint stripper over the oil filter cover, oil pressure switch cover, clutch cover, and chain guard.

The chain guard's going to need a little panel beating and a little repair where the metal has torn a little. Nothing major and won't be too hard to sort out.

by starpoint73, on Flickr

I did a bunch more sanding on the crankcases as well, 180 grit wet sanding wrapped around a paddle pop stick to get into the cooling fins and nooks and crannies around the place. One more run over with wire brushes then brake cleaner and a pressure wash should see them ready for paint I think.

Depending if I get time for more prep on Wednesday, there's a chance I might be able to paint them next weekend which would be awesome.

Now on to the gearbox...
 
I grabbed the driveshaft and all the bits and new bearings etc. and got set to go.

Untitled by starpoint73, on Flickr

And all done ready to install.

by starpoint73, on Flickr

I followed the manual to the T, a light coating of moly lube on the drive shaft first, and while I have no idea what Suzuki Super Grease A is, I figured I couldn't go wrong with some high temp bearing grease considering it was just going on the lip of the oil seal.

Counter shaft is next and I'll get it to the point where second can get pressed on and welded.
 
If you're going to use Katana instruments, there is no provision for hooking up the temp sensor.
If you just want to plug the hole, remember, it 1/8-28 BSPT. Not 1/8-27 NPT.
 
Cheers Greg, the plan is to use an Acewell 1500 but the 1600 has provisions for a temperature sensor. Not sure it's worth the extra $$ just for that though, there's a big difference between them.

Thanks for the thread tip too, I was going to use my thread gauge in my tap and die set to check it out, just saved me some time :)
 
The body work and finished frame are nice incentives to keep you inspired, eh Pete? Love the look. Are you going to paint the engine all silver, or all black, or a combination? A black engine, polished edges on head fins, with red cylinders might be interesting..
 
Yep Hillsy, they are indeed a little secondhand. Unfortunately in my excitement at getting to assemble it I didn't notice until after I'd pressed the bearing on... oh well! I've ordered an M20 x 1.5 die which should clean them up though, the nut isn't as bad a fit as I thought it would be so I'm pretty sure it'll be ok.

Cheers Larry, very true! I do have to keep myself moving past it in the garage when I'm trying to get to work etc. though, I'm finding it a little distracting (in a good way) :D

The plan for the engine is all black as the later Kat and EFE motors were, and if I can then yes polish the head fins in the same style too.

Like this:

1984_GSX1100SE_p2_450.jpg

Not sure on the red cylinders though, I'll have to mock that up and see... I'd also need to find some high temp paint in a suitable red which I suspect may be the tricky part if I do that.

I got the easy one done last night, countershaft is now ready for second to be pressed on and welded.

Untitled by starpoint73, on Flickr
 
Red cylinders with a red frame would probably be....too red IMHO :cool:

As far as paint goes, any of the new breed epoxy stuff in spray cans is really good. I've used the Killrust matt and gloss and they are super durable. Also, Rustoleum make a chassis and rollbar paint in satin which looks very close to the original Suzuki engine black. I used the Rustoleum one on the MC's on an FJ1200 about 2 years ago and spilt a good lot of brake fluid all over them during re-assembly - the paint is still like new.
 
I've already got the paint for the crankcases, going with satin black VHT engine enamel:

https://www.autobarn.com.au/vht-eng-enamel-satin-black-sp139

It's easy to get locally, other guys I know have used it with good success, and doesn't break the bank. I have the primer and clear as well to do my best to make sure it has a good base to stick to and is protected as much as possible from stone chips etc.

As long as my prep work is up to scratch it should be good, which is the focus this week. More sanding last night and got the wire brushes into the awkward spots between the cooling fins and so forth as well. At this point I'm on track to be painting the cases Sunday morning.

I don't have enough paint to do the cylinders or head yet, and I also don't want to degrease and clean them until I'm a bit closer to assembling the head so I can leave the existing oil there to keep the bits preserved.

I started with your suggestion Larry to go red cylinders with the rest black, thought it could be a little over the top and yep, didn't even get a third the way through before realising it would be too much red.

I thought I'd give red fins instead of polished fins a shot instead, but I still think it's a bit too much, and will look a little out of place unless I do the cam end covers as well, which definitely makes it too much.

Maybe not so bad if I black out the end caps and just have the head fins red though.

Leaning towards sticking with just the polished fin edges like stock, just enough to break up the black a bit, although the red fins and blacked out cam end caps is growing on me... it really depends on what sort of red comes out of the paint can though, if it's too orange it's not going to work at all.

Black Motor by starpoint73, on Flickr

Red Fins by starpoint73, on Flickr

Red End Caps Fins by starpoint73, on Flickr

Red Fins Black End Caps by starpoint73, on Flickr
 
Hey, thanks for even considering my suggestion, Pete. It'll look great all black with the edges of the head fins polished like stock as you mentioned. That bike is gonna be a serious head-turner.
 
Back
Top