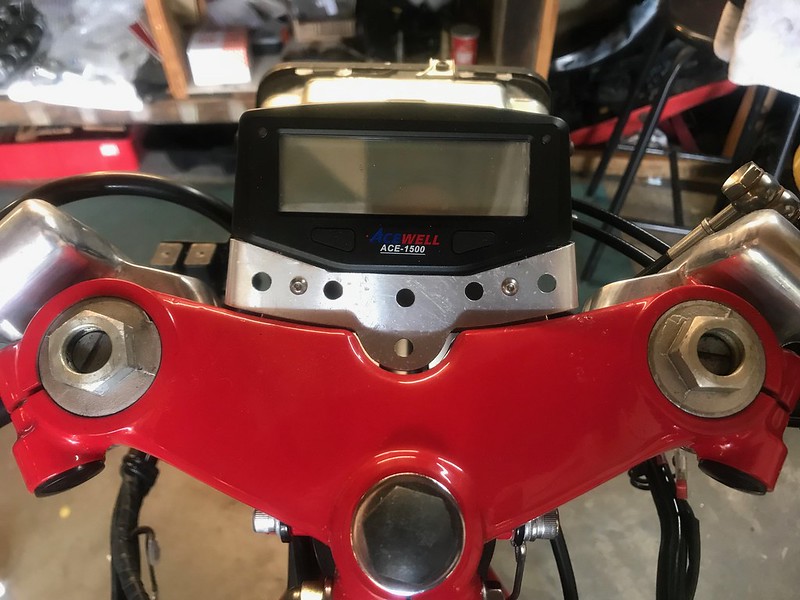
• Required reading for all forum users!!!

    Welcome!
    Register to access the full functionality of the GSResources forum. Until you register and activate your account you will not have full forum access, nor will you be able to post or reply to messages.

    A note to new registrants...
    All new forum registrations must be activated via email before you have full access to the forum.

    A Special Note about Email accounts!
    DO NOT SIGN UP USING hotmail, outlook, gmx, sbcglobal, att, bellsouth or email.com. They delete our forum signup emails.

    A note to old forum members...
    I receive numerous requests from people who can no longer log in because their accounts were deleted. As mentioned in the forum FAQ, user accounts are deleted if you haven't logged in for the past 6 months. If you can't log in, then create a new forum account. If you don't get an error message, then check your email account for an activation message. If you get a message stating that the email address is already in use, then your account still exists so follow the instructions in the forum FAQ for resetting your password.

    Have you forgotten your password or have a new email address? Then read the forum FAQ for details on how to reset it.

    Any email requests for "can't log in anymore" problems or "lost my password" problems will be deleted. Read the forum FAQ and follow the instructions there - that's what we have one for...

  • Returning Visitors

    If you are a returning visitor who never received your confirmation email, then odds are your email provider is blockinig emails from our server. The only thing that can be done to get around this is you will have to try creating another forum account using an email address from another domain.

    If you are a returning visitor to the forum and can't log in using your old forum name and password but used to be able to then chances are your account is deleted. Purges of the databases are done regularly. You will have to create a new forum account and you should be all set.

1984 Katana 7/11

  • Thread starter Thread starter Guest
  • Start date Start date
I got some time to sort out the oil cooler and indicator mounting after finishing the 450 service.

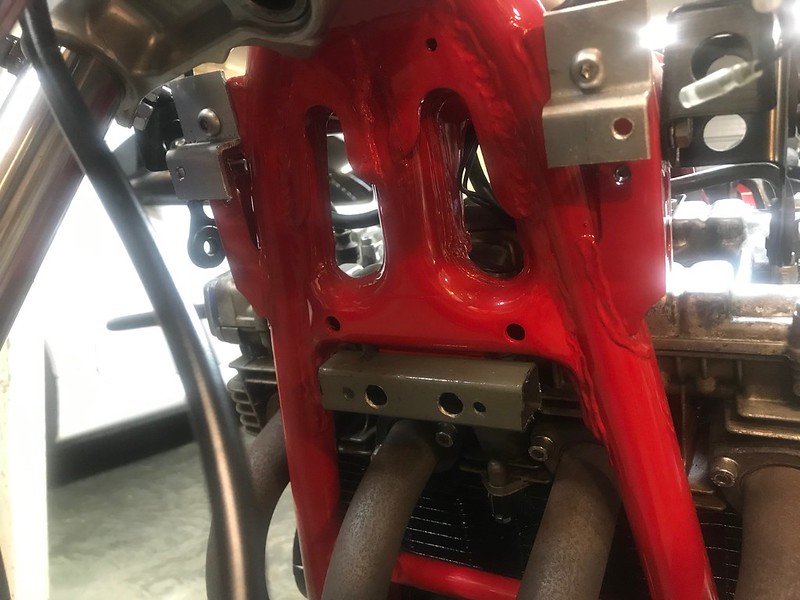
I'm using an offcut of square section steel tube for the bottom mount and bent up a couple of 2.5mm thick aluminium offcuts for the top mounts. They're a bit agricultural but a tidy up and some satin black will make them look just fine.

I've got some 6mm thick rubber here which I'll use between the cooler and the mounts for some vibration dampening also.

Untitled by starpoint73, on Flickr

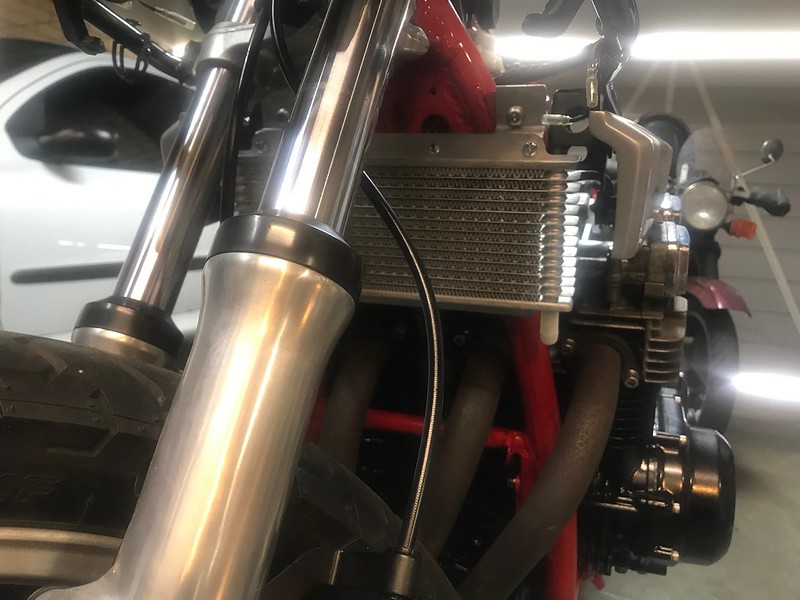
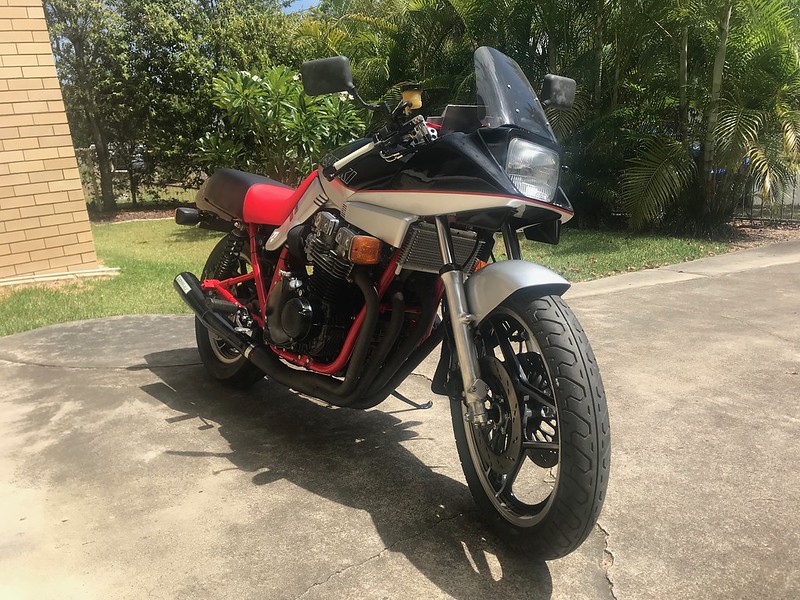
The cooler sits pretty neatly between the side covers.

Untitled by starpoint73, on Flickr

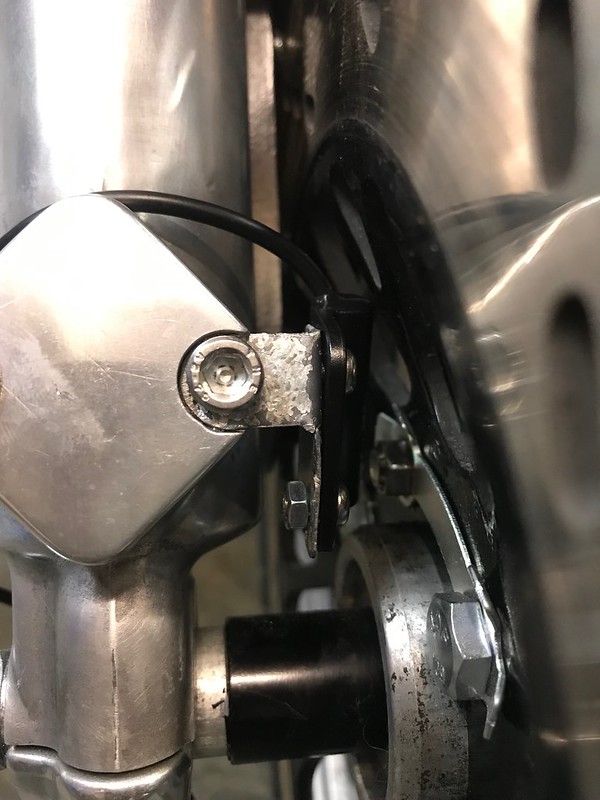
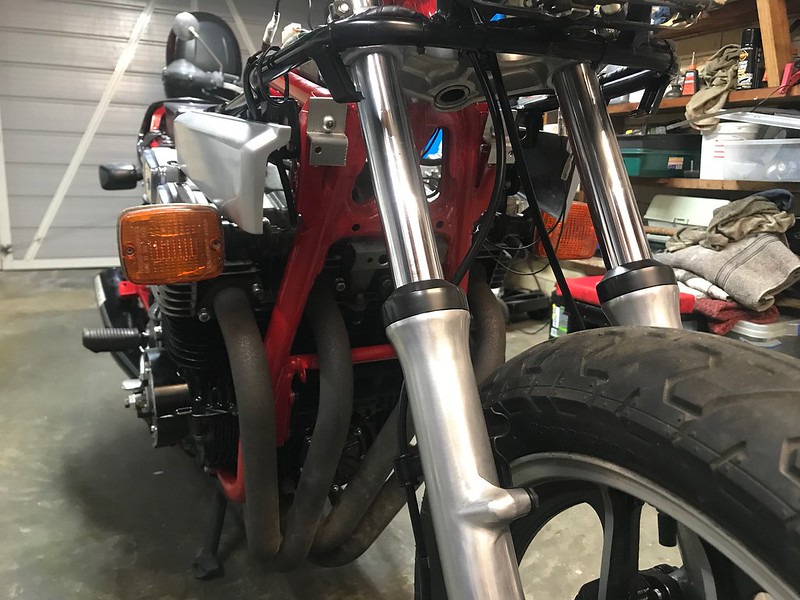
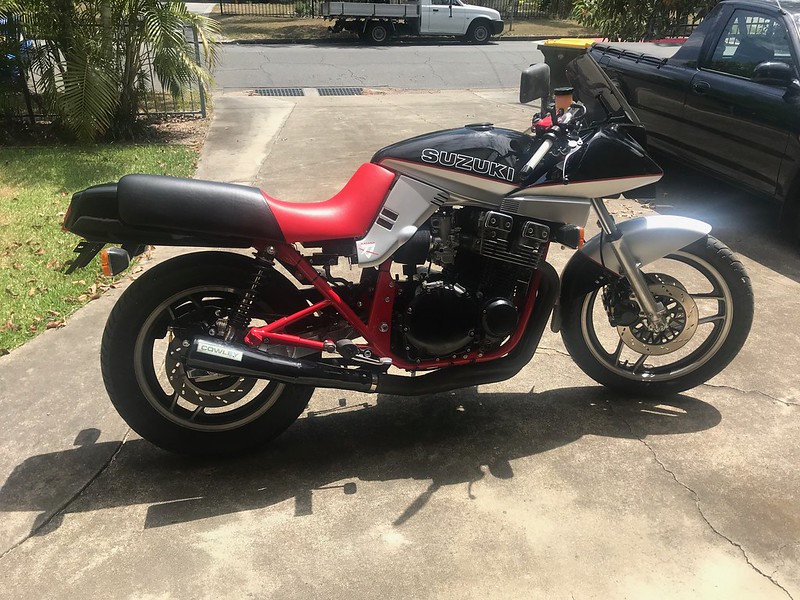
The new indicator position should work well too.

Untitled by starpoint73, on Flickr

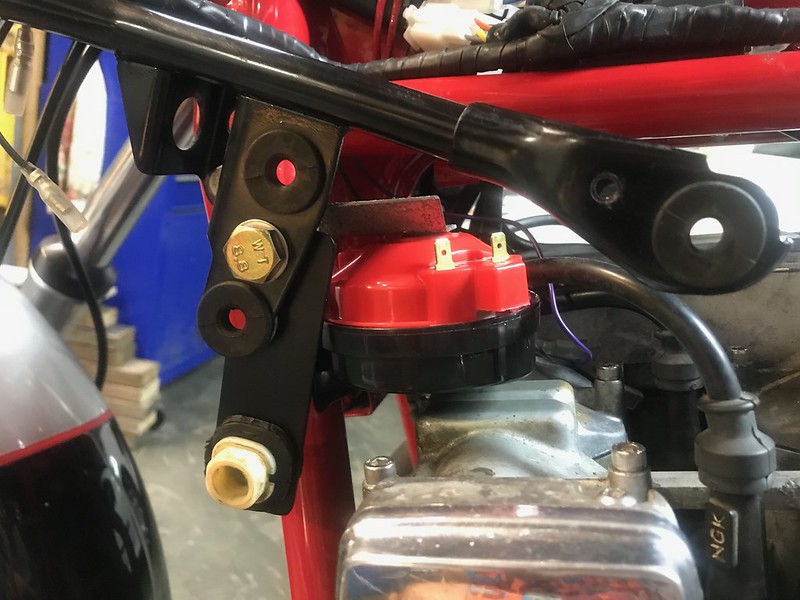
One thing left is to relocate the horn, if it goes below the cooler it will meet the front mudguard, so it definitely needs a new home.
 
I had to put the tank and front cowl on to figure out a suitable horn location, and figured I might as well chuck everything together to give myself some motivation to get moving.

Yeah I gotta get her done!

Untitled by starpoint73, on Flickr

Untitled by starpoint73, on Flickr

Untitled by starpoint73, on Flickr

I managed to find a suitable location for the horn and got the bracket made up also. It's a snug fit but it'll work.

Untitled by starpoint73, on Flickr
 
Very nice Pete! If that doesn't motivate you to get it done and on the road then nothing will!

Cheers!
 
Last edited:
Cheers Pete, you sly devil. Do you know how many of us are now drooling over the pix of that beautiful Kat?
 
Hahaha cheers guys! I'm extremely happy with how she's turning out!

Yes, certainly motivating seeing her all together, although I've resisted doing that up to now as it was frustrating knowing how close she is yet how far there is to go just getting the $$ together for the final push and on road costs etc.

Fingers crossed the first ride won't be too much further away, I can't wait!
 
The bike does indeed look real nice, Pete. Getting this close to finished has to feel good. Man, you been working on this bike for a long time now..and your vision of what it could be is really coming to fruition. :D
 
Yes indeed Larry, and a lot of thanks to you again for your painting advice! I'm going to have to do a final cut and polish at some point soon and finally apply some wax, I think the paint's had enough time to breath now :)

It does seem like forever since I started...
 
I'm very happy to've helped in any way, Pete. Yeah, fresh paint has a tendency to shrink back a bit after a month or so. I, too, am sure it's set long enough to go over it with a yellow pad followed by the black pad for a freshening up followed by a couple good coats of wax. It'll look great once you do.
 
Yep it sure will Larry, looked pretty good in the sun even all dusty from hanging up for months on end, so it should all polish up very nicely indeed!
 
My Acewell arrived during the week, so I finished up the idiot light dash and mounting bracket.

Untitled by starpoint73, on Flickr

Then yesterday I got those along with the oil cooler and horn brackets painted.

Untitled by starpoint73, on Flickr

It was only then that I test fit the speedo sensor and realised the fork mount Acewell bracket won't work due to the anti dive location, so I made a bracket for that also which will now need some satin black as well.

Untitled by starpoint73, on Flickr

I also have a new issue to deal with where the front left brake line has a little weep. I managed to determine it's not weeping out from the copper washers or banjo bolt, rather it's weeping from where the banjo fitting goes into the sleeve on the braided line itself. I'm going to have to call HEL this week to find out what the go is, fingers crossed it gets sorted as a warranty job as it's just been sitting.

I'm really glad I went the DOT 5 fluid otherwise I'd be painting the left caliper again.
 
Looks good.
Although your forks look like they're pushed too far down in the triples. The tops of the tubes should be flush, but the caps should be above.
 
Last edited:
Cheers Greg, and thanks for the tip! I thought I'd adjusted those correctly but looks like I'll have to sort that out. Only a few mm's difference but I'd rather get it right now.
 
In this photo from the manual, you can see how the cap is above the top clamp.
Just by the thickness of the lip on the cap. Hope this helps.


Yep, very clear thanks Greg! I've got a note down to sort that out and get it right, although I'll avoid it until I get my brake line replaced so I don't end up squeezing the lever by mistake and squirting expensive DOT 5 fluid everywhere.
 
I didn't get a whole lot done yesterday but the oil cooler, horn, and dash are mounted at least.

The Acewell is also wired in and I think the satin black dash works well with it, although a bit hard to tell in the photo with the very bright neutral and oil lights.

Untitled by starpoint73, on Flickr

I'm heading out early from work this arvo to go to HEL to hopefully get my weeping brake line sorted.

Next weekend I'll have to pull the headers off and start sanding them back ready for paint.
 
Nothing huge or photo worthy to update but HEL replaced my brake line under warranty on Friday, so I have front brakes back again with no weeping.

I started on paint prep for the headers today as well. Man whatever coating is on there now is tough! Two rounds of paint stripper and still plenty of sanding to do.

Been doing some odds and ends tidy up as well like swapping out cracked indicator lenses and so forth.

Greg I haven't gotten to those forks yet but will shuffle them up in the trees soon.
 
I ended up with a very simple solution to labelling my fuses and relays last night. I've been pondering how to do this as none of the generic sheets of decals I've found are suitable and I was at the point of designing something to get a custom vinyl decal printed. All getting way too complicated...

The end result is just printing onto paper, taping onto some thin cardboard with clear packing tape, and sticking to the inner mudguard with some double sided tape. It won't ever see the sun under there and should be protected from most water etc. but if it disappears, it's all of 5 minutes work to redo it...

Untitled by starpoint73, on Flickr
 
Cheers Pete. Way back in the Original Post of this thread, you said you'd always wanted a Kat of your very own. Well.....this is your very own Kat. Suzuki couldn't take more credit than you for the build. I bow
 
Cheers mate, it's pretty exciting I tell ya'! It certainly is my Kat, glad I've been able to make some changes that suit me but without spoiling the lines and the core of what makes a Kat a Kat (or at least in my mind anyway) :)

I got the headers painted yesterday, and one can of the VHT Flameproof was exactly the right amount. Those VHT paints really do go on nicely too.

Untitled by starpoint73, on Flickr

I've ordered chain and sprockets also and should be picking those up after work this afternoon.

I have time off work next week after Easter so I should be able to start her up again, check the fueling, and hopefully even get a ride up the driveway to make sure the clutch and gearbox are operational.

I might even be able to get the new front tyre next week yet, although I'll still be anxiously awaiting May and June's pay before I can take care of the on road costs.
 
The pipe looks very nice, Pete. Wait till you wipe it down with a blue paper shop rag. It'll take away that slight chalkiness and give it a ceramic-like shine. I continue to enjoy the progress. It'll be a bit bittersweet to see it come to a conclusion, but I can't wait for you to have the chance to ride it.
 
Back
Top