• Required reading for all forum users!!!

    Welcome!
    Register to access the full functionality of the GSResources forum. Until you register and activate your account you will not have full forum access, nor will you be able to post or reply to messages.

    A note to new registrants...
    All new forum registrations must be activated via email before you have full access to the forum.

    A Special Note about Email accounts!
    DO NOT SIGN UP USING hotmail, outlook, gmx, sbcglobal, att, bellsouth or email.com. They delete our forum signup emails.

    A note to old forum members...
    I receive numerous requests from people who can no longer log in because their accounts were deleted. As mentioned in the forum FAQ, user accounts are deleted if you haven't logged in for the past 6 months. If you can't log in, then create a new forum account. If you don't get an error message, then check your email account for an activation message. If you get a message stating that the email address is already in use, then your account still exists so follow the instructions in the forum FAQ for resetting your password.

    Have you forgotten your password or have a new email address? Then read the forum FAQ for details on how to reset it.

    Any email requests for "can't log in anymore" problems or "lost my password" problems will be deleted. Read the forum FAQ and follow the instructions there - that's what we have one for...

  • Returning Visitors

    If you are a returning visitor who never received your confirmation email, then odds are your email provider is blockinig emails from our server. The only thing that can be done to get around this is you will have to try creating another forum account using an email address from another domain.

    If you are a returning visitor to the forum and can't log in using your old forum name and password but used to be able to then chances are your account is deleted. Purges of the databases are done regularly. You will have to create a new forum account and you should be all set.

Another cafe racer........

  • Thread starter Thread starter yaddy
  • Start date Start date
Very true Bill,

moving the sprung weight higher will deffo affect the handling somewhat. Whether it's moved enough to make a noticeable difference is another story.
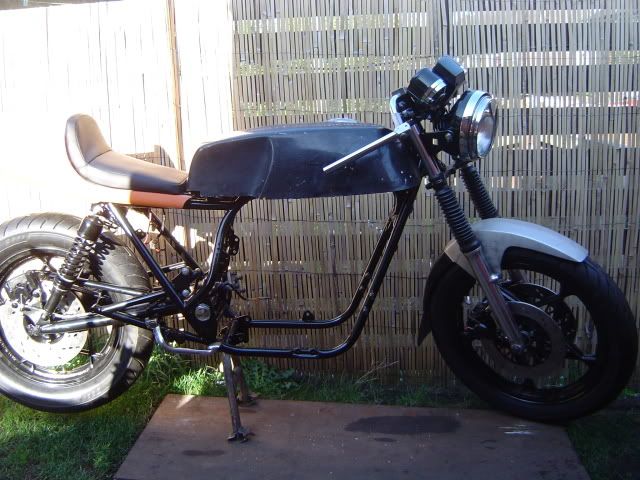
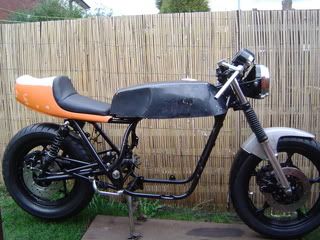
Overall, the bike should be a tad lighter than stock, the electrical components have not moved very fall and don't weigh a great deal anyway, a possible solution would be to purchase a smaller, lighter GEL battery to reduce the affect somewhat. Overall, the seat, tail unit, rear light etc should all weigh less than the stock parts i've taken off so i don't think it's going to make things worse. I've been considering getting a gel battery anyway because of the vent tube route.

Placing the battery as low and central to improve handling is debatable, placing it LOW is the best option but central all depends on the weight distribution of the bike as a whole. Moving the weight backwards works in MY favour very much, people prefer different setups and i like heavier rears (joke there somewhere?). I'm known to be a bit "ham fisted" with the throttle and tend to break the rear away on my R1. I do quite a few track days throughout the year so i understand a little of what can be gained (or lost!) from subtle changes to the geometry, tyres, suspension etc. In this case, while you make a very valid point as it WILL of made some difference, I'm not at all worried by it as i still imagine the bike will perform reasonably well for me.

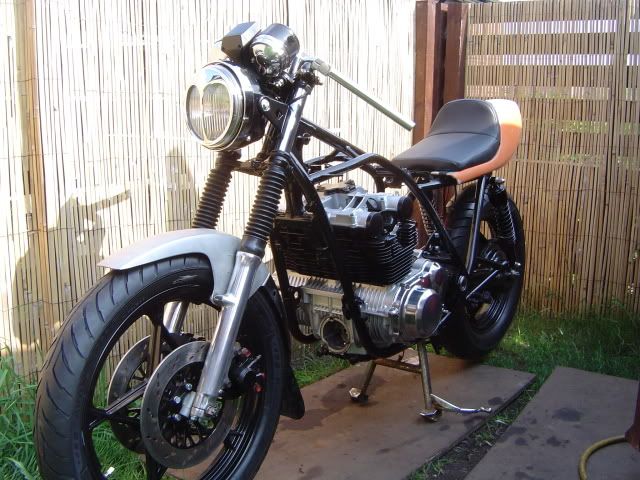
The fibreglass tank weighs quite a bit less than stock too, so this is going to lower the centre of gravity and have yet another affect on the handling, i'll never be tracking the bike though and having never ridden the thing as yet, i probably won't even notice any little quirks as being anything other than standard.
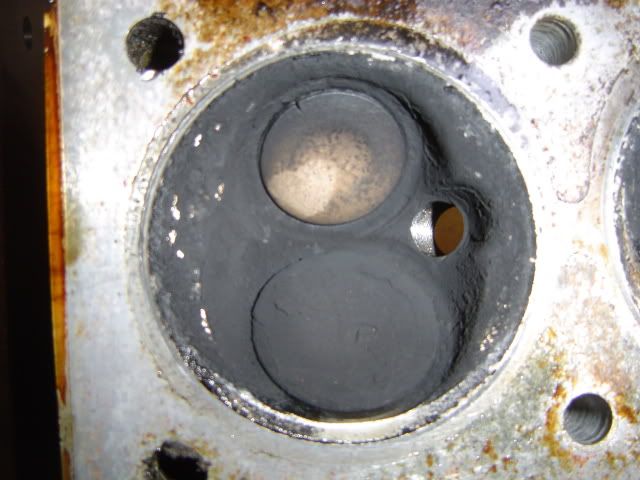
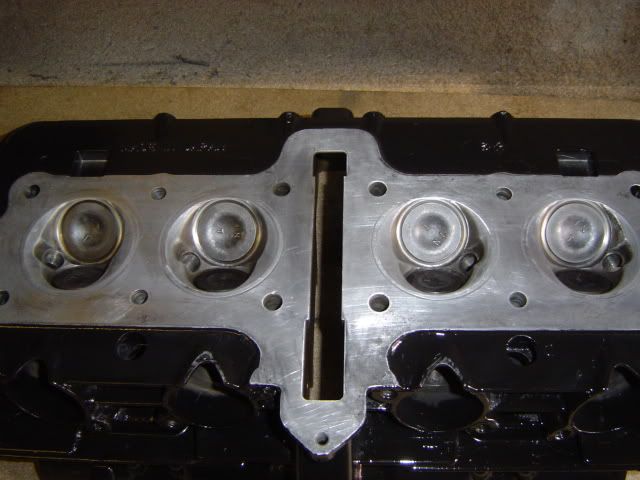
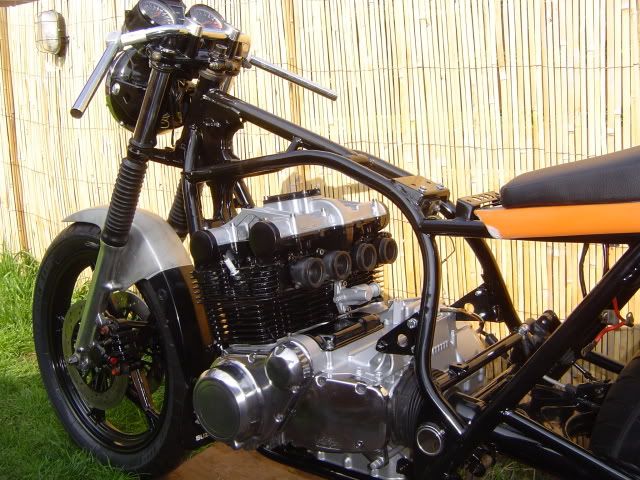
 
Hey Yaddy, I see your project is moving along nicely!! Keep posting pics as you complete things. Looks very cool so far. That alum is nicely polished.

Cheers
 
Headlamp assembly

Headlamp assembly

So here's my headlight assembly and rebuilt clocks. I had to rattlecan the headlight bowl and clock plastics as i couldn't find any decent ones on eGay, turned out pretty nice i have to say, will need a bit of "rub n buff" once the paints cured properly though.
Check out the shiny chrome clock backs, kindly donated to the project by Bribird, one very kind and generous chap.

So if anyone wants Bri's number to see if he will donate anything to their project too, pm me and i'll give it to you! Only joking Bri, your top banana, you know that. Cheers dude!

I've now decided i'm going to try to lower the headlight and clocks a bit, i think they stand a little high if anything. Not sure how to do it just yet, i'll have to have a brew while staring at it for a while methinks. All the calipers are back on too, just rebuilt them with new seals, pistons, pads etc. Got a new braided hose for the rear fitted, just waiting for the braided hose to arrive that runs up the frame to the rear cylinder now mounted under the tail. Front hoses will have to wait until i've sourced a front cylinder setup. The original is way too big for these bars so the hose lengths may change (top one at least).

Can't wait to get the tank leakproof and mountings sorted but i've realised that i need the motor and carbs back in first. I need the carbs in place to determine how high the tank needs to be for the tap to clear. Going to pull the motor apart later today and see what 30,000 miles has done to it. Hope to get the bottom end rebuilt and back in by the end of the week if poss, i took the lump out in one go and it nearly broke my back, hahah, deffo rebuilding it in the frame!

cafe75.jpg


cafe76.jpg


cafe80.jpg
 
I've now decided i'm going to try to lower the headlight and clocks a bit, i think they stand a little high if anything. Not sure how to do it just yet, i'll have to have a brew while staring at it for a while methinks.

easy peasy.

The headlight is just a case of turning the 'ears' (brackets) upside down on the fork tubes.

For the clocks you can 'reverse' the way it is mounted at the moment and get it an inch or two lower.

To explain - the clocks are usually mounted to above the top triple. I pulled mine off and remounted them under the triple clamp with longer bolts going through the same holes. You can even use a few washers as spacers and get them to sit a bit lower. The only problem is that the plastic housing (where the ignition barrel sits) will foul on the triple. I used a dremel with small cutting wheel to cut two notches in the plastic so it sits down around this part of the triple clamp.

If this is hard to follow I can try and take a pic for you.
 
Thanks for the reply Zooks,
so i get the headlight ears, just drop the fork tubes out and spin them the other way up.
This pic is my clocks mount before it went for coating. So i just flip this on the clocks so the studs face uphill instead of down, again it sounds easy.
I don't follow your "longer bolts" statement, did you drill the studs out then, or did you extend them using rod connectors or does your bracket not have studs at all? Either way, i'm pretty sure i can do something here, don't want to trash my coating but it should be a simple mod to complete.

Thanks for the tip, i'll try that later today. :dancing:


cafe57.jpg
 
Yeah it wasn't a Kat that I did this to. It was my 750. It has bolts that hold the clocks to the top triple tree. The concept is pretty much the same though. If you just flip things upside down (basically) you should find that they sit lower (hopefully). You'll probably have to do some grinding / cutting / bending but I'm guessing that originality is not something that you're too worried about considering what you started with.

Good luck. I love the way this is coming along.
 
I lowered my gauges, Mine are the standard GS/GS-E gauges so these have the bolt going through rather than the stud as your style.
GS-Gaugespace.JPG

I machined an aluminum nut that has a 10mm shaft with the 6mm internal thread and used a Delrin spacer to move the gauges down. Originally I moved them down to far , therefore the spacer was split to move stuff around.
On your style with the stud, machine the nut the same way but where mine uses a bolt from underneath yours would spin onto the stud.
Also note the headlight bracket has been shortened so it is all below the clipons.
Here is a view of the nuts from above.
GS-Gauge.JPG


What does not show well in these pics is the key switch is lowered down 25mm also.
 
Detailed info there chaps, many thanks for the input. I'll be trying to lower them over the next day or two, along with stripping, rebuilding and painting the bottom end of the engine.

Here's what 30,000 miles looks like:


Pulled the head off and saw these pistons, i have to say at this point i was pleasantly surprised at how clean everything looked, i know it has a decent carbon build up but i expected a lot more.
cafe72.jpg


Then i flipped the head over and realised it was as bad as i expected, haha. Check out the white-hot exhaust valve on no2 cylinder.
cafe73.jpg


Closer inspection here reveals a crack in the exhaust valve, 1 of the studs has been snapped off from the head that secures the exhaust clamp, obv this is why the valve has run hot and cracked. Best add new valve/s to the list of parts then.

cafe74.jpg


Any advice here? I've already ordered new rings, circlips and gudgeon pins, got new stem seals too. when i remove these valves and mic them up, if they are within Suzuki tolerances, would it be ok to use the existing valves and just replace the one damaged exhaust valve, or is it best to play safe and replace the lot? A friend says if the old valves measure ok and are lapped in sufficiently, there's no real benefit to replacing them, does anyone agree with this?
 
yaddy, those studs in your guage mounting plate are pressed in and should be able to be knocked with some care. i use a socket slightly larger than the heads of the studs on the top side and tap on the threaded end of the stud beong careful not to hit the mounting plate. for spacers a piece of chrome accesory tube works from a junk backrest or crash bars, a couple of cheap deep sockets works too
 
Thanks for the advice Guy's

I wasn't able to knock the studs out, I cut the end flush and drilled a 10mm hole right through the middle of the stud to allow bolts to pass through. I used two zinc plated round head bolts that are used on timber (you know the ones with the domed head and square shank that bites into the wood?), dunno what theyre called. They fit perfect into the rubber mount and top yoke, allowing me to keep the rubber mounts.
I flipped the headlight brackets over and dropped the gauges to 15mm above the headlight to allow for any movement in the rubbers. Had to drop the ignition to suit as well.

This is a subtle change to the appearance of the bike but in my opinion, it was well worth it. Cheers for the hints n tips, much appreciated.

cafe80-1.jpg


cafe82.jpg
 
Lowered gages

Lowered gages

Funny thing about the high or low look of the gages. When I put drop bars on my 550T I liked the new look of high gages. Now hearing you guys disliking that look is a curiosity to me, but it's your bike do what you like. It's cool to see a different way to do stuff.
 
I used two zinc plated round head bolts that are used on timber (you know the ones with the domed head and square shank that bites into the wood?), dunno what theyre called.


coach bolts

75743.jpg
 
Carraige bolts in Missouri. Just to be informative....:D
'
Any others???
 
Hahahahaha,
Thems the chaps, i had to run a die down mine so i could lop the extra length off, then i dipped them in my galv paint.


Couldn't resist a quick google, came up with "Cup bolts", any more?:D
 
Update

Update

So then, been more than a couple of weeks since i updated the build project. Here are a few more pics showing the engine in place. This for me at least, is a huge leap forward. Things will really start to take shape now, i can get on with positioning a fuel tap into the tank and glassing up the holes in the underside where i had to cut out for the ignition coils. Carbs should be rebuilt in the next couple of weeks or so, with a bit of luck (no pressure there Bribird! ;). Custom wiring loom can now progress too. The rebuilt head was at a standstill until my good friend Bribird came to the rescue with the two inner exhaust valves and a full set of springs, he's supplying some bits for the carbs too, ohhh, and a master cylinder (again, hopefully). He's got nearly as much in this project as me now, cheers Bribird, you are a star!


DSC01091.jpg


Bottomendfitted.jpg


DSC01088.jpg
 
Update

Update

Thought i'd best turn the bike around and take a couple of pics from the left side to prove i'm on with both sides, hahahahah. The bikes been stripped, and now being rebuilt all on the same piece of 4'x2' plywood, getting quite attached to that now. Casings need a final polishing but i'll get to them nearer the end.

DSC01095.jpg


DSC01094.jpg


DSC01096.jpg


DSC01097.jpg
 
DUDE! That is starting to look like something!! That motor looks great. I am excited for you...
And dont worry about that stuff I got to do, I am on top of it...I would imagine you will have the box of stuff in like 2 weeks if shipping goes ok. Still waiting on the box of parts to show up on my end...maybe tomorrow or Monday???

Keep up the good work there Yaddy!!
 
Back
Top