-
Required reading for all forum users!!!
Welcome!
Register to access the full functionality of the GSResources forum. Until you register and activate your account you will not have full forum access, nor will you be able to post or reply to messages.A note to new registrants...
All new forum registrations must be activated via email before you have full access to the forum.A Special Note about Email accounts!
DO NOT SIGN UP USING hotmail, outlook, gmx, sbcglobal, att, bellsouth or email.com. They delete our forum signup emails.A note to old forum members...
I receive numerous requests from people who can no longer log in because their accounts were deleted. As mentioned in the forum FAQ, user accounts are deleted if you haven't logged in for the past 6 months. If you can't log in, then create a new forum account. If you don't get an error message, then check your email account for an activation message. If you get a message stating that the email address is already in use, then your account still exists so follow the instructions in the forum FAQ for resetting your password.Have you forgotten your password or have a new email address? Then read the forum FAQ for details on how to reset it.
Any email requests for "can't log in anymore" problems or "lost my password" problems will be deleted. Read the forum FAQ and follow the instructions there - that's what we have one for...
-
Returning Visitors
If you are a returning visitor who never received your confirmation email, then odds are your email provider is blockinig emails from our server. The only thing that can be done to get around this is you will have to try creating another forum account using an email address from another domain.
If you are a returning visitor to the forum and can't log in using your old forum name and password but used to be able to then chances are your account is deleted. Purges of the databases are done regularly. You will have to create a new forum account and you should be all set.
You should upgrade or use an alternative browser.
Back to bikes
- Thread starter nvr2old
- Start date
nvr2old
Forum Sage
nvr2old
Forum Sage

Back to the spray booth today to get the second round of clear coats going. No sense re-spraying the bottom. Just a waste of expensive material.


Six coats later. Rotated the pics to get a better look.


The next step will be to cut and buff. Should have more then enough clear coats on these parts, 9 in all. And even after 6 over the decals, they're still so thick they won't be completely buried. It'll be close though when everything is block sanded down. They'll still look real nice when done.
nvr2old
Forum Sage
Guest
Guest
")
Mal's getting a top notch job!
nvr2old
Forum Sage
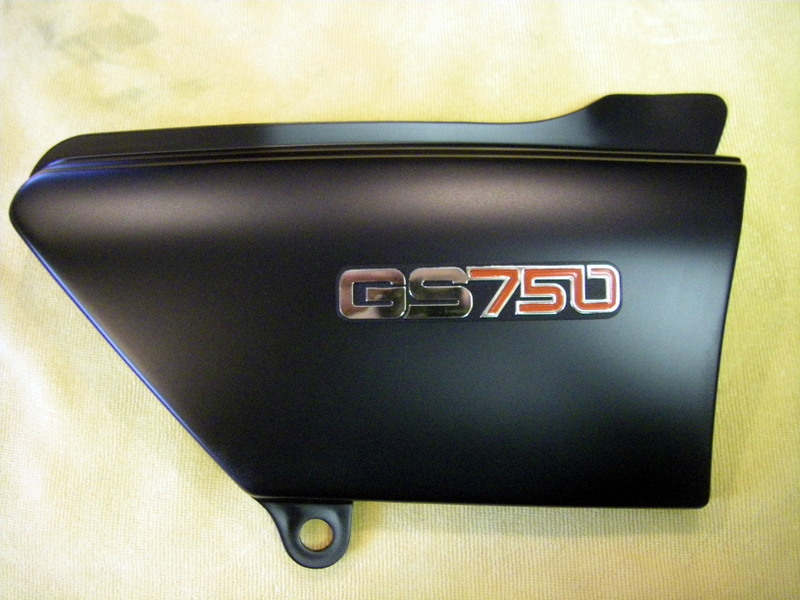
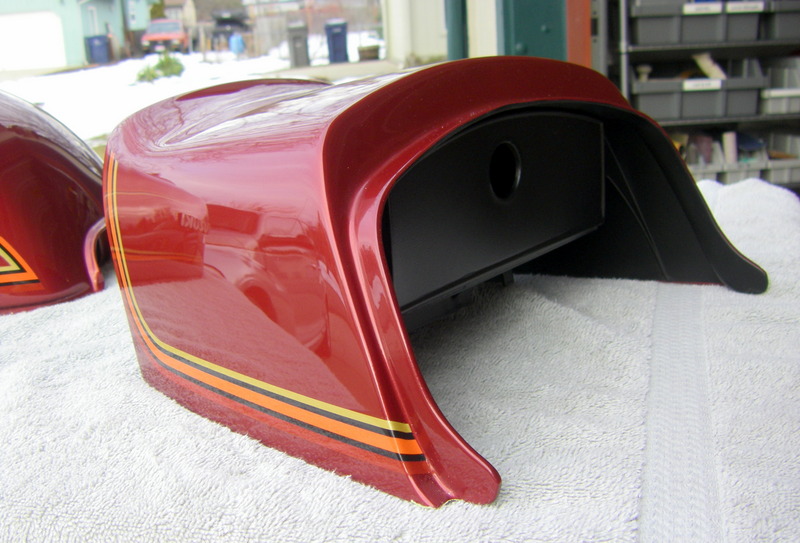
Took a moment to put a quick spritz of the same black for the side covers to match the back ground for the tank emblems. No masking required, just spray, and wipe the letters off after they dried a bit.
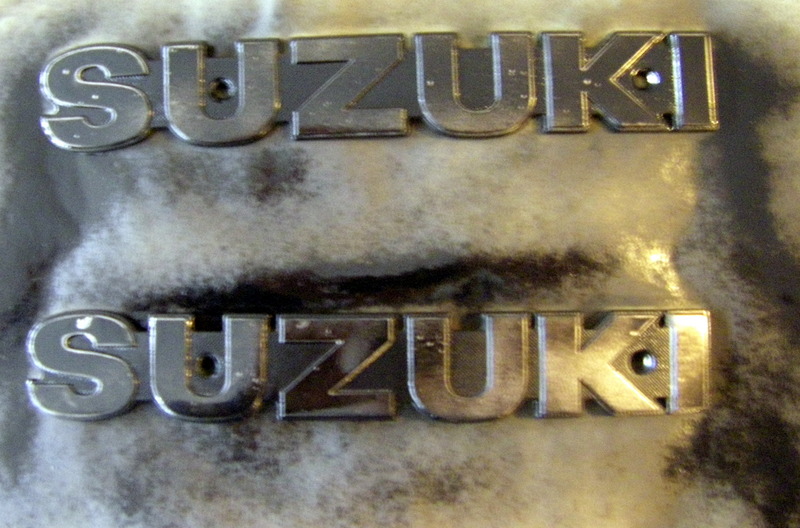
Voila..simple

I put the emblems back on the side covers, too. Amazing what a difference a bit of color and chrome makes.

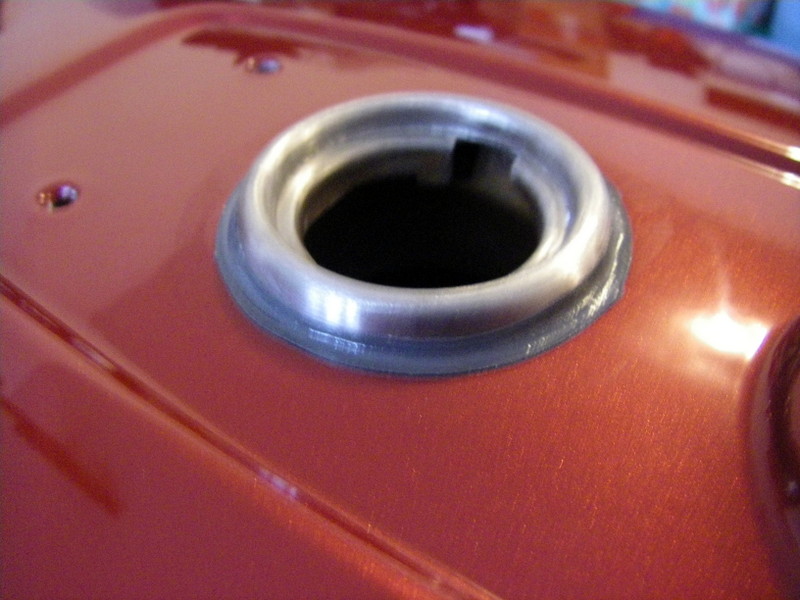
After the three step polishing process, it's a good time to cover over the paint line around the gas filler. Started with 1/4" Fine Line, followed by 1/2" to reveal the "smear zone".

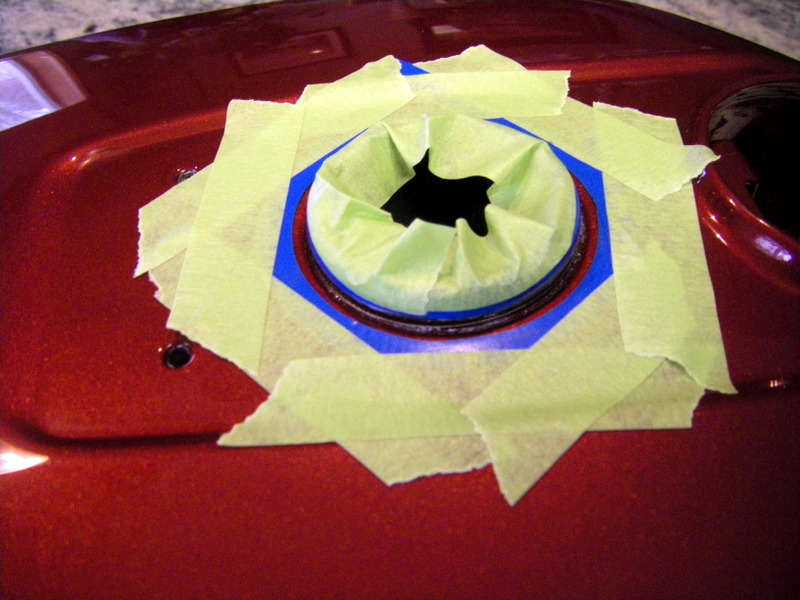

Just used my finger to swipe the JB Weld over the paint line.

I always pull the tape off almost immediately before the JB has a chance to set up. You don't want it to harden on top of the tape making it really difficult to pull off cleanly. No gas fumes should ever lift the new paint doing this.
nvr2old
Forum Sage


Still shows off the depth of reflections even in this light. I love the way these parts turned out. I painted the underside of the tail section with the same satin black.


Thanks again for the interest and thanks as well to Mal for sending me the parts. I still enjoy doing this stuff and being able to do it as a hobby these days makes it all the better. Next up a 1973 Honda CB750 in metal flake orange..cool.

And thank you for that tip on the JB Weld around the tank filler hole.
")
I've got a '73 and of the 3 colors I think sunrise orange flake is best, very iconic. VMR paints has the base/flake/clear kits. A quart each of silver base and orange flake is $400 though (!). I see a company in Germany sells a kit on eBay (link) but says they won't ship to the US. There is also a recipe on SOHC forum (link) using House of Kolor which looks interesting. I'm sure you'll figure it out and do a great job. The tank I have is orange and tired, but sound. Good for measurements on the decal location.
On top of that I just got a '79 GS1000E and it needs a re-paint, it's the black with very faint sparkles, still researching the name/code and vendor.
Next up a 1973 Honda CB750 in metal flake orange..cool.
nvr2old
Forum Sage
I have a guy, that even if you can't find the codes for the '79 Suzuki, can be 99% sure he can replicate it as long as you have a piece that's clean to scan.
I'm grateful to folks like Mal who know about being patient because I can only work on the weekends, but it's nice that people are still interested in having me do some work for them.
Guest
Guest
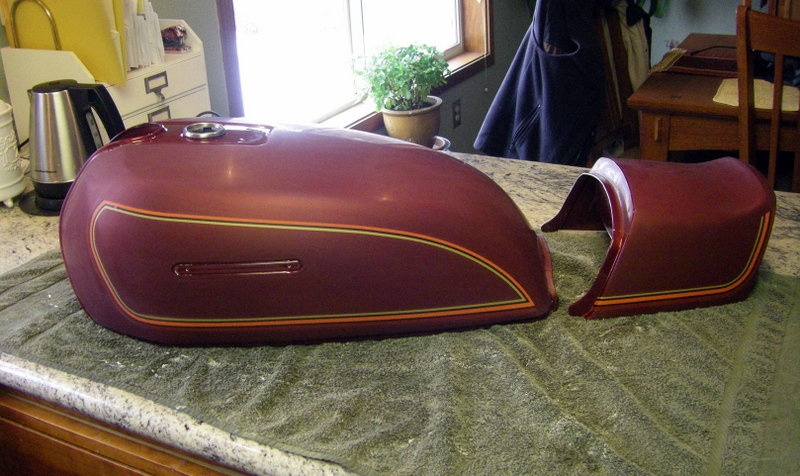
Screwed the tank emblems on and took the parts outside in natural light. Sadly, a very gloomy day, not the greatest for finish pics,
Us geeky photographers will say that overcast is actually good for this sort of thing. Soft diffused light
doesn't have distracting highlights, shapes / lines, are easily followed, etc....
Anyways, another beautiful job.
nvr2old
Forum Sage
Thanks for the kind words gentlemen. Glen, your expertise in photography also blows me away. I went to the photo section and checked out your pics. You, my friend, are an artist of the highest order. Such beautiful work.. In my lack of photo knowledge and skills, I've always gone for early morning and early evening because of that "magic light time" I've heard people describe. These of Mal's finished parts were taken early afternoon and at least showed reflections better then I thought they would. I don't like the busy background in them, though..my garage isn't exactly captivating subject matter.
I like this one. Ran when parked...
 Valvetrain by Glen Brenner, on Flickr