-
Required reading for all forum users!!!
Welcome!
Register to access the full functionality of the GSResources forum. Until you register and activate your account you will not have full forum access, nor will you be able to post or reply to messages.A note to new registrants...
All new forum registrations must be activated via email before you have full access to the forum.A Special Note about Email accounts!
DO NOT SIGN UP USING hotmail, outlook, gmx, sbcglobal, att, bellsouth or email.com. They delete our forum signup emails.A note to old forum members...
I receive numerous requests from people who can no longer log in because their accounts were deleted. As mentioned in the forum FAQ, user accounts are deleted if you haven't logged in for the past 6 months. If you can't log in, then create a new forum account. If you don't get an error message, then check your email account for an activation message. If you get a message stating that the email address is already in use, then your account still exists so follow the instructions in the forum FAQ for resetting your password.Have you forgotten your password or have a new email address? Then read the forum FAQ for details on how to reset it.
Any email requests for "can't log in anymore" problems or "lost my password" problems will be deleted. Read the forum FAQ and follow the instructions there - that's what we have one for...
-
Returning Visitors
If you are a returning visitor who never received your confirmation email, then odds are your email provider is blockinig emails from our server. The only thing that can be done to get around this is you will have to try creating another forum account using an email address from another domain.
If you are a returning visitor to the forum and can't log in using your old forum name and password but used to be able to then chances are your account is deleted. Purges of the databases are done regularly. You will have to create a new forum account and you should be all set.
-
In order to help others find info on a particular bike, be sure to put the year, make or model of bike that you are asking a question about, in the Topic Title. This will allow people to pass by posts they have no interest in.
You should upgrade or use an alternative browser.
Building/equipping a workshop/garage.
- Thread starter Steve
- Start date
Steve
GS Whisperer
Besides, it's a lot easier to "finish". I just plan on tossing some paint on the OSB and calling it "done". If something happens to fall to a wall and put a dent in it, it will be far less noticeable with the OSB than with drywall (blue board). OSB is also just a little bit cheaper per sheet, then factor in that you don't have to mud and tape, it's a lot quicker.
If I were going for a more elegant showplace of a garage, I might have considered drywall, but it's a work place, not a show place.
.
Steve
GS Whisperer
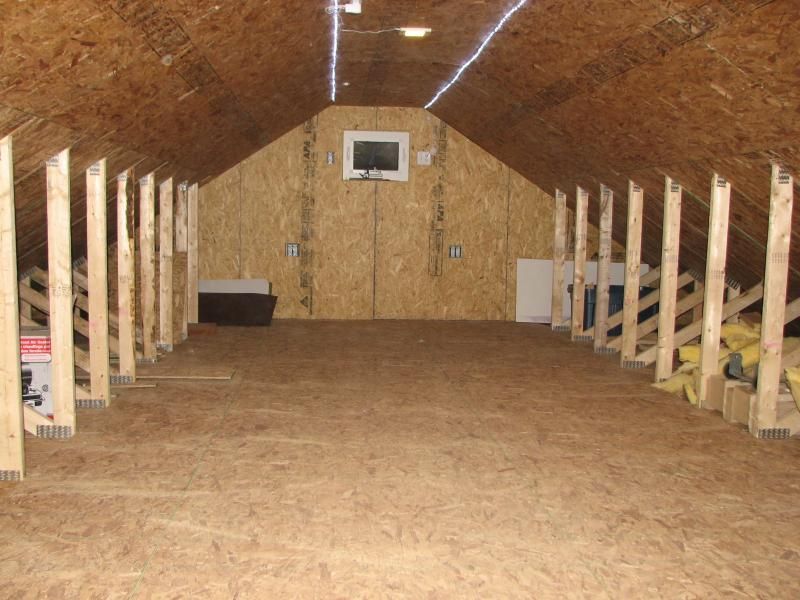
The upstairs room has been the focus, so it can be ready for #2 son when he comes home for #1 son's wedding next weekend. Since other family members are also staying with us, he has volunteered to stay in the garage, so I am concentrating on making it very liveable.
Last week, the room looked like this:
Then I started masking the trusses so I could paint the ceiling:

After painting the ceiling and the end wall:

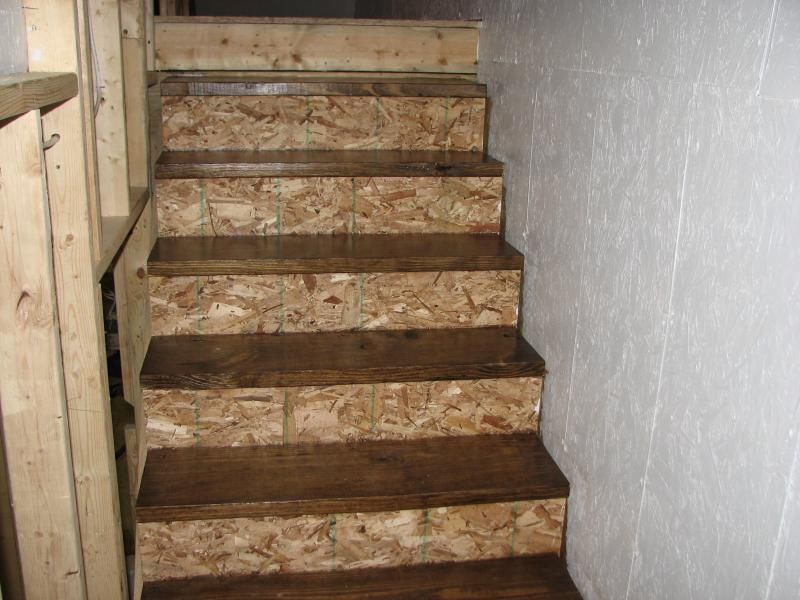
The stair treads got stained and three coats of clear polyurethane: (the risers will end up being painted white)
The floor got painted a light gray:

All of this trim:

Was put around these windows:

So they ended up looking like this:
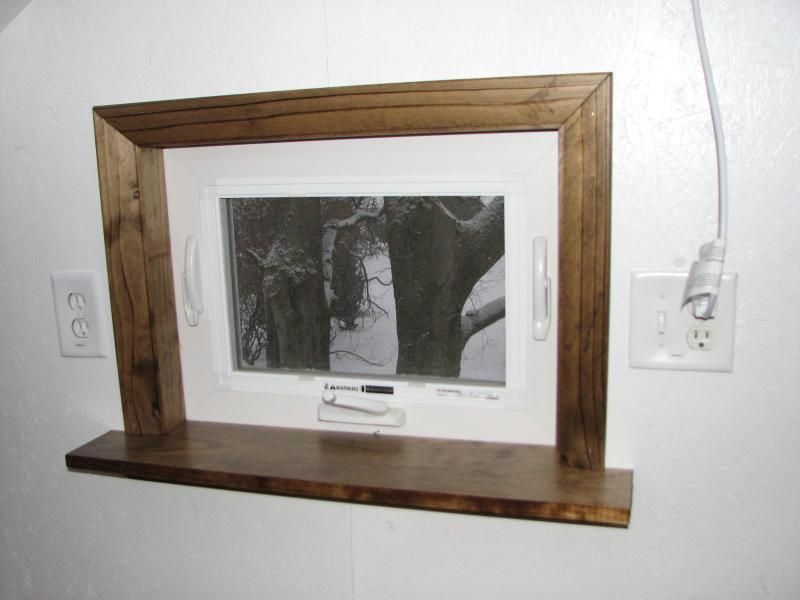

A near-perfect match to the windows in the house. :encouragement:
Over the next week or so, the plan is to install the pocket door at the bottom of the stairs, so I can finish panelling the second wall on the stairway. THEN I can get back to working on the downstairs, which will be to finish the insulation, install one more electrical outlet outside, install a motion sensor for the entry light, put up the ceiling, then the walls. Then a coat (or two) of paint, and maybe the ground will have dried out enough for the plumber to come in and do his "thing". Also need to make a decision on which air compressor to get, so I can work on finishing up my 220-volt wiring.
Progress is a bit slower than originally planned, but, dog-gone it, it's getting done RIGHT!
.
Steve
GS Whisperer
Allie
Forum Sage
I had a counterpoint teacher in college that talked just like Tom Bodett. It's pretty funny having someone who sounds like that explain the intricacies of writing a five voice fugue.
Guest
Guest
It's looking awesome! Glad you found a productive project that kept you busy through the winter months!
Steve
GS Whisperer
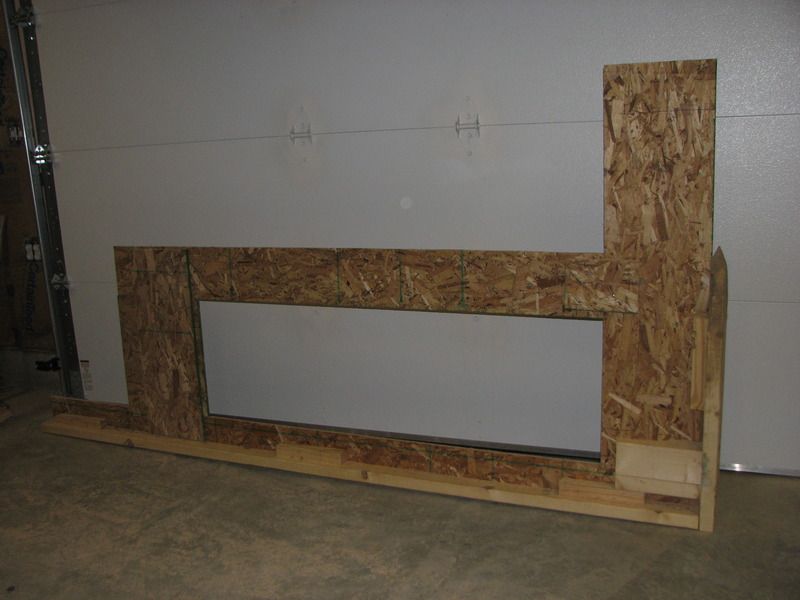
Good observation, Rich. My original drawing was more of an "artist's concept" than an actual building print. There were some changes necessary, due to my lack of knowing how things needed to be. For example: I had no idea how to integrate the stairway with the trusses for access upstairs. What was done was to slide the next-to-last truss over, creating a space that was just about 4 feet wide (minus the thickness of the truss). The stairs are just a bit less than that, of course, rather than the 4 feet that I had in my drawing. No problem.A couple of thoughts: It looks like your original plan was to have the bathroom in line with the stairs. Based on the PT bottom plate, it looks like you ended up going a couple of feet wider. So, instead of doing a custom pocket door ( looks like you will need to hang it above the first tread), how about continue the bath wall all the way to the end wall? This would allow you to have a good size closet as well as a door to the upstairs? Keep in mind that I don't have a clear shot of that area in it's current state, so disregard if you are beyond that point.
The size of the bathroom was also open to design considerations. I just drew the concept, they said "here is how much room we need to do it". No problem.
The door will, indeed, slide over the bottom tread, I have no problem with that.
The rest of the offset between the pocket door and the bathroom wall will be occupied by my Snap-On tool chest, which will be just about arm's-length away from the lift. The width of the wall is PERFECT for the width of the box and its swing-up shelf. I will have to measure the actual offset from the pocket door to the bathroom wall and compare that with the depth of the toolbox.
Thanks for the questions and comments, I know that you have insight on this type of work. :encouragement:
.
Steve
GS Whisperer
No "project" necessary, just stop on by. :encouragement:Steve, If I make it out for the Brown county ride I'll have to use up some of my garage use credits. I just need to thank of a project :-k...
It's looking awesome! Glad you found a productive project that kept you busy through the winter months!
.
Steve
GS Whisperer
OK, I just measured, the offset on the wall right now is 22".I will have to measure the actual offset from the pocket door to the bathroom wall and compare that with the depth of the toolbox.
I think the pocket door is about 6", so that will leave an offset of about 16".
My toolbox is 19 1/2" deep, I am very comfortable with that. :encouragement:
.
OK, I just measured, the offset on the wall right now is 22".
I think the pocket door is about 6", so that will leave an offset of about 16".
My toolbox is 19 1/2" deep, I am very comfortable with that. :encouragement:
.
You shouldn't lose any of the 22" inch depth if you use a 2" x 4" pocket door kit. You can remove the two studs to the left of the first step and reframe it so you can install this:
http://www.johnsonhardware.com/pdindex.htm
They are relatively easy to install.
Steve
GS Whisperer
1. I would have to knock out three of the four studs to make room for a 36" door.
2. I already have electrical wiring run to a switch in that wall.
I will just double-up the thickness of that wall, it really won't be noticed by many or missed by any.
The difference in the offset to the bathroom wall will be totally irrelevant, because there will be a utility sink and a short bench for the parts washer there.
Thanks for the suggestion, though. I looked at the link, that's a nice-looking piece of hardware. We'll see how it compares with what is available at the "big box" store.
.
Steve
GS Whisperer
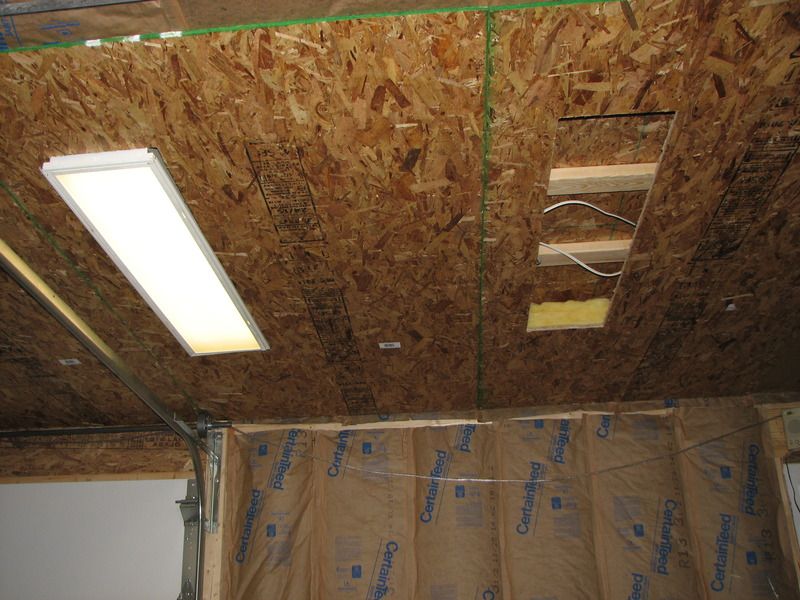
It was sized to be able to place it over a panel and run my router around the inside of the hole. That assured same-size and same-location holes in 11 of the 16 panels that will be getting lights.
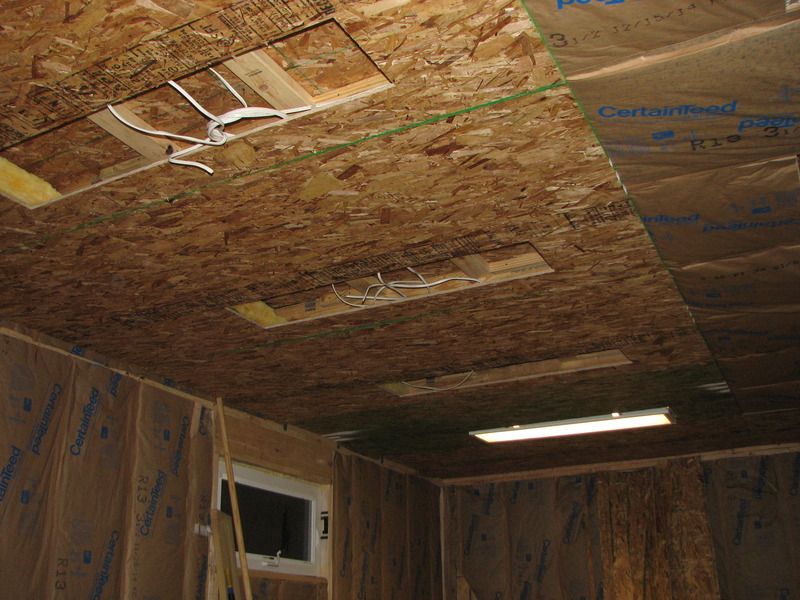
We started with the panels that would be the hardest to install, mainly due to some custom cuts around the edges.
That took a bit longer than anticipated, but we still got several done. I continued this morning and now have a total of 10 (out of 16) panels installed.
One hole empty, one filled with a light.
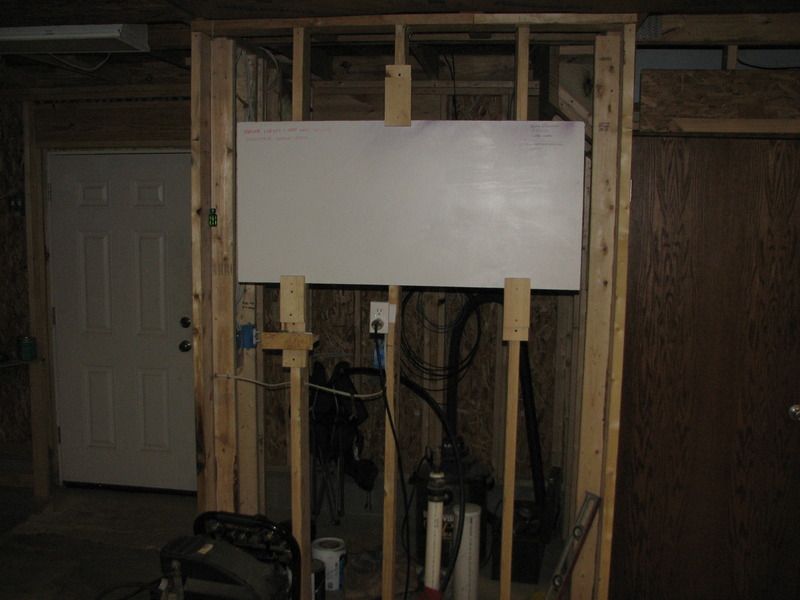
I have had a white panel sitting around, figured it's about time to put it to use.
The project is getting to the point that I need to make notes, the board will later be used for bike project scheduling.
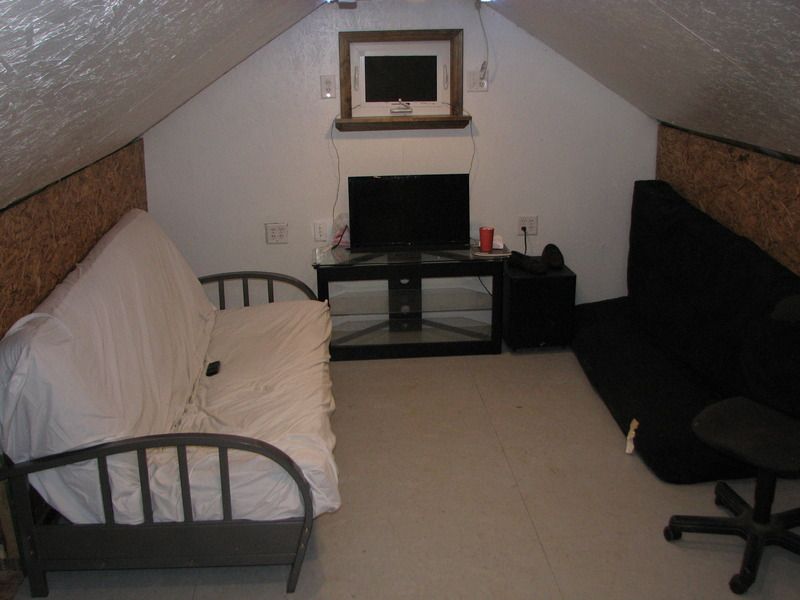
Remember this picture of the upper room?
After some trim around the window, connections for cable and internet and a few pieces of furniture, #2 son pronounces it "liveable".
This week, I need to adjust the template to cut holes for the five lights in the middle row, then get them installed.
When the ceiling is done, the walls are next, then to get some paint flying.
I have come to the conclusion that this place is going to be ridiculously easy to heat enough to work in. My little kerosene heater kept the temperature inside no lower than 62 when the outside temperature got down to about 37 overnight. Over the last couple of weeks, I have been testing the heaters. When the overnight temps got down to single digits, inside never got below 49. Fired up the torpedo heater, less than ten minutes later, it was almost 65 inside. And that was before all the insulation that I added this weekend. :-\\\
Hopefully it might be cool enough in the summer, but we'll find out soon enough.
It's getting close. :encouragement:
.
Allie
Forum Sage
Dogma and I had arranged to meet to do some work on the shop yesterday, so last week, I made up a template to cut the holes in the ceiling panels for the lights.
It was sized to be able to place it over a panel and run my router around the inside of the hole. That assured same-size and same-location holes in 11 of the 16 panels that will be getting lights.
We started with the panels that would be the hardest to install, mainly due to some custom cuts around the edges.
That took a bit longer than anticipated, but we still got several done. I continued this morning and now have a total of 10 (out of 16) panels installed.
One hole empty, one filled with a light.
I have had a white panel sitting around, figured it's about time to put it to use.
The project is getting to the point that I need to make notes, the board will later be used for bike project scheduling.
Remember this picture of the upper room?
After some trim around the window, connections for cable and internet and a few pieces of furniture, #2 son pronounces it "liveable".
This week, I need to adjust the template to cut holes for the five lights in the middle row, then get them installed.
When the ceiling is done, the walls are next, then to get some paint flying.
I have come to the conclusion that this place is going to be ridiculously easy to heat enough to work in. My little kerosene heater kept the temperature inside no lower than 62 when the outside temperature got down to about 37 overnight. Over the last couple of weeks, I have been testing the heaters. When the overnight temps got down to single digits, inside never got below 49. Fired up the torpedo heater, less than ten minutes later, it was almost 65 inside. And that was before all the insulation that I added this weekend. :-\\\
Hopefully it might be cool enough in the summer, but we'll find out soon enough.
It's getting close. :encouragement:
.
I've come to the conclusion that you're lounging around there altogether too much. That futon torpedo looks armed and ready for sleeping.
Steve
GS Whisperer
I've come to the conclusion that you're lounging around there altogether too much. That futon torpedo looks armed and ready for sleeping.
It has been slept on, but not by me. :-k
Yet. :-\\\
.