• Required reading for all forum users!!!

    Welcome!
    Register to access the full functionality of the GSResources forum. Until you register and activate your account you will not have full forum access, nor will you be able to post or reply to messages.

    A note to new registrants...
    All new forum registrations must be activated via email before you have full access to the forum.

    A Special Note about Email accounts!
    DO NOT SIGN UP USING hotmail, outlook, gmx, sbcglobal, att, bellsouth or email.com. They delete our forum signup emails.

    A note to old forum members...
    I receive numerous requests from people who can no longer log in because their accounts were deleted. As mentioned in the forum FAQ, user accounts are deleted if you haven't logged in for the past 6 months. If you can't log in, then create a new forum account. If you don't get an error message, then check your email account for an activation message. If you get a message stating that the email address is already in use, then your account still exists so follow the instructions in the forum FAQ for resetting your password.

    Have you forgotten your password or have a new email address? Then read the forum FAQ for details on how to reset it.

    Any email requests for "can't log in anymore" problems or "lost my password" problems will be deleted. Read the forum FAQ and follow the instructions there - that's what we have one for...

  • Returning Visitors

    If you are a returning visitor who never received your confirmation email, then odds are your email provider is blockinig emails from our server. The only thing that can be done to get around this is you will have to try creating another forum account using an email address from another domain.

    If you are a returning visitor to the forum and can't log in using your old forum name and password but used to be able to then chances are your account is deleted. Purges of the databases are done regularly. You will have to create a new forum account and you should be all set.

GS650 starts but dumps fuel.

  • Thread starter Thread starter Krunk_Kracker
  • Start date Start date
Airbox

Airbox

Thanks guys, all of this is extremely helpful.

Does anyone have any input about the airbox?

I believe this is part of what you need, the adjacent pages from this seller indicate that it is an '82 GL, you'll still need clamps and intake
pipes, but it's a start.

http://cgi.ebay.com/ebaymotors/1982...rcycles_Parts_Accessories&hash=item20b14b693a

Also, from the same seller, sometimes these hardware assortments are handy, this guy has a lot of stuff, maybe clamps in there, can't tell:

http://cgi.ebay.com/ebaymotors/1982...rcycles_Parts_Accessories&hash=item5190cae6ed
 
Last edited:
yea check the manual on basscliff's site for the stock main jet number and see whats in the carbs. if you are ordering new orings and taking the carbs off I would recommend getting new intake boot rings and new allen bolts for them (all available on cycleorings)

As far as the airbox, you are missing a part that connects to the main box and diverts the flow to the carbs. It is something you are best getting used, check the for sale section here, think a few are parting some 650s. Also post on the wanted forum if you dont find what you need, I did that for my 850 for the similar part and found someone here that had what I needed and didnt have a for sale thread up.

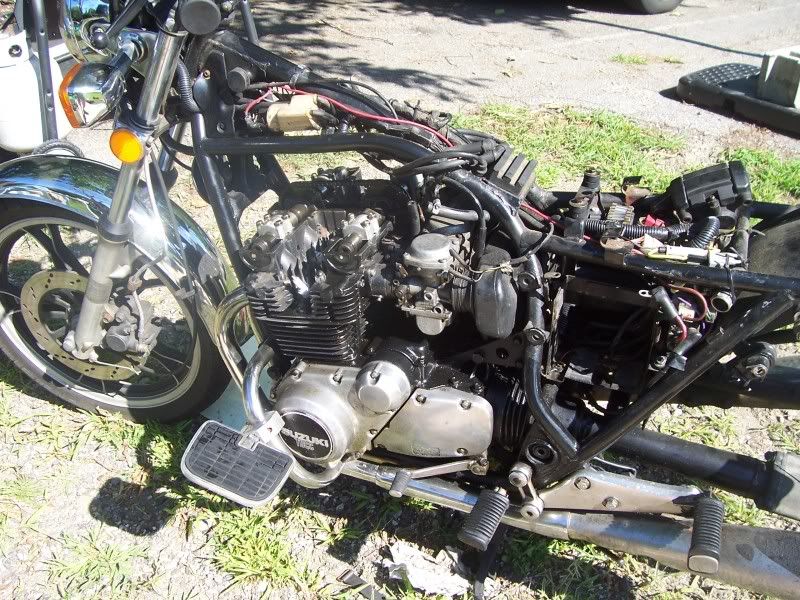
100_5212.jpg

the section directly behind the carbs is what you are missing, it is hard plastic with soft rubber boots that connect to the carbs and a single large rubber boot that connects to the other part of the airbox in your picture. Also if you open your box, slide the clips on top and bottom, you should have a foam filter in there.

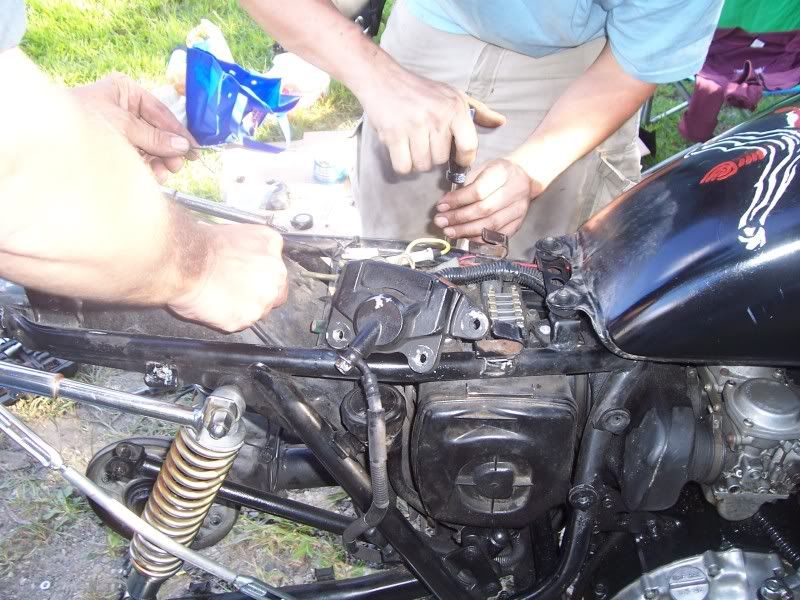
Here is the other side.
100_5219.jpg
 
Also depending on what the jetting is and if its more set for pods I do have some K&N's off the 850 I got. The boots wont work as I um... modified them to connect my airbox for now, but with the boots on those cheap pods it might be an option.

Most here will advise you to go big or go home when it comes to carb cleaning... however IF they look like they been dipped and cleaned it could be something simple like the shop cleaned them but messed up with the float setting. I would take them off, drain them and flip them over, check the float height per the carb rebuild guide linked earlier here. Make sure you are measuring the right parts. Also look for any major issues like broken post or missing parts.

I prefer to start simple and work till I get it right but if you do a complete rebuild it will work.
 
No, there's no lines on them yet. I'm actually heading to the store very shortly to get some.

I'm willing to put the time in to adjust them, it will give me a good chance to get to learn the carbs better.

that is important to have but not for driveway tests, as I understand it that is more to keep them in clean air and with the bike not moving it shouldnt matter. (but I easily could be wrong) :D
 
Hi,

Yes, everything starts with properly cleaned carbs. CLICK HERE for the procedure. For background on why your carbs are "flooding" see [FONT=Trebuchet MS, sans-serif]Overflowing Carbs[/FONT] and be sure that no gas has leaked into your crankcase oil. If so, fix the carbs and change the oil and filter.

As for your airbox intake, the ebay link that recycled64 posted looks like the one. As he mentioned, you will need some additional parts. Here's the parts fiche picture from partshark.com ('82 GS650GL, right?):

2128_14.gif


This is the link to the parts fichce:
http://www.partshark.com/fiche_sect...y=Motorcycles&make=SUZUKI&year=1981&fveh=2127

I think you will need items 2, 3, 4, 5, 6, 7, 8, 9, and 10 in the necessary quantities. Make sure your air intake system is sealed up tightly. New weatherstripping may be necessary in some places. I know your airbox is different than my 850, but have a look at the air intake repair and airbox sealing pages anyway to get an idea of what is necessary. And you might need a new filter element too, #12. K&N or UNI filters work well.

You have Mikuni BS32SS carbs but don't order an aftermarket "rebuild kit". Just get the O-ring kit from Robert Barr at http://cycleorings.com and follow the guide. The float bowl gaskets can be reused if they're in good shape. If not, order some up. Note that the aftermarket float bowl gaskets may have circular "punch outs" that will have to be matched up to the gaskets you are replacing. Carefully compare the new gaskets to the old gaskets to make sure they are exactly the same. Or else you will have a really hard time trying to start your bike. When refurbishing your carbs, you can re-use all of the metal parts (jets, etc) but don't dip any rubber parts. Oh yeah, you might as well pick up 4 new rubber plugs for the pilot jets and replace those while you're in there.

I'll admit, I've "cleaned" carbs without taking them completely apart. If they are not in bad shape sometimes you can run a can of spray carb cleaner (Ray likes the RED CRC brake cleaner) through a carb body and do an OK job. But without removing the emulsion tube (needle jet) you can't be sure every orifice is clean. The same goes for the choke circuit and pilot circuit in the carb bodies. Those are very small passages that get gummed up easily if the bike sits for too long.

With the airbox restored you can use stock jetting. There's a copy of the stock jetting chart on my website in one of the carb sections. You can make pod filters work too but they can be fiddly trying to figure out the jetting.

I know some (if not all) of this information has been covered in previous posts but I wanted to be thorough. I apologize for any profound glimpses into the obvious. :p


Thank you for your indulgence,

BassCliff
 
Last edited:
So, I just bought the carb o-ring kit, the 38mm intake boot o-ring kit and the 16mm hex head bolts for the intake. I think this will be a good start to establishing a maintenance history on this old girl :)

No, sorry, I am not fully fimiliar with the 650, but i would suggest, first things first, get those carbs off and lets have a look whats going on in there first.
For all you know, the P.O might even have had them set up for the pods, in which case half your work dissapears right there, stranger things have happened.
But we won't know until you get them off and we see what jets are in there.
Seems like our esteemed BassCliff has taken the long weekend off, so here is the link to his site in the mean time, plenty to keep you busy there.
http://members.dslextreme.com/users/bikecliff

That's a great idea, I think I'll do that. Maybe I'll be lucky and the previous owner knew what they were doing with putting pods on it. And I'm definitely familiar with Basscliffs site, I've been doing a LOT of reading on his site while at work (I'm a network admin so I have lots of time to read read and read some more!)

I believe this is part of what you need, the adjacent pages from this seller indicate that it is an '82 GL, you'll still need clamps and intake
pipes, but it's a start.

http://cgi.ebay.com/ebaymotors/1982...rcycles_Parts_Accessories&hash=item20b14b693a

Also, from the same seller, sometimes these hardware assortments are handy, this guy has a lot of stuff, maybe clamps in there, can't tell:

http://cgi.ebay.com/ebaymotors/1982...rcycles_Parts_Accessories&hash=item5190cae6ed

yea check the manual on basscliff's site for the stock main jet number and see whats in the carbs. if you are ordering new orings and taking the carbs off I would recommend getting new intake boot rings and new allen bolts for them (all available on cycleorings)

As far as the airbox, you are missing a part that connects to the main box and diverts the flow to the carbs. It is something you are best getting used, check the for sale section here, think a few are parting some 650s. Also post on the wanted forum if you dont find what you need, I did that for my 850 for the similar part and found someone here that had what I needed and didnt have a for sale thread up.

100_5212.jpg

the section directly behind the carbs is what you are missing, it is hard plastic with soft rubber boots that connect to the carbs and a single large rubber boot that connects to the other part of the airbox in your picture. Also if you open your box, slide the clips on top and bottom, you should have a foam filter in there.

Here is the other side.
100_5219.jpg

Thank you, both! I'm going to pull the carbs and see where we stand as far as jetting goes, and then look into getting the OEM air box if they are factory jetting.

Also depending on what the jetting is and if its more set for pods I do have some K&N's off the 850 I got. The boots wont work as I um... modified them to connect my airbox for now, but with the boots on those cheap pods it might be an option.

Most here will advise you to go big or go home when it comes to carb cleaning... however IF they look like they been dipped and cleaned it could be something simple like the shop cleaned them but messed up with the float setting. I would take them off, drain them and flip them over, check the float height per the carb rebuild guide linked earlier here. Make sure you are measuring the right parts. Also look for any major issues like broken post or missing parts.

I prefer to start simple and work till I get it right but if you do a complete rebuild it will work.

Sounds like a good plan to me.

that is important to have but not for driveway tests, as I understand it that is more to keep them in clean air and with the bike not moving it shouldnt matter. (but I easily could be wrong) :D

I'm not sure what you're talking about. The fuel line I put on the vents?

Hi,

Yes, everything starts with properly cleaned carbs. CLICK HERE for the procedure. For background on why your carbs are "flooding" see [FONT=Trebuchet MS, sans-serif]Overflowing Carbs[/FONT] and be sure that no gas has leaked into your crankcase oil. If so, fix the carbs and change the oil and filter.

As for your airbox intake, the ebay link that recycled64 posted looks like the one. As he mentioned, you will need some additional parts. Here's the parts fiche picture from partshark.com ('82 GS650GL, right?):

2128_14.gif


This is the link to the parts fichce:
http://www.partshark.com/fiche_sect...y=Motorcycles&make=SUZUKI&year=1981&fveh=2127

I think you will need items 2, 3, 4, 5, 6, 7, 8, 9, and 10 in the necessary quantities. Make sure your air intake system is sealed up tightly. New weatherstripping may be necessary in some places. I know your airbox is different than my 850, but have a look at the air intake repair and airbox sealing pages anyway to get an idea of what is necessary. And you might need a new filter element too, #12. K&N or UNI filters work well.

You have Mikuni BS32SS carbs but don't order an aftermarket "rebuild kit". Just get the O-ring kit from Robert Barr at http://cycleorings.com and follow the guide. The float bowl gaskets can be reused if they're in good shape. If not, order some up. Note that the aftermarket float bowl gaskets may have circular "punch outs" that will have to be matched up to the gaskets you are replacing. Carefully compare the new gaskets to the old gaskets to make sure they are exactly the same. Or else you will have a really hard time trying to start your bike. When refurbishing your carbs, you can re-use all of the metal parts (jets, etc) but don't dip any rubber parts. Oh yeah, you might as well pick up 4 new rubber plugs for the pilot jets and replace those while you're in there.

I'll admit, I've "cleaned" carbs without taking them completely apart. If they are not in bad shape sometimes you can run a can of spray carb cleaner (Ray likes the RED CRC brake cleaner) through a carb body and do an OK job. But without removing the emulsion tube (needle jet) you can't be sure every orifice is clean. The same goes for the choke circuit and pilot circuit in the carb bodies. Those are very small passages that get gummed up easily if the bike sits for too long.

I know some (if not all) of this information has been covered in previous posts but I wanted to be thorough. I apologize for any profound glimpses into the obvious. :p


Thank you for your indulgence,

BassCliff

With the airbox restored you can use stock jetting. There's a copy of the stock jetting chart on my website in one of the carb sections. You can make pod filters work too but they can be fiddly trying to figure out the jetting.

Bassclif, again you amaze me. Thank you, I'm all over that "Overflowing Carb" link just as soon as I press "Submit Reply" on this post!
 
Last edited:
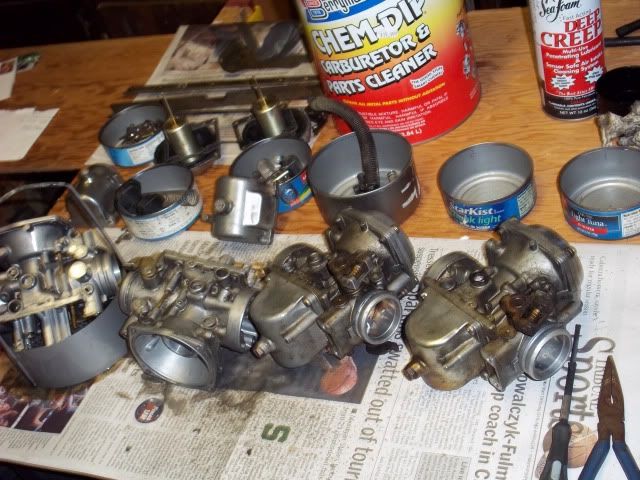
Berrymans.
Most any big autoparts store will have it, about $18.
Is a gallon can (top center of photo), includes a basket with a handle (lower left).
That SeaFoam Deep Creep penitrating oil isnt cheap ($12) but works real well for loosing up stick air screw or jets.
100_0263.jpg


You can inspect the flaot height setting without without tearing carbs apart from the rack.
Remove carbs. Take off float bowls. Hold up carbs and lightly lift the floats with your finger (or rotate carbs to make flots push on float needle) and watch it push on the float needle, and see that it pushes the float needle up before the float hits the carb body.
To check the float height adjustment, turn the carbs upside down, remove the float bowl gasket. Will need a mm metal scale or a depth guage set of calipers.

Note: The carb cleaning series back on the GSR homepage is real good for every step of dissasembly and cleaning and reassiembly. But doesnt cover setting the float heights.
Here is a link to BikeCliff BassCliff website tutorial.
http://members.dslextreme.com/users/bikecliff/images/carbspec_float_height.html


You can inspect your float needles without tearing carbs apart from the rack.
Remove carbs. Take off float bowls, remove float. Then can take out the float needle for inspection.
(do keep trackl of which float in which carb bady.)

.
Tell us more what you find.

.
 
Last edited:
Thanks guys, all of this is extremely helpful.

Does anyone have any input about the airbox?
That ebay seller in N. Carolina has the right airbox - note the orientation of the oval connector to air filter box- some other models have this oval 90 degrees off, like in the alpha-sports parts diagrams. I'd scoop that part, and life will be alot easier. Good luck!
 
Quote:
Originally Posted by Skateguy50
that is important to have but not for driveway tests, as I understand it that is more to keep them in clean air and with the bike not moving it shouldnt matter. (but I easily could be wrong) :D

I'm not sure what you're talking about. The fuel line I put on the vents?

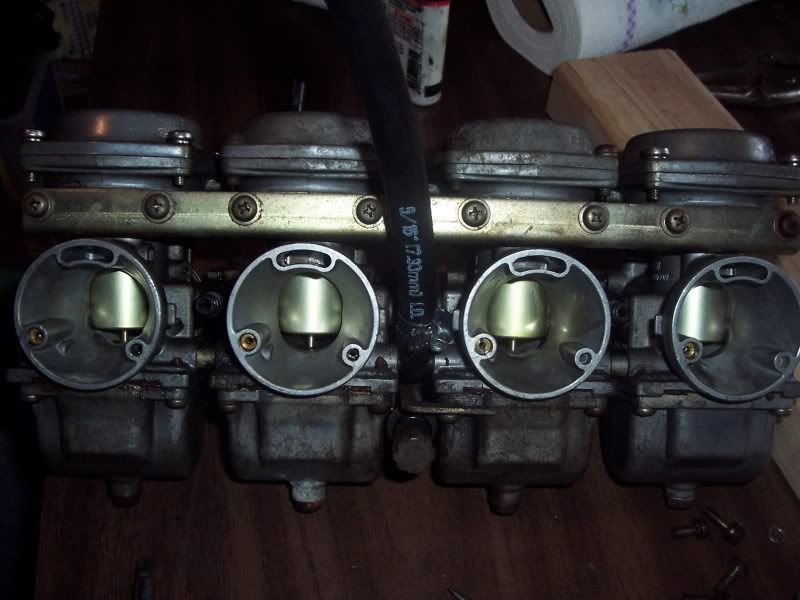
I was talking about the carb vent tubes, on mine the fuel line goes to the middle of the rack and between 1-2 and 3-4 is another connection for a vent tube, you will want to install that before running on the road as it gets the vent air "clean" without wind changing the pressure.

100_2309.jpg


I dont have the tubes on them at this point (before cleaning if you cant tell) anyways the line on is the fuel line. If you look between 1-2 and 3-4 you can see where the other line would connect, about 12" should do. dont think I have any good pics showing the routing of it but basically just get it back a bit and down.
 
Quote:
Originally Posted by Skateguy50
that is important to have but not for driveway tests, as I understand it that is more to keep them in clean air and with the bike not moving it shouldnt matter. (but I easily could be wrong) :D


I was talking about the carb vent tubes, on mine the fuel line goes to the middle of the rack and between 1-2 and 3-4 is another connection for a vent tube, you will want to install that before running on the road as it gets the vent air "clean" without wind changing the pressure.

100_2309.jpg


I dont have the tubes on them at this point (before cleaning if you cant tell) anyways the line on is the fuel line. If you look between 1-2 and 3-4 you can see where the other line would connect, about 12" should do. dont think I have any good pics showing the routing of it but basically just get it back a bit and down.
No, I got the tubes on there because it was spraying fuel everywhere and was making the bike dangerous to diagnose....now it just runs out of the bottom of the bike and onto the ground, and it helped to figure out when the vents were leaking, and when it was leaking out of the intake on the carbs.
 
Here's a quick video of it running, maybe that will help a little.

http://www.youtube.com/watch?v=A2_Fp8iq3Uc

To me, it doesn't sound like it is firing on all four. Plus the obvious, gas draining out, the float valves need inspection. Pull the carbs, measure float height and carefully inspect the fuel valves for excessive wear. Considering how much fuel is draining through carbs, I would suspect that one of your floats may have failed completely and/or is stuck. After checking height, you may consider doing a static fuel level check to make sure floats are still working properly.
 
To me, it doesn't sound like it is firing on all four. Plus the obvious, gas draining out, the float valves need inspection. Pull the carbs, measure float height and carefully inspect the fuel valves for excessive wear. Considering how much fuel is draining through carbs, I would suspect that one of your floats may have failed completely and/or is stuck. After checking height, you may consider doing a static fuel level check to make sure floats are still working properly.
Thank you.

It is being kept at my buddies house as he has all the appropriate tools and means to make this as easy as possible, so his next day off, we're pulling the carbs and going through them.
 
Another issue might be the "professional rebuild" did not keep the parts separate for carb 1, 2, 3, 4 and mixed one of the float valves with the wrong seat making them not match up and just keep leaking fuel.
 
Another issue might be the "professional rebuild" did not keep the parts separate for carb 1, 2, 3, 4 and mixed one of the float valves with the wrong seat making them not match up and just keep leaking fuel.
So what do I do to fix that, if that is the case?
 
I decided again that I'm going to keep the pods, instead of tracking down an OEM air box.

I did some research and discovered that going two up from the factory (110) jets is a good place to start, so I ordered some 120's. What pilot jet should I get?
 
Another issue might be the "professional rebuild" did not keep the parts separate for carb 1, 2, 3, 4 and mixed one of the float valves with the wrong seat making them not match up and just keep leaking fuel.
I asked earlier, but if this is the case, how do I remedy this?

I received all the o-rings for the carb, the new bolt kit for the intake boots, the o-rings for the intake boots and the new 120 jets. I also have a service manual that cost me freaking 45 damn dollars.

This is most likely going to be done this Friday. I'm really hoping this straightens out my issues with the carbs.

A few things:

I've familiarized myself with the procedure of breaking these down with the manual, and I don't believe it is going to be a problem doing it. What I want to know is, what I need to look for when taking these apart. I'd much rather replace everything as need be instead of doing so after I have the carbs back in.

So, what should I look for when disassembling these?
 
Hi,

Have a look at these.

The Carb Rebuild Series

Carb Specs:
Float Height/Jetting/Tuning

Carb Notes:
Synchronizing/Troubleshooting/Theory


Thank you for your indulgence,

BassCliff


Yes sir, I have seen all those! Thank you!

What I am asking is in the way of damage. What to look for damage wise...how to discern what needs repairing etc.

I have so many of your PDF's saved BassClif, thanks for providing such an awesome resource. I'll give those a look over again though, thank you!
 
Y
What I am asking is in the way of damage. What to look for damage wise...how to discern what needs repairing etc.

Hi,

Once you take your carbs apart I think it will be obvious if something is amiss. You've got 4 carbs to compare. If something looks different in one then you may have something worn or broken. Most, if not all, of the metal bits (jets, needles, valve seats, etc) should be OK. It might be hard to tell if a float needle or seat is not making a good seal, if it's slightly out of round. You'll be able to tell if, for example, the needles have any damage. Normally all you have to do is clean the carb bodies and all of the metal bits, then reassemble with the O-ring kit.


Thank you for your indulgence,

BassCliff
 
Back
Top