• Required reading for all forum users!!!

    Welcome!
    Register to access the full functionality of the GSResources forum. Until you register and activate your account you will not have full forum access, nor will you be able to post or reply to messages.

    A note to new registrants...
    All new forum registrations must be activated via email before you have full access to the forum.

    A Special Note about Email accounts!
    DO NOT SIGN UP USING hotmail, outlook, gmx, sbcglobal, att, bellsouth or email.com. They delete our forum signup emails.

    A note to old forum members...
    I receive numerous requests from people who can no longer log in because their accounts were deleted. As mentioned in the forum FAQ, user accounts are deleted if you haven't logged in for the past 6 months. If you can't log in, then create a new forum account. If you don't get an error message, then check your email account for an activation message. If you get a message stating that the email address is already in use, then your account still exists so follow the instructions in the forum FAQ for resetting your password.

    Have you forgotten your password or have a new email address? Then read the forum FAQ for details on how to reset it.

    Any email requests for "can't log in anymore" problems or "lost my password" problems will be deleted. Read the forum FAQ and follow the instructions there - that's what we have one for...

  • Returning Visitors

    If you are a returning visitor who never received your confirmation email, then odds are your email provider is blockinig emails from our server. The only thing that can be done to get around this is you will have to try creating another forum account using an email address from another domain.

    If you are a returning visitor to the forum and can't log in using your old forum name and password but used to be able to then chances are your account is deleted. Purges of the databases are done regularly. You will have to create a new forum account and you should be all set.

here i go again.. project: 'too late to go back now'

  • Thread starter Thread starter 08rangerdan
  • Start date Start date
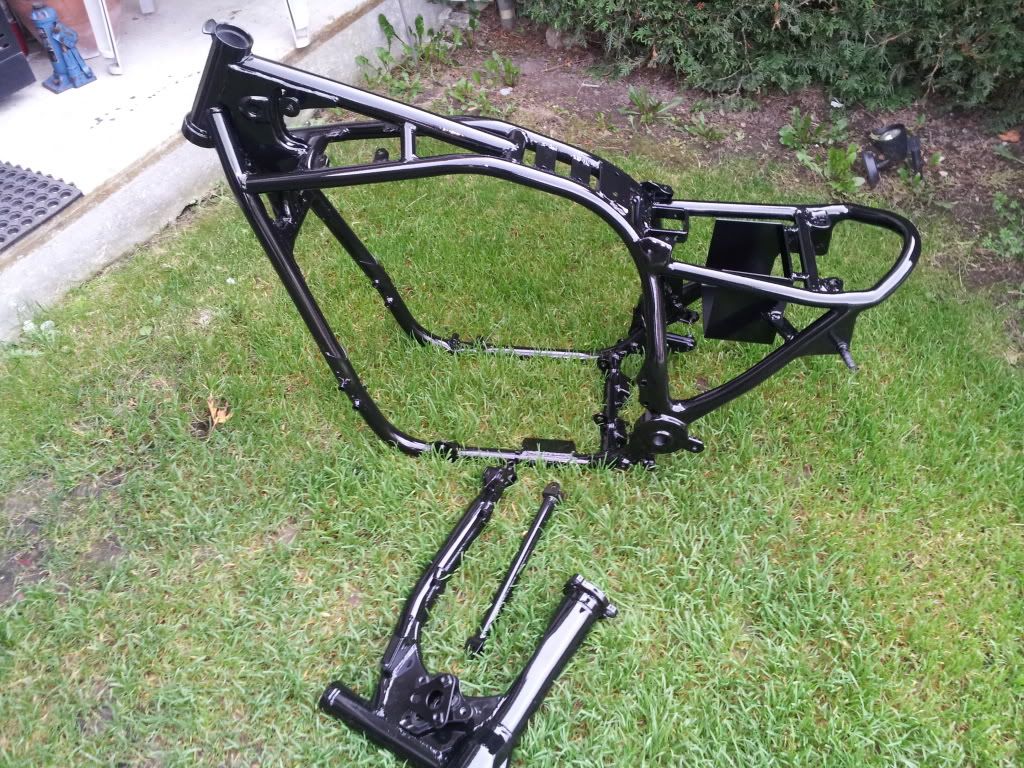
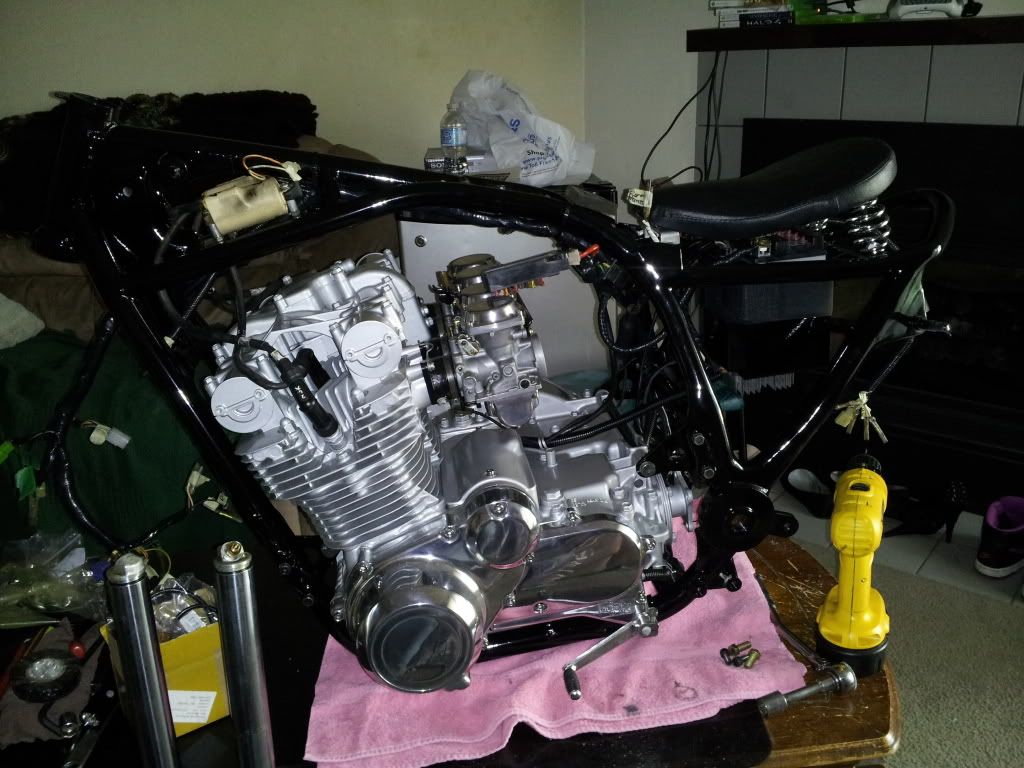
Looks really nice and clean.....

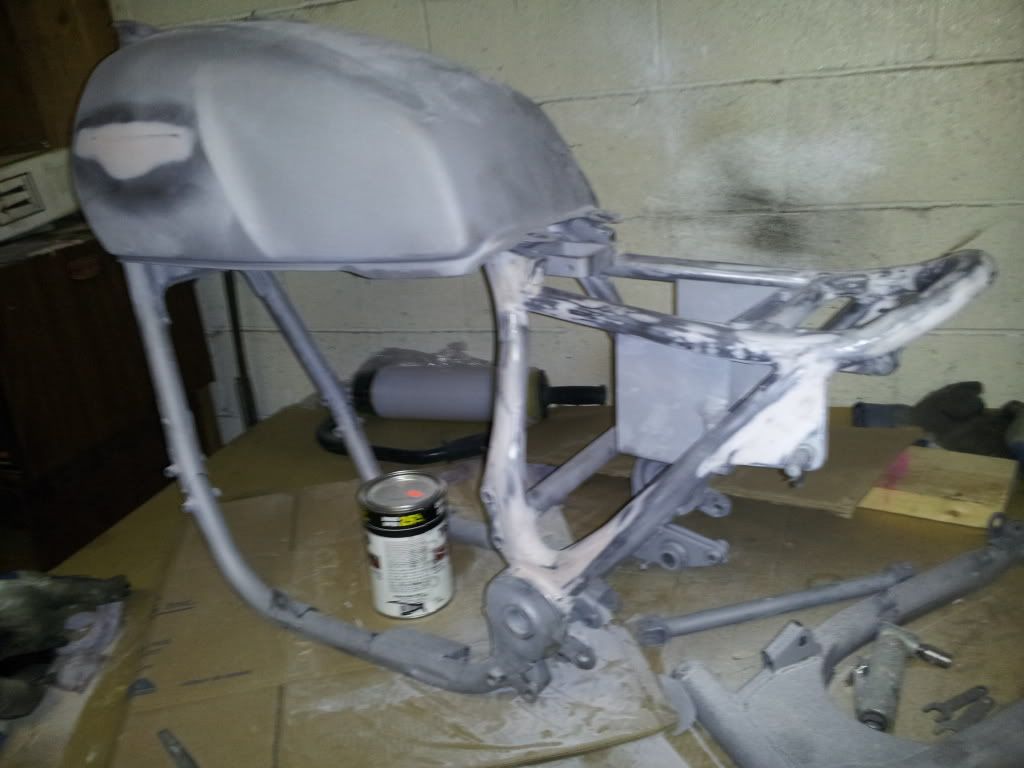
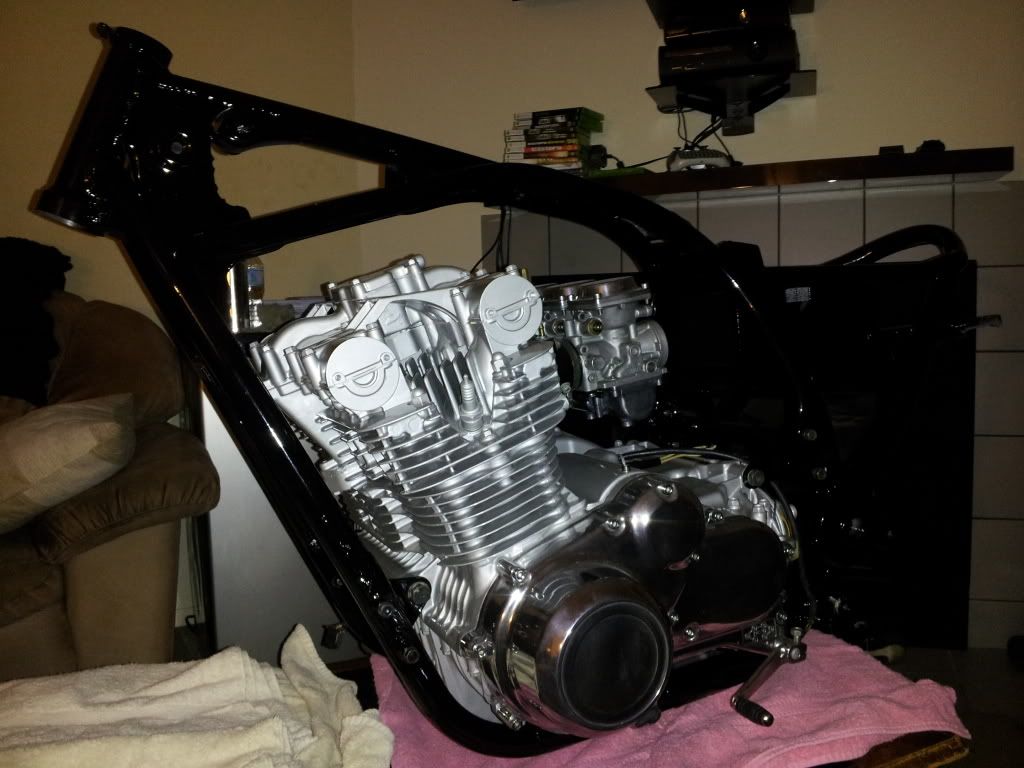
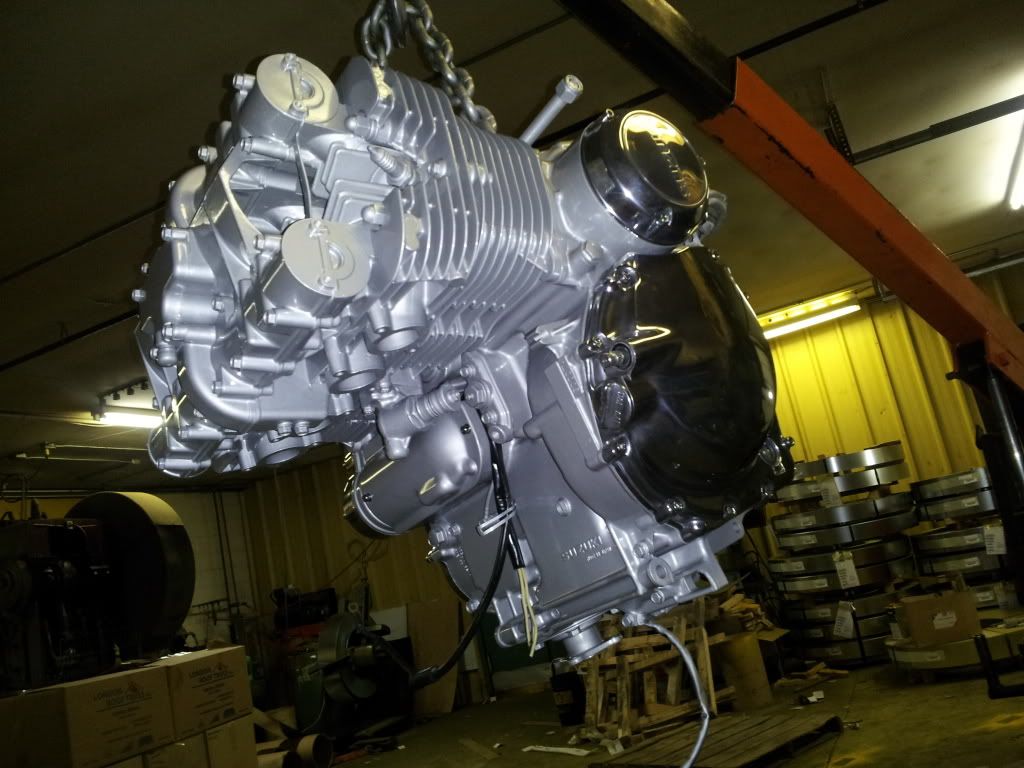
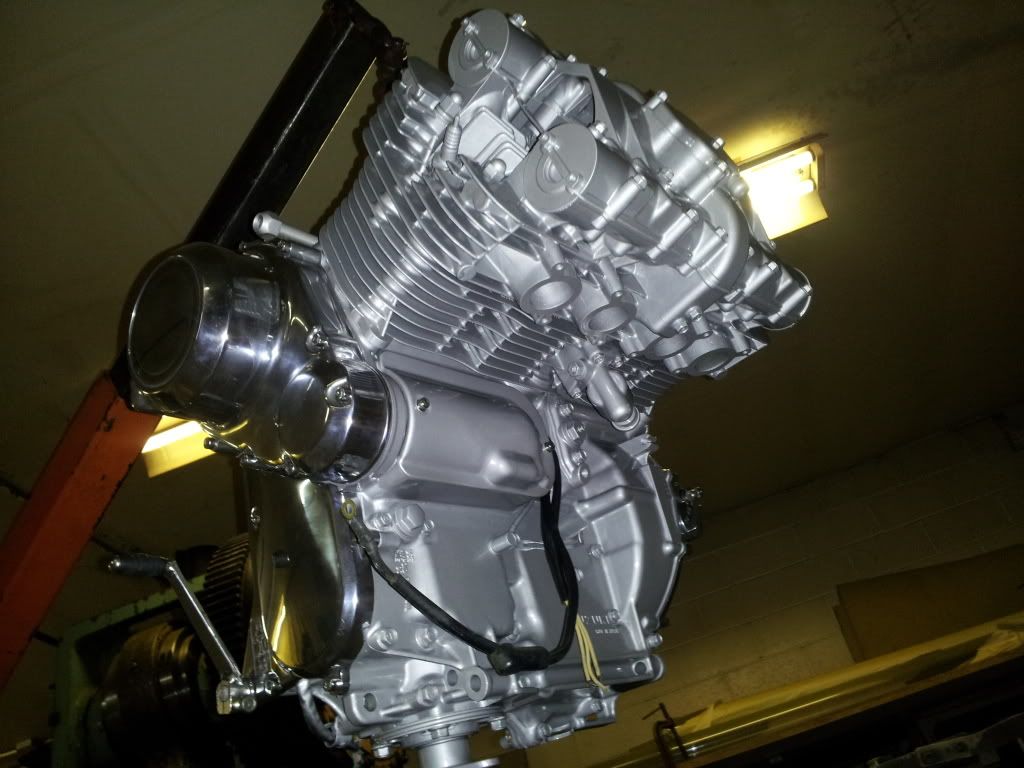
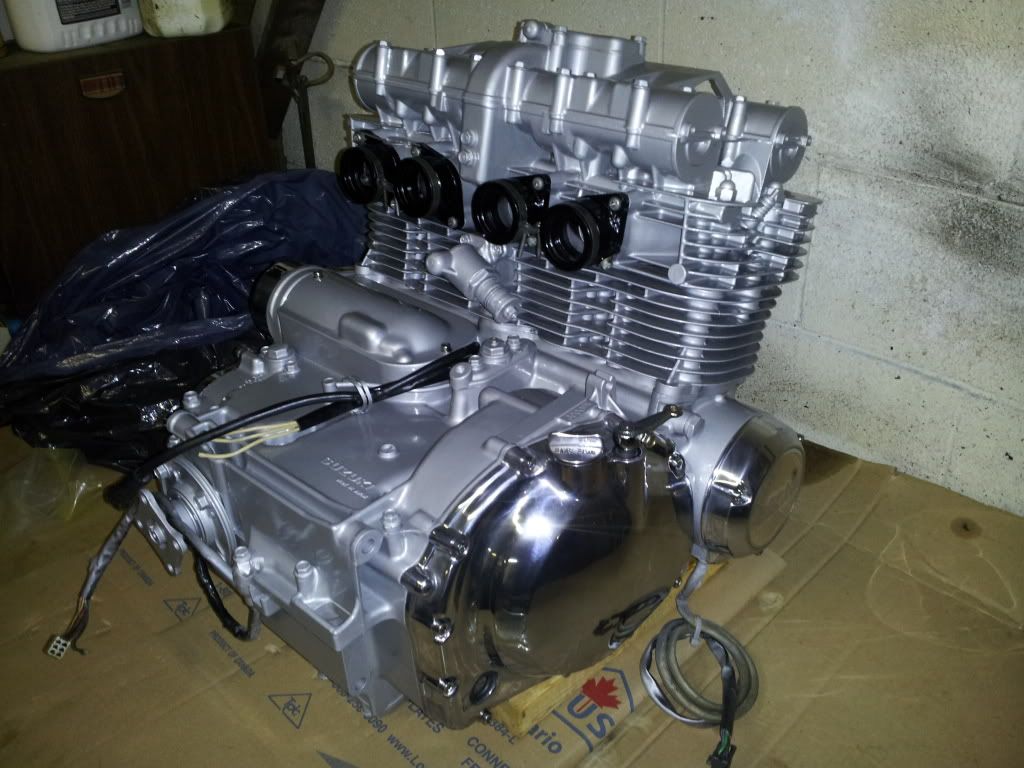
I will say one thing though, you should have plugged up with either the original bolts/nuts and such, all the threaded holes, possibly covered up the oil filter area, the intake ports, the exhaust ports, the cam chain tensioner, the points area, and anything else you really should not have had paint on....

it's going to be a real pain to get it all cleaned up now ?

Just a thought....

.
 
Dunno why i would mask off parts i dont see. Not like paint overspray is going to cause an internal failure. Its not like i plastered paint in areas i wasnt planning to see... I seperated the coils of the tensioner spring with a razor since it got a little gummed up but other then that its all functional and sealed propetly.. No point in being tedious about painting like this.

Starting to button up

20130906_105158_zpsda2dc766.jpg


20130906_115645_zps700d9627.jpg


20130906_115603_zps5aef4bf3.jpg


20130909_100205_zpsea632387.jpg
 
Last edited:
Nice polishing job on the covers. I know how much elbow grease that takes. Should look good back in the frame.
 
Starting on the new rear shock mounts.

20130911_123730_zpsf06b1c87.jpg


20130911_124124_zps6a2518cb.jpg


20130911_130010_zps2a515a8e.jpg
 
Last edited:
Not sure if you will run into the problem I had but on my bike the shock mounts were around that location and the ride was so harsh I ended up selling it partly because of that.
 
Any more of an angle on them and i bet it would be pretty rough. These air shocks were pretty soft to begin with. With a bit of an angle i was hoping they would stiffen up alot more then they were fully gassed. If they feel that stiff ill just take a bit of air out until it feels ok
 
Dunno why i would mask off parts i dont see. Not like paint overspray is going to cause an internal failure. Its not like i plastered paint in areas i wasnt planning to see... I seperated the coils of the tensioner spring with a razor since it got a little gummed up but other then that its all functional and sealed propetly.. No point in being tedious about painting like this.

Starting to button up

OK

It was only a suggestion, no need to have paint where it don't need to be, any contamination inside could cause an issue, it might not, but it could...

Looks good

don't mind me....:)

.
 
Shock mounts are on for good. Also removed most extra tabs and brackets.. Im short one set of shock bushings. I got a set from a member but thought i was getting a complete set.. Oh well.. If anyone has another set (pair) of bushings ill be looking for them any time.

20130913_064804_zpsec6684c1.jpg


20130913_064819_zps037156df.jpg


20130913_071343_zps38912a80.jpg


20130913_071406_zps6807f93d.jpg


20130913_082844_zpseaae208e.jpg


20130913_082828_zps24868a8c.jpg
 
Last edited:
I like the lines that you created with your seat and the rear "hoop". Great looking bike so far.
 
I like the lines that you created with your seat and the rear "hoop". Great looking bike so far.

Thank you, once i got the rear tubing done i wasnt happy so i spent a little too much time attempting to put a curve in it to give it some personality. Was quite a setup.. But i managed to curve it up just an inch to achieve the radius i liked
 
Im kind of in a pickle.. I need to really know what these air shocks are from.. Ive been doing alot of digging on them lately. My best guess is that these may be from an old 'interstate' air ride Honda goldwing. Give me some opinions on my discovery.. I need to know what i should put in them for oil and how much oil.. and i also need upper bushings..

Ive read that a common practice for the goldwing air ride was to use about 350ml of ATF for fluid per unit.. Does this sound acceptable?

Heres my shock and lines. The lines attach to a valve junction which also incorporates a pressure sensor/switch. The head of the shock tells me a similar description of the air ride suspension used on early to mid 80s goldwings, 1000-1200cc models. Not sure if it would be an oem accessory or aftetmarket but the name 'interstate' pops up frequently when I see a similar shock design pop up from a source.

20130916_162151_zpsd34b30b6.jpg


20130916_162341_zps41a68bc0.jpg


Heres one source i pulled up on ebay with a similar model shock with some identifying labeling. Can anyone be certain and pinpoint a make or model of this shock i have??

SC20130916-150945_zps7dcd0aca.png


SC20130916-150921_zpsf541a20b.png


SC20130916-150853_zps6fd0fe4e.png

32/08rangerdan/20130916_162319_zpse37ff6e0.jpg[/IMG]
 
Last edited:
Battery box coming along.. Also made a mount for the starter solenoid and a couple strap mounts for a couple modules under the tank. In going to start mounting the harness and getting that finalized

20130921_011358_zpsc7d40d0b.jpg
 
Frame and tank got blasted last Sunday. Ive spent a couple days working away at some bondo smoothing but only invthe visible framed areas of the rear end.. Ill be picking up paint this evening.. In just going to use a gloss black tremclad and a universal hardener. Should look nice when done!

20131009_093058_zps54e4fbb0.jpg


20131009_093031_zpsf306b3dd.jpg


20131008_122222_zps6aa82397.jpg


20131008_122211_zpsae0fd5f4.jpg


20131008_122203_zpsf073f82d.jpg
 
Last edited:
Frame is all painted and tank is epoxied and awaiting final body work and smoothing before my metalic candy/burgandy base.

Motor mounting party is planned for Friday night! Makes a great coffee table centerpiece haha..

20131015_165220_zpsb3ccc4de.jpg


20131015_165228_zpse09501f2.jpg


20131015_165236_zps8dc3aa3c.jpg


20131015_165243_zpsd6b341a7.jpg


20131015_170501_zpse8f069e7.jpg
 
Easier then i thought to mount.. Layed the motor on its side and framed over it.. Done! Wiring next..

20131016_225857_zpsded48000.jpg
 
Frame electronics are all sorted out and installed. i just need to shorten up the rear harness for the new lighting. Im just starting on the front suspension, i have the forks drained and internals removed but i need to make a tool to remove the lower end internals. New pods ordered also..

20131020_153430_zpsda7976e7.jpg


SC20131020-153237-1_zpsc5e9cfc1.jpg
 
Last edited:
Rough hand sand and polish to get these going. I need to find bushings but have no idea where!?

20131022_192703_zps7f5b33ca.jpg
 
That engine looks so clean! Good to see a remodel for the shafty too. Doesn't seem to be too many of those well documented (at least from what I've been able to find).
 
Back
Top