• Required reading for all forum users!!!

    Welcome!
    Register to access the full functionality of the GSResources forum. Until you register and activate your account you will not have full forum access, nor will you be able to post or reply to messages.

    A note to new registrants...
    All new forum registrations must be activated via email before you have full access to the forum.

    A Special Note about Email accounts!
    DO NOT SIGN UP USING hotmail, outlook, gmx, sbcglobal, att, bellsouth or email.com. They delete our forum signup emails.

    A note to old forum members...
    I receive numerous requests from people who can no longer log in because their accounts were deleted. As mentioned in the forum FAQ, user accounts are deleted if you haven't logged in for the past 6 months. If you can't log in, then create a new forum account. If you don't get an error message, then check your email account for an activation message. If you get a message stating that the email address is already in use, then your account still exists so follow the instructions in the forum FAQ for resetting your password.

    Have you forgotten your password or have a new email address? Then read the forum FAQ for details on how to reset it.

    Any email requests for "can't log in anymore" problems or "lost my password" problems will be deleted. Read the forum FAQ and follow the instructions there - that's what we have one for...

  • Returning Visitors

    If you are a returning visitor who never received your confirmation email, then odds are your email provider is blockinig emails from our server. The only thing that can be done to get around this is you will have to try creating another forum account using an email address from another domain.

    If you are a returning visitor to the forum and can't log in using your old forum name and password but used to be able to then chances are your account is deleted. Purges of the databases are done regularly. You will have to create a new forum account and you should be all set.

New to GS - 1st stupid question

Hi,

I know a little of what it's like to work three jobs and find time for family and everything else you want to do. ;)

Keep up the good work. There are two good carb cleaning guides on my website. They are PDF format so you can download them for local viewing and/or printing. Those carbs should clean up cery nicely. Be very careful when removing the float bowl pins.

Thank you for your indulgence,

BassCliff
 
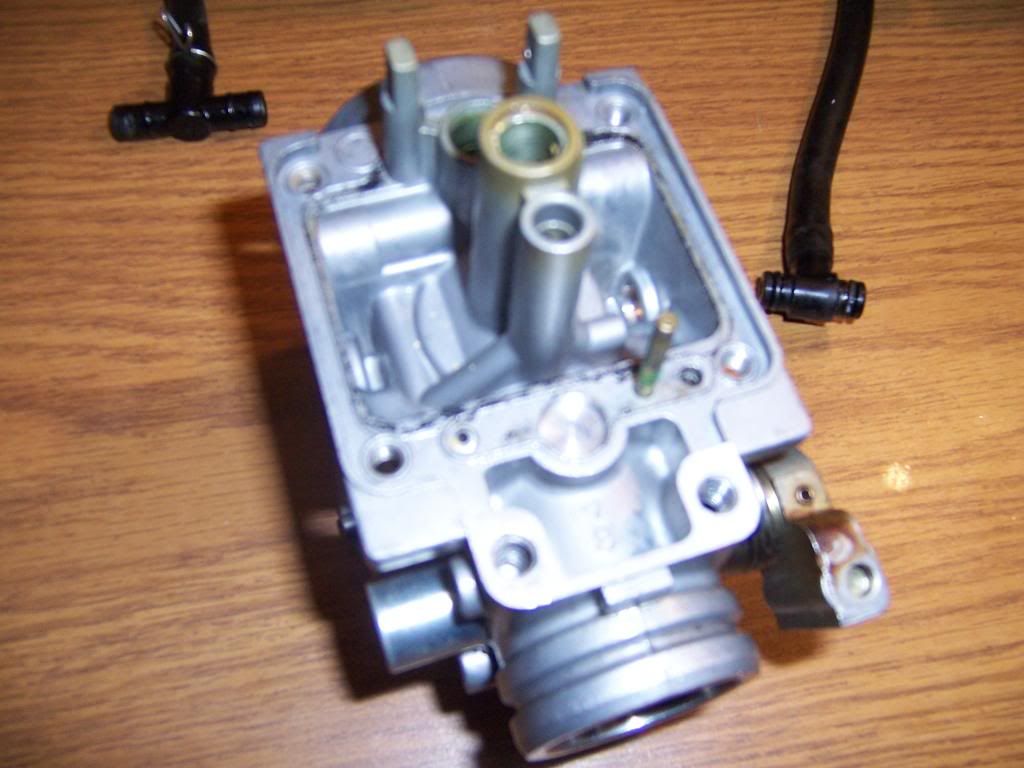
Are the screws schown in the 4th picture (idle screws?) the oines that would be behind the cap that needs to be screwed out..? Becasue what you see is how it was ...
The "idle mixture control screws" sometimes mistakenly referred to as "air screws" or "pilot screws", are the ones at the bottom of the picture. When the carbs are installed on the bike, they are directly over the outlet of the carbs. Yes, they are normally under caps to seal them, but somebody has already saved you the effort of removing them.

It is going to take 10 or 15 turns to get them out, so don't give up. There will be the screw, a spring, a very small washer and an o-ring. Very likely, only the screw will come out, everything else will be stuck inside the carb. The easiest way to remove them is with a drywall screw. Push it in lightly, give it about 1/8 turn, pull it out. You will likely only get the spring the first time, and will have to repeat for the washer and o-ring.
 
The "idle mixture control screws" sometimes mistakenly referred to as "air screws" or "pilot screws", are the ones at the bottom of the picture. When the carbs are installed on the bike, they are directly over the outlet of the carbs. Yes, they are normally under caps to seal them, but somebody has already saved you the effort of removing them.

It is going to take 10 or 15 turns to get them out, so don't give up. There will be the screw, a spring, a very small washer and an o-ring. Very likely, only the screw will come out, everything else will be stuck inside the carb. The easiest way to remove them is with a drywall screw. Push it in lightly, give it about 1/8 turn, pull it out. You will likely only get the spring the first time, and will have to repeat for the washer and o-ring.

Okay - This is making more sense to me...
The previous owner said "We had it running 2 years ago" but didn't elaborate. I think they tinkered with the carbs and screws but never cleaned them properly. The slide were stuck, a float needle is stuck and the varnish from 30 years old gas is coating everything making it sticky and difficult to operate..

:pI would bet they took off the old caps and fiddled with the pilot screws to try to get it running - I found evidence of the carb slide tops haveing been removed as 1 scew was badly stuck and stripped --I worked on that one scew for 1/2 an hour - It took a vise-grips to get it started to back out...
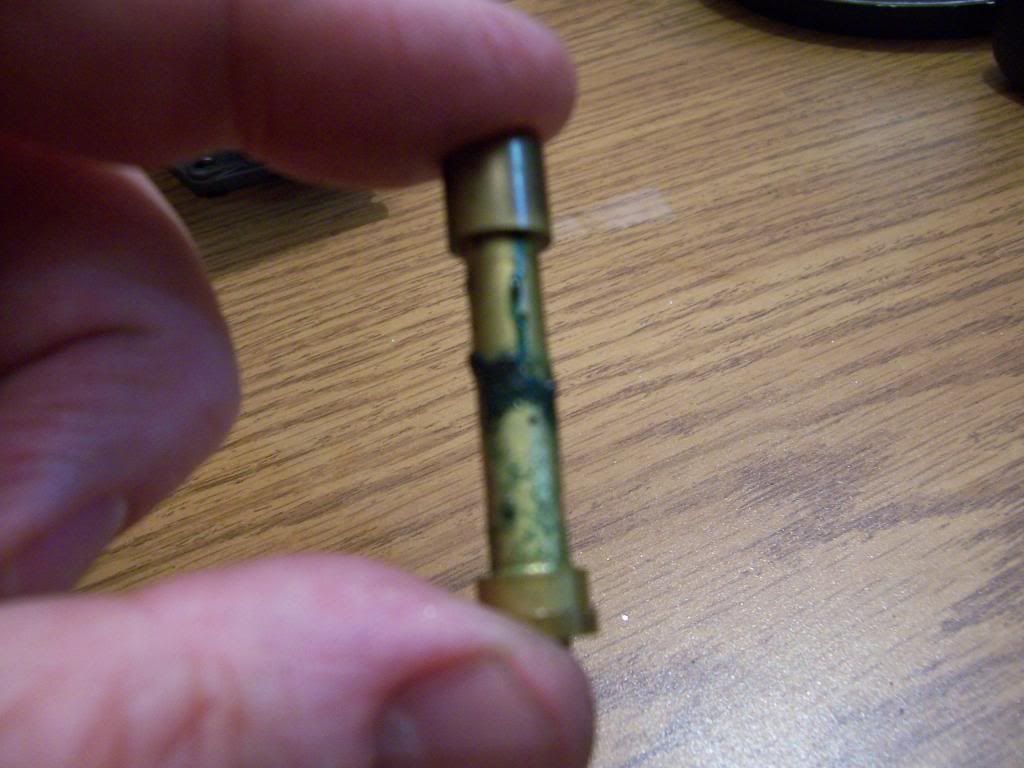
It seems the P.O. wasn't willing to do the carb clean up correctly - so I bought it cheap as a non-runner - ;)

Thanks BassCliff & Steve for the words of encouragement . I am learning every minute as I do this carb cleaning. I downloaded the tutorials to my tablet today so tonight I will have the ready reference nearby. I did most of the disassembly so far from memory of reading these previously.

Tonight I will break them apart fully and get on with the carb dip soaking...Is there any advantage to getting an ultrasonic cleaner machine..? That seems be something others like to do to really clean the carb parts...?

Next question - IN the carb dip chemical - Is there any problem dipping brass parts and aluminum carb bodies at the same time..? Will they interact and discolor..? :?:
 
Don't just grab any screwdriver to attack the pilot jet and the idle mixture screws- you need one that fits them completely (all the way across slot), so you will likely have to grind off the heel of screwdrivers to fit inside the "tunnels".
Consider soaking them with decent rust penetrant (not wd-40), before you attack. Heat might also help if they don't appear to budge as carb body will expand more than brass screw.
 
Next question - IN the carb dip chemical - Is there any problem dipping brass parts and aluminum carb bodies at the same time..? Will they interact and discolor..? :?:
No problem dipping different metals at the same time, just make sure you have no rubber pieces in there that you plan to re-use. :eek:

Give me a call in the evening (after 4:30 EDT) if you need help (with the carbs :-\\\).

.
 
Don't just grab any screwdriver to attack the pilot jet and the idle mixture screws- you need one that fits them completely (all the way across slot), so you will likely have to grind off the heel of screwdrivers to fit inside the "tunnels".
Consider soaking them with decent rust penetrant (not wd-40), before you attack. Heat might also help if they don't appear to budge as carb body will expand more than brass screw.

Why not WD-40 ..?
What are the recommendations instead...?
Thanks for following this thread also and your input...
 
Why not WD-40 ..?
What are the recommendations instead...?
Thanks for following this thread also and your input...
The classic fluid that everybody knows as WD-40 is not really a rust penetrant or a penetrating fluid in general. :eek:

It is designed, and sold, as a product that displaces water, hence its hame: Water Displacement - 40th forumula.

However, they have a new line of products that does include a rust penetrant.

Until someone tries one of them and reports it here, we will probably continue to recommend PB Blaster, Kroil and a few others, including a home-brew mix that is a 50-50 mix of ATF and acetone.

.
 
Tonights progress - Made some headway

Tonights progress - Made some headway

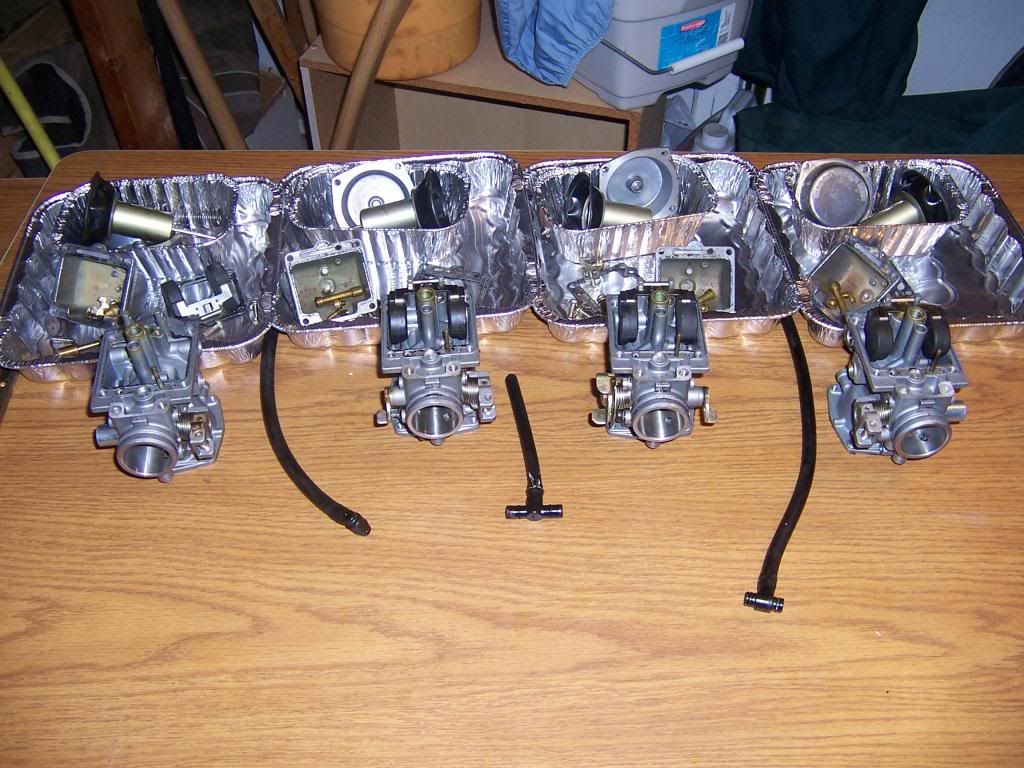
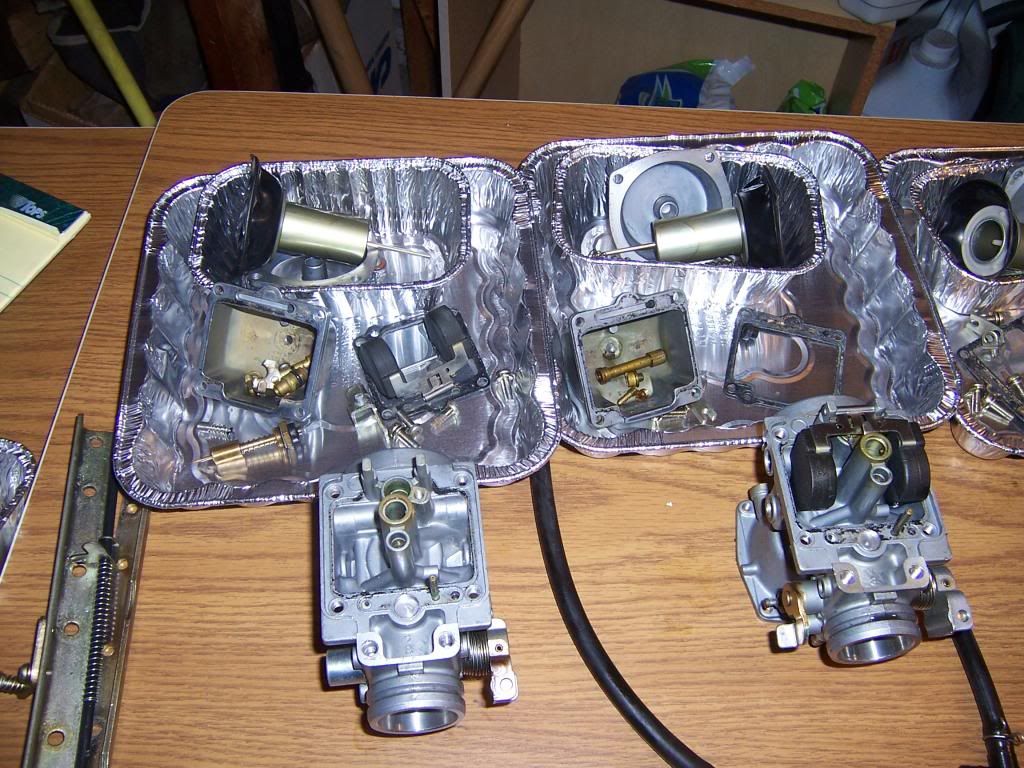
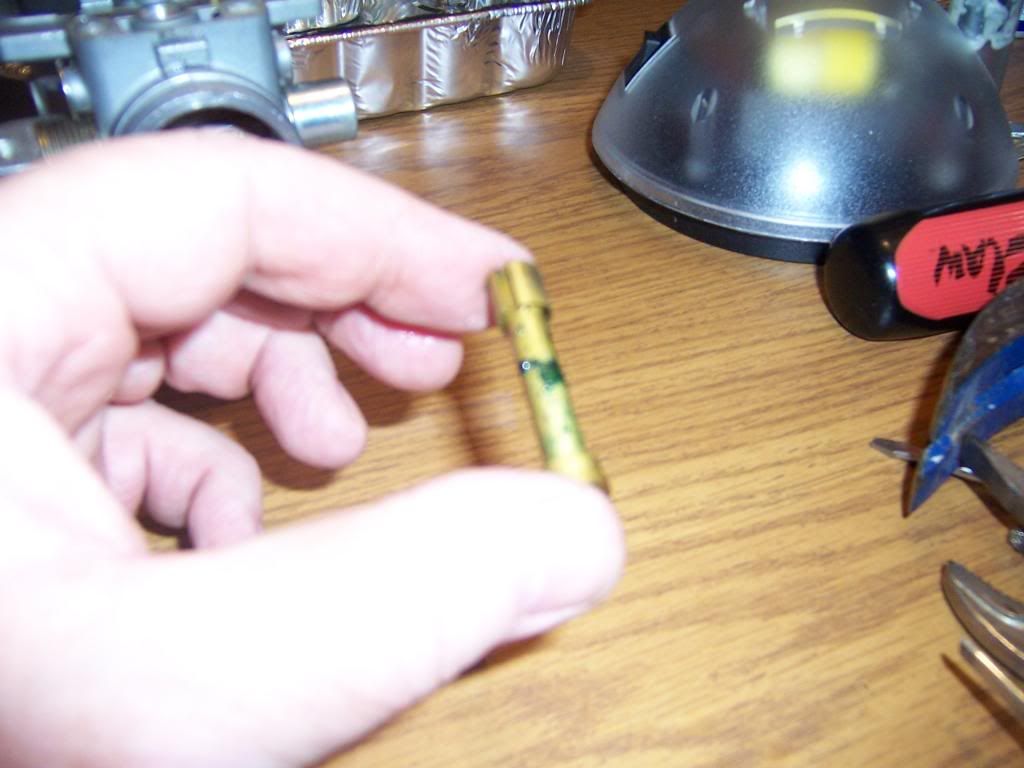
Thanks to the advice here and my ability to read the great tutorials found on GS Resources I was able to seperate the carbs, and have #1 entirely taken apart at this time. Found some pretty ugly green stuff on the needle jets ...Lots of fine varnish like golden brown patina on metal parts...and some black goo (?) that I think was once fuel or ...

Question -- The brass "straw" sticking up - Does it stay or come out for cleaning..? Right now it is still in the carb body...

Pictures -

100_0958_zps749c93e9.jpg


100_0957_zpsf096a8af.jpg


100_0956_zpsa57e5dee.jpg


100_0955_zpsee7827c3.jpg


100_0953_zps44345925.jpg


Notice how I am trying to stay as organized as possible - I even am taking pictures as I disassemble t in hopes to aid my reassembly process if needed...A few more days at this pace and I will have a running 650..! :cool:

For anyone looking this thread over - This is MY FIRST ever carb cleaning. So that is why I am so cautious. But thanks to the gang here I am confident I will get it done properly.

I hope all these pictures don't annoy anyone...:-s
 
If it's metal....dip it! Organization is a good thing when it comes to carbs.

cg
 
Thanks for the guidance this far...

Thanks for the guidance this far...

gsrick - thanks. I watched them and found I was on track.

Todays update is simple. (Sorry - no pictures to share)

I got all the carbs broken down, all the jets out, all the parts organized.
I purchase an Ultrasonic cleaner last week when it was on sale and cleaned all the carb bodies and bowls in a solution of water and simple green. The carb top covers as well. The ultrasonic cleraner did really well on these parts. All the varnish, and gunk is gone inside and out.

My plan is to carb dip all the brass parts that have the real goo on & in them this Saturday and then ultrasonic them as a "rinse". Then reassemble the entire thing. I received my new orings - but will need a quick trip to the hardware store to replace a few screws that ended up with stripped out tops. I may try to switch to allen head screws instead where I can...just easier really ...
 
gsrick - thanks. I watched them and found I was on track.

Todays update is simple. (Sorry - no pictures to share)

I got all the carbs broken down, all the jets out, all the parts organized.
I purchase an Ultrasonic cleaner last week when it was on sale and cleaned all the carb bodies and bowls in a solution of water and simple green. The carb top covers as well. The ultrasonic cleraner did really well on these parts. All the varnish, and gunk is gone inside and out.

My plan is to carb dip all the brass parts that have the real goo on & in them this Saturday and then ultrasonic them as a "rinse". Then reassemble the entire thing. I received my new orings - but will need a quick trip to the hardware store to replace a few screws that ended up with stripped out tops. I may try to switch to allen head screws instead where I can...just easier really ...

Yes go to the allen heads on both the top cover and fuel bowls. I even put them on the gang rails as well. Get rid of those JIS screws any where you can.
 
Yes go to the allen heads on both the top cover and fuel bowls. I even put them on the gang rails as well. Get rid of those JIS screws any where you can.
I do this as well, replace all the JIS phillips screws with allen head stainless steel screws. Including the rails, it just makes it easier overall to do it correctly the first time.
Ace hardware has a good selection IIRC, although I got mine in bulk from McMasterCarr.
 
Gettin it done ...

Gettin it done ...

I am ready for the reassembly ...
Do I lube the slides with something ?.
All is clean and shiny ...
New allen screws for everything :)
 
You don't have to lube the slides, but you can if you wish. I usually put a VERY LIGHT coating of 3 in 1 oil on them because I do lots of testing prior to the first lighting of the engine.
They will get washed down with gasoline the first time it runs, anyway.
 
stumped...

stumped...

Okay...I am starting to put things back together...

1-- float height setting?.
2-- idle adjust screw setting , turns out to start ?.

I know I should have this info ...but I cant put my brain on it right now...


:confused:
 
1. 22.4 +/- 1.0mm, measured from the gasket seating area of the carb body (with no gasket in place)

2. You talking about the idle SPEED screw or the idle MIXTURE screw? I am going to assume the mixture screw, as the other one will be rather obvious.
Most of us start with them 2 1/2 to 3 full turns out from lightly seated. When the bike is running and warmed up, you will adjust those screws for best idle speed.
They might end up in the 2 to 1 /2 turn range, and they won't necessarily all be the same when you are done.

.
 
The idle whatever screw that is initially inaccesible ...we drill off the cap ...that is the one ...

Floats at 22 right now :)

Going to 3 turns for starters I guess ...

Thanks :cool:
 
Yep, that would be the "idle mixture adjustment screw". :D

Starting with them three turns out is a little like having a bit of choke applied when you start the bike the first time. It will be running a little rich, but it will run better when rich than lean. If you try starting with the mixture screws too lean, you will have a VERY hard time starting it, and you won't know just what the problem is, so it just makes more sense to start with the rich mixture to eliminate one possibility.

After the bike warms up, you can slowly turn the screws in, listening for highest idle speed. You can also do this while the sync gauges are still connected, that "highest idle speed" will show up as a higher vacuum level on all cylinders. :D

When you are done tweaking the mixture screws, you may find that they are in the 2 to 2 1/2 turn range, and don't be surprised if they are not all exactly the same.

.
 
I Appeciate the help

I Appeciate the help

SO far I have ALL the carbs re-assmebled.
Next will be getting them "ganged" back together correctly.
Then back onto the bike for an attempt to start & fine tune them..
But first I want to change the oil and filter so I know the engine is ready to run.

A few days ago I changed the final drive fluids - the stuff draining out was pretty smelly - and green tinted - but still seemed to have good lubricating properties - NEW OIL INSTALLED.

This process is taking some time as I am going slow and methodically whenever I get some free time from my hectic life. I al really looking forward to riding this beauty one day soon..but will not do so until I know it is right...

Tires are in the garage but not on yet...
Brakes will need a complete cleaning out of all the old brown goo that used to be brake fluid...
Rubber hoses are laying on the work bench waiting for installation.

A few more weeks perhaps...:|
 
Back
Top