Announcement

Collapse
No announcement yet.

'81 GS550 Cafe Build

Collapse
X
 
  • Filter
  • Time
  • Show
Clear All
new posts

  • D-Mac
    Guest replied
    As usual, I didn’t manage to get anything done over the weekend. Too many kids birthday parties and such.

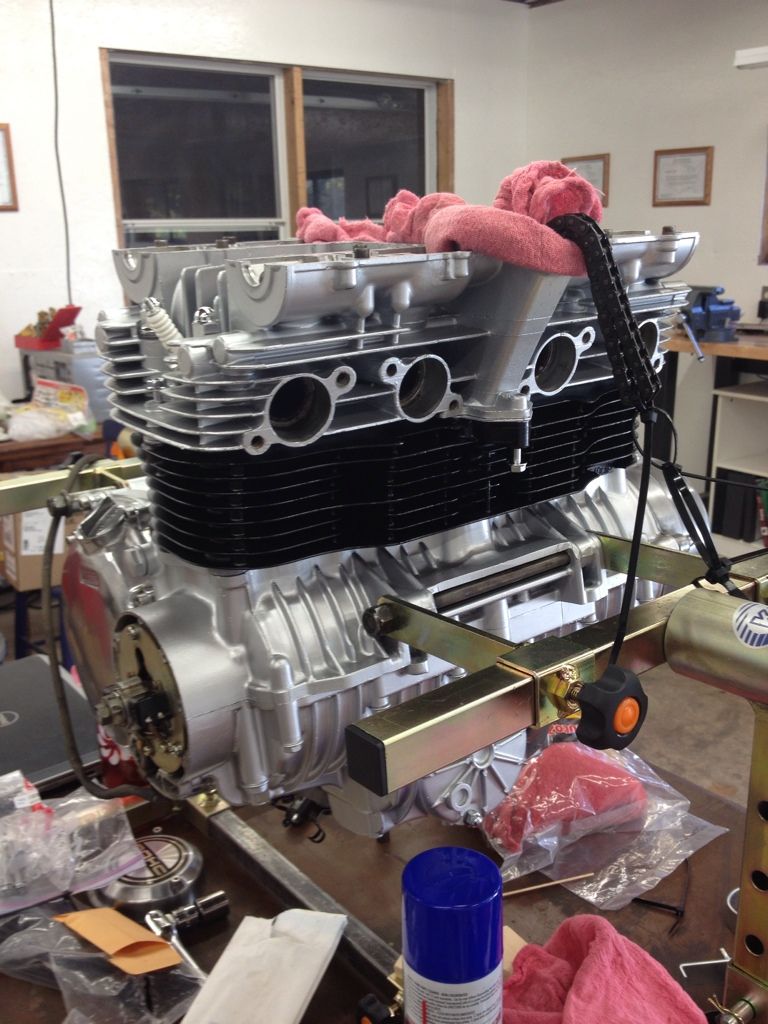
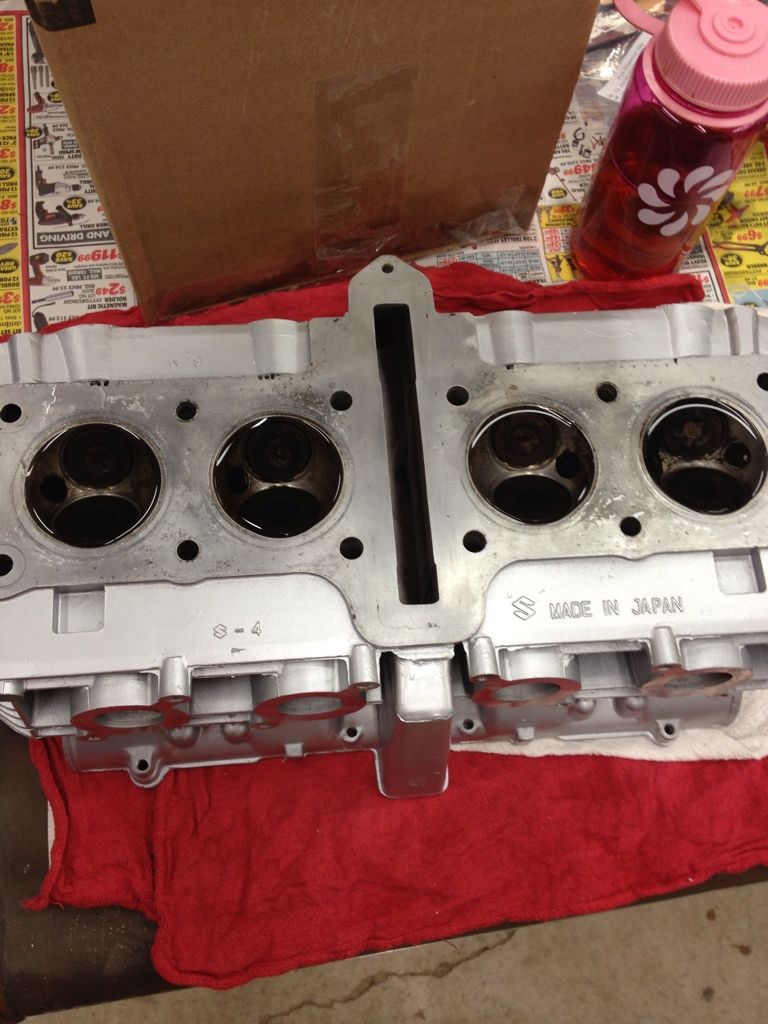
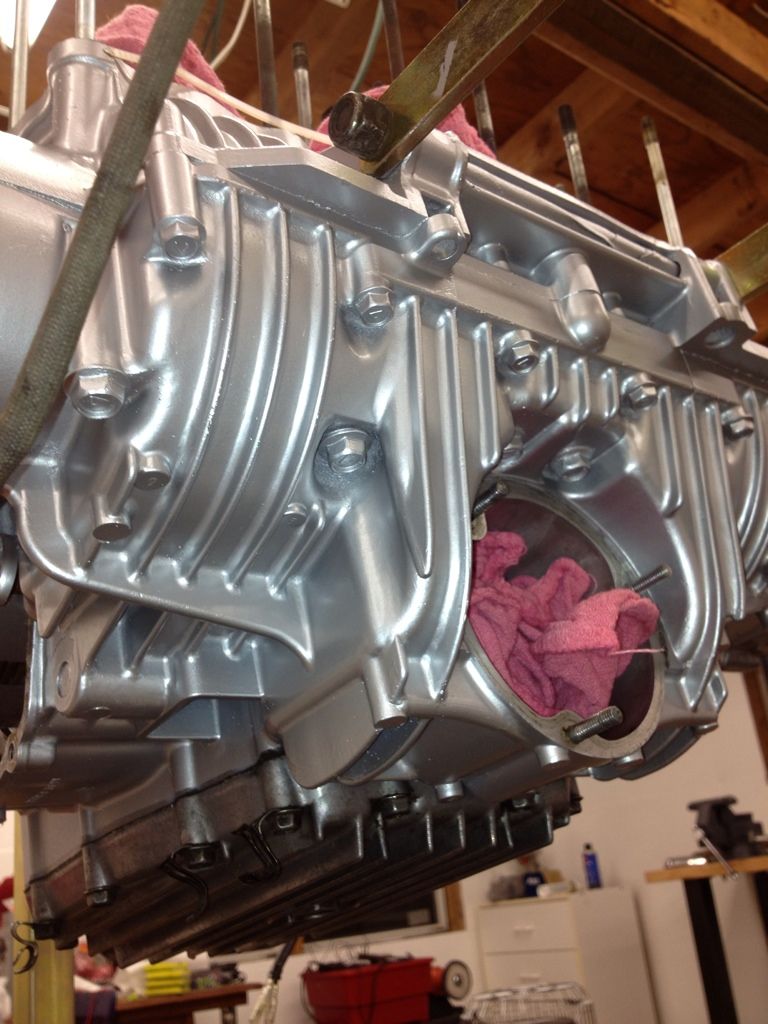
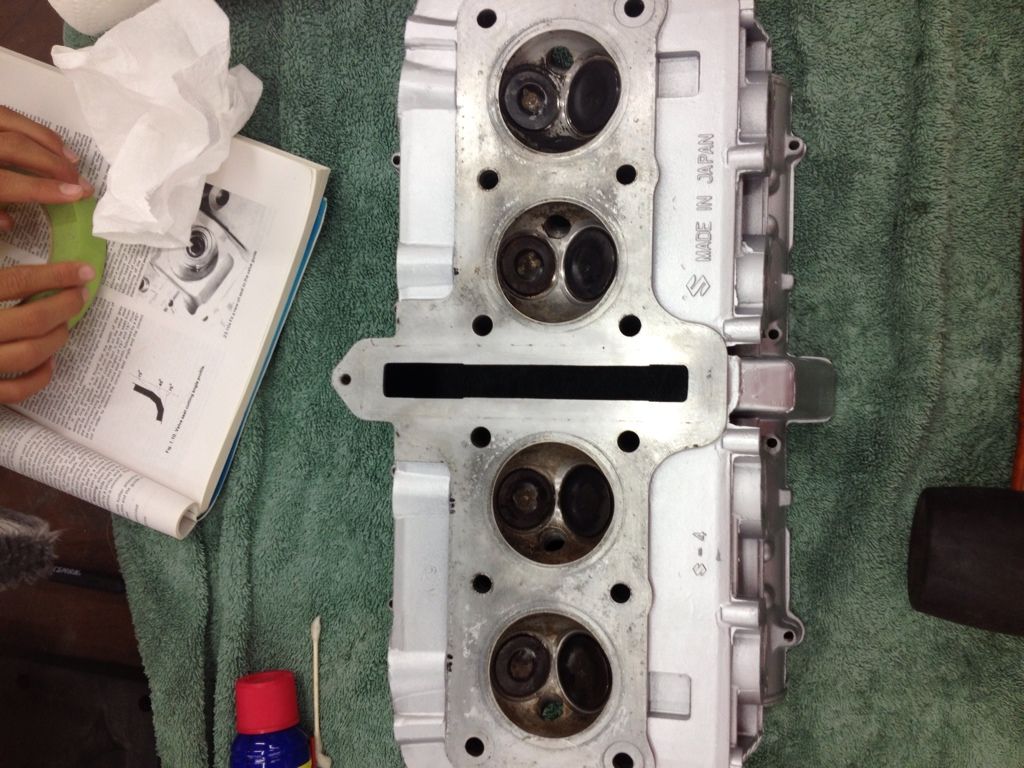
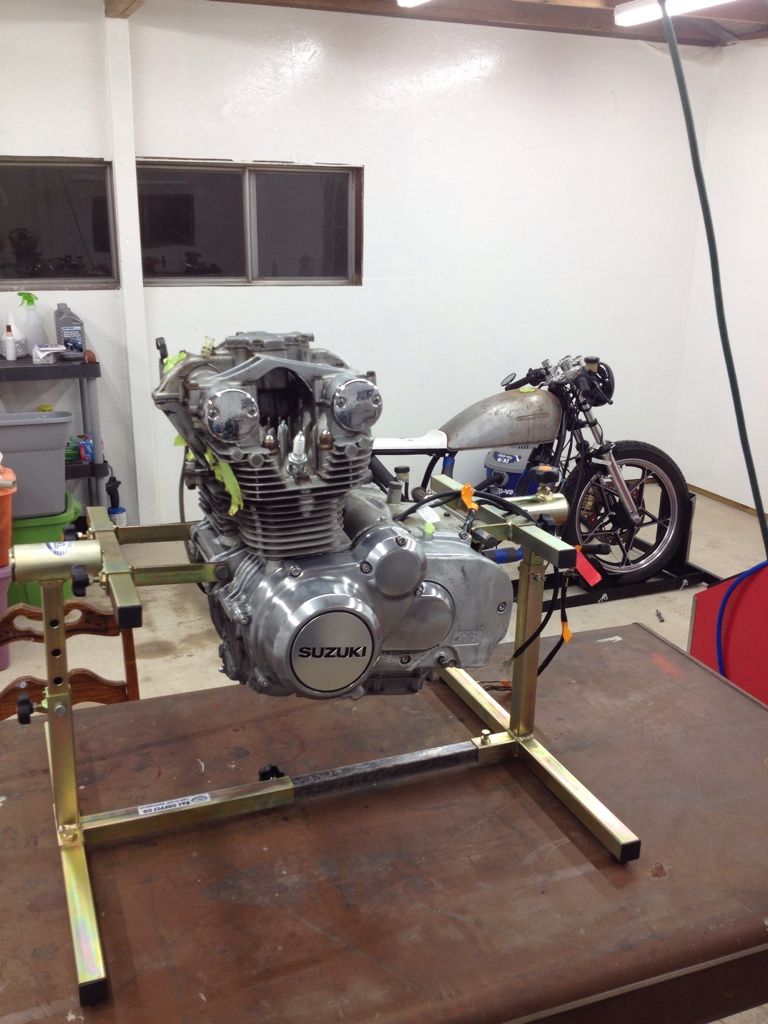
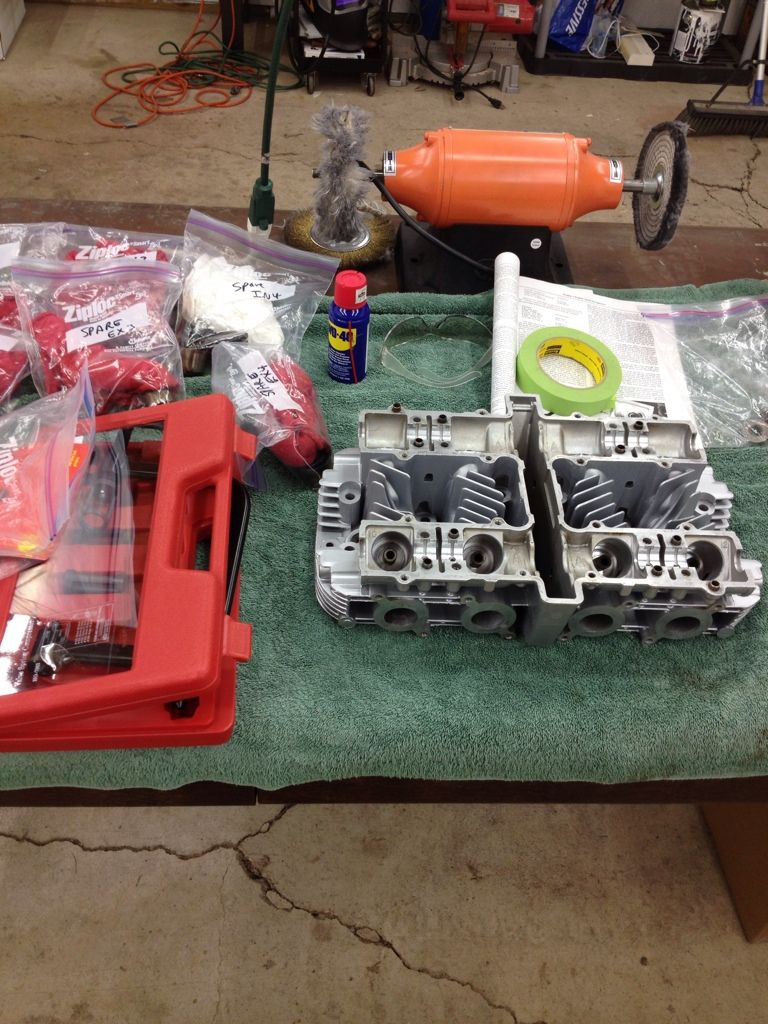
    As I mentioned the other day, I ended up removing and replacing the cylinders to get the guide pins in, so next up was the head, which was now ready FINALLY and not leaking. The only other thing I did was knock down a fine edge on one part with a jewlers’ file (I’m sure it didn’t matter much, but I didn’t want a fine burr on an outside edge to prevent a proper seal on the head gasket).

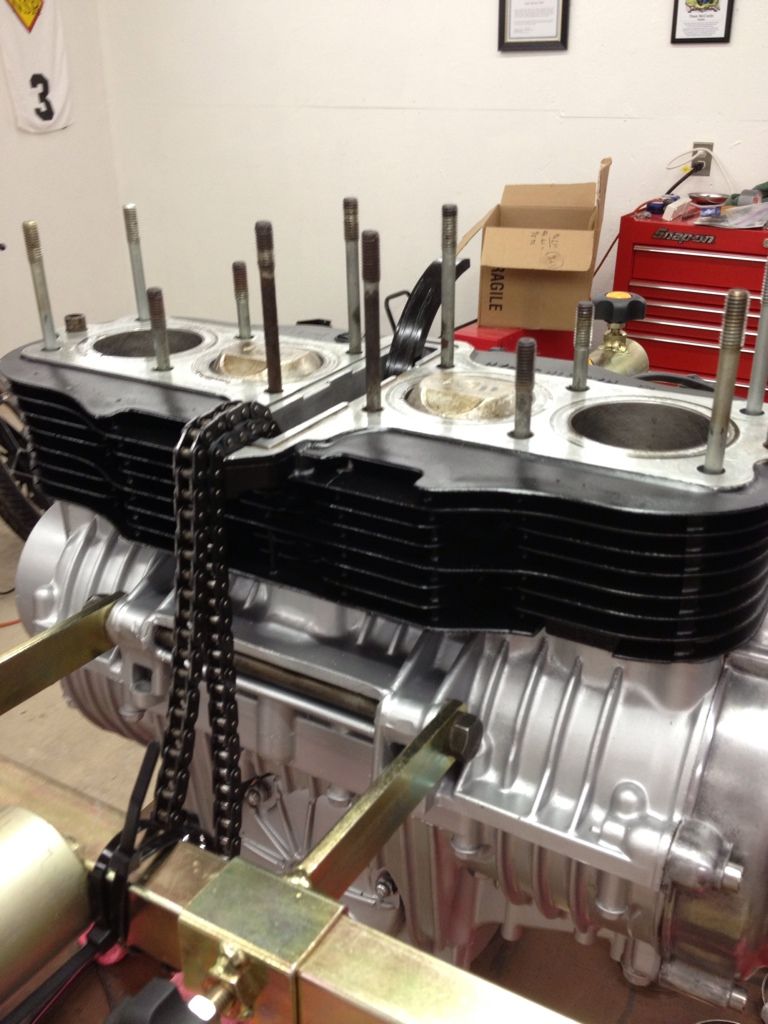
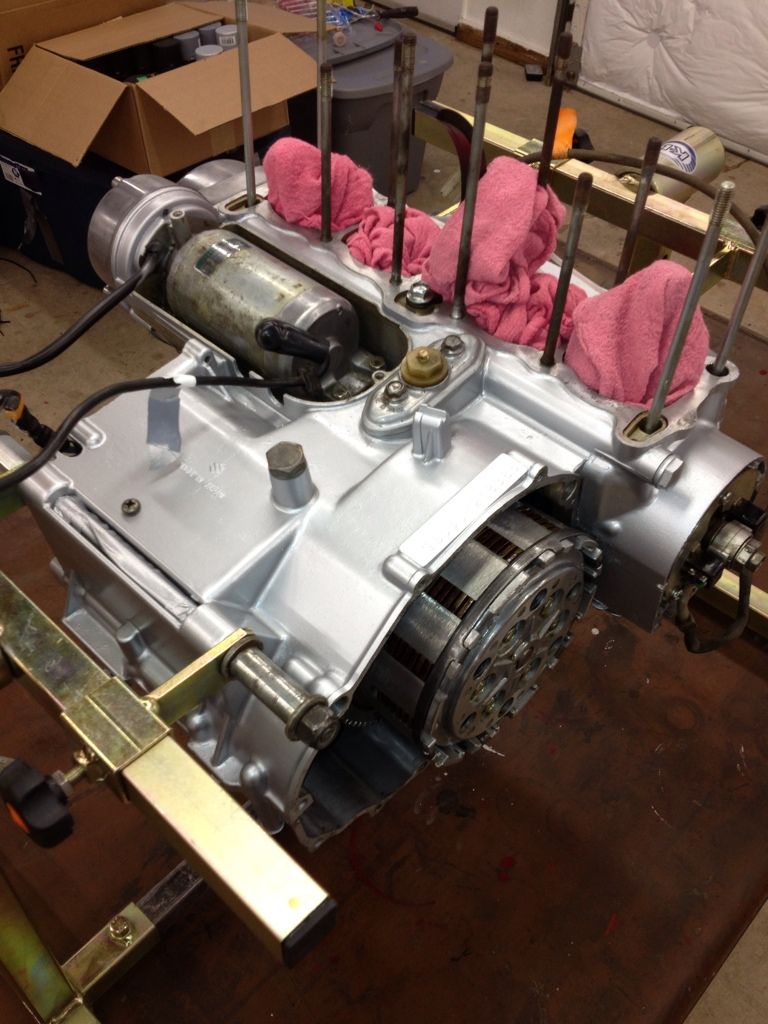
    It took a little juggling to get the cam chain up through the head without any help. I went with a Suzuki head gasket and o-ring, even though they are fairly pricey. Then I torqued the various fasteners in the designated order in 4 steps. I used all new fasteners because the old ones were a little beat and rusty.
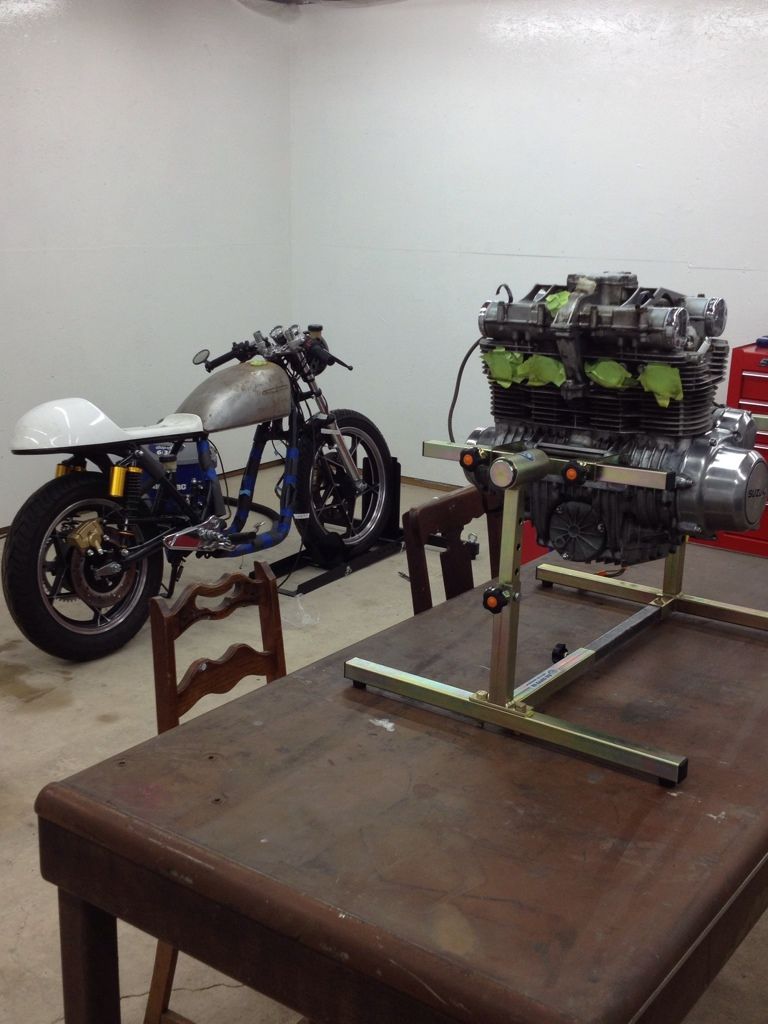
    Pretty. Note that I hadn’t tightened some of the fasteners down when I took this photo (like the bolt on the front of the head/cylinder).


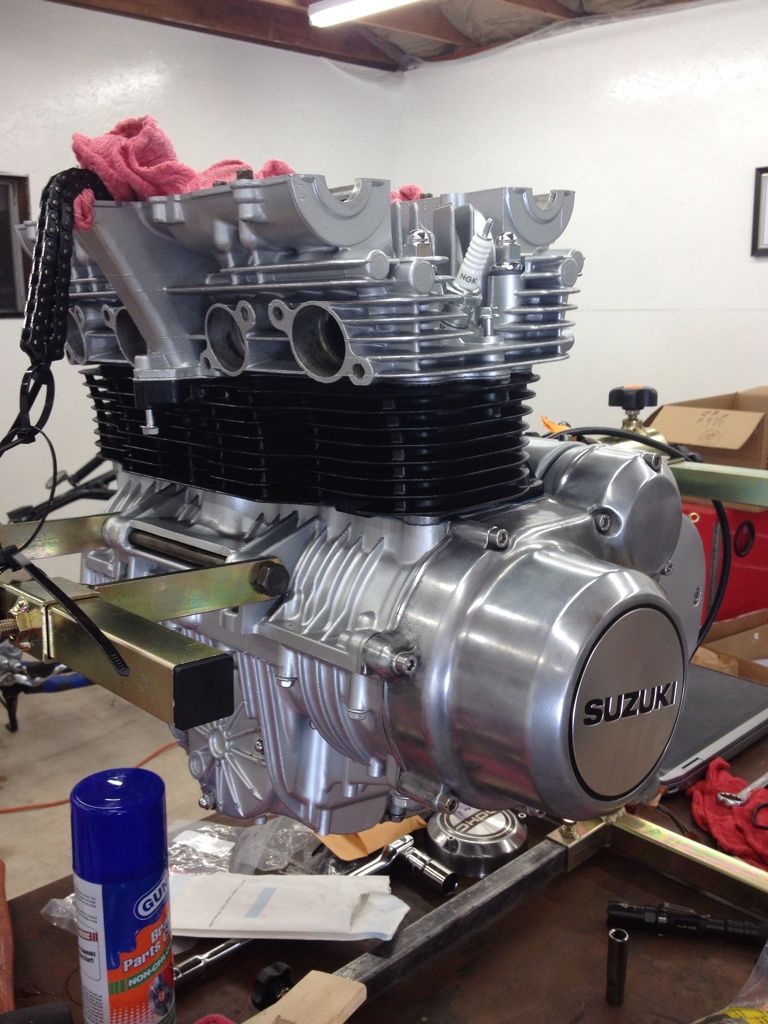
    Now to tackle valve lash/cam chain tensioner, timing, etc. This will take a while.

    Leave a comment:


  • D-Mac
    Guest replied
    Two steps forward.......

    One set of valves failed the test. Both leaked a little and the chamber was empty after 12 hours.

    So I removed and re-lapped those valves a little more. I reinstalled them and the second test was MUCH better. I still had one valve leaking a little more than I wanted, so pulled it yet again, lapped a little more, and tried again. A tiny bit better still (good enough I think - no visible weeping until after ~8 hours, and then only the tiniest amount).

    Then, as I was cleaning up, I realized that I'd missed replacing a guide pin between the cylinders and bottom end. 
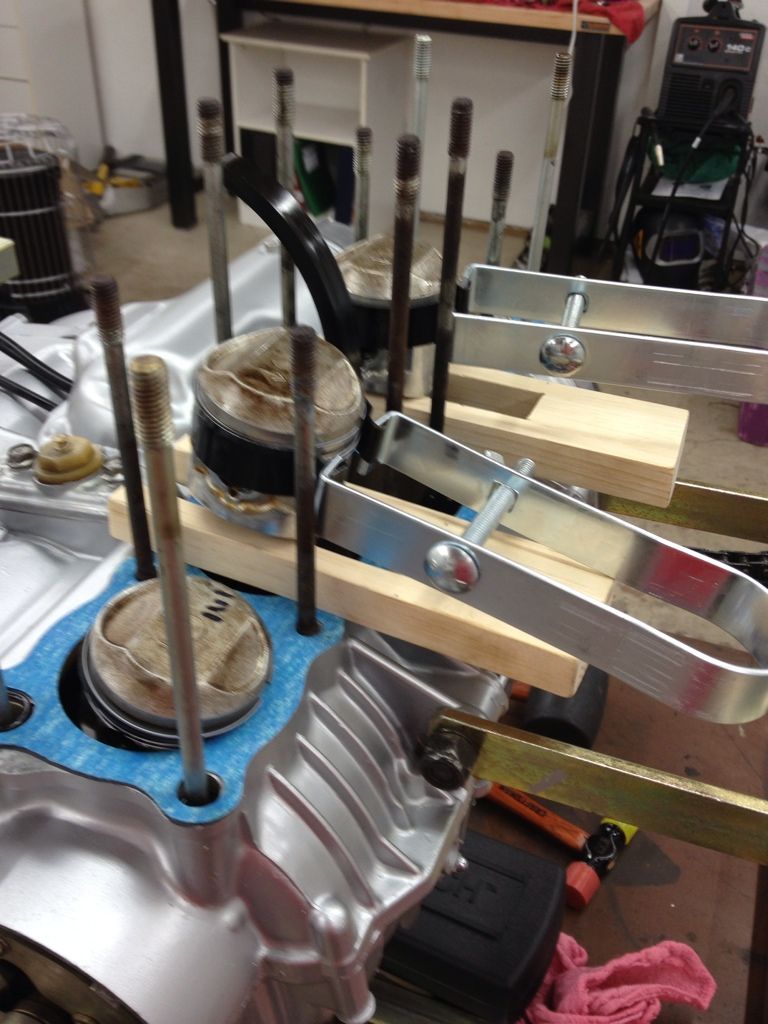
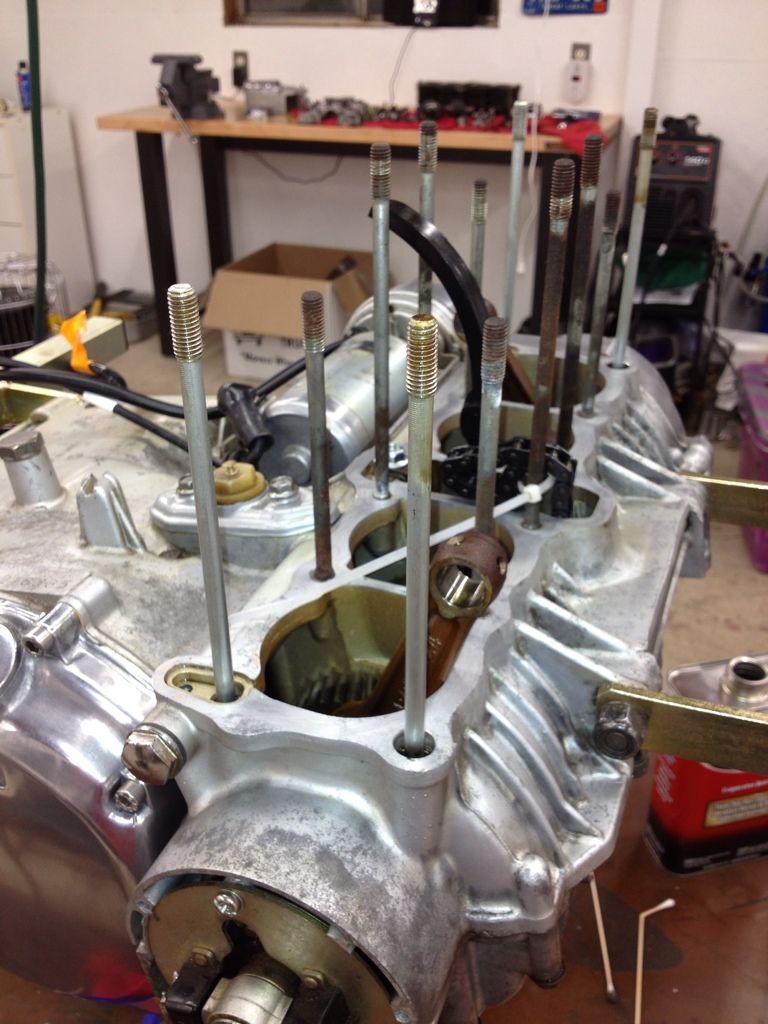
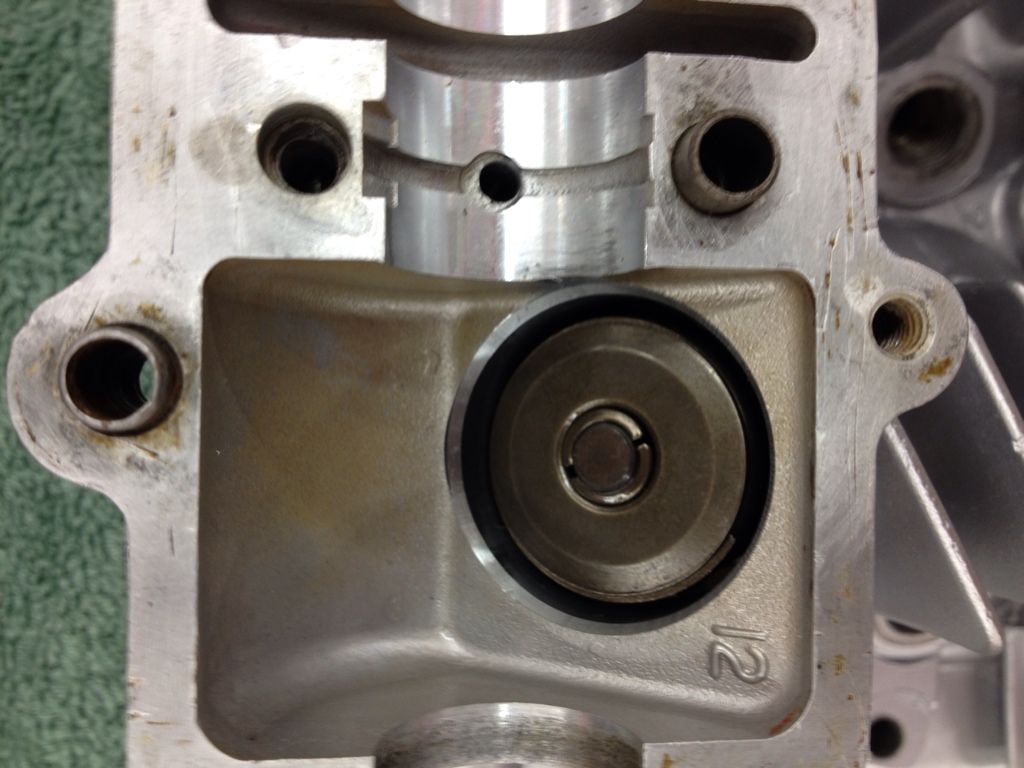
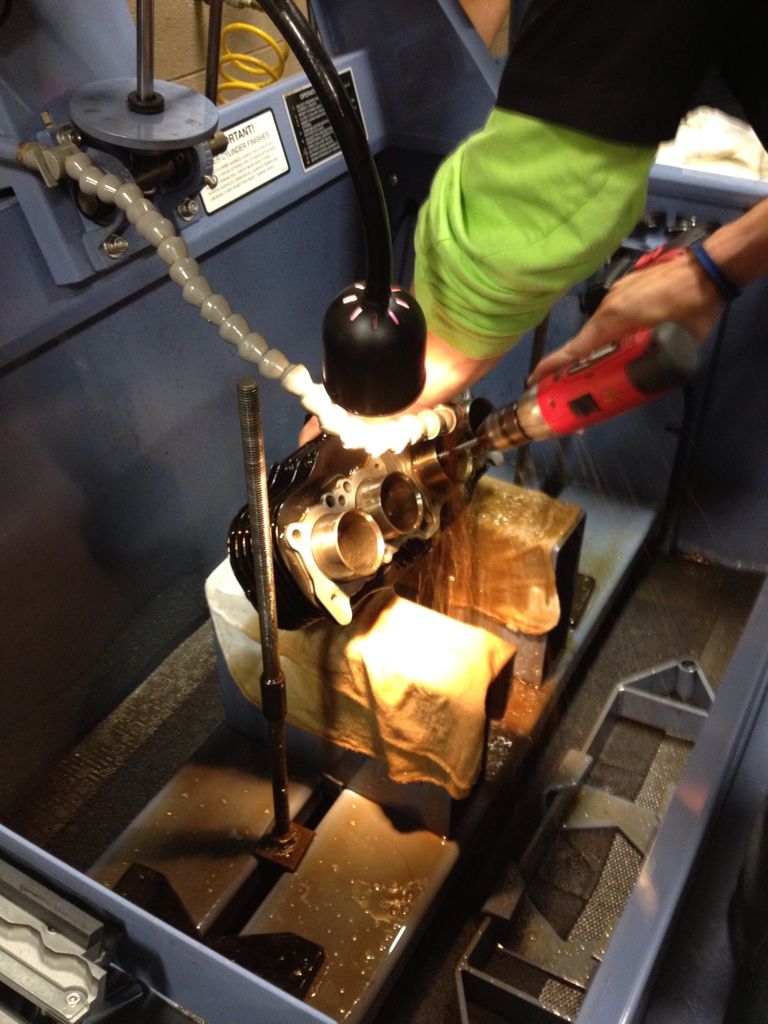
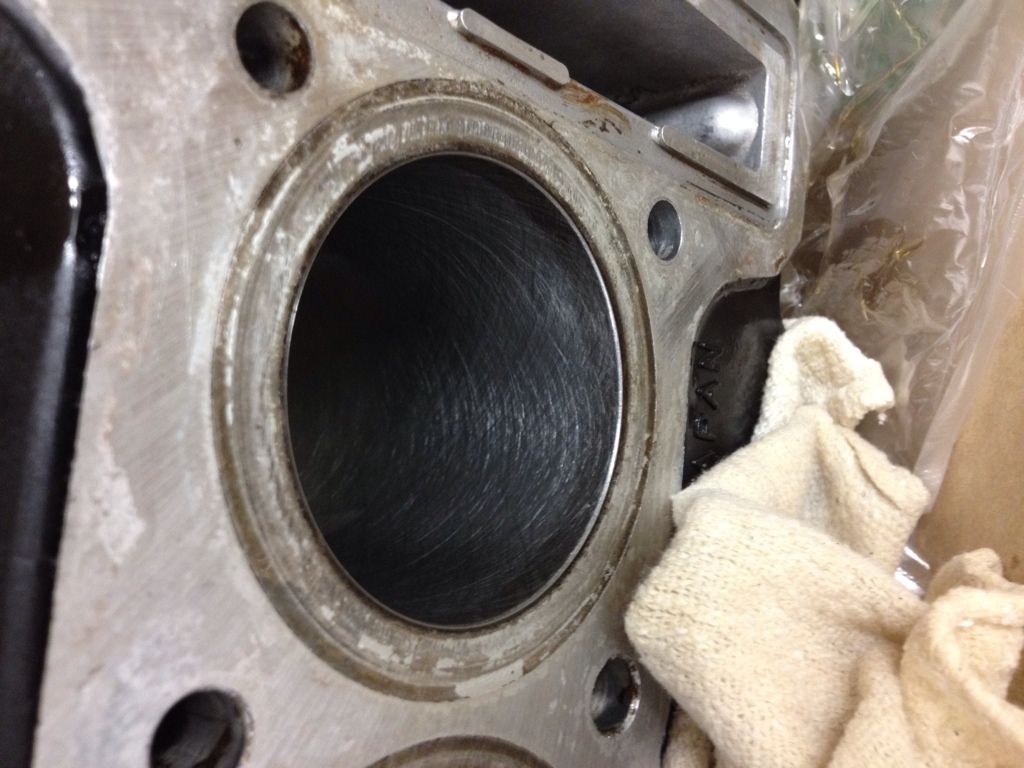
It goes around one of the studs, so the "easiest" thing to do was to pull off the cylinders, install the pin, and replace the cylinders again. It was easier the second time, although I still had to get one kid and my wife to help out.

    I'm FINALLY ready to get the head back on.

    Leave a comment:


  • Sci85
    replied
    Looking good d-Mac! You know the best thing about this time of year? Asking for things you needed for the bike project for Christmas!

    Leave a comment:


  • D-Mac
    Guest replied
    Well, it’s been an interesting couple of weeks, but I do have a little progress to report.

    After checking the ring end gaps, I put the new rings back on the pistons, reattached the pistons, and got the cylinders back on.
    I had a lot of pics of the process, but I managed to drop my smartphone in a lake last week (!), and the pics were lost.

    After the phone fiasco, I was busy finding a home for this….a pig we bought from 4H (mmm bacon!)


    ….then my old lawn mower blew up. I don’t know why. The oil level was fine, but it came with my house and had over 1800 hours on it, so I suppose it might be due for a rebuild. I picked up a new mower, but there’s more money gone from my “project” fund.


    Anyway, here are a few pics of cylinder installation…

    The procedure for installing the cylinders calls for placing the middle two pistons up and lowering the cylinders down over them first. I had trouble getting the first two pistons in – even though the cylinders are tapered at the bottom. After trying a couple of times myself (along with a few pieces of wood to hold them in place), I decided to get some cheap ring compressors. Hose clamps would work too, but I figured I might as well buy the tool for the long-term. Here are the middle rings compressed and ready for the cylinders.


    After getting the cylinders over pistons #2 and #3, I had a little trouble sliding the cylinders down to meet the outside pistons. It turns out I wasn’t able to hold the crank steady and it was getting turned over. I had the cylinders a little cocked too. With some help from my kids, I was able to keep things steady and compress the rings for pistons 1 and 4 enough to get them in easily. Then it was just a matter of gently tapping down the cylinder the rest of the way, and it was done! New base gasket and o-rings were used of course.


    Before re-installing the head, I decided to test my freshly lapped valves. I poured some kerosene into each combustion chamber. After 30 min there were no leaks, but I’ll check again in the morning.


    Over the weekend I plan to install the head and begin the long process of getting the valve lash correct. There was no lash clearance anywhere when I began the project, and with re-lapping the valves I’ll have even less now. That, and I also managed to mix up a few buckets. The only way I can get the proper-sized shims is to use thin enough shims so that I can measure SOME gap for each valve, and then place in the appropriate ones based on a known shim used and whatever lash is remaining. Not a quick job methinks.

    Leave a comment:


  • Sci85
    replied
    Nice work on the engine D-mac. And yeah, I feel the same way as do many on here. I'm on my third try with with stinkin gas tank paint job doh!

    Leave a comment:


  • D-Mac
    Guest replied
    Just noticed that the clutch pushrod seal looks shot. Looks like an easy replacement (screw in drywall screws and pull old seal; carefully tap a new one in).

    My clutch rod also came right out the left side. I thought it was supposed to be threaded in tight. No matter I guess.....the right-side cover is off anyway and the part it pushes on looks to be accessible enough to hold from that side. Hopefully I can just thread it back in without having to remove the dreaded basket and mess around in there (I didn't look closely, but the parts diagram makes it look like a threaded rod).

    What ISN'T wrong with this bike?!

    Leave a comment:


  • D-Mac
    Guest replied
    September 27, 2012

    Progress continues and is picking up again……

    First off, I got the top end removed from the original engine. It didn’t come apart as easily as the spare that I’m using, but it all looked OK. I might use the camshafts from it, but the rest of the head is probably scrap. Unfortunately, the front bolt where the head meets the cylinders was broken and glued on somehow (?!) As a result, the head had leaked a lot and it might even be a little warped. The fact that the head also has five broken exhaust studs (one reason I’m using my spare), means I probably won’t be using it on another project. At least engines are cheap for these things. Pistons looked ok, but I’ll be using the ones that match the other cylinders.

    Anyway, here’s a shot of how it looked during cleaning (don’t worry – I very gently rested the connecting rods on the engine just for this pic – they are wrapped otherwise). Despite cleaning, and cleaning, and cleaning it, it was still hard to keep debris from going into the bottom end. I also cleaned up the threads on the engine studs.


    I carefully removed the base gasket residue, cleaned for many more hours with an assortment of pics, brushes, cleaners (mostly a lot of acetone), and rags. Then I spent many more hours carefully taping everything off. I pulled the right cover and oil filter cover and taped the mating surfaces off, but decided to tape carefully over the stator cover rather than removing it.

    Then I set up a little painting tent…..


    Donned a mask and gloves (I look a little red here!)


    And started painting (finally!) Here’s the primer coat done.


    At the last minute, I changed my mind and went with “universal aluminum” instead of black. So the only black is the cylinders – just like an old café bike.

    Top coat


    I also painted the top starter cover, oil filter cover, and outer sprocket cover.

    Since my last post, I’ve decided to put a cheap heater in the shop. I really want a fancier one, but this one fits my current budget and works great.


    Safety first. So I added some other items ….

    Fire extinguisher. I’ve also put a carbon monoxide detector and smoke detector in the shop.


    I also have some BIG news about the fuel tank and seat cowling. My wife went to pick up her car from a body shop this week that specializes in European cars. They know her quite well because her BMW has been there FOUR times over the past year (it was hit hard three times while parked and she also hit a deer). Anyway, she noticed that the owner has some nice custom bikes, so she suggested having them shoot some paint for me. They were excited about the idea, so she took the parts to them and a note I wrote with some suggestions. They will fix the dings in the tank, smooth over the original side plates, and shoot some paint within the next 3-4 weeks.

    In other news, I ordered K&N air filters and a drive chain this week.

    Next up…..engine reassembly and putting it back in the frame! I hope to start that this weekend.

    Leave a comment:


  • Dec79
    Guest replied
    Originally posted by D-Mac View Post
    Where did you get your coils? I'm thinking about getting new ones (along with plug wires - mine are pretty ratty).
    Dyna 3 Ohms - do a quick search in eBay

    Originally posted by ClineDesign View Post
    How did you mount your ignition switch? Really nice work!
    Thanks, a couple of tabs carefully welded to the inside of the frame, took a bit of positioning to get right

    Leave a comment:


  • ClineDesign
    Guest replied
    How did you mount your ignition switch? Really nice work!

    Leave a comment:


  • D-Mac
    Guest replied
    Originally posted by Dec79 View Post
    Great project dude, I love your work ethic - very neat!

    I managed to relocate my ignition on the right hand side just below the tank:


    Dec
    I like that MUCH better. It's on my "to do" list at some point. In the long-term, I'm going to do something fun with the gear indicator lights too.

    Where did you get your coils? I'm thinking about getting new ones (along with plug wires - mine are pretty ratty).

    Leave a comment:


  • Dec79
    Guest replied
    Great project dude, I love your work ethic - very neat!

    I managed to relocate my ignition on the right hand side just below the tank:


    Dec

    Leave a comment:


  • D-Mac
    Guest replied
    September 17, 2012

    Yesterday I put the rest of the valves back in. Nothing unusual to report here. A few pics….


    Since I now have a good shop space at home, I decided to bring the original engine home from my office. Recall that I’m using the bottom end of this engine, along with the covers I polished, but I will be replacing the cylinders/pistons and the rest of the top-end from the lower-mileage parts engine I’ve been rebuilding from scratch.


    My next step is to strip down this engine to paint the bottom end. Then I can FINALLY reassemble everything and get it back in the bike!

    Leave a comment:


  • D-Mac
    Guest replied
    September 15 continued (part 3)…..

    Magical assembly lube:


    I need to work on getting the tank and seat cowling painted. I have piston rings too, so I think I can continue working on the engine for a while (I still gotta paint the bottom end and swap parts between the two engines I have). I have a lot of wiring challenges coming up too.

    I also picked up this little guy. 1975 Honda CB125S. Runs rough, but looks almost like new and has super low miles. I am teaching a first-year college class that will include having the students take it apart and getting it running better. Fun! The 6-volt electrical system is a bit of a pain though.

    Leave a comment:


  • D-Mac
    Guest replied
    September 15 continued (part 2)….

    This August also brought lots of new changes. I moved to a much bigger place with two large garages. One for my wife and one for ME! “My” garage has two parts – an L-shaped outer garage that was built a couple of years ago (600 sqft) and an older inner part that is about 520 sqft. I decided to insulate and re-wire the inner garage as my shop. I will heat it in winter. I started by insulating it completely, installing OSB, priming and painting the walls, re-wiring everything (including all new lighting), and fixing the door. It’s nearly done, although I haven’t really organized or unpacked anything yet.

    Some pics of my new “shop”:

    Insulation is done and OSB walls are up.


    Yesterday. Painted, finished wiring new lights, and now ready to start moving in and working on the GS again!


    The new house has also brought a lot of new maintenance things to keep me distracted (massive lawn, pool, new garden to dig, etc. etc.), so I’m just now re-focusing on the bike.

    My new gauges came in. Sweet!


    I think I like them in this spot. Looks compact and pretty retro. I need to re-locate the ignition and replace it with something that actually works (mine is pretty much toast anyway).


    Here are some other pics of the bike as it sits right now:


    I’ve also started prepping the top-end. I did the valve seals tonight, and put back in three of the valves so far. My cheap valve spring compressor seems to work fine. For assembly lube I’m using STP, even though it can cause slippage problems for a wet clutch if you use a lot of it. It sticks well and all of the mechanics I worked with over the summer use it on every engine they touch. I figure that if it works OK on a modern sportbike, it’ll be OK on a GS too. Hell, I don’t even know if my clutch is any good anyway.

    The head ready for valves:


    More in next post….

    Leave a comment:


  • D-Mac
    Guest replied
    September 15, 2012

    Part 1 of 3

    OK….so where were we…..

    First thing I did since my last update was strip the old paint off the tank. No more “redneck rocket!” About time really.

    Bike before:


    Here is the tank after stripping:


    I then rinsed the inside of the tank with acetone. It lifted off the old Kreem layer immediately. I then applied Caswell liner from their motorcycle tank kit, which has received rave reviews from restorers. I had a very tiny leak near the back and it plugged it right up too. This stuff looks and feels like honey when it goes on and it leaves a nice even, clear layer over everything. I’m confident the tank is near bullet-proof now. Because I just left the tank exterior untreated, it quick built up some surface rust, but it should come right off when it gets painted.

    This summer I also took two motorcycle-related classes to improve my skills. One was a machine shop class and the other was a more advanced “overall” rebuild class. My main assignment was to COMPLETELY disassemble, blueprint/test everything, and then reassemble a 2001 GSXR-1000 from the crank up. Compared to a GS it’s like a rocket! I learned a TON during this process and I’ve already applied it to my GS project. I’ll share some of what I’ve learned below.

    My summer “project” bike (a great, great grandson of my GS).


    For example, I learned how to recondition valve seats and valves in the course. I used these skills to clean up my GS valves and re-lap them a bit. Here are some pics of the valves from the GS.

    Before – pitted.


    Note the white color on this one. This valve was from a very lean running bike.


    After a four-stage process on the wheel they looked more like this….


    Seats cleaned up:


    Next up was a little de-glazing of the cylinders. After sitting for 20+ years, there were some clear ring marks in them. The cross-hatching was also very faint. Within a few minutes using one of these rigs…..


    …..I was able to get the cylinders looking more like this.


    More in next post…

    Leave a comment:

Working...
X