try here for posting pics to the site, and how to set it up...
it should help
.
-
 Guest replied
 -
Guest repliedand thats exactly what I will do. thanks.Leave a comment:
-
Guest repliedhi, d- mac.
sure, the circlip is out. we tried: heat, cold, pb blaster soaking, carb cleaner soaking,
air pressure ( are you kidding , how about 300 pounds per square inch?)
If you have Billy Joel's master motorcycle mechanic behind you, how much more support do you need? Anyways, I rather spend a few bucks than kill myself with
that%^&$#@. so to e bay I go. the thing with the photo- upload I dont get at all , to old for that. regards, and good luck with your project.
ps. tremedous job taping off your parts. patience is a virtue. spelling wrong? to bad. immigrants have issues....If you give me an e mai l adress outside the forum I will send you pictures about how I solved the electrical issues. may be it helps.Last edited by Guest; 04-24-2012, 10:12 PM.Leave a comment:
-
Guest repliedPeter,
Sounds like you've been busy! You can get a free account from Photobucket and easily use it to upload pics here (or elsewhere). You upload pics to your photobucket account, and one of the options you'll see there allows you to copy the IMG code (it's like a web link). You paste that link in your posts here and it'll connect to photobucket automatically so that the pics show up. At least that's how I do it.
I've seen some terrible master cylinders on these bikes, but the piston is actually pretty flimsy and it should come out eventually. You removed the snap ring holding in the piston, right? It's easily missed under the rubber plug since it's far down in there. Once that's done you tried 100psi pressure and you still can't force it out? Usually that'll do it. Soak in PB blaster and try a little heat from a propane torch if that fails. If you're still stuck you could also pressurize the master cylinder with grease and remove it that way. If THAT doesn't work, and it's truly fused, you should be able to pick up a replacement on ebay cheaply enough.Leave a comment:
-
Guest repliedHi, I got a 550 E a few weeks ago and am in the process of more or less doing the same thing you are going thru. Fun, is it not? unfortunatelly, I have not figured out how to upload pictures to this forum....yet. I decided to get first a running bike, and have it in the shape and color and condition I would like it in. So I rebuilt the carbs
( credits go to the mikuni rebuild manual from this site as well as a few members who gracefully answered all my questions, since I had not done it in over 30 years)
and jetted propperly for 4/1 exhaust and k&m pods. she runs like a charm with 155 lbs
compression on all 4's. than i pulled the tank, sandblasted it and fixed a few dents,
sprayed it with a few cans of black I got for free from sherwin williams. Put a clubman on I had around in the shop and polished the upper tree.Then I painstakingly
cleaned up the wireharness and shortened it wherever possible, and tookout whats not needed. There is just to many lights and indicaters on these bikes distracting from riding. One of these days, I will shee whether this bike can be converted from pure electric starting to an additional kickstart. Winter project. Then, I added a nice racing seat. Gee, its easier to re-build an engine than make these seats propperly, still more work on that. Got rid of the airbox, and battery cage. Cut out the back with the panel
that houses solenoid, starter relay and fuseboxes and mounted that under the seat
against a horizontal reinforcement- plate that came with the seat. Next month, I will be able to afford the Shorai battery I always wanted, it will go into/under the hump
of the seat, along with the rectifier. Grinding my teeth, I re-used the existing ignal lights, but brought themall the way in, rear ones on the hump, front ones right next to headlight bucket. When all is set and done, god knows when, I will pull her apart again and powder coat frame and tank. I am not sure yet what to do about the rims.
Right now, I am looking for guidance on the front brake master cylinder. The existing one needs repacement, since the piston is solidly corroded into the bore. ( this was confirmed by folks much smarter than myself) So I am not sure whether to try to find
a replacement for the exact model, or find a new one with same bore and for one disc. I appreciate any thought and or ideas.
Regards, PeterLeave a comment:
-
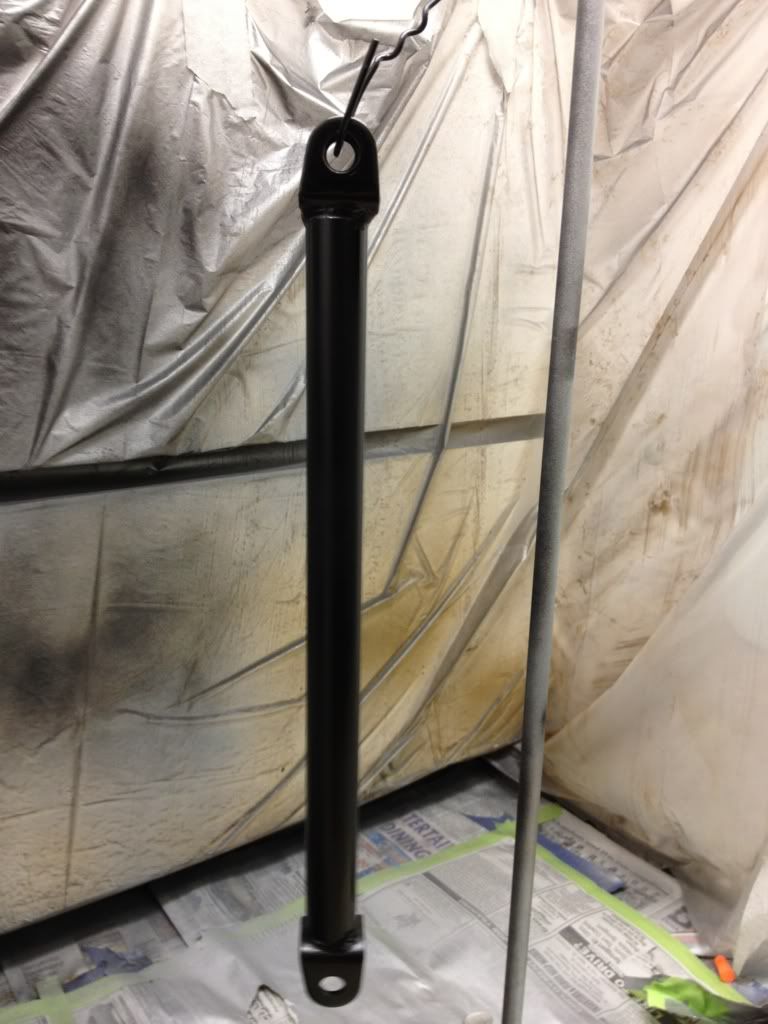
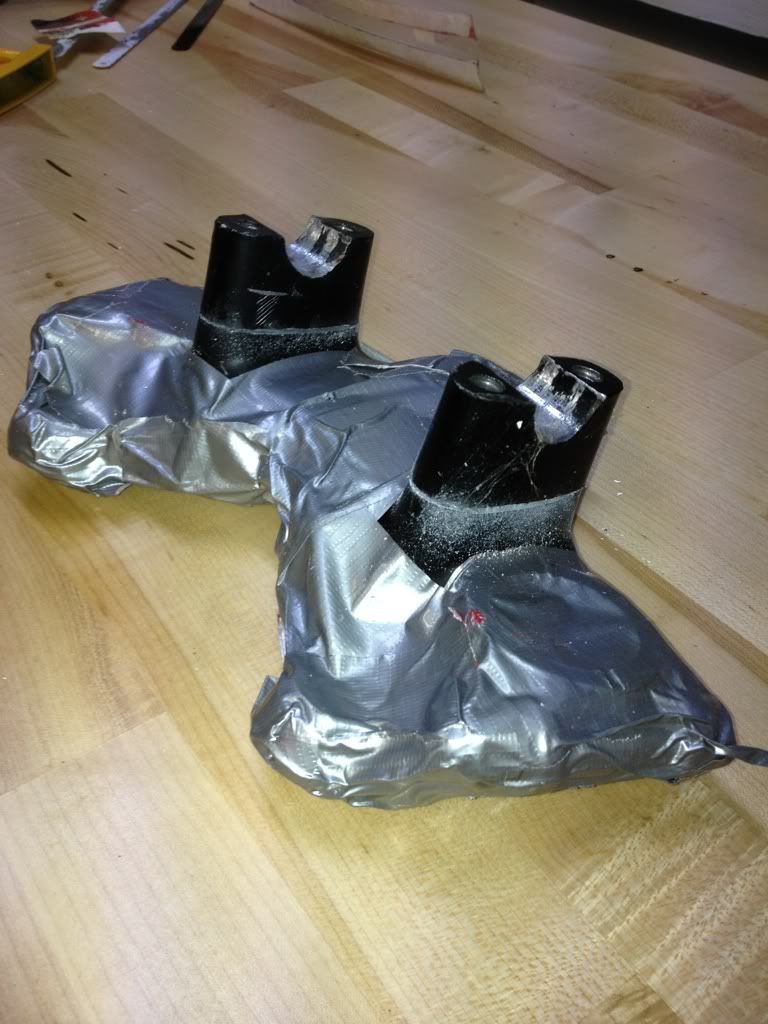
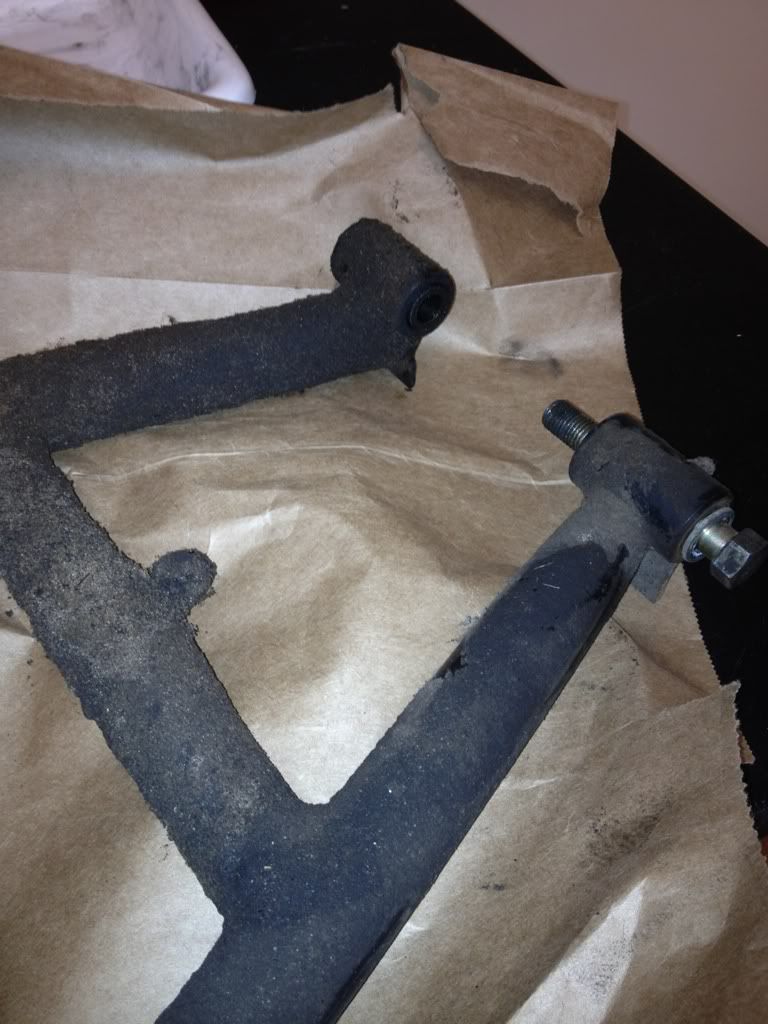
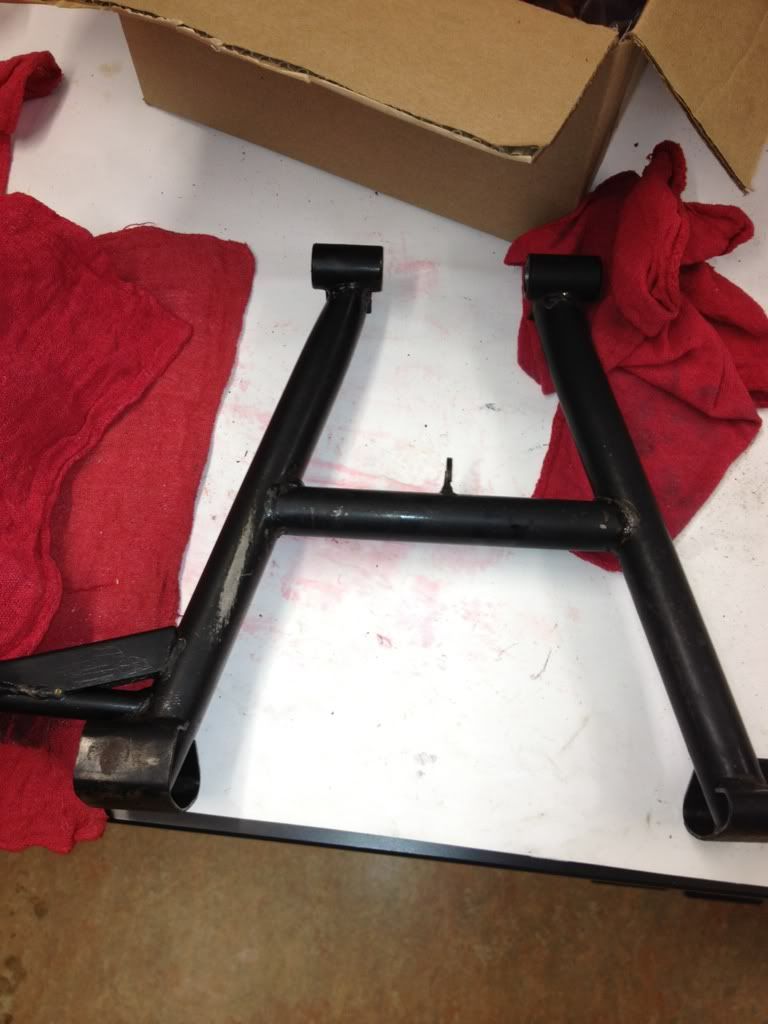
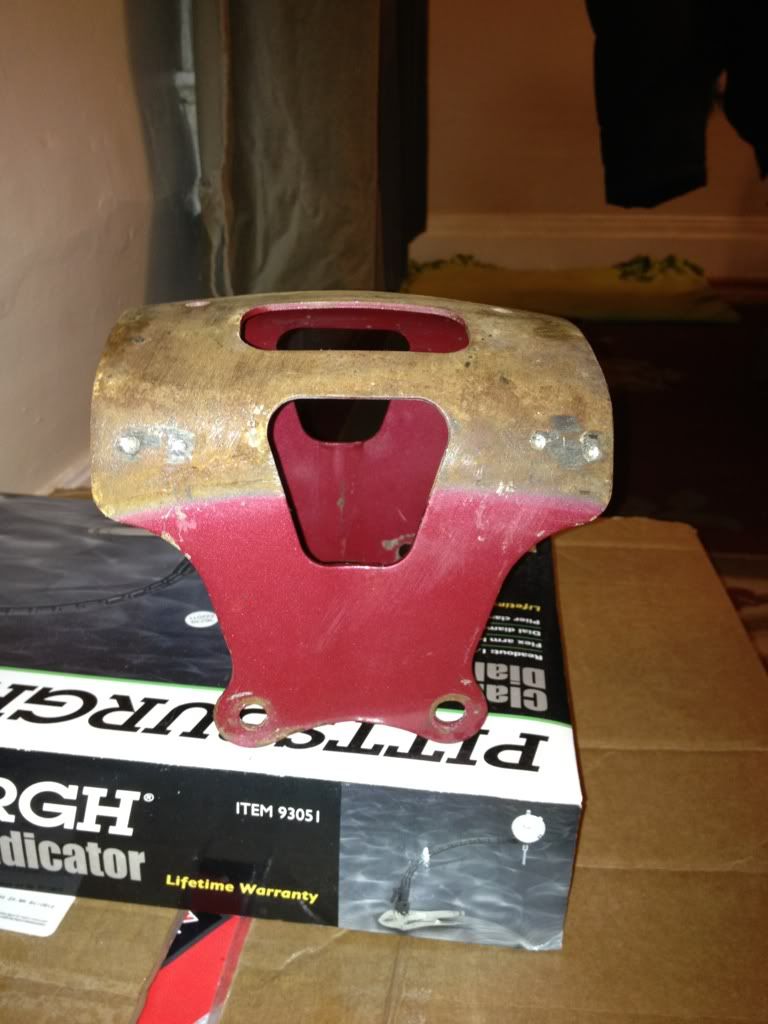
Guest repliedFinal update of the weekend. I got the lower tree painted, along with the brake arm that I forgot to drop at the powdercoater.
Hit them with a wire wheels and did a little sanding. Prepped.
Three coats of black caliper paint and two coats of clear later. I?ll cure them later this week.

Leave a comment:
-
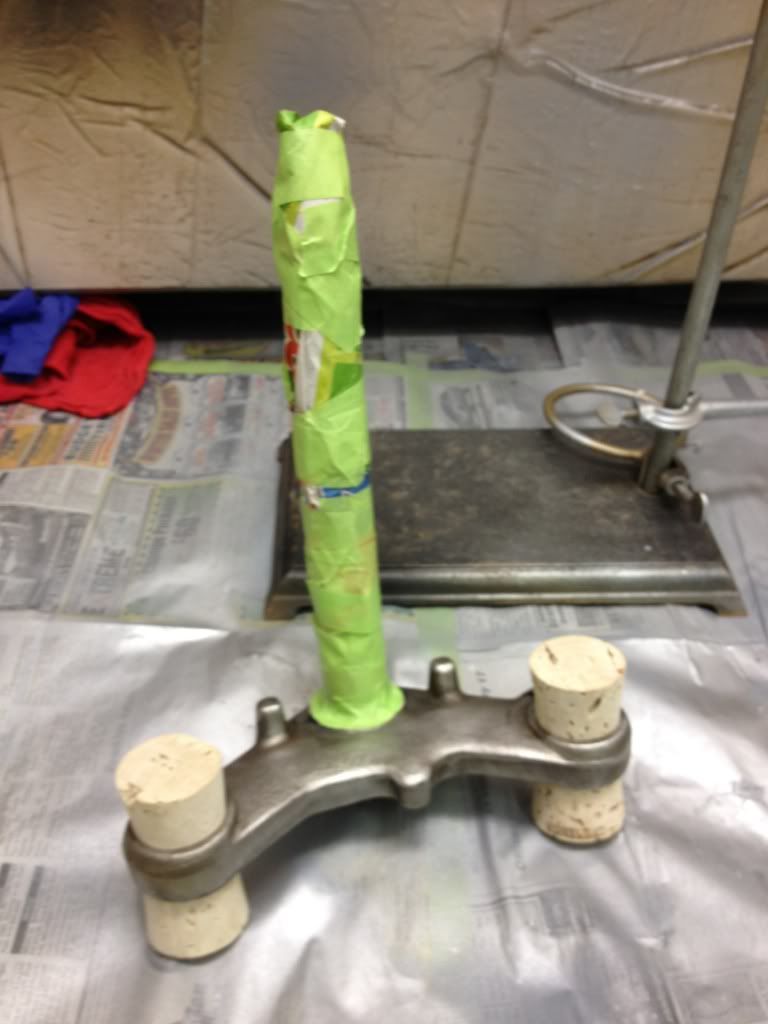
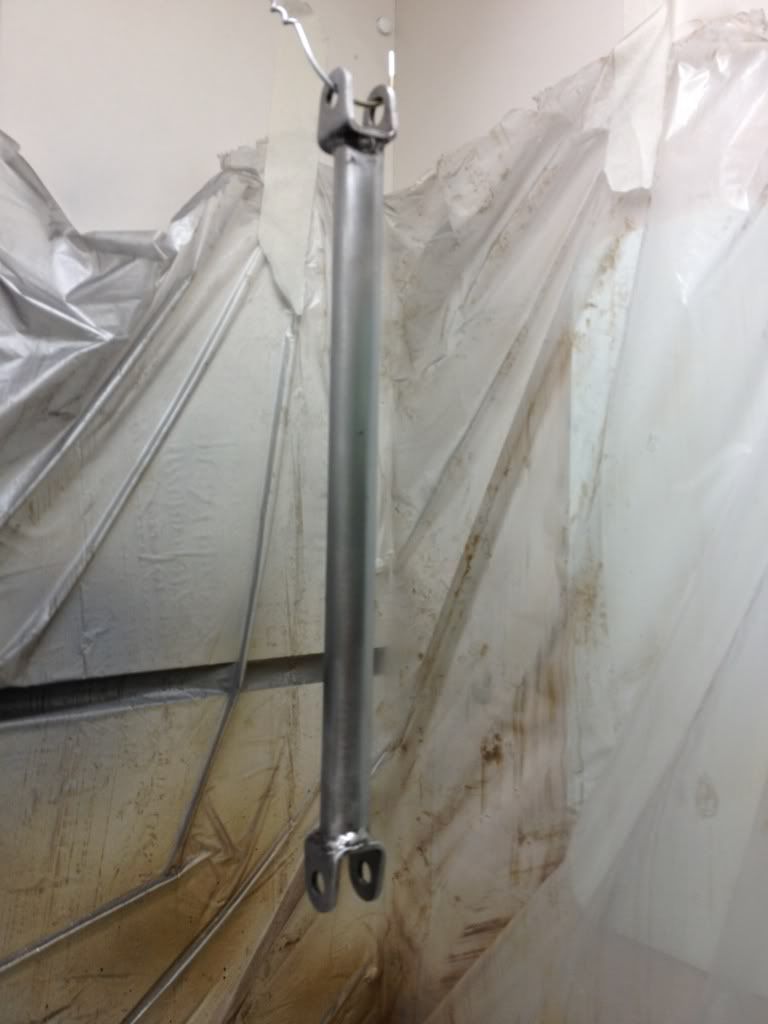
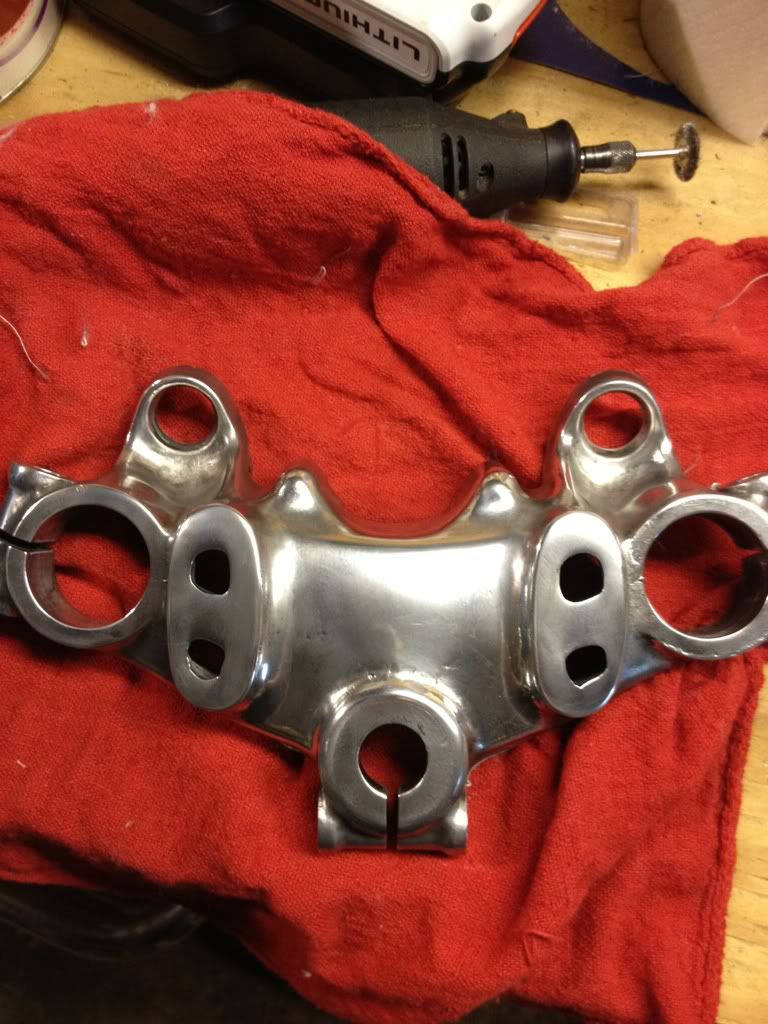
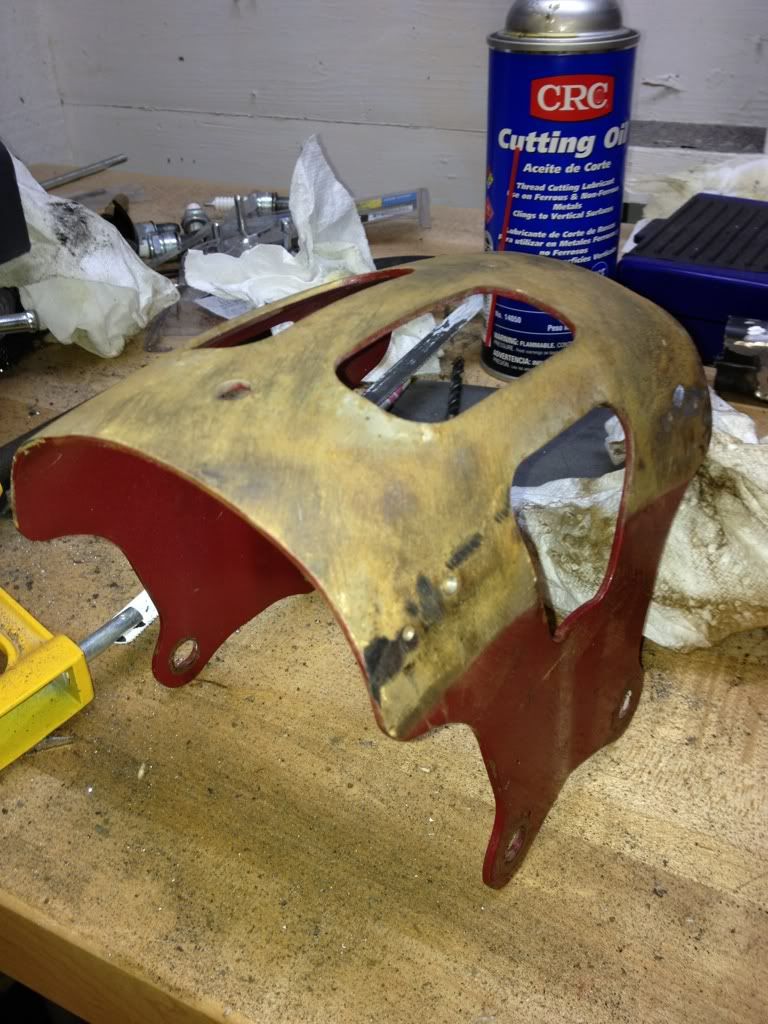
Guest repliedUpper triple tree clamp is done. In the end I decided to polish rather than paint it. Looks more ?retro? that way.
Originally black (taped up to cut off the risers).
After grinding and sanding.
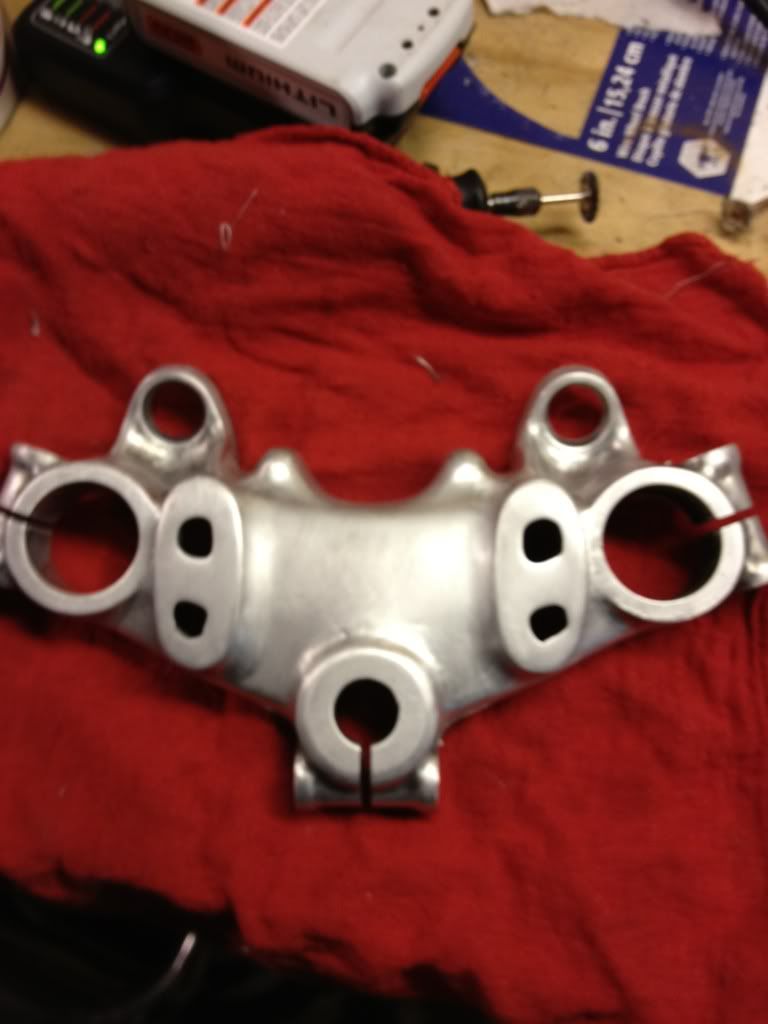
Now?.Just needs a hand polish and a little dremeling in the nooks and crannies.
Leave a comment:
-
Guest repliedThere have been some new developments in my "slow and overly-documented" build...
First, the big news. On Thursday I dropped off my frame, swingarm, kickstand, centerstand, engine mounting brackets, exhaust brackets, front inner fender brace, and headlight housing for POWDERCOATING. I went with plain satin black for everything but the headlight, which will be gloss black. The place I chose is nearly 2 hours away, but they had a lot of bicycles and motorcycles on site and their work looked really good. They were also quite cheap ($155 for the frame, and about the same for everything else together). They assured me that they will not coat the ?important? parts (steering head, holes in swingarm, threaded parts, etc) and that they will try and have it done by the end of next week (which is my next chance to drive up there). My prep work was not perfect, but my welds look better than the Suzuki ones and I did spend a couple hours sanding the frame. Powdercoat might be a little overkill for this project, although I?ve been looking for an excuse to try it on a frame and I feel like I?ve come too far now NOT to do it for the minor difference in price.
Centerstand pics. I didn?t grind the brackets for it off the frame because I might end up using it. I?ll probably leave it off to start though. Here?s what it looked life off the bike. There was a good 2?-thick layer of crud on it!
After cleaning.
Unfortunately, I discovered when I got home from the powdercoater that I had forgotten to drop off the rusty rear brake arm! D?oh! I?m just gonna sand and paint it at home and take it along when I pick up the coated parts. If it doesn?t match well, I?ll leave it for coating and ride back later to get it. I?m sure I?ll have other bits to powdercoat later anyway.
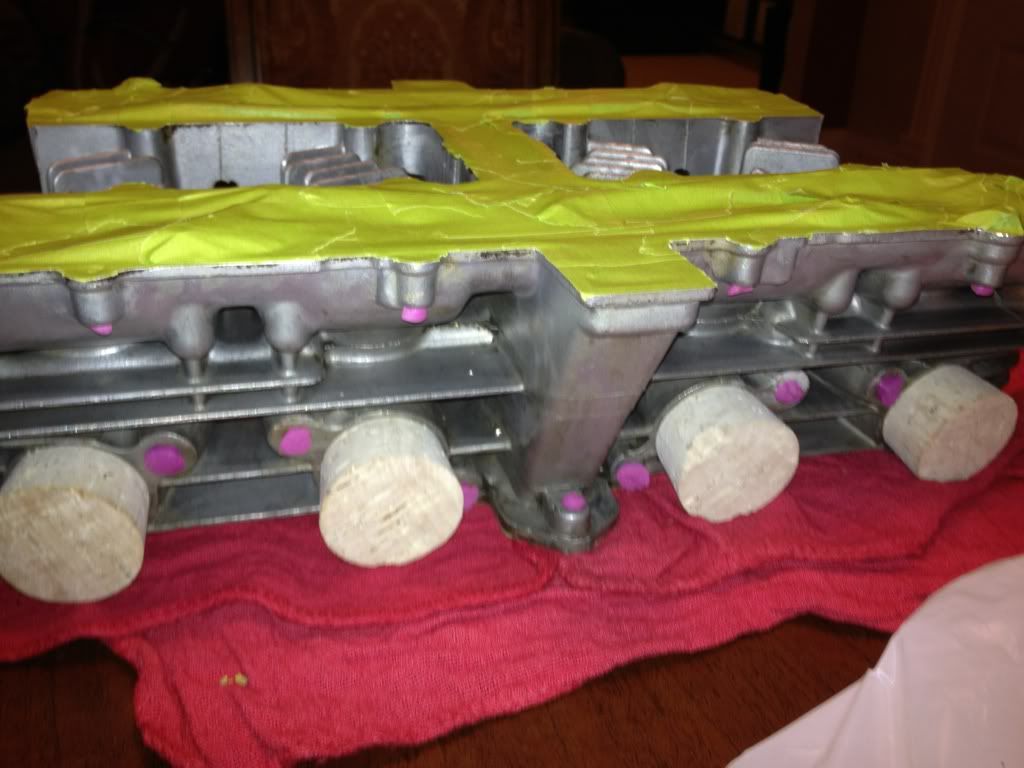
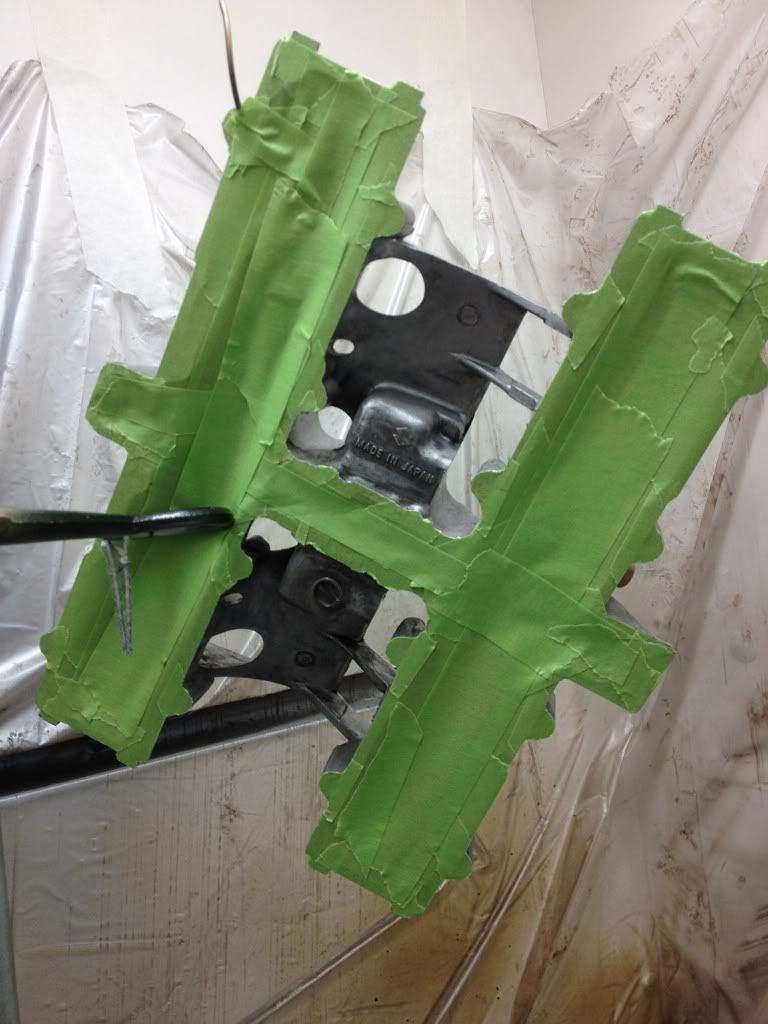
As for the rest of the paint, I fixed the mangled spot on my valve cover, and painted the head (of course I managed to chip off a little paint on it too by handling it too early, so now every piece I?ve done has a little flaw on it). Here are a few pics??
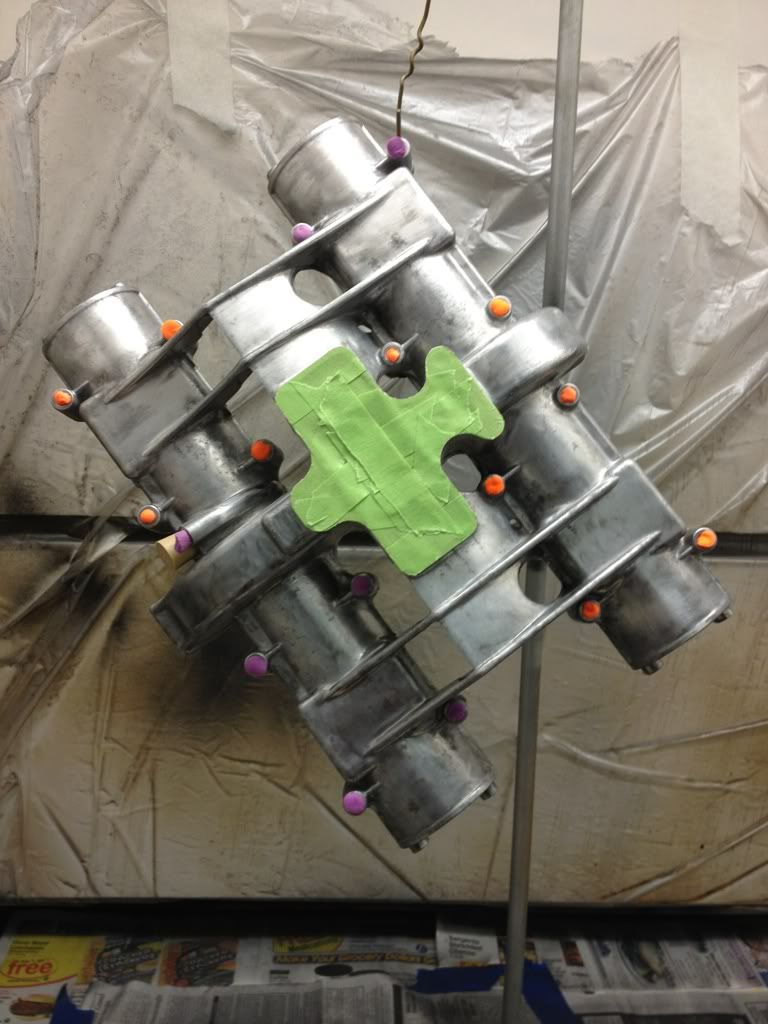
Some shots after a ridiculous amount of time spent soda blasting, neutralizing, cleaning, wiping down, and masking.?.

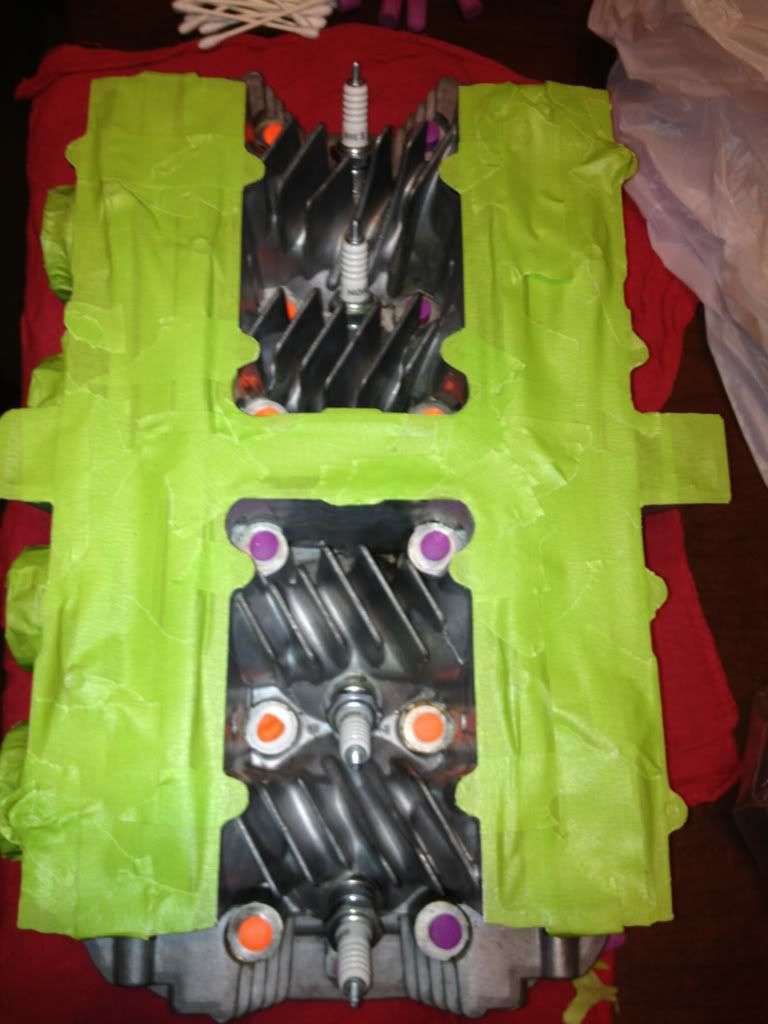
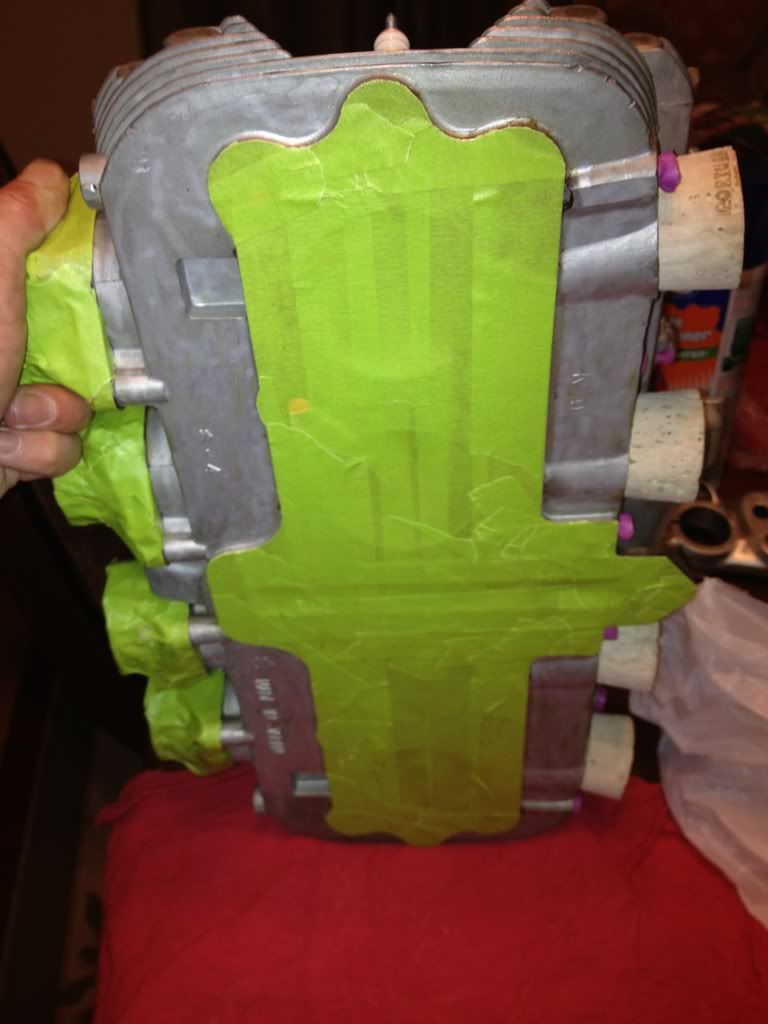
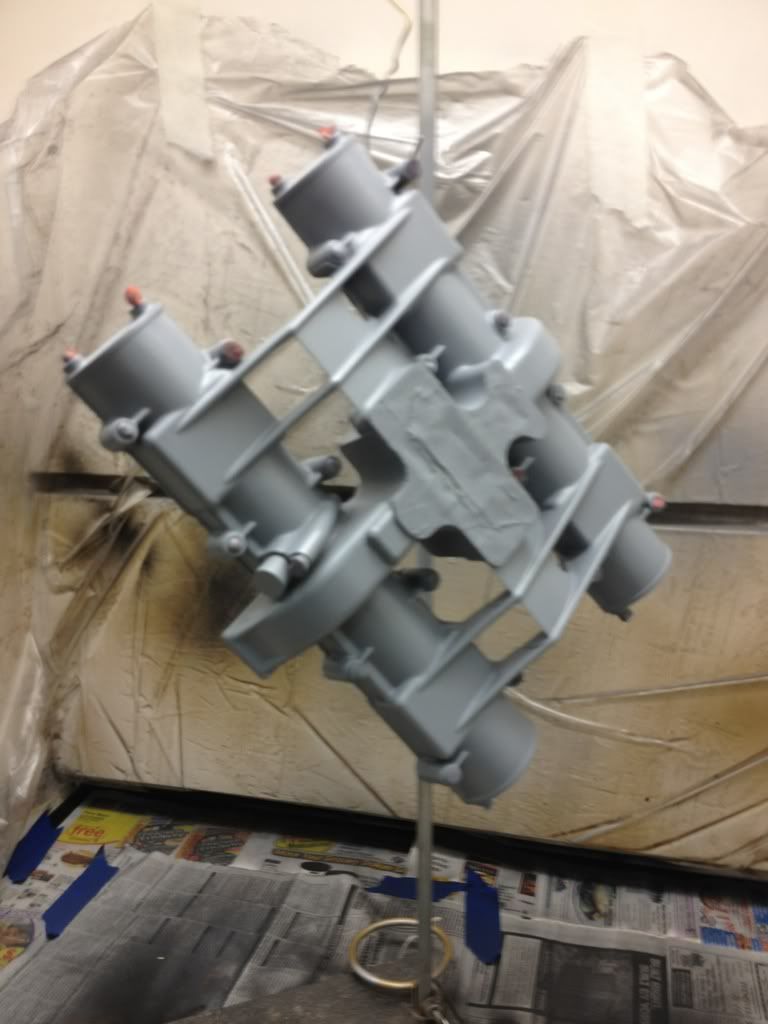
Primer. The flash kind of makes it look weird.
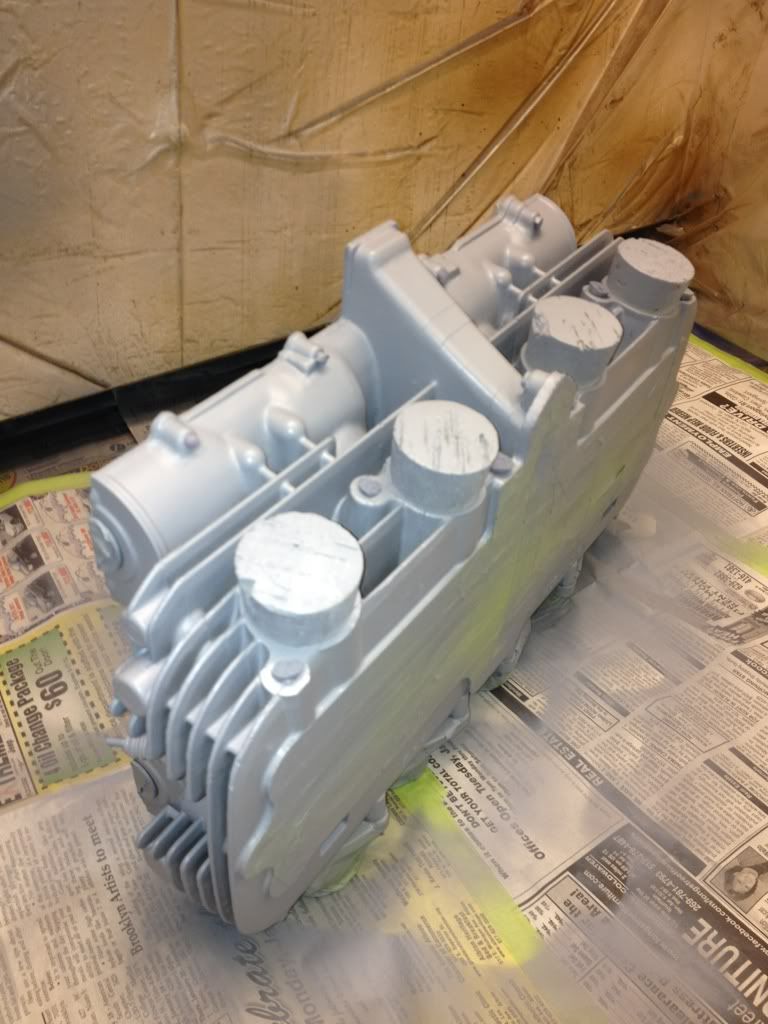
Flashback to what it looked like after the initial cleaning (remember, this is off of my parts bike, which was not that dirty).

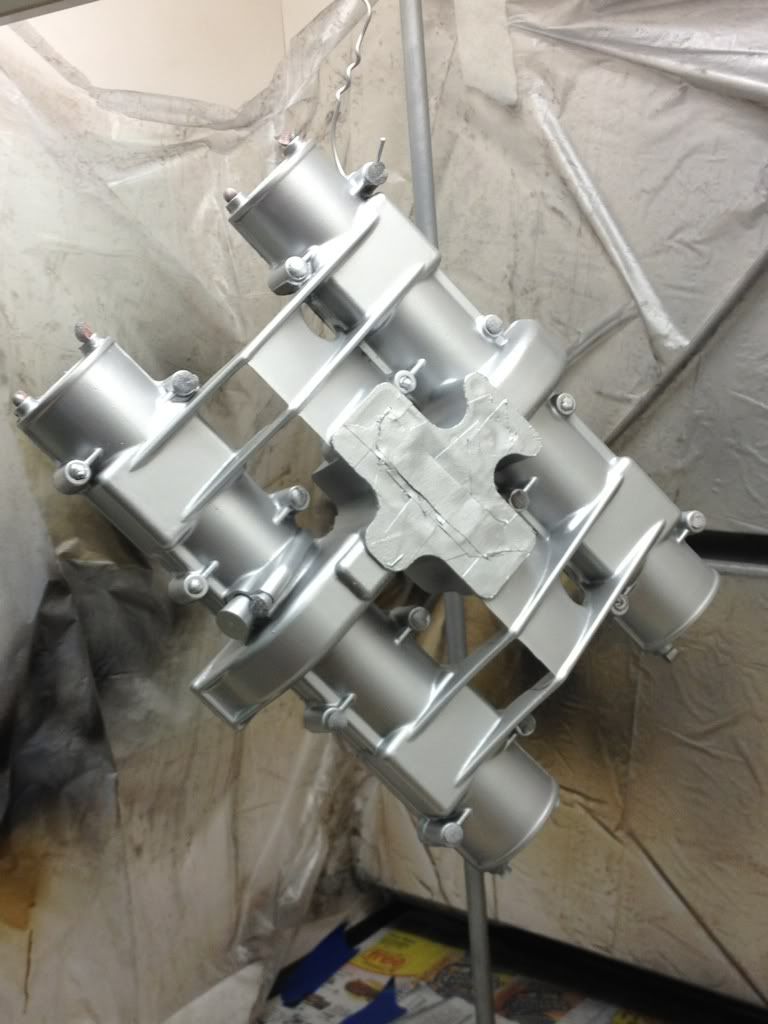
NOW. Painted, with masking removed!
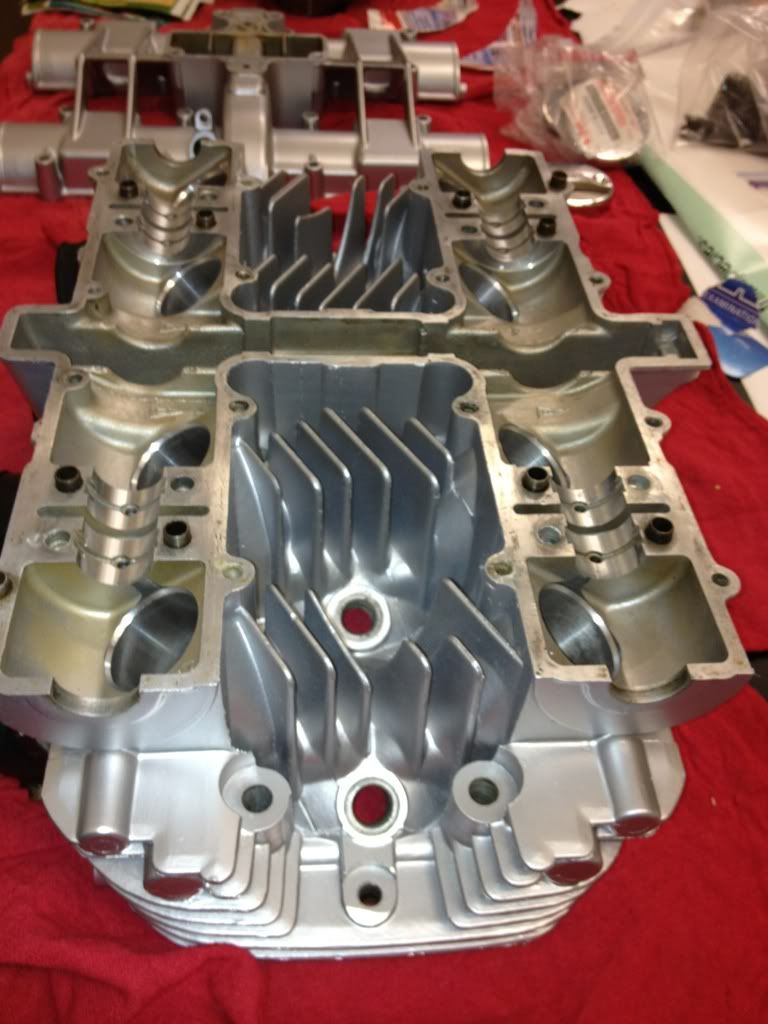
Now I can reinstall the valves, along with new seals. I still gotta tackle the bottom end paint job and order piston rings before I can start putting the engine back together.
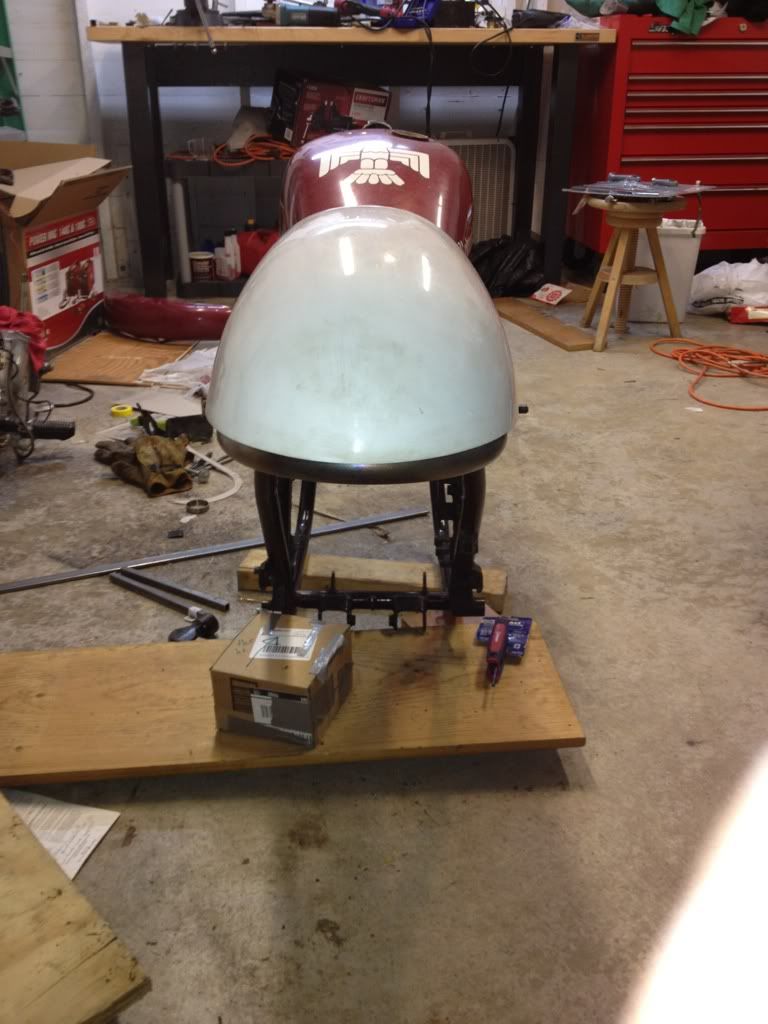
I was leaning toward having the tank repaired professionally and painted along with the seat, but the quote I got from a reputable company was $1100. When I think about it, it?s actually reasonable given that I had requested a quote for repairing dents, fixing leaks, removing the paint and inner coating, re-coating the inside, and painting and pinstriping both the tank and seat cowling. My budget for final paint is far, far lower than this so I?m going to strip the tank, assess the leaks, and them solder them and/or coat the tank with Caswell coating myself. Then I?ll shop around closer to home for a basic paint job. I might use decals instead of painted stripes to cut costs further.
Other stuff:
Yesterday I ordered new tires and tubes (yup, this old bike takes tubes). No sense leaving the old ones on ? they are so rotted they aren?t going anywhere. Everything but the rear tire will arrive on Tuesday, so I?m hopeful I can get to a rolling chassis within a couple of weeks.
Then I ordered a headlight bracket, grips, a bar-end mirror, and a couple of electrical bits. Still gotta save my pennies for gauges and fab some sort of bracket for them.
As for the rest of the weekend, I have a few little things planned?.gasket removal from the breather cover, prepping the lower and upper trees for paint/polish, cleaning the cam chain tensioner??.that type of thing. For every little thing I write on here, there are always a bunch of things that are so boring I rarely mention them.Leave a comment:
-
Guest repliedNow that you bought a welder you have opened up a whole new world to yourself.
Your welds look OK... they certainly look a lot better that the welds done at the factory on suzi frames.
Ive been welding for about 30 years and I think your little MIG is a great starter set up. I doubt you will be needing to weld anything that machine won't handle for a long time. Lincoln makes good machines.
Do yourself a favour and join the welding web.
An awesome forum full of helpful people and a lot of *******s.Leave a comment:
-
Guest repliedPART 3: I finally tackled the problem of my front fender. You might recall that my original one had been painted and that it is FULL of dents. It?s heavy and a little ugly too, but the inner fender is thick steel and I?m told that it acts as a much-needed fork brace on the bike. So rather than trying to cut it down and go nuts with Bondo, or get rid of it completely, I opted to drill out the rivets/spot welds that held the fender to the inner brace.
Dead fender?..
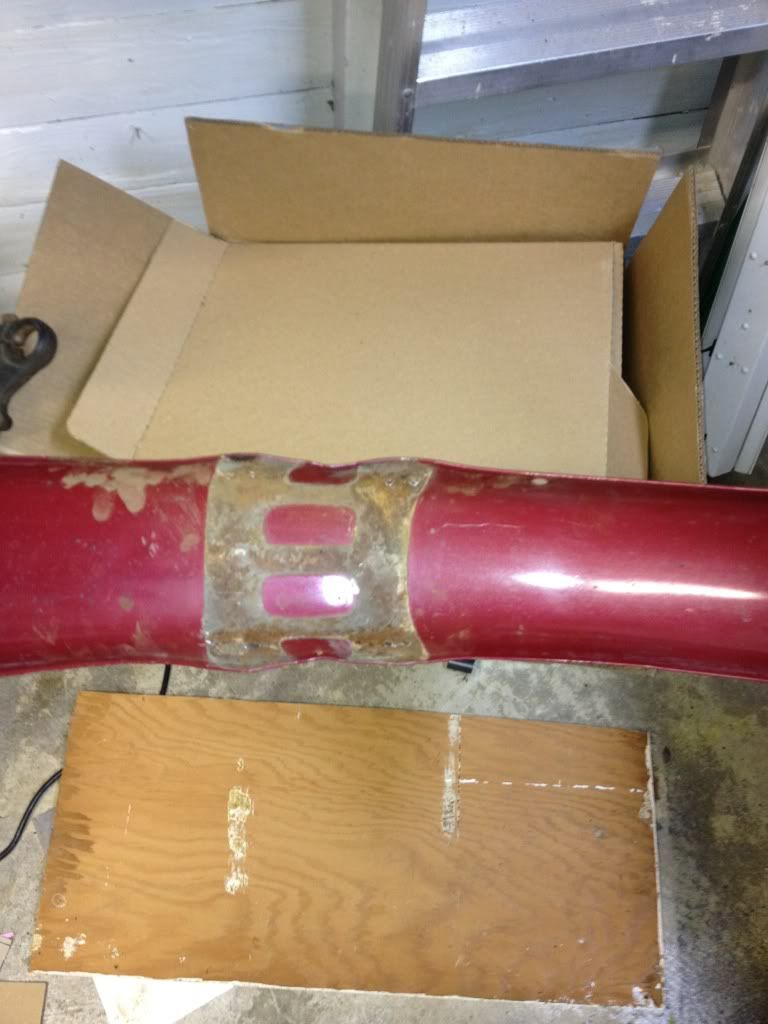
Inner brace??
Yup. I?m going to run just the inner brace for now. I think it?ll look pretty good powdercoated. If not, or if I decide I actually want to ride in the rain, I can always fabricate or buy a new fender later and attach it to this piece.
WHAT?S NEXT? Other than maybe trying drill a few holes for mounting various electrical bits under the seat hump and figuring out where to mount turn signals, I think the frame is FINALLY ready for powdercoat! I can?t wait to have a rolling chassis. Once the head and lower end of the engine are painted I can begin to reassemble the engine too. After that it?s a lot of electrical work, dealing with the gas tank, more paint, and a lot of fabrication/installation for various lights, switches, and gauges (ok, it?s a lot more than that). Beginning in mid-May I will have a lot more time to work on this project, so I figure I can have it on the road by July if I can find enough money to finish it.
Oh yeah.....I feel like I'm being watched.....
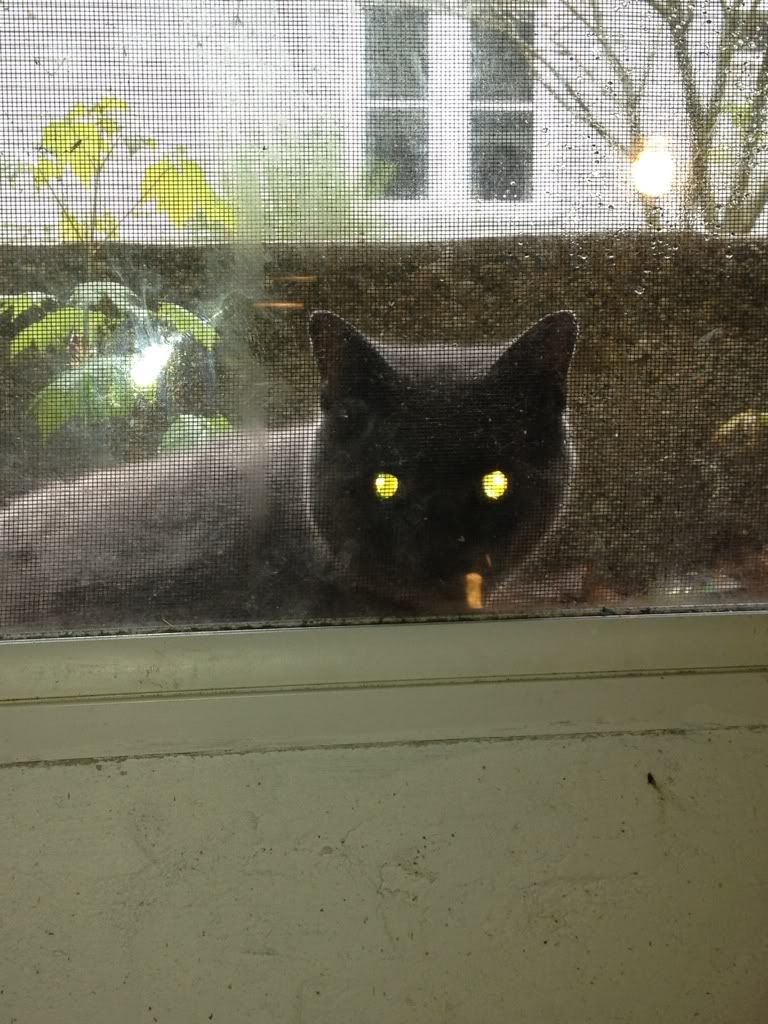
Leave a comment:
-
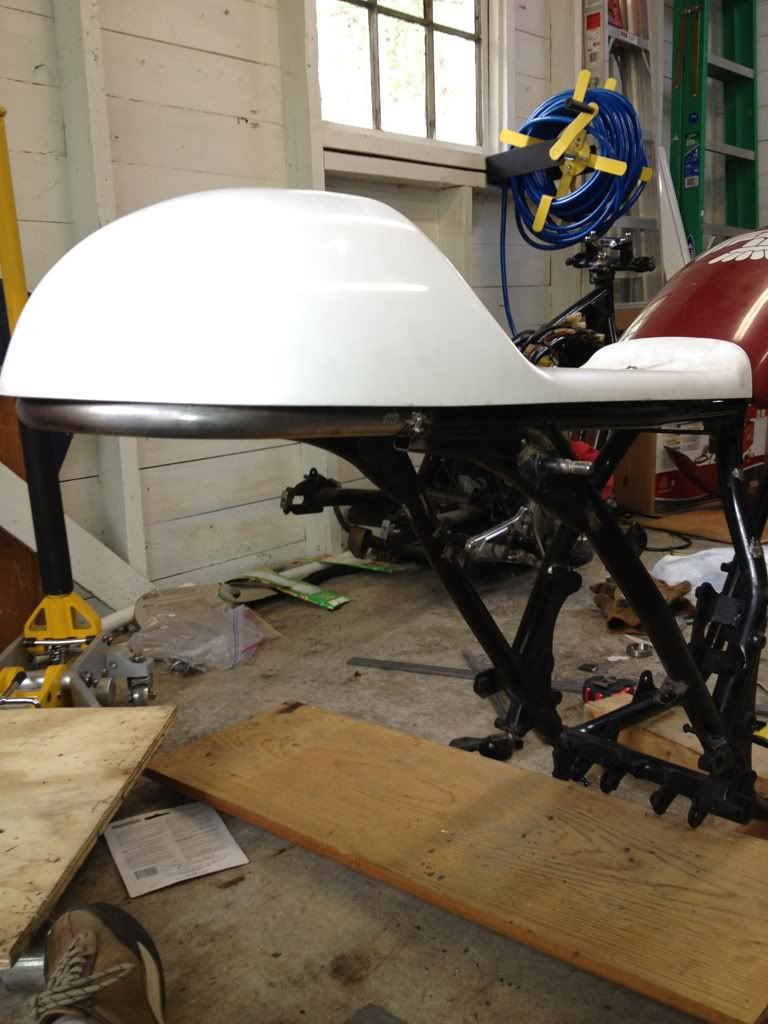
Guest repliedPART 2: After getting the seat portion done, I cut and welded some 16-gauge sheet metal on the rear to support the battery and various electrical bits.
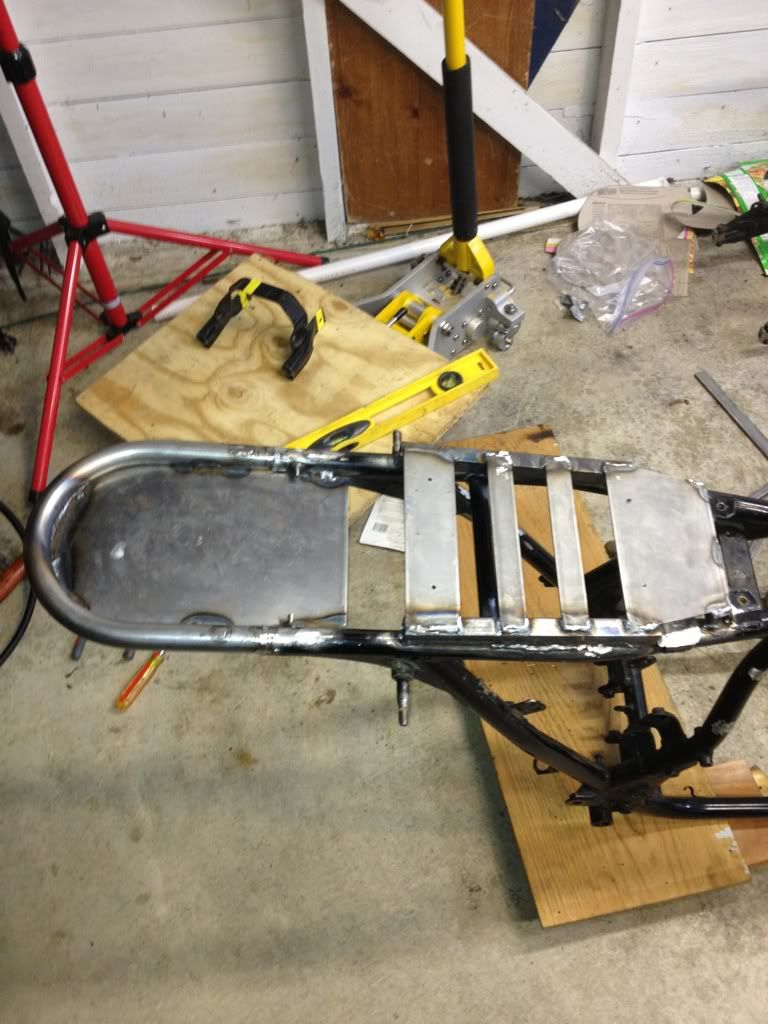
A few holes and bolts/nuts later and the seat was mounted! I plan to fab a cushion later.


I decided to line up the seat so that the rear just sits above the hoop (covering my nasty welds of course). The hoop isn?t a perfect match for the seat cowling above it, but I do like the look.
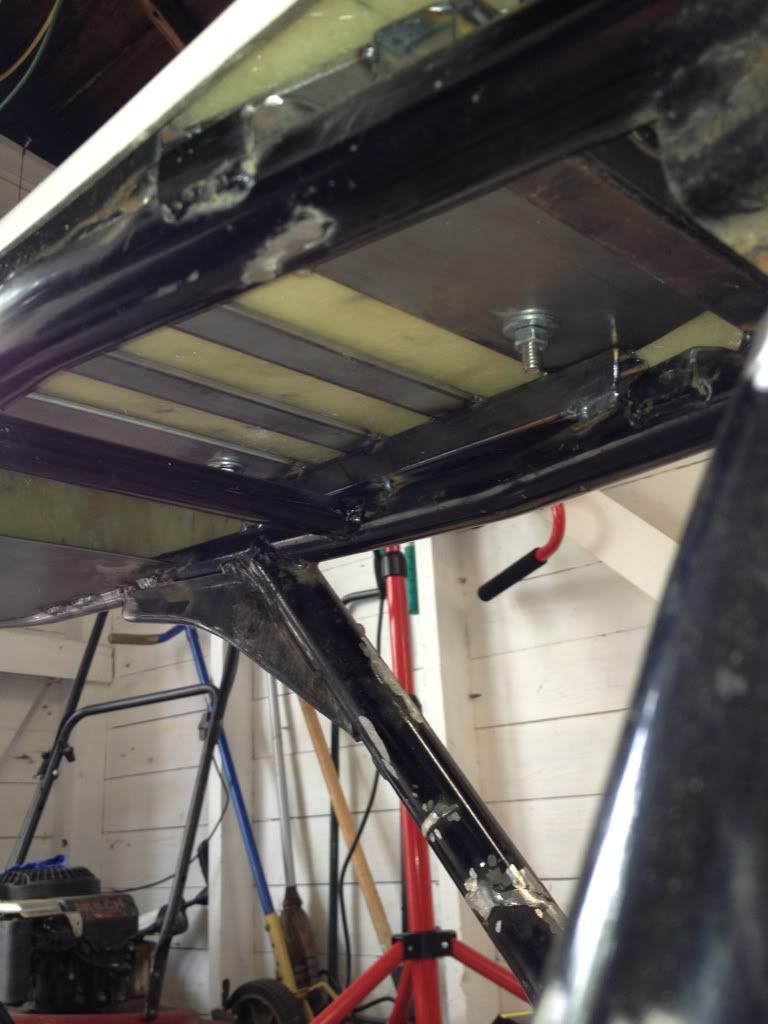
Here?s a look underneath. Notice that I left a lot of room to pass wires though from the rear portion. I might even pass them through the 3/8 square tube to make them totally hidden.
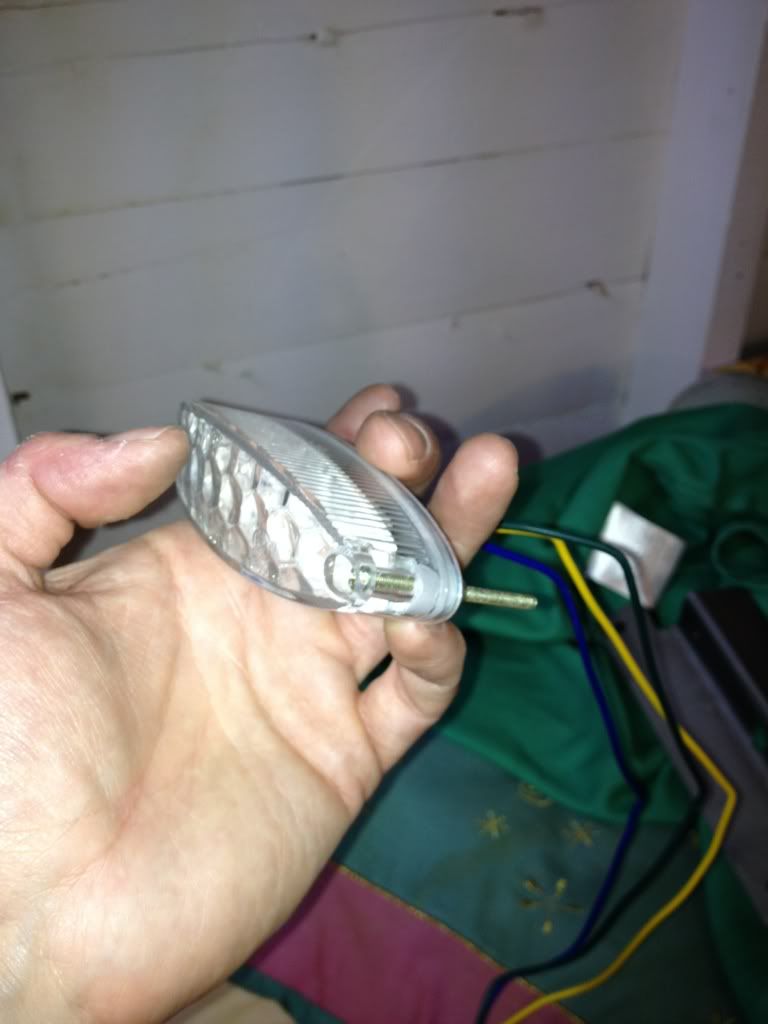
I picked up this brake/tail/license plate light.
If I?ve calculated it right, I should have just enough room to mount a tail light below and behind the seat hoop. So a fabricated a little bracket.
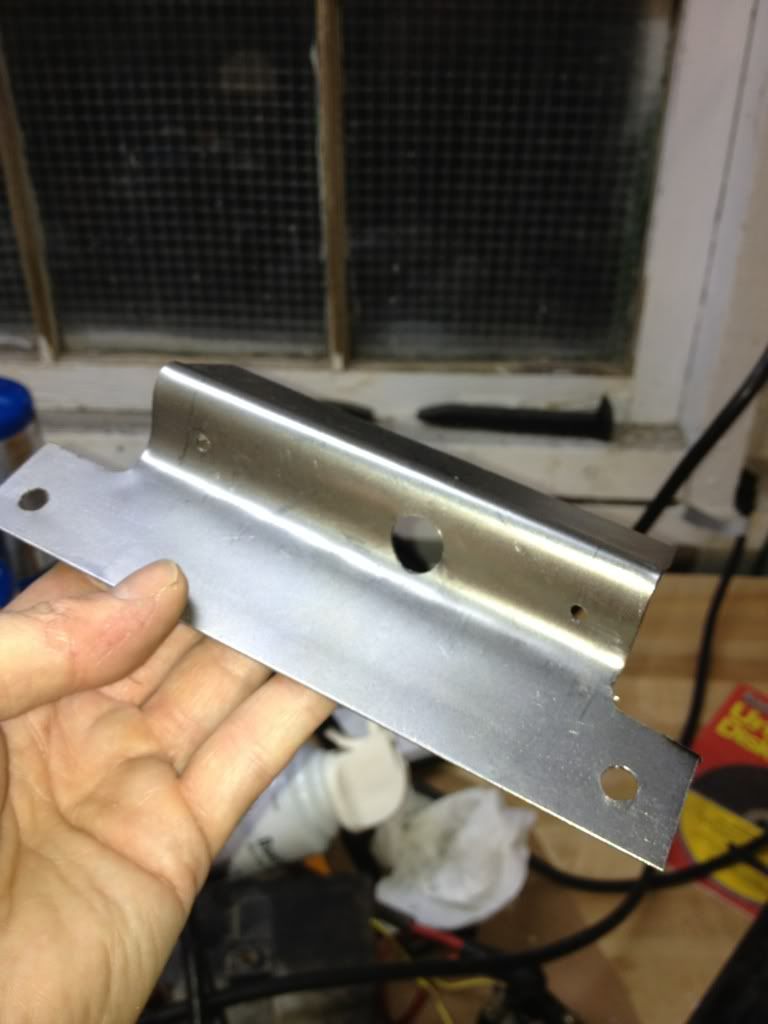
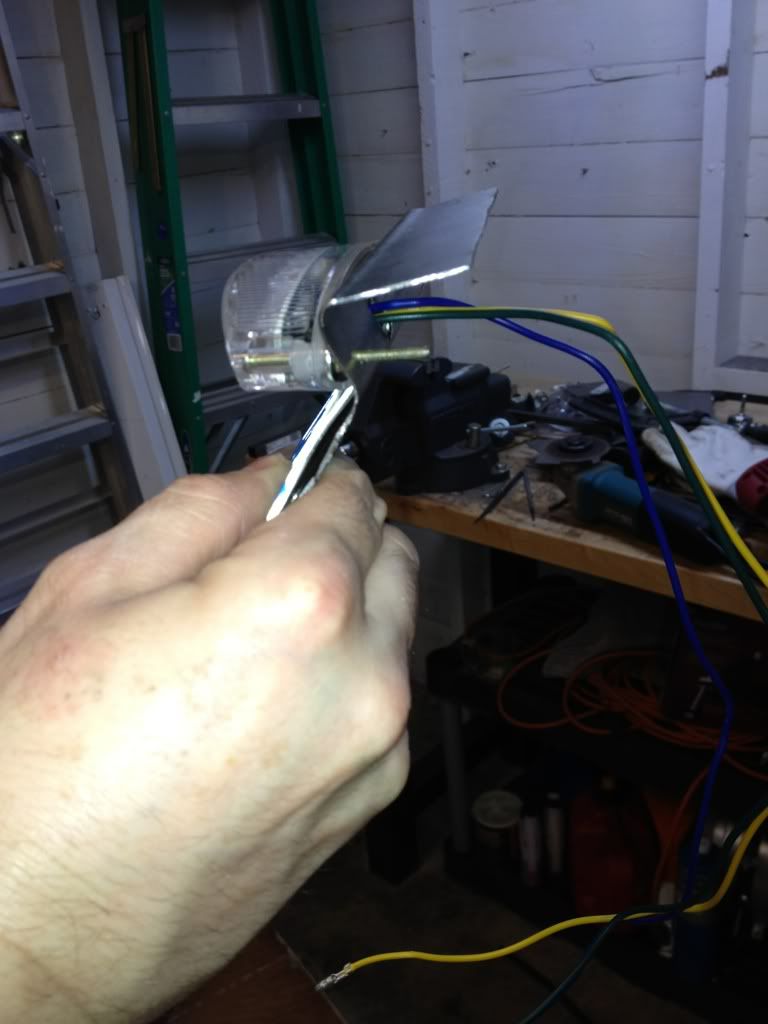

If it doesn?t work with the rear wheel I can always remove the bracket and try something else (it will just bolt to the pan under the seat hump).
More in next post....Leave a comment:
-
Guest repliedIt?s been nearly 10 days since my last update. I do have a little progress to report. Lots of pics, so this will be done in three posts.
First, the paint scheme. I took the valve cover, cleaned it, scraped off the gasket, removed the paint, cleaned it 1000 more times, and then painted it?.silver.
Yup. I?m going with a black and silver paint scheme for the engine. Black bottom with polished side covers, black cylinders, silver head, and silver valve cover. In the end, I decided that the two-tone scheme looks a little more ?refined? and custom. The silver head will also tie in the chrome exhaust and polished carb bodies a little better.
Masked?.
Masked some more?.
Primed?..
Top coat! ? VHT Universal Aluminum. It?s a little brighter than stock. Unfortunately, I moved it a little early after taking this photo and smudged a large part of the top! I?m going to re-sand and paint that portion again.
On to the next issue. Since I now have a welder, I tackled the rear seat hoop. I placed a long piece of tube inside the frame/rear hoop and drilled holes through the outside tubes about 1.5? on each side of the seam (you can see the drilled holes here with the tube lined up).
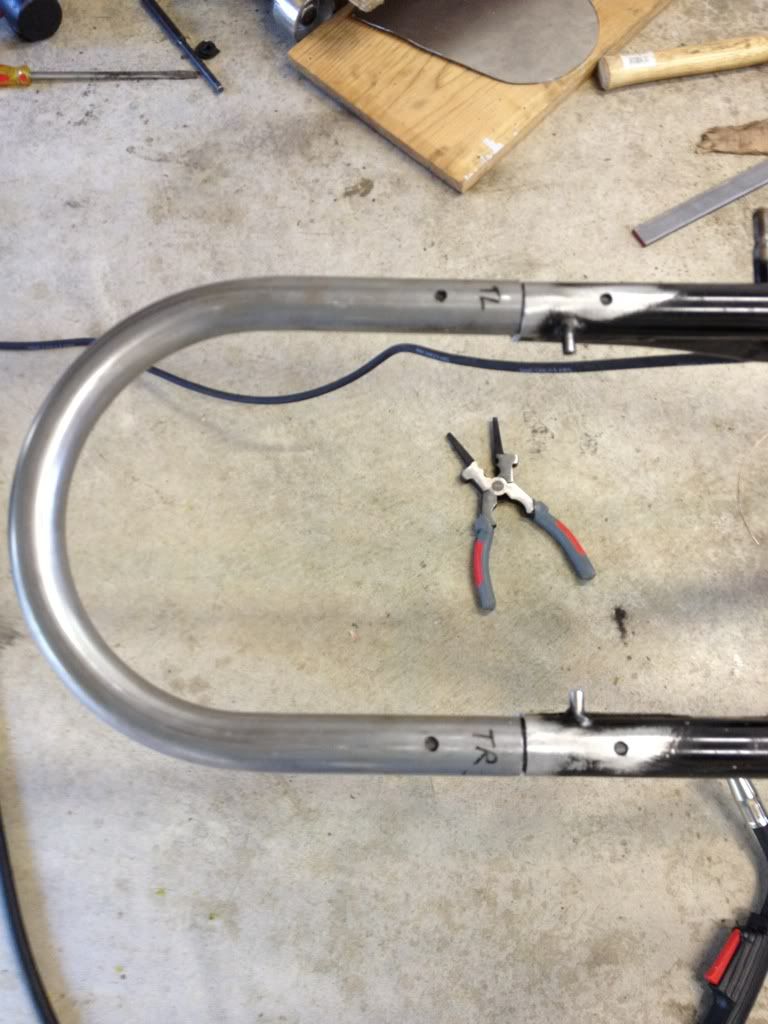
Then I welded the plugs and welded the two outer tubes together. It doesn?t look pretty, but when ground down and powder-coated, it?ll look fine I think. It matches well and my practice welds on this material had excellent penetration.
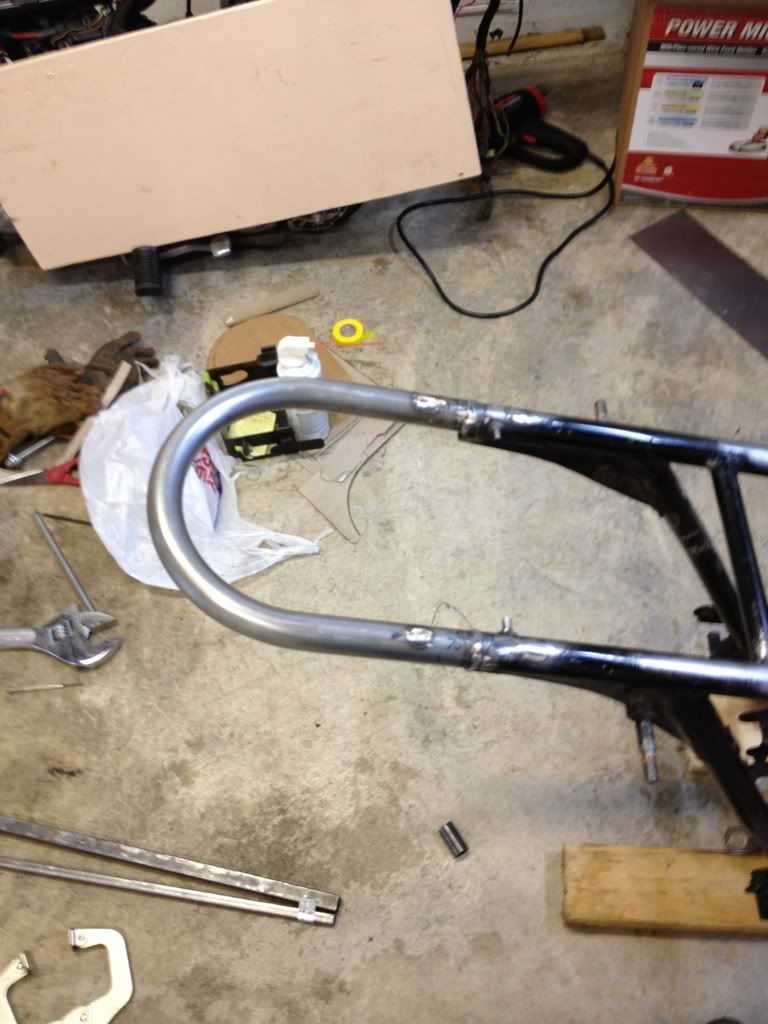
Finished hoop.
After that I sorted out mounting the seat. I want to show off the frame a little and leave as much room for the battery as possible, so I opted to raise the seat about 7/8" off the frame (I tested it with wood shims a few posts back). I started by welding some ?? square tube to the top of the frame. Not all of the welds look great, and I went a little nuts with the welding, but it?s done.
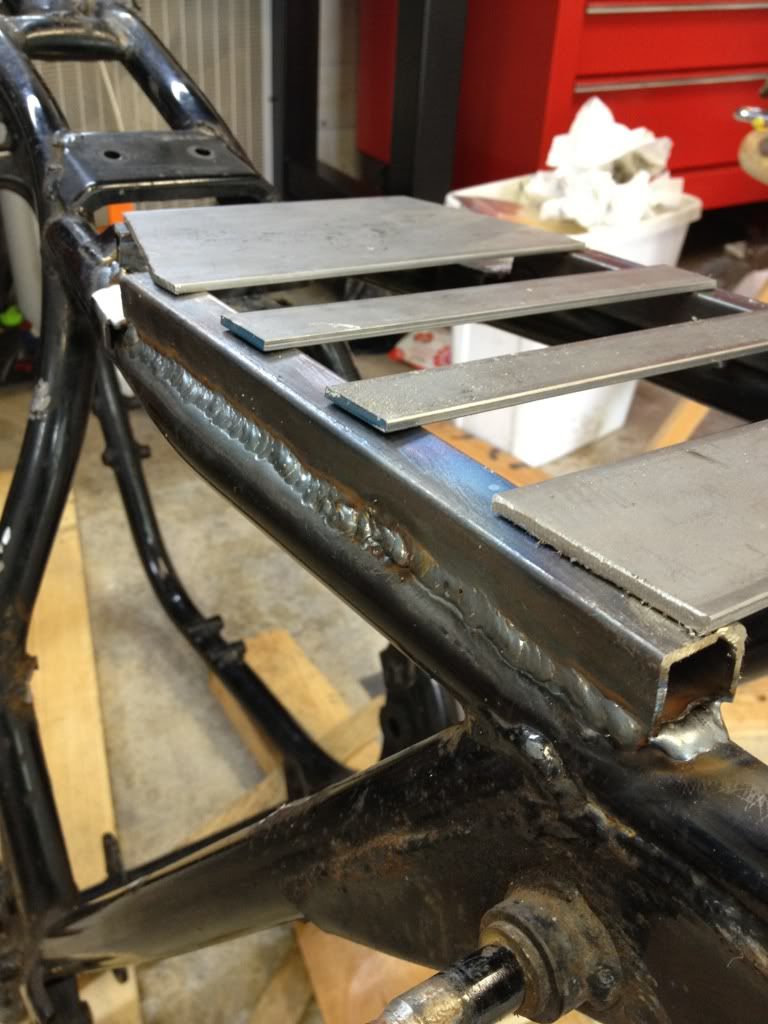
Then I welded some cross pieces of 1/8? steel across the "new" upper frame. This new ?pan" extends all the way along the bottom of the seat from the front to the hump and leaves a little around the sides in case I decide to cover the seat completely later.
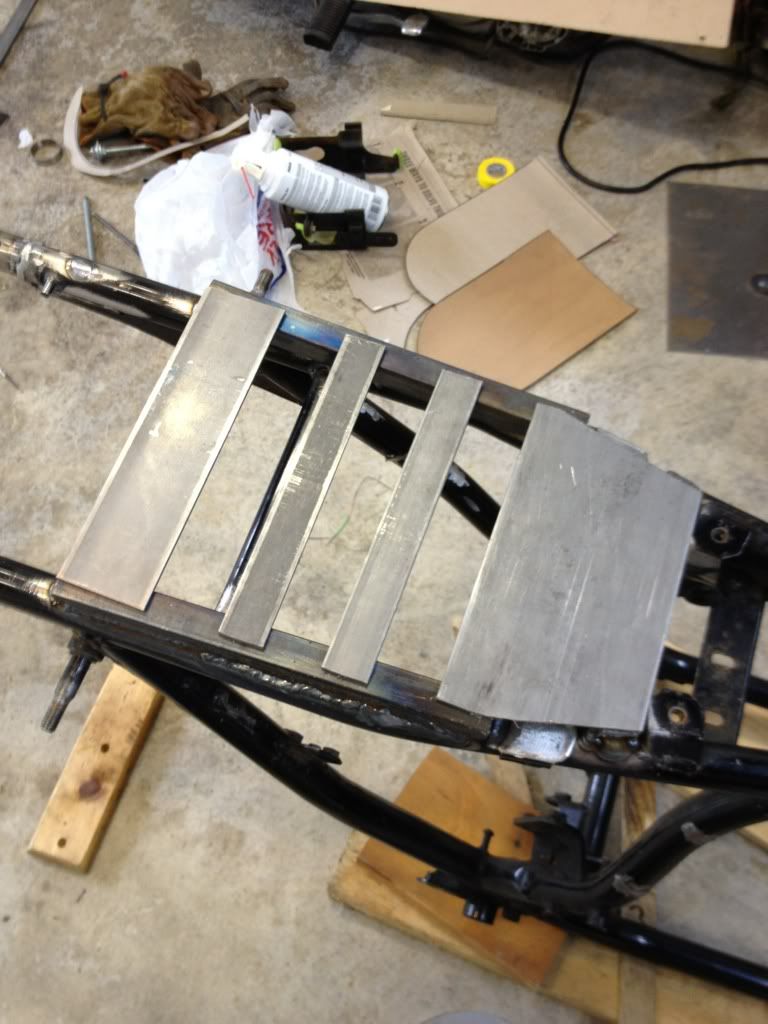
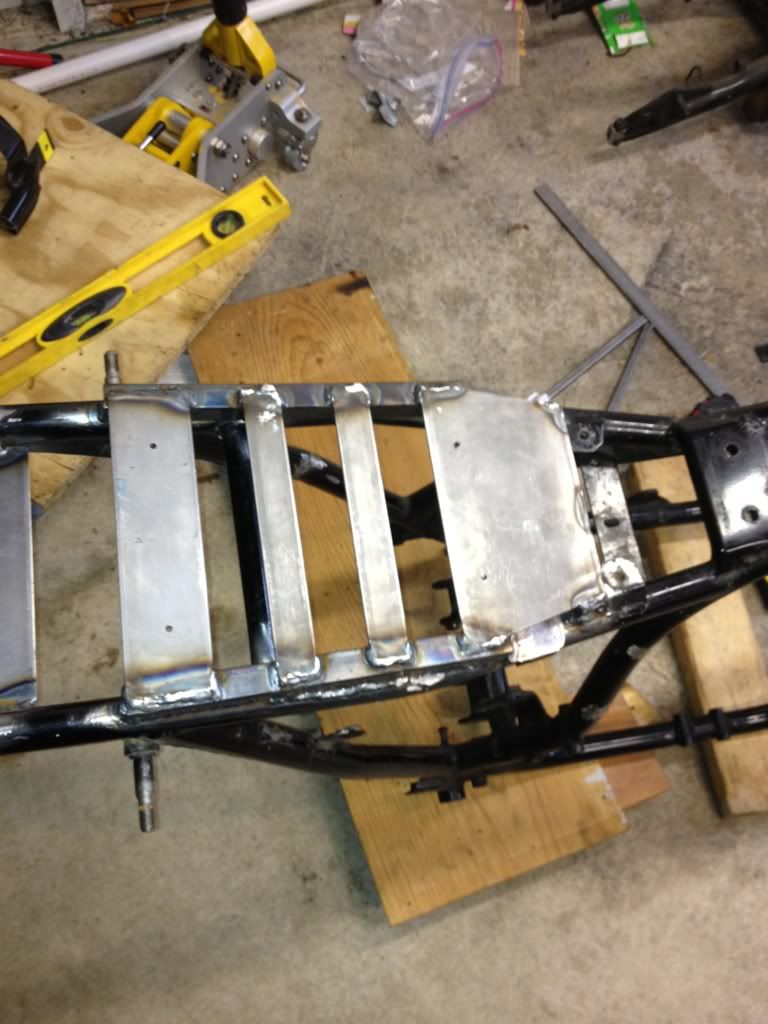
More in next post.....Leave a comment:
-
Guest repliedThis was my biggest concern too. I was contemplating holding out for a bigger unit, but I can say now that I'm glad I didn't bother. This afternoon I tried a few practice welds on some of the frame components I cut off a while back and on some sheet metal (14-gauge). I'm VERY impressed with how much heat this little thing puts out. It'll easily weld any sheet metal and tubing. I did a 1/4" plate butt weld too, and it worked fine (I beveled the pieces, spaced them about 1/16" apart, welded a bead at the bottom, and covered it with a small weave bead - just like what I would have done with a larger unit). I'm using the 0.025" wire that came with the welder, which is kinda small but it gives good penetration. I bought a big roll of 0.030" today, which I will use when my current spool runs out.
Unless you're building a frame from scratch (which you'd probably want to TIG anyway), this thing will do anything I can think of on my bike. It'll also be good for various projects around the house.
I'll post some pics when I get a few things done.Leave a comment:
-
Guest repliedNice little setup D-Mac. I'm jealous. I've wanted a welding rig for some time now but just not sure how well a small unit is going to work. Please let us know how it works out for you over time. And good job on the race. These GSer's know all the little tricks no?Leave a comment:

Leave a comment: