-
 Guest repliedI would just use it. Those things are super strong. Suzuki over built them. That's why the welds are ugly. They are ugly but strong!
 -
Guest repliedCan it maybe be from/for the rear torque link?Leave a comment:
-
Guest repliedI need some advice folks....
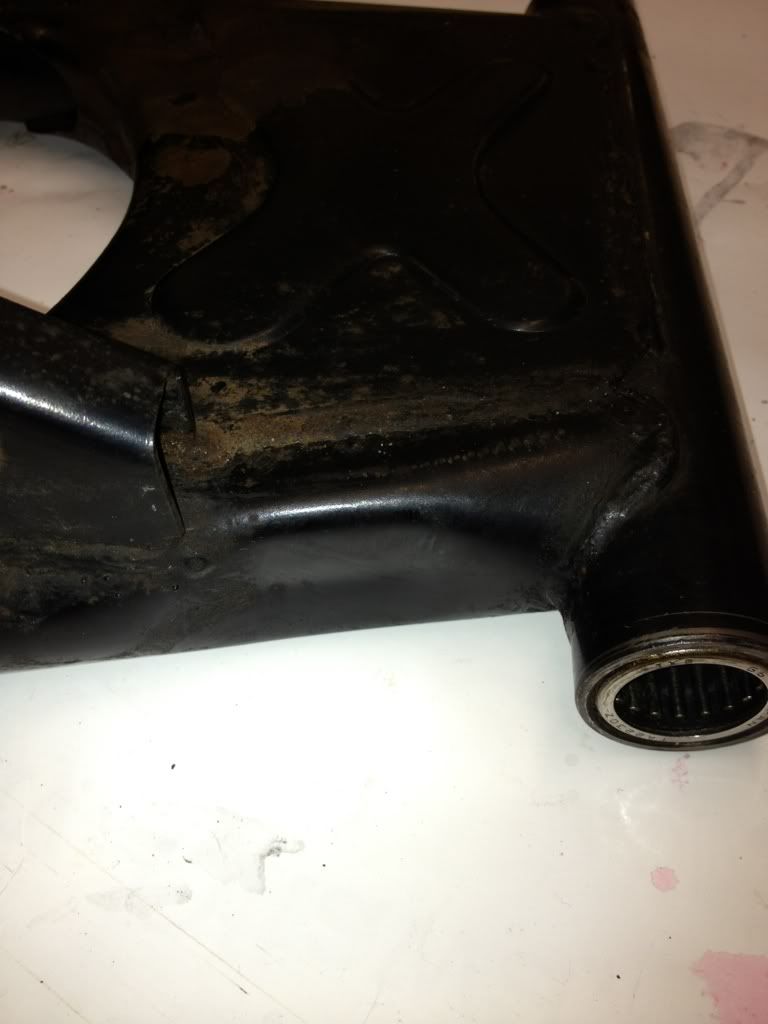
I cleaned up the swingarm today and discovered this.....
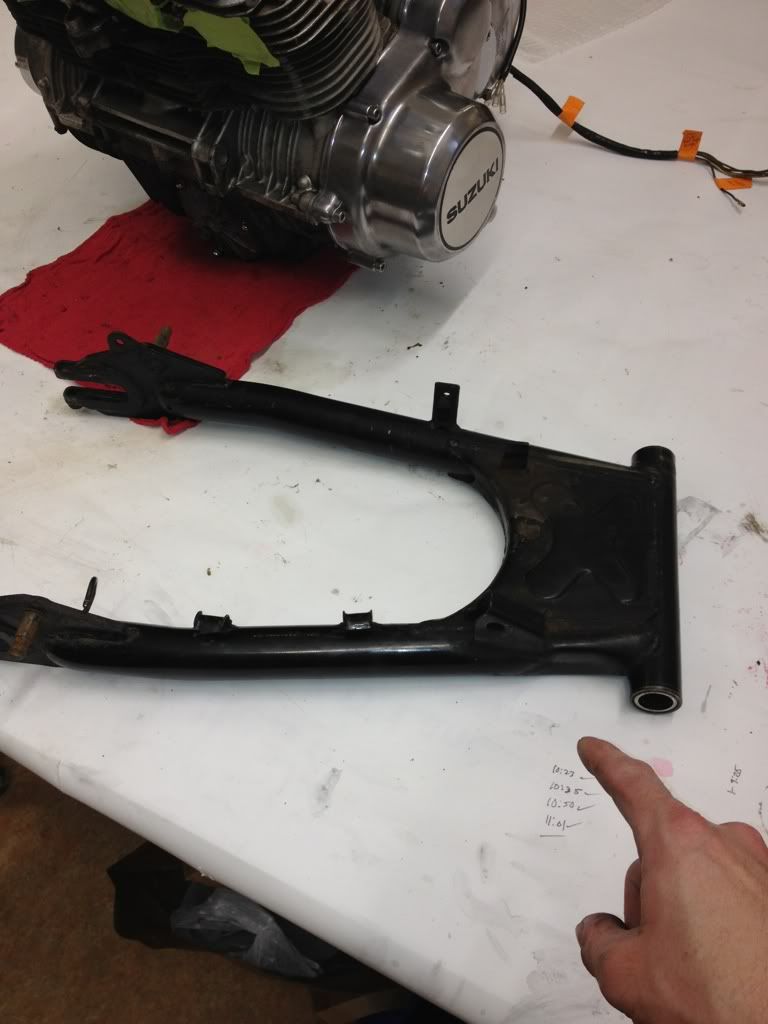
It's a little hard to see here, but there is an indent on the swingarm - it's on the right side just behind the pivot point/bearing. It looks like a side impact pushed in the tube 1/4-1/3". I thought it might be a stock "feature" (but a quick search indicates no). The rear brake arm lever is just behind it.
A couple of other better pics.....
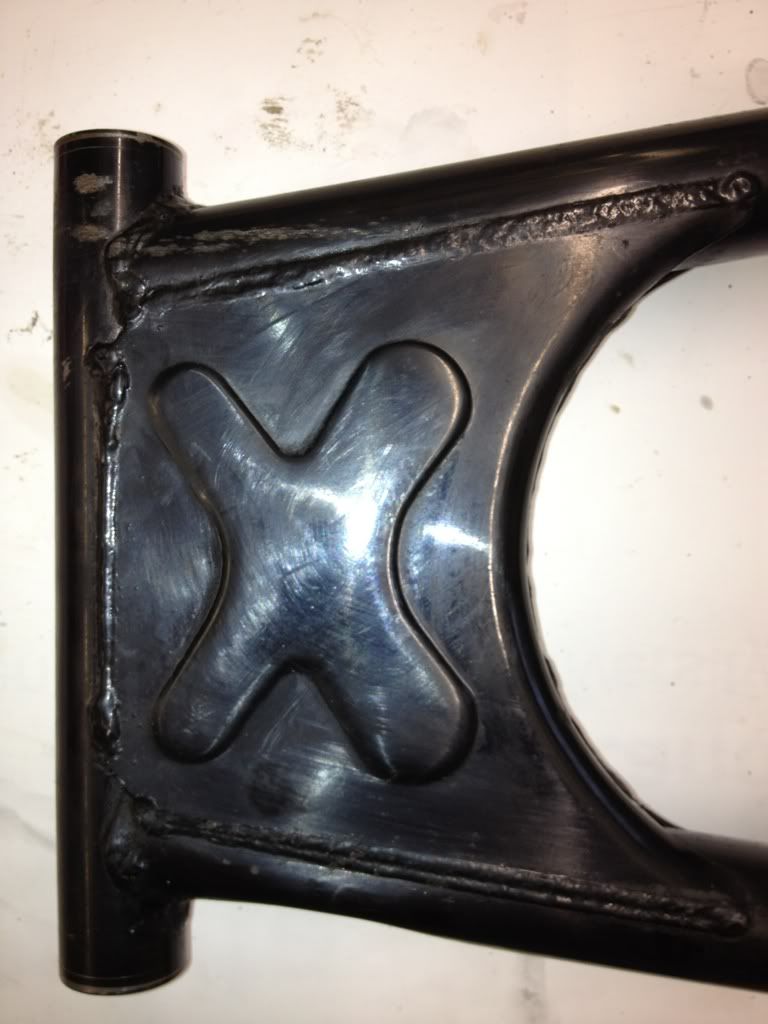
Swingarm upside down showing it.
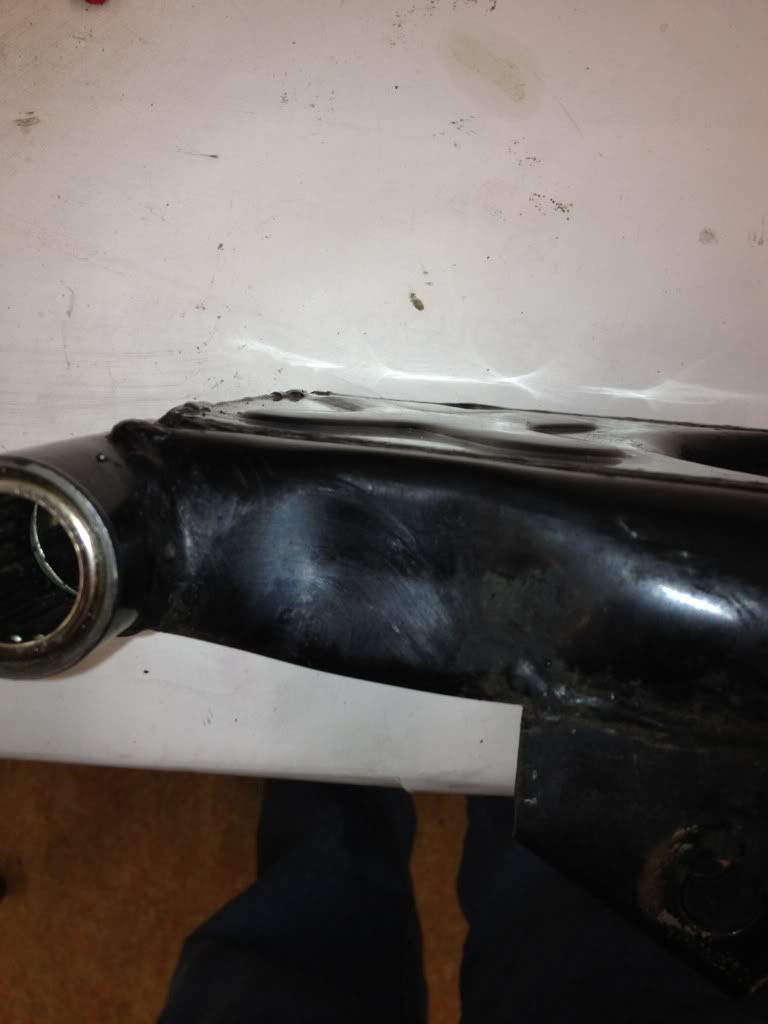
I made some quick measurements from the pivot point back to the chain adjusters. They seem to be even on both sides. None of the welds are cracked, and the paint on the dent isn't broken. There seems to be no other significant damage. Since the tubes are box welded together on both sides, it seems like the only damage is the indent itself. The tubes themselves are 1.5" in diameter.
eBay doesn't have any exact fits currently, but another site has one for $100. It looks like I can still buy a new one from Suzuki for $130 or so.
What do you think I should do?Leave a comment:
-
Guest repliedNice work. Rotors and wheels look well done from the pics. And yeah, I like the proposed engine scheme. That pic you linked to is the bike I'm rebuilding and i will also go with the black engine color and polished cases (assuming I can ever get the dang thing cleaned enough!). Black and chrome just go together like "peas and carrots".
Sci85Last edited by Guest; 01-07-2012, 01:23 AM.Leave a comment:
-
Guest repliedLots done, and looks good.......
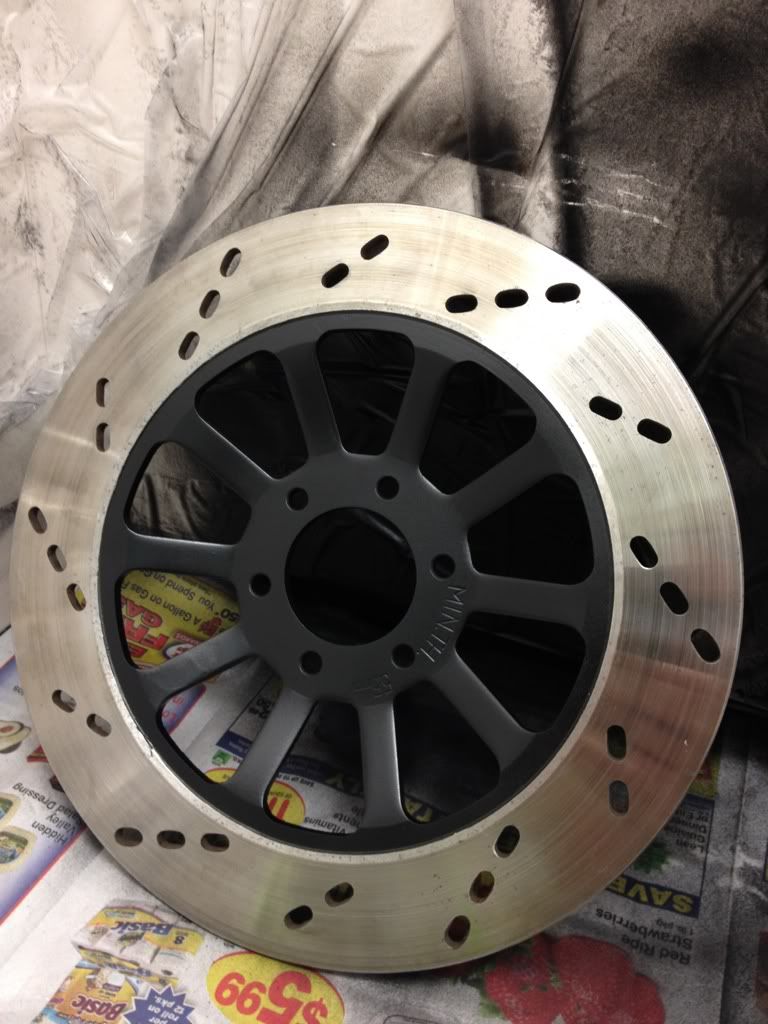
I took off the chipped paint off of the outside edge of the rotors, if that helps any...
I might try to paint it using a small roller, just wet enough and spin the rotor, apply wet roller to that edge and hopefully it will coat it, but that I can do when it's all back on the bike....Leave a comment:
-
Guest repliedi like the idea. except my silver parts not so shiny. I used duplicolor high temp engine paint.
Leave a comment:
-
Guest repliedDaily update:
I got a few nagging things done today.
First, I put in a big parts order. This included a few brake caliper parts I forgot to order last time, fasteners for the rear brake arm, a bunch of exterior engine fasteners/caps (might as well start getting this stuff now), swingarm bearings/seals etc, steering head bearings and other related things, and sprockets+nuts+washers. Easily my biggest parts order to date. A lot of this won?t get touched until the frame is done, but I don?t want to have to wait weeks to do anything at that point.
This morning I went to the shop where I?m taking motorcycle classes and rebuilt my forks. I used their fork vise and oil leveling contraption to help things along. I replaced the o-rings, washers, seals, dust covers, and snap rings. It didn?t go so well though in that I made pretty much every rookie mistake possible with the first fork (although nothing past the point of no return). Mistakes included: forgetting to put the drain bolt back in before filling the fork (duh!), overfilling a fork badly because the suction on the fork oil leveler syringe was broken (so I thought I hadn?t added enough oil when I had really been adding too much and it just wasn?t sucking any up) and then I accidently pumped the fork, which shot about 100mL of oil all over the place. I almost put the first seal on backwards too. I managed to scuff up a bit of the lower tubes as well. In the end, it got done and nothing leaks.
Finished! (I hope)

Then I picked up a book for the welding course I?m taking starting next week. I had no idea there were so many types of welding! Should be fun and useful. I will need to cut and weld some things on the frame.
Welding textbook. I immediately found myself immersed in the world of stick, MIG, and TIG.

Back at home I masked off the rotors.
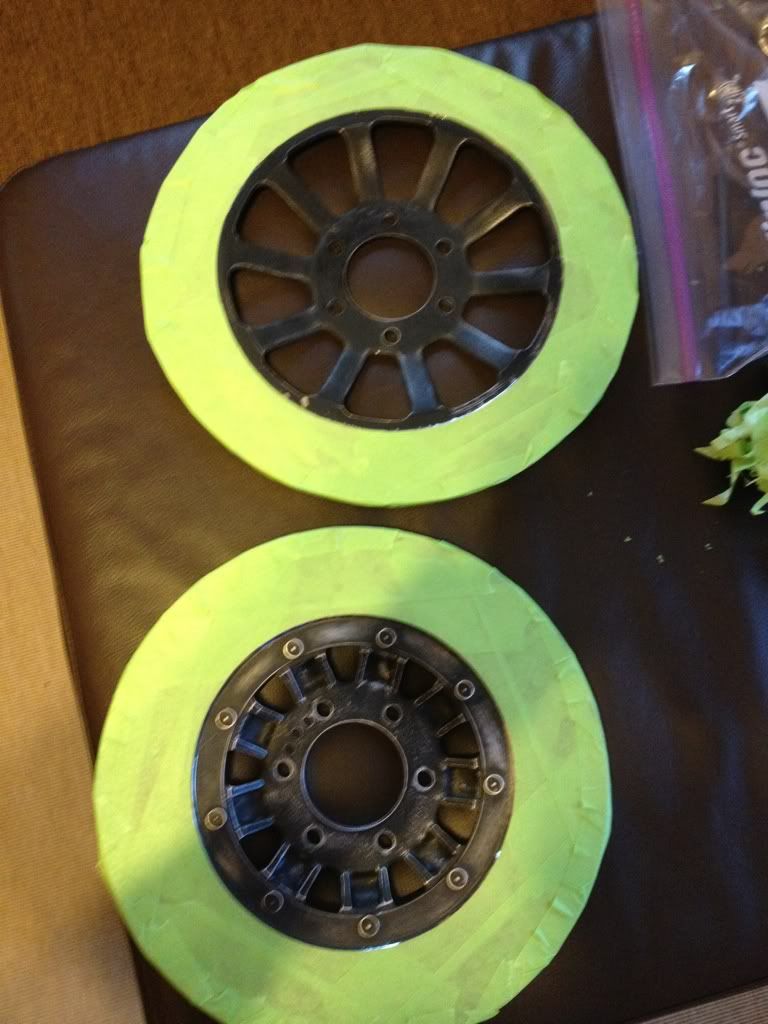
Then I went back to my ?paint booth? at the office and sprayed on some new black.
I goofed a little on one part (check out the black spoke at 8 o?clock, it ran a bit as I was trying to reach the sides of the rotor spokes).
Rear rotor
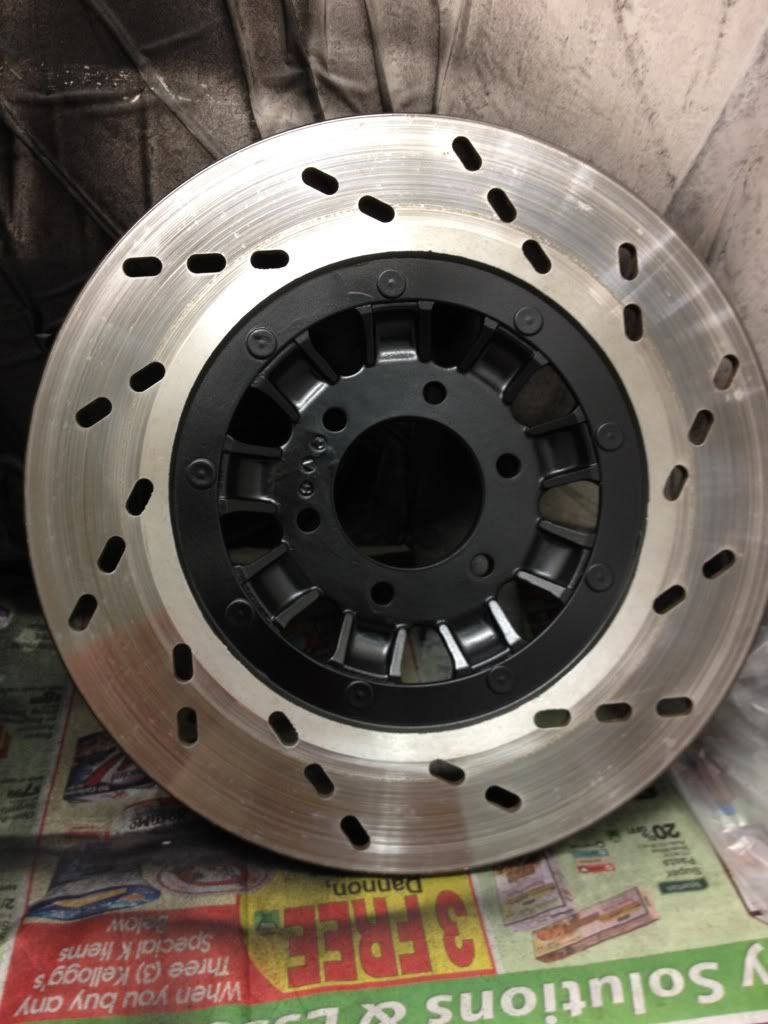
I still have to sort out what to do with the chipped paint on the outside rims of the rotors (I'll either sand it off or repaint it once the inner rotor dries).
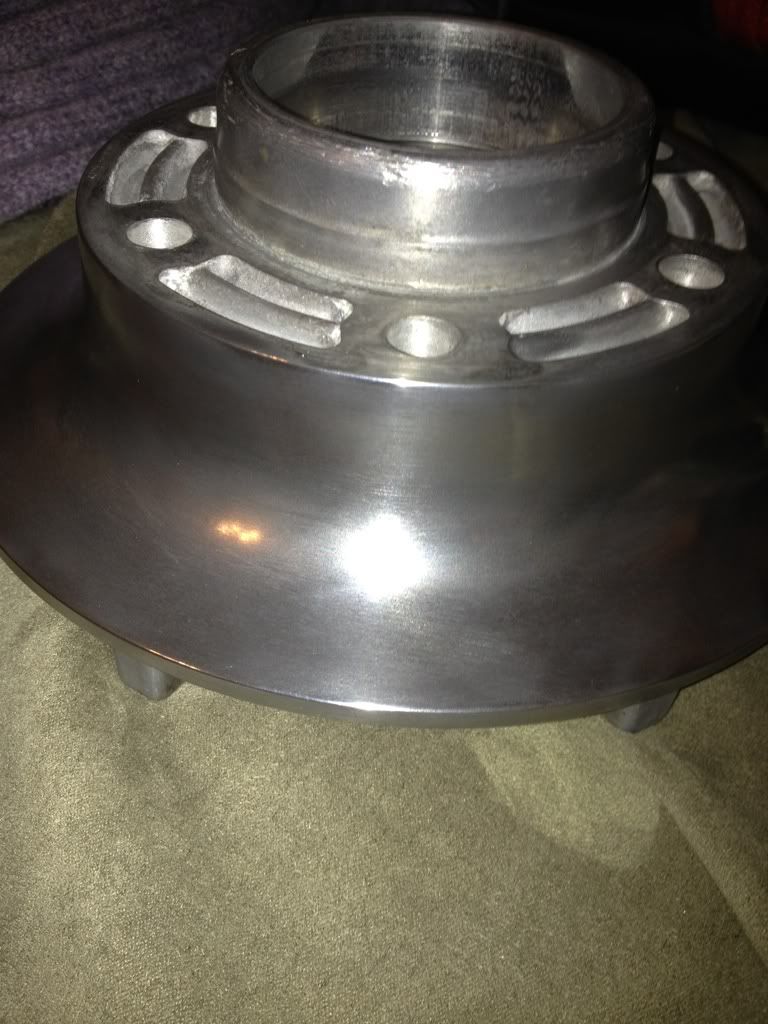
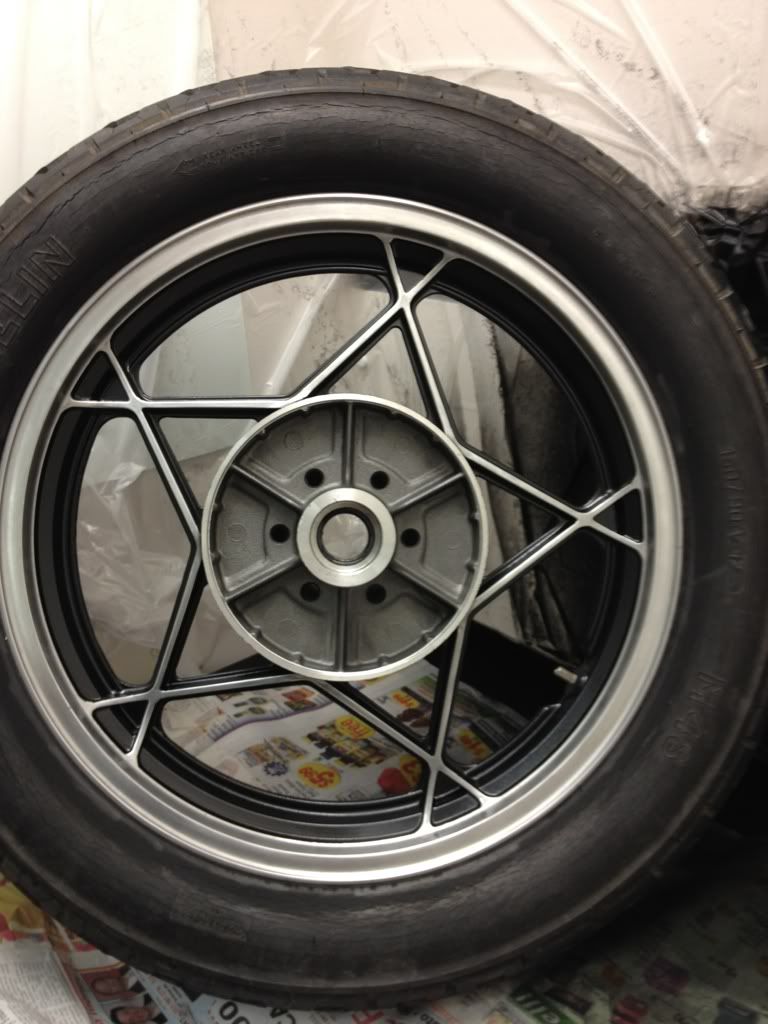
Also took this part from the rear wheel??..
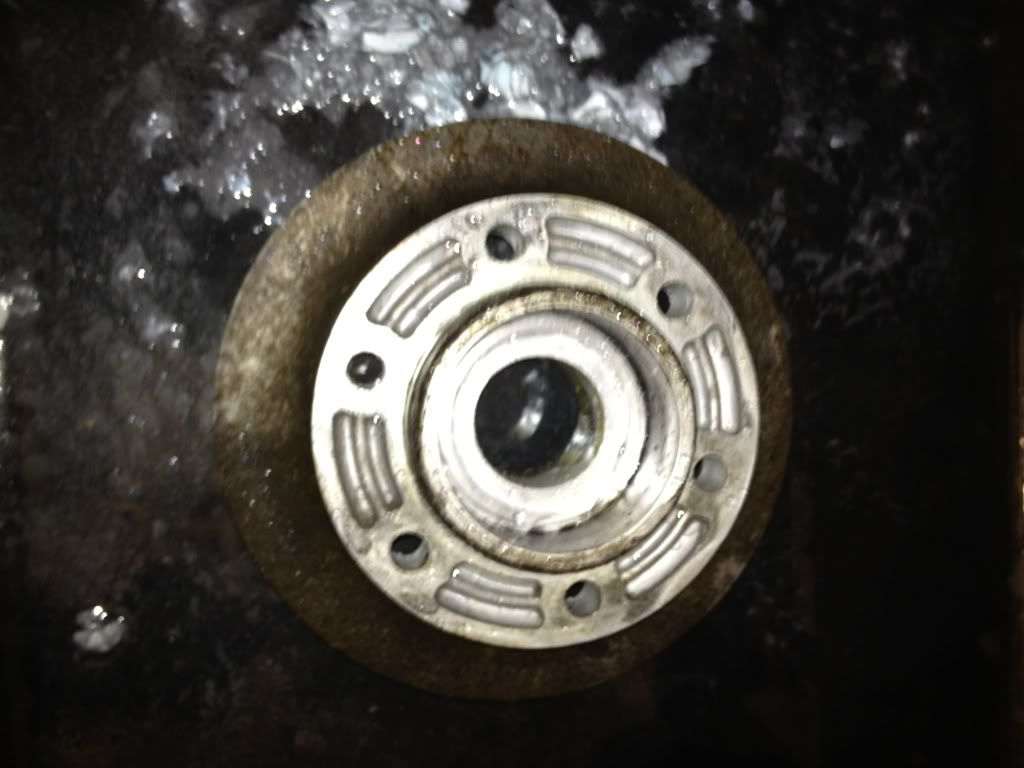
?..and made it look like this?.
COMMENTS NEEDED:
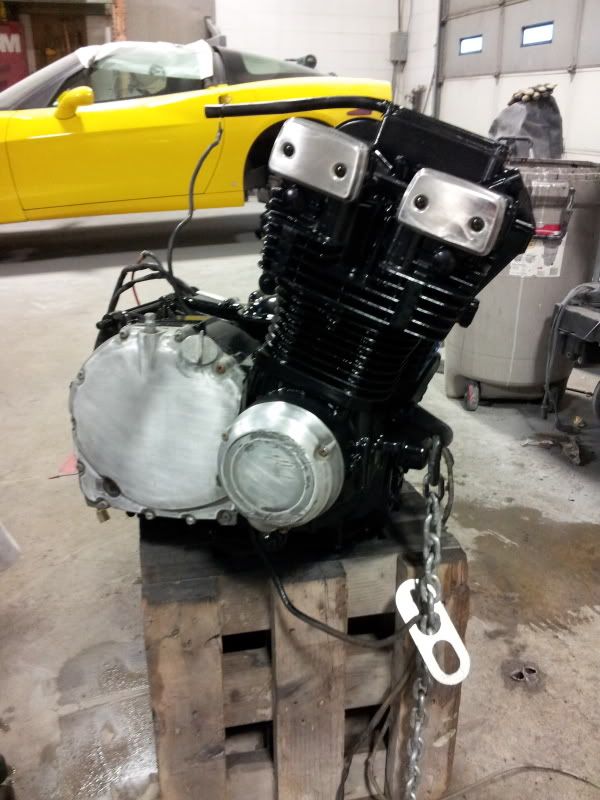
My original plan was to paint the engine with VHT Universal Aluminum (silver color). Now I?m really leaning toward blacking out the engine using VHT Black Oxide, except for new chrome cam covers at the top, OEM (silver/chrome) fasteners, and my bare polished crankcase covers of course. It would look kind of like the engine on this GS.
Any thoughts on this idea?Leave a comment:
-
Guest repliedgonna hit the stores tonight to find this tape, Thanks
and get it a bit closer to that nice and shiny polished edge....Leave a comment:
-
Guest repliedGK get yourself a roll of 3M 3mm fineline tape and use it for the edges, and mask with normal masking tape back from there.
That stuff goes around curves beautifuly, you can mask really precicly.Leave a comment:
-
Guest repliedIf it's like mine, the paint should come off if you carefully scrape it off before it dries (within an hour of spraying). That said, I think it's worth the extra time to mask it off as well as you can. Better to spend the extra half-hour now than risk removing too much paint later. Mine wasn't perfect, and I missed a couple of spots on the front wheel, but I tried to cover the shiny parts except where I thought they went a little beyond where they should have. These wheels clearly weren't perfect from the factory, so a good effort will likely be at least as good as what Suzuki did.
I can't say enough good things about the green masking tape (the "automotive" type). It's more expensive, but it sticks well, can be removed and "re-stuck" if needed, and it pulls off great. I will only use this stuff from now on.Leave a comment:
-
Guest repliedAhhhh OK, just a touch up is good, I thought you needed to do a full polish.....
how close to the lip was your masking using the tape, I can still see a bit of my polished lip, not sure if this will cause me an issue when I go to paint, will I be able to get it off, it's about 1 millimeter that is not covered, do I need to get it taped a bit better ? I was thinking of using some wax or a crayon to cover up the exposed polished parts, hopefully preventing paint from sticking to it, would make clean up much easier.Leave a comment:
-
Guest repliedNice work there, don't look like no rookie paint job to me, keep up the nice work.Leave a comment:
-
Guest repliedLooking good.......and no runs, that is the best....
Only thing I would have suggested is that you did the polishing of the rims first, then the paint, you risk the chance of scuffing the paint job now, or getting polishing compound on the fresh paint, you will just have to be a bit more careful when doing the polishLast edited by Guest; 01-05-2012, 01:04 AM.Leave a comment:
-
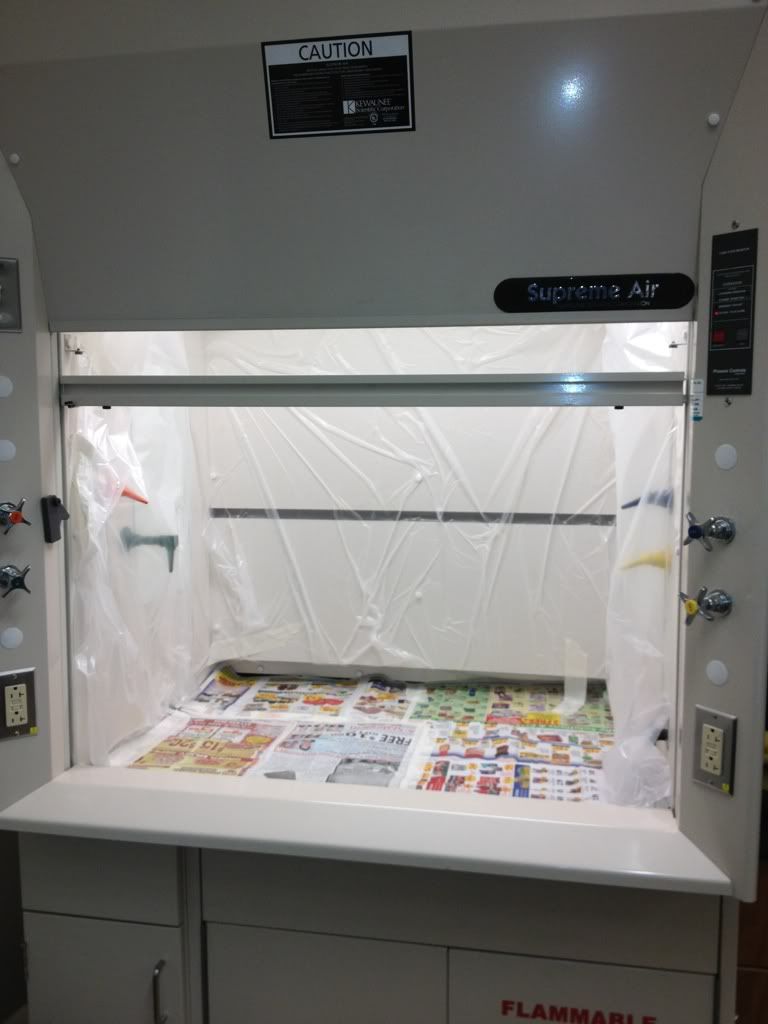
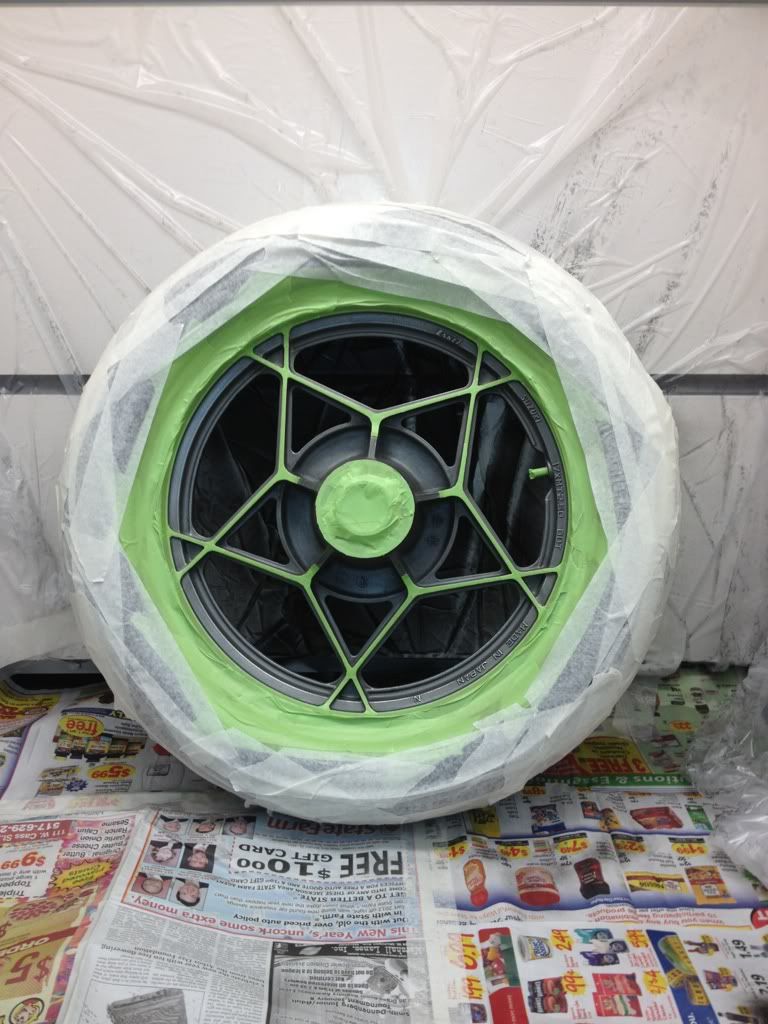
Guest repliedOk folks, the wheels are FINALLY painted!
I used my fume hood in the lab as a paint booth. It worked great and eliminated the fumes.
Front wheel??ready??aim??.
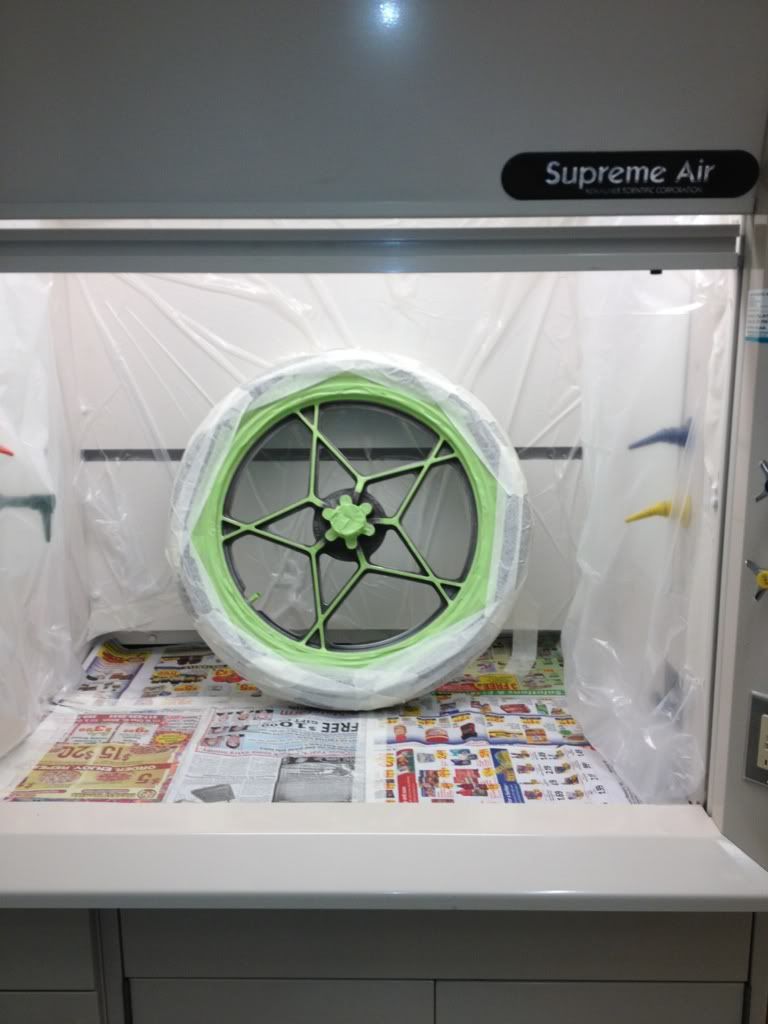
??fire!
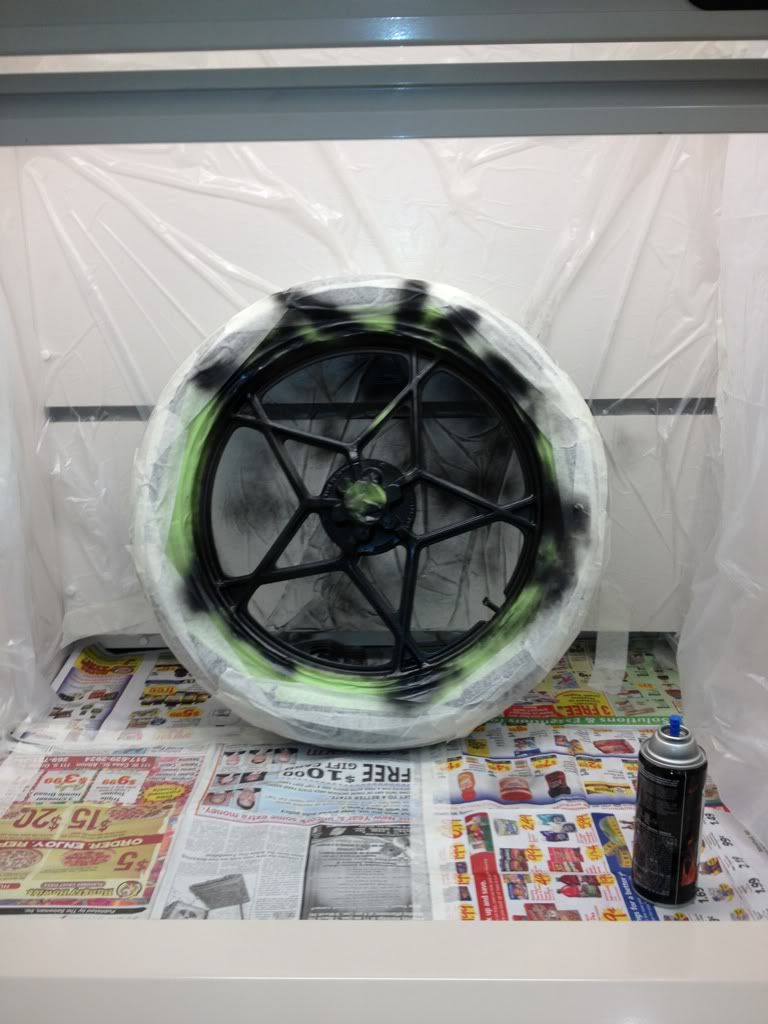
Several coats later, here it is! It looks better in person than the pic would suggest (even better without the camera flash too). I?m happy. As it dried it started to look more even as well.
Considering I?m a painting rookie, it went pretty easy. I took my time and there were no runs in the paint. I put on four coats ? two light and two medium. If I add clear coat, it?ll be after it dries completely and I have a chance to shine up the aluminum first (it?s pretty dull and still needs a hand polish). Then I?ll replace the wheel bearings, reinstall the rotors/sprocket/etc. and change the tires.
Rear wheel being painted.
Rear wheel is done! It came out better than the front.
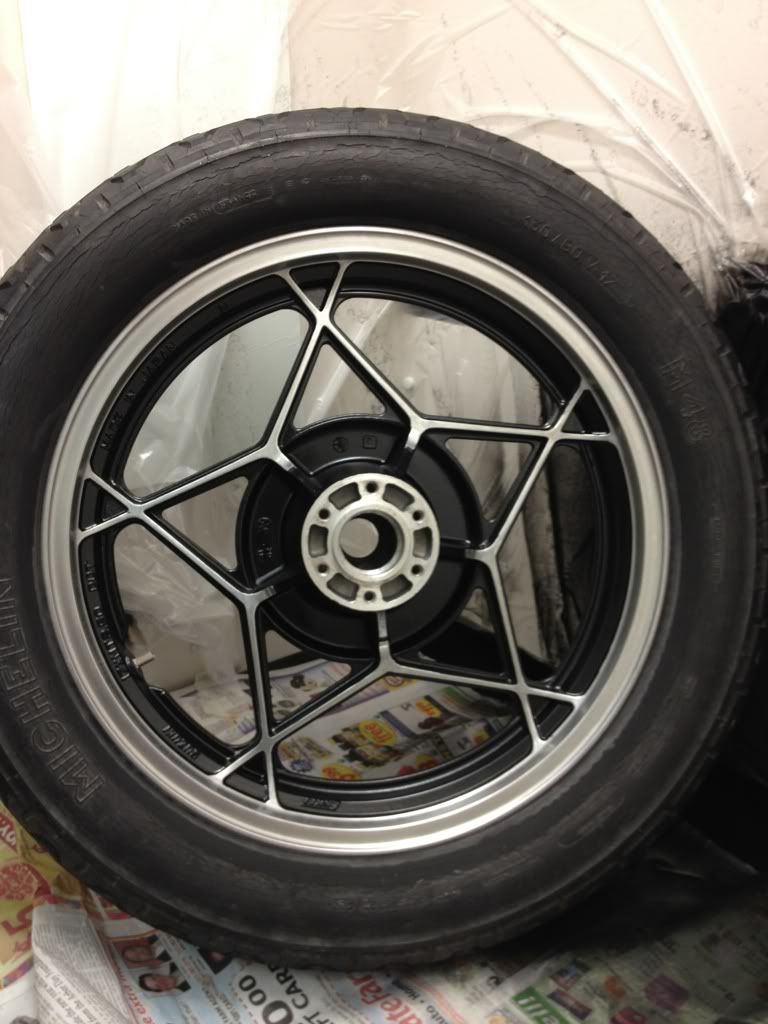
I left the inner hub grey because the original paint was in great shape and it?s hidden by the cush drive anyway.
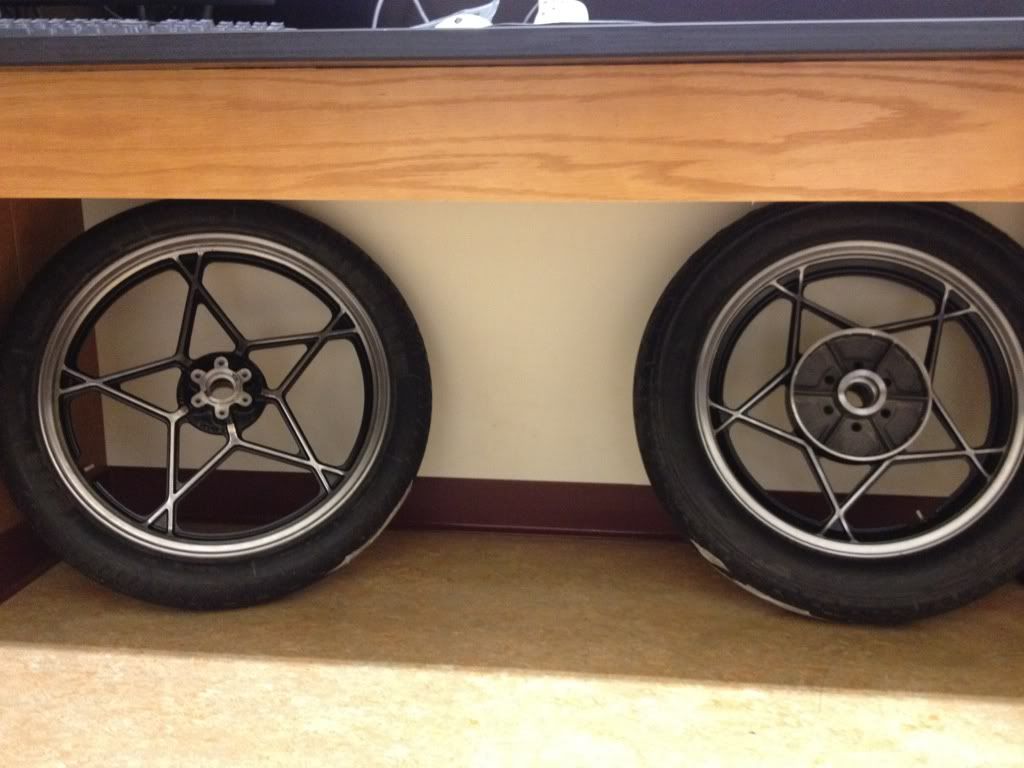
I stored them somewhere nice and safe?.under my desk at work.
Tomorrow I?ll likely paint the rotors and shine up a few other parts. I?m thinking I'll rebuild the forks on Friday.Leave a comment:

Leave a comment: