-
An observation Pete.
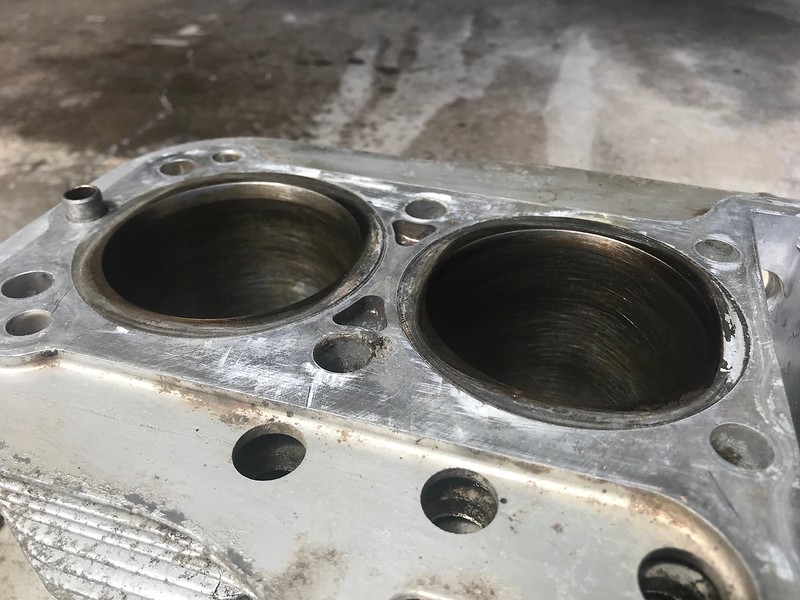
It appears you were spinning the hone too fast and moving it up and down in the cyl too slowly.
Slow down the spinning speed and speed up the stroking speed, this way you will typically end up with the desirable 45 degree cross hatch on your walls. I try to keep the rpm under 150 and stroke like a SOB
Progress looks great!
DarylLeave a comment:
-
Well I finally pulled my finger out and got some stuff done.
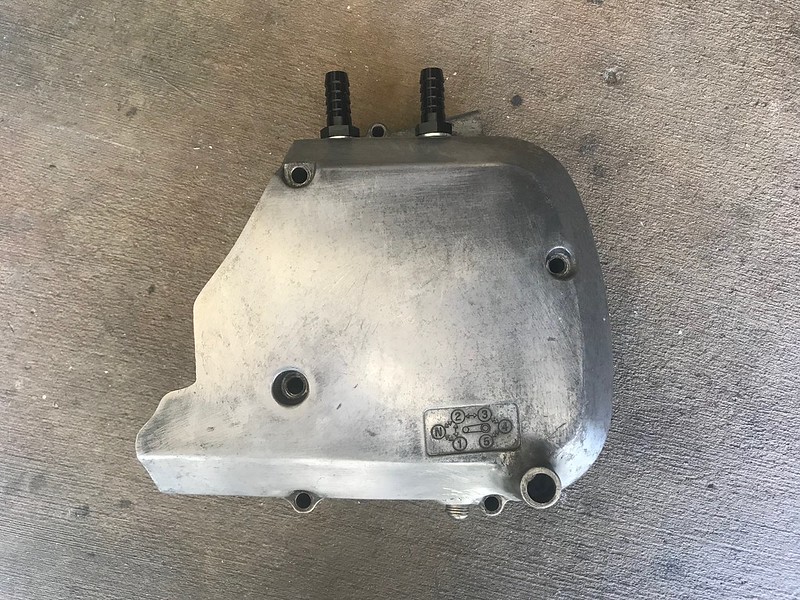
My cunning plan for the sprocket cover ended up working out, although I ended up with plan C for the inside part.
 Untitled by starpoint73, on Flickr
 Untitled by starpoint73, on Flickr
 Untitled by starpoint73, on Flickr
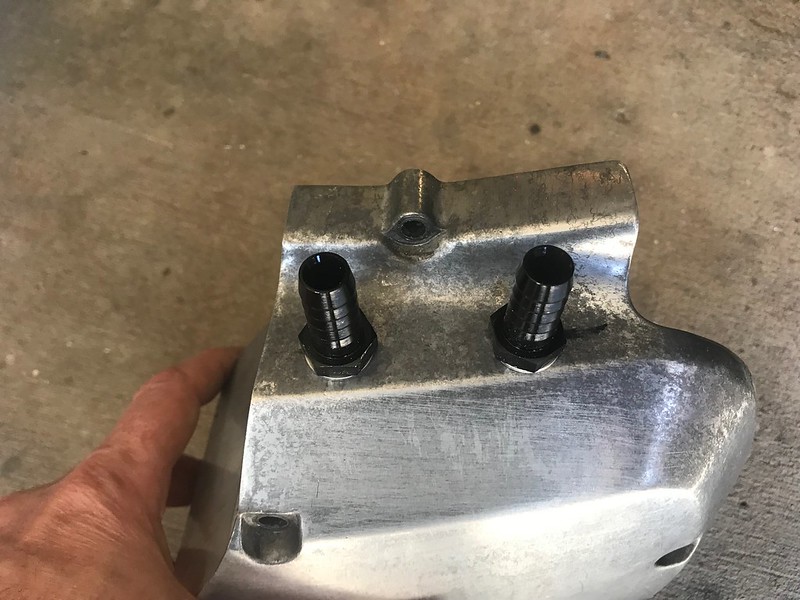
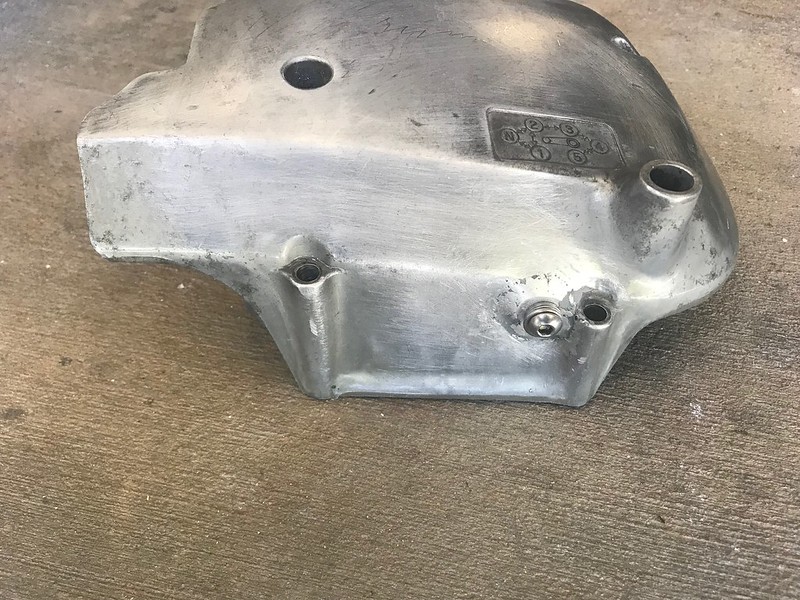
It's now my breather catch tank. Some 12mm or 1/2" internal diameter hose will run from the breather cover down to the rear barb with a filter on the front barb. Should scrub up well once it's got some paint on it too. I've made the drain hole as neat as I could, will just have a copper washer under an M6 button head to seal it up.
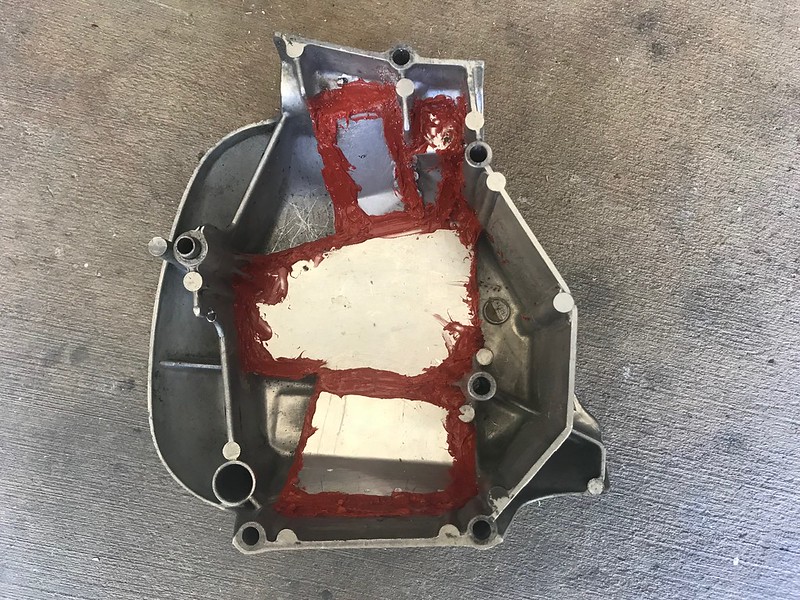
Plan A for the inside was a neatly tacked in single piece of aluminium, but getting it to form around all the bits of webbing, posts, etc. made it impossible, so I went with Plan B which was four separate pieces welded in neatly. My pathetic aluminium welding plus running out of Argon meant Plan C... the four pieces tacked in but sealed up with RTV. Not pretty but it's inside where noone will ever see it.
 Untitled by starpoint73, on Flickr
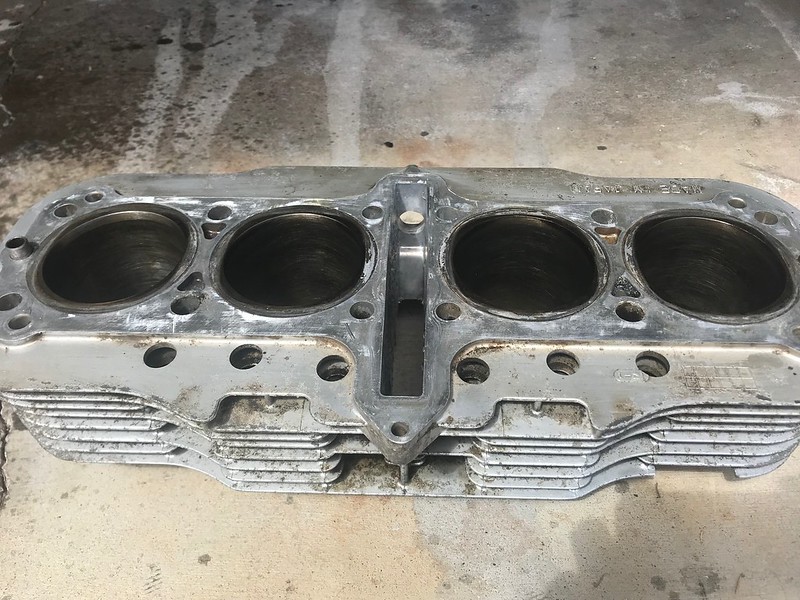
The big thing really is I got the cylinders honed at last. Gave them a good scrub out with soapy water afterwards and a good rinse (three times in fact). I also degreased and pressure washed the outside as step one towards paint prep.
I've coated the cylinders in fresh engine oil to stop the rusting for the moment.
Not the world's best hone job I'm afraid (first time for me) but from what I understand it should at least do the job, and it's certainly broken the glaze that's for sure!
 Untitled by starpoint73, on Flickr
 Untitled by starpoint73, on Flickr
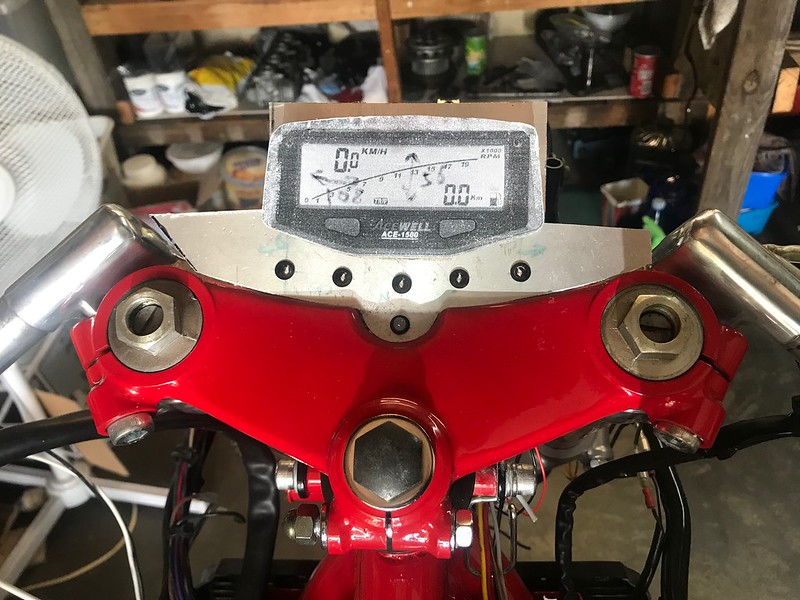
I've also gotten a start on my dash mainly so I can get the harness as complete as possible and have an oil pressure light once I'm ready to fire the motor up at last.
The Acewell I'm going to use has no idiot lights so I'm making a panel to sit between the triple clamp and the Acewell. It won't stay that wide, the sides will bend down once I actually get the Acewell, no point doing too much of that until I know the exact dimensions etc.
 Untitled by starpoint73, on Flickr
Gotta make a call hopefully tomorrow about getting the top end gaskets and get some paint stripper during the week for the cylinders and engine covers. I should be able to get a good go on paint prep next weekend and probably paint the weekend after.Leave a comment:
-
Yep, South African is right, and yeah that gloss black finish is very nice indeed! I'll likely get the headers ceramic coated in black which I think will be the closest I'll be able to get.Leave a comment:
-
Years ago i had a Cowley 6-2 exhaust on a CBX. South African manufacturer i think.
They did nothing for performance but had a lovely, gloss black finish that was hard as nails.Leave a comment:
-
Yes indeed Larry! The muffler is actually made for Kats and GSX' but I have no idea on the brand of the headers, so it was quite surprising that they appear to line up pretty spot on.
I know the collector was pretty close to the sump cover when I sat the empty crank cases etc. in the frame a while back but the bracket on the muffler has some adjustment so I should be able to get it to all work very nicely together.
Now to get a motor in one piece and running so I have something to bolt it to and can hear it
Leave a comment:
-
That pipe looks perfect, Pete. Seriously. Look how nicely it follows the lines of the frame. Like it was made for it.Leave a comment:
-
Still no real progress to report. I have been working on my cunning plan for the sprocket cover and was hoping to have it to a point where I could share something today but I didn't quite get there, hopefully next weekend. I'm at least confident it will work now!
On another note, looks like I'm sorted for my exhaust. A mate had an unused muffler that doesn't fit any of his headers, and it turns out to be a spot on fit for my headers. I sat the headers roughly where I think they'll sit once the motor's in the frame and it looks like it'll all be spot on. Looks good to me!
 Untitled by starpoint73, on Flickr
 Untitled by starpoint73, on Flickr
Leave a comment:
-
Sorry guys, been very low key lately... few different things going on at work keeping me busy and exactly as you say Larry waiting for funds to build at the moment which is not exactly exciting stuff. The 450 needs a service too which it'll get this coming weekend.
I did pick up more VHT engine paint the other day as the local store who stocks it had a sale on (yay) so that's something. I do need to start some things I can do like sanding though.
Sam, you can definitely do it, just be sure to be patient, don't rush, and just take your time.Leave a comment:
-
You're welcome, Sam. Patience, persistence, and having quality materials is the key. Don't be afraid to spend a bit more for the good stuff. You'll save in the long run.
I know you're in a funds gathering/saving mode these days, Pete, (been there..) but we're still jonesing for updates on your Kat.
Leave a comment:
-
Originally posted by Sam 78 GS750 View PostI forgot that I posted this, but 4 months later here I am... Reading through Pete's entire thread again (the paint portions at least) before I head out to the garage to continue the beginning stages of paint prep.Originally posted by nvr2old View Post
I was on the fence between doing it myself and farming it out, and went back and forth many times throughout my own build. Watching you go through this, Pete, and then reading through some of Larry's older threads is what's given me the confidence to try and tackle a proper paint job on my own bike. You both definitely de-mystified the process for me and showed that with a lot of patience (and some help and guidance along the way), an amateur can get amazing, professional looking results.
Thank you.Leave a comment:
-
Cheers Larry, haven't logged in at all this week... but yeah might give the 80 grit a go this time, most of the stripper available here now isn't designed for 2K paints etc. and is only good on acrylics and so forth, useless!
I used paddle pop sticks for the fins on the cases and still have a bunch of them here
Leave a comment:
-
If you can't find a good stripper, Pete..hit all the covers with some 80 grit. That'll get things going..quickly. You'll probably need that on the points cover anyway. 180 will remove those scratches and then on to 320 and 400 before paint. 180 wrapped around a paint stir stick will get in-between the cylinder fins real nicely. (you probably know, that.. )
Leave a comment:
-
Yep Steve I can be quite the procrastinator myself, and you're right definitely don't need extra delays!
Larry if I can get some decent paint stripper the covers won't take too long, the last lot I used was weak as water and did almost nothing. Prep for the cylinders will be a whole different ball game... I reckon multiple rounds of degreaser, brake cleaner, and pressure washer followed by lots of wire brush action and sanding again like I did with the crank cases.
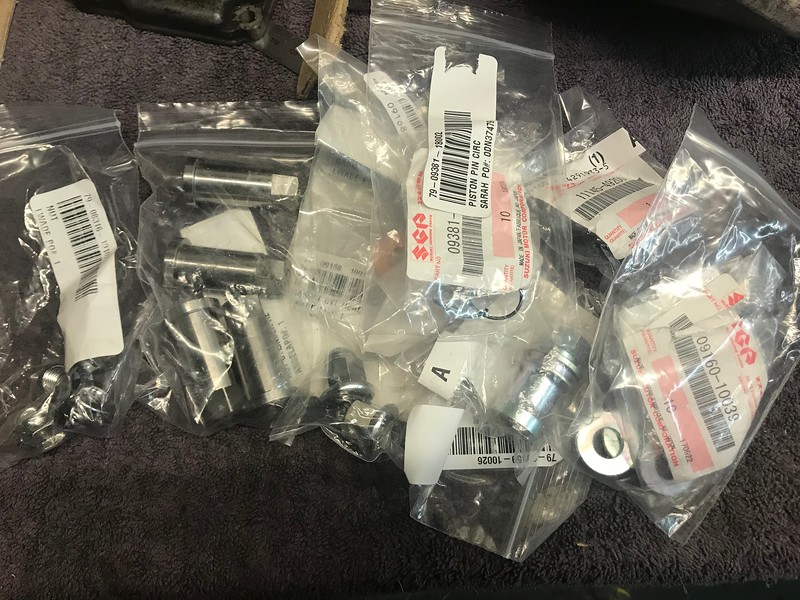
As for the parts... Well bugger me if they didn't arrive today at last...
 Untitled by starpoint73, on Flickr
I best get honing, cleaning, and degreasing ready for some paint!Leave a comment:
-
The engine covers alone will keep you busy for an afternoon or so.. Always nice to see progress on this bike, Pete.
Leave a comment:
.png "Powered by vBulletin")
Required reading for all forum users!!!
Welcome!
Register to access the full functionality of the GSResources forum. Until you register and activate your account you will not have full forum access, nor will you be able to post or reply to messages.A note to new registrants...
All new forum registrations must be activated via email before you have full access to the forum.A Special Note about Email accounts!
DO NOT USE sbcglobal.net, att.net, bellsouth.net or email.com email addresses when registering for the forum! Email that our system sends out to these email servers is treated as SPAM and you will never receive your activation email, or any other email that our system may send out. Use an email address from gmail.com or some other email server.A note to old forum members...
I receive numerous requests from people who can no longer log in because their accounts were deleted. As mentioned in the forum FAQ, user accounts are deleted if you haven't logged in for the past 6 months. If you can't log in, then create a new forum account. If you don't get an error message, then check your email account for an activation message. If you get a message stating that the email address is already in use, then your account still exists so follow the instructions in the forum FAQ for resetting your password.Have you forgotten your password or have a new email address? Then read the forum FAQ for details on how to reset it.
Any email requests for "can't log in anymore" problems or "lost my password" problems will be deleted. Read the forum FAQ and follow the instructions there - that's what we have one for...
New users should be sure to read the FAQ as well as the posts in the Announcements forum. This will answer many of the questions you may have about how this forum works.
Before posting questions in the forums be sure to use the forum search function!!! Odds are your question has already been asked and answered before. And when posting, please make sure that you post to the correct forum.
Finally, be sure to check out BassCliff's website here. He has useful information that can't be found on this site. His welcome page containing useful GS information can be found here. Be sure to check it out!
If you are a returning visitor to the forum and can't log in using your old forum name and password, chances are your account is deleted. Just create a new forum account and you should be all set.
Leave a comment: