.png "Powered by vBulletin")
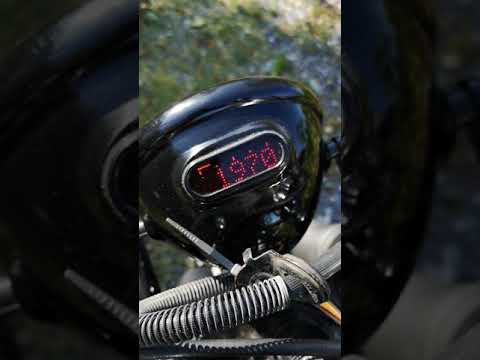
 IMG_20190924_184413 by Lars Krogh-Stea, on Flickr
-
I also took apart the china-petcock, and there's no mystery why it doesn't hold tight. Adding to that, it had become almost impossible to switch between positions because of the expanded rubber. Note that there's no O-ring or even slot for O-ring on the base plate for the "handle".
IMG_20190924_184413 by Lars Krogh-Stea, on Flickr
-
Didn't really have the spare time, but wanted a solution for the leaking petcock. I ordered a better quality petcock, made in Italy. Although the quality was awesome, it didn't look like it would flow nearly enough for 4 carbs. Inside the tall screen there is at thin plastic tube with an ID of roughly 2,5mm. As the float valves are 2mm each, I recon the ID of the petcock tube shuld be at least 4mm for it to not become the bottleneck. Looks nice though, and when I took it apart it seemed very well made. It also has springloaded stop-points, so it clicks nicely into the different positions. I guess it is a replacement petcock for a 50cc Tempo Panther or something.
 IMG_20190924_182442 by Lars Krogh-Stea, on Flickr
I did some googling though, and some people with badly tuned or defective 50cc engines did experience around 23mpg. This indicates that even this small petcock would flow enough for the GS. I might try to hook it up and measure the flow per minute or somethingLeave a comment:
-
The old master pump was both leaking and looking pretty worn out. Was contemeplating a rebuild kit, but decided on a new master in stead. Didnt cost too much and looks nice i think
 IMG_20190920_175251 by Lars Krogh-Stea, on Flickr.
Leave a comment:
-
 Guest repliedHi, first post on this forum. Love the build and ingenuity on this thing. Definitely following along from here on out.
Leave a comment:
-
That's a nice compact stance on that bikeOriginally posted by Buffalo Bill View Post I have a Kercher 4 into 1 exhaust on mine and the exhaust tubes are more to the senter of the bike which gives more lean angle even if the bike is lower.
Do you have a closeup of how you made the risers for the shocks?Leave a comment:
-
Only problem with lowering the forks of a GS is ground clearance.
Raising the rear adds to it.
This is how my 1100G sits with: 35mm rear shock risers and the front end lowered 40mm.
No resets because this is a road bike, comfort is important for longer rides.

Leave a comment:
-
Awesome feedbackOriginally posted by Buffalo Bill View Post
I don't know as much about this as you do, but I think I'm on the same track. The reason I have the foot that far forward is because I haven't mounted rearsets on this side yet, and I'm putting the bike in neutral from second If you look 5-6 cm behind my heel, you can se the prototype peg I've mounted temporary. This is where the rearset will sit. On the brake side the rearsets I've made is already in place:
 2019-08-31_09-15-07 by Lars Krogh-Stea, on Flickr
These give a good angle and position for the knee I think.
I'm also glad you backed up my feeling about the rear sitting too low. I'll do some trips with my gopro mounted to the front of the frame and see how much clearance there is between the front wheel and the exhaust/frame first, as I want to lower the bike in the front first. If the trail/rake doesn't get close to how I want it, I'll raise the rear. Theres maybe no real advantage of lowering in the front as opposed to raising the rear, but I'm also thinking aestethics, and I want to keep the bike low for the good looks (in my view). Is there any disadvantage of lowering the front, as long as the geometry is good?Leave a comment:
-
Very useful photo, I take side views like this to help me see my suspension set ups.
I can see that if you really want it to improve the handling, you need to raise the rear end 25-35mm with longer shocks.
Fabricate rear sets too, it's EZ to see your feet are too far forward.
Keep on truckin'…

Leave a comment:
-
Was going to ride the bike home this weekend, but things didn't go well.. Neither of the petcocks I bought off of eBay worked. The short one was leaking at the riveted plate in the front. The longer one didn't leak but it didn't flow well enough to keep the right fuel level in the carbs either, and the bike wasn't really rideable. It really was a big dissapointment, because all the lights and all electronics except the magnetic pickup for the speedo now works. The bike ran well with the small plastic gas tank and all seemed well.. but the last trip of the season was a total of 15 yards
But lasted long enough for my brother to take a picture:
2019-09-18_10-45-33 by Lars Krogh-Stea, on Flickr
The project is now extended for another winter, and I've ordered a few new parts. I've ordered an Italian made petcock and a magnetic bolt for the rear brakedisc. The bolt will be used for the magnetic pickup for the speedo. I've had plans earlier to integrate this into the speedo gear at the front axle. The plan now is to place it at the rear wheel and route the cable in a nylon sleeve together with the rear brakeline. The frequency of updates will be lower for a while as I need to focus on my masters thesis the next couple of months.
On the positive side; the m-unit blue and Motoscope mini is awesome!
Leave a comment:
-
Very temporary varning light panel Will use this until the new top triple is finished.
 2019-09-06_04-03-15 by Lars Krogh-Stea, on Flickr
Leave a comment:
-
Accossato PRS2 radial master with matching clutch lever. Blue ATE brake fluid matched the blue stripes on the tank and seat nicely
 2019-09-06_04-03-38 by Lars Krogh-Stea, on Flickr
 IMG_20170407_115832 by Lars Krogh-Stea, on Flickr
Leave a comment:
-
I'm thinking maybe over the carburettors, on the right side where I've marked with a blue dot.
 Tenning by Lars Krogh-Stea, on Flickr
Leave a comment:
-
There's no room for the ignition-lock on the top triple so I'll have to place it somewhere else.
Anyone have a suggestion? Pictures are welcome
Leave a comment:
-
The handlebar controls I bought came with one momentary and two laching buttons. I knew this in advance, but I bought them anyway because the housing are good quality and I have some spare M12 momentary steel buttons. What I didn't know was that they were non standard threads and I don't have a tap that fits. Thankfully they came with some low profile nuts and the housing have just enough room for them to fit.
 2019-07-15_10-24-17 by Lars Krogh-Stea, on Flickr
 2019-08-31_09-16-49 by Lars Krogh-Stea, on Flickr
Leave a comment:
Leave a comment: