You titled this thread retro racer, so are you racing the bike?
Announcement
Collapse
No announcement yet.
1981 gs750 (gs750e) Retro Racer project
Collapse
X
-
Maybe my bad. Right, I just read the last few posts and looks like you've never had the bike on the road.Originally posted by LarsKroghStea View Post
You titled this thread retro racer, so are you racing the bike?
-
Qurious to know the chain of thoughts leading up to that post.. I think I've explained this more than once..Originally posted by Buffalo Bill View Post4 years and your bike ain't rideble yet???
I can't take your project as serious…
Or are you just angry because you spent your time reading a few posts and now the ending isn't in plain sight?
Leave a comment:
-
4 years and your bike ain't rideble yet???
I can't take your project as serious…
Leave a comment:
-
New carburetor boots. Ordered the original Suzuki ones and the rubber seems brand new 😊
 2019-06-30_06-42-06 by Lars Krogh-Stea, on Flickr
I took apart the carbs and cleaned the float needle and filter. Now there's no leaks and the fuel level is correct when measured through the clear hose.
 2019-06-30_06-44-39 by Lars Krogh-Stea, on Flickr
I also took the oppurtunity to change the rail bolts into unbrakos:
 Untitled13 by Lars Krogh-Stea, on Flickr
Leave a comment:
-
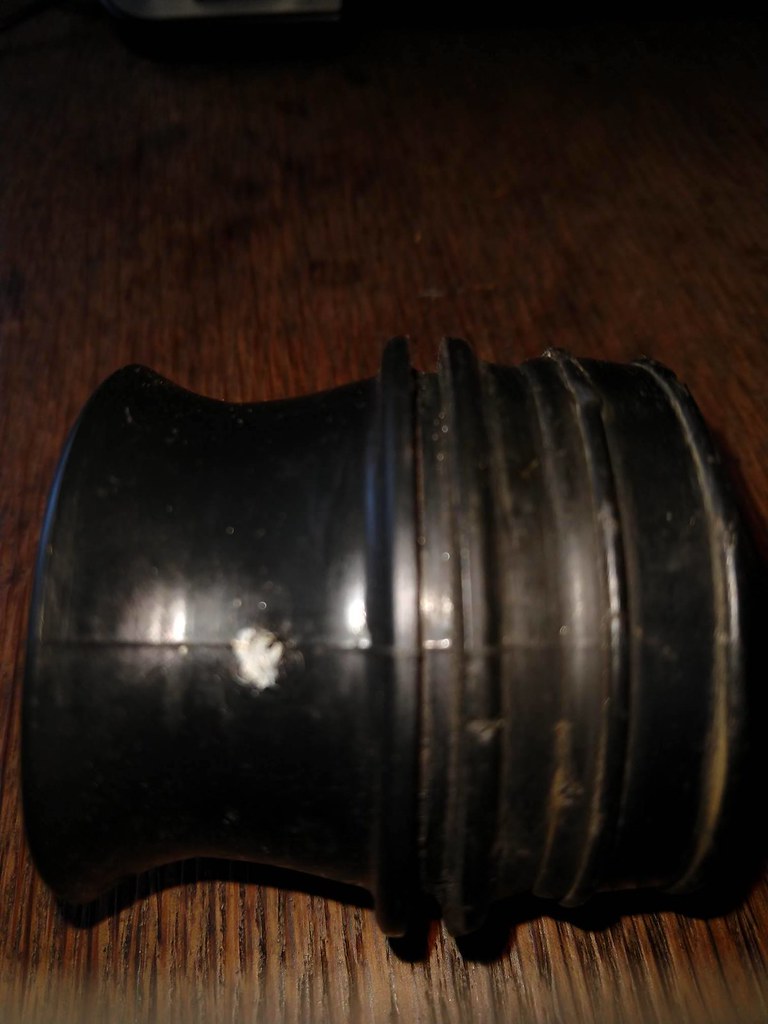
This is a picture of how my bike was assembled. Some kind of thick radiator hose sits loosely over the intake boot and carb opening.
 48036867868_135740661c_o by Lars Krogh-Stea, on Flickr
Next picture shows my brothers bike (same model and year). This is an airtight assembly:
 riktig_muffe by Lars Krogh-Stea, on Flickr
My bike is sucking in lots of unfiltered air and at the same time the intake plenum is not alowed to do its job as it's supposed to. Next picture shows one of the intake boots. It's inside diameter is about 45mm and on the carb the outside diameter is about 53mm. Not an optimal solution..
 feil_muffe by Lars Krogh-Stea, on Flickr
They don't make a particularly tight connection with the holes in the plenumbox. This is also why gas poured over my engine.. If everything was done correctly, excess fluid would flow out the boots and down the draintube in the bottom of the plenum. One less firehazard to worry about when this is corrected Guess the bike will run smoother as well.
Leave a comment:
-
Originally posted by cowboyup3371 View PostQuit reading that one and get Nessism's CV rebuild tutorial from Basscliff's site. It is a much better written one.
http://members.dslextreme.com/users/bikecliff
A million thanks yous! I've never scrolled past the manuals section of that page. I now see that it's a gold mine of information
EDIT: It's the same tutorial that I've got from somewhere else. But thanks for showing me the rest of the site Last edited by LarsKroghStea; 06-10-2019, 05:51 AM.
Leave a comment:
-
Quit reading that one and get Nessism's CV rebuild tutorial from Basscliff's site. It is a much better written one.
Leave a comment:
-
I've also read page 4-5 and onwards in the workshop manual for an explanation on why gas flows from both holes, so I'm now confident I have it narrowed down to wrong float setting or some obstruction or similar problem connected to the needle not making a good enough seal to stop the gas from flowing.
Leave a comment:
-
I'm learning a few things about carburettors today..
The hoses I thought were overflow-circuits are really just for venting. The reason for connecting hoses to them is so gas will flow away from the engine in case of a crash where the bike is left lying on the side. Makes more sense since they're located so high up.
The leftmost hole on the intake side is the real vent and is where gas will overflow. I guess that points to the float/needle.
 2019-06-10_12-50-50 by Lars Krogh-Stea, on Flickr
Leave a comment:
-
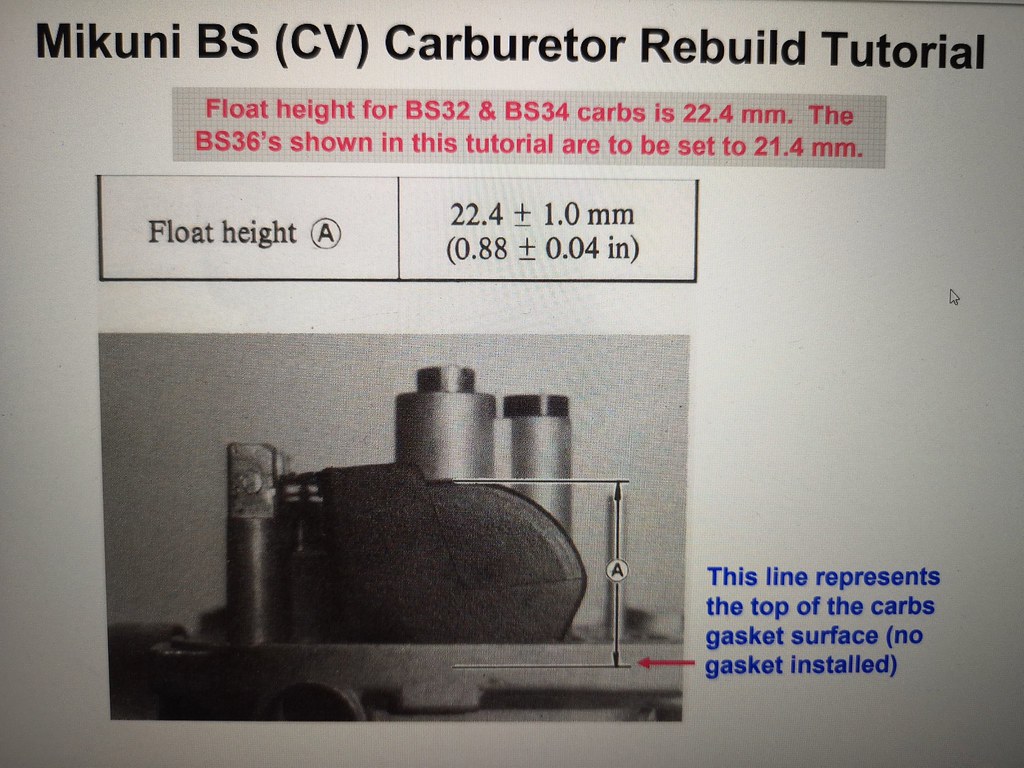
Found a good rebuild tutorial online:
 2019-06-09_11-33-11 by Lars Krogh-Stea, on Flickr
 2019-06-09_11-33-00 by Lars Krogh-Stea, on Flickr
Stupid as I am, I didn't bring the carbs home with me. I'll make some tube adaptors for the drainholes while I wait for my next wrenchday..
Leave a comment:
-
Short lived happiness..
The two carburettors on the left side of the bike are leaking a lot and there was also a leak between the two on the right. The small leaks between the outermost carburettors was fixed by replacing the O-rings on the connecting tubes. I changed theese on both sides. Se pictures below:
 IMG_20190609_125606 by Lars Krogh-Stea, on Flickr
 IMG_20190609_125534 by Lars Krogh-Stea, on Flickr
I connected a one liter gas tank to the carbs to see what was happening. The gas is pouring out of the two holes on the next picture:
 IMG_20190609_125512 by Lars Krogh-Stea, on Flickr
Nothing comes out of the overflow tubes. Removed the floatbowl on the leftmost carb and the float is moving unrestricted, the needle seems fine too. The float hight might be off but I checked this when I cleaned them. I might have done the measurements wrong. I sodablasted the carbs so there is also the possibility that some passage is clogged. Does anyone know what might cause gas flowing out from the holes on the intake side? Any tips on how to go about fixing this? Is it better to measure float hight with a ruler or check with gas and clear tube and measure on the outside? These are BS34s instead of the original BS32, but they are rejetted and worked well last time I ran the bike three years ago.
Leave a comment:
-
 First run
  by Lars Krogh-Stea, on Flickr
Here's a short clip of that first run Feels amazing to reach this milestone!
Leave a comment:
-
 IMG_20190414_180251 by Lars Krogh-Stea, on Flickr
Quick and temporary M-Unit hookup.
On the input side I've connected Key, Start/Kill (pushbutton) and Horn/Config (pushbutton, to initialize bluetooth pairing).
On the output side, I've connected Ignition (power to ignition and coils), Start (one wire, activates original starter relay).
I addition to this I've grounded the charging system , the two push buttons and the ignition.
The key input is, per manual, connected to the positive side of the M-unit. I guess this is to make it compatible with the M-lock or other wireless key systems that require power to operate.
I can now monitor voltages and amps on my phone, as well as shut off inputs and outputs for testing purposes.
I must say the M-unit blue is an awsome toy for gadget-lovers in addition to som cool practical features.
I've also sorted out the oil pressure problem, which relly was just a rookie problem. I filled the engine to the correct level and cranked the engine. Didn't notice that the oil level dropped. Topped it off today and cranked it without the pressure switch in the hole so I could se oil coming out of the hole. Connected the switch and a test light and it worked as it should.
Leave a comment:
-
So, got a few hours of work in the garage
I,ve mounted the M-unit blue and connected the R/R, starter relay, starter and ignition on the output side. On the input side I've connected the horn button (for initial setup of the m-unit) and the start button. I've filled the engine with new oil and connected the oil pressure switch via a test lamp to the positive side on the battery. When I crank the engine the test light doesn't go out. The engine has been parked for three years. I think the pressure switch probably is stuck? Can I remove the cover for the pressure switch and test it without draining the oil again?
I must say it was a fantastic feeling to hear the engine turn over again!
Leave a comment:
-
Good point John I'll test with and without the cover and check the sparkplugs for color changes. Won't happen in the near future though, as it's winter in Norway.
Leave a comment:
.png)

Leave a comment: