• Required reading for all forum users!!!

    Welcome!
    Register to access the full functionality of the GSResources forum. Until you register and activate your account you will not have full forum access, nor will you be able to post or reply to messages.

    A note to new registrants...
    All new forum registrations must be activated via email before you have full access to the forum.

    A Special Note about Email accounts!
    DO NOT SIGN UP USING hotmail, outlook, gmx, sbcglobal, att, bellsouth or email.com. They delete our forum signup emails.

    A note to old forum members...
    I receive numerous requests from people who can no longer log in because their accounts were deleted. As mentioned in the forum FAQ, user accounts are deleted if you haven't logged in for the past 6 months. If you can't log in, then create a new forum account. If you don't get an error message, then check your email account for an activation message. If you get a message stating that the email address is already in use, then your account still exists so follow the instructions in the forum FAQ for resetting your password.

    Have you forgotten your password or have a new email address? Then read the forum FAQ for details on how to reset it.

    Any email requests for "can't log in anymore" problems or "lost my password" problems will be deleted. Read the forum FAQ and follow the instructions there - that's what we have one for...

  • Returning Visitors

    If you are a returning visitor who never received your confirmation email, then odds are your email provider is blockinig emails from our server. The only thing that can be done to get around this is you will have to try creating another forum account using an email address from another domain.

    If you are a returning visitor to the forum and can't log in using your old forum name and password but used to be able to then chances are your account is deleted. Purges of the databases are done regularly. You will have to create a new forum account and you should be all set.

1981 GS450E Rebuild

  • Thread starter Thread starter Guest
  • Start date Start date
Yup that was me!
I have a feeling I might drop it in the weeks to come, so wanted to make sure it was good and strong.
 
Was I ITim the one who used the small bars to build the frame then tacked on the mesh and fiberglassed over it. I thought that was pretty cool be cause the wire will make it good and strong especially along the edges to prevent cracking. I say go for it.

How long now till you send it off to get the pipes made? Cant wait to see them on.

Paul

Yeah I reckon it was a good plan, which is why I wanna copy it :D

Big thing for me will be the welds... my house mate has a welder but I've never welded before... could be interesting :eek:

Bike's booked in to get towed to Tranzac on Friday 24th June, and I should have the bike back the following Wednesday/Thursday with the pipes coming back from being ceramic coated a couple of weeks after that :dancing:

Yup that was me!
I have a feeling I might drop it in the weeks to come, so wanted to make sure it was good and strong.

'Twas indeed! Think positive, you won't drop it :D
 
Well, I got a few hours in today, made some forward progress on noisy stuff, cut another finger, and then discovered another setback...

First of all, did a little modification to the front of the new rear mudguard as I was concerned that with it above the inner rear mudguard, in rain it would allow water to spray off the rear tyre directly down onto the new electrics tray.

So, I cut a couple of grooves out to allow the inner mudguard to sit on top of the rear mudguard so any water should stay within the guards.

This also enabled me to use the screws that hold the two guards together as well:


Then onto putting the rear guard onto a diet so it would flow better.

Made up a template from the curve of the inner guard:


First attempt at the left side:


Still wasn't quite happy with the thickness under the frame rail, so slimmed down some more:


Much better I think...

Forgot to get a before pic, but had to trim the inside edge of the front duck tail frame mounts as they were too close together with the new rear mudguard and it wasn't letting them line up with the mounting holes on the frame:


Then I assembled everything to get some mock up pic's so I could play with some colours in The GIMP to help me decide which way to go.

I put the old headlight on as well as the seat pan and the side rail under the pan as well as the duck tail frame so I can also edit in the duck tail I want to make to see how that looks.


Looking at it side on like that makes me realise my idea of a long flat seat would look out of proportion with the tank length, so I'm glad I ditched that idea.

So far I don't think I've screwed things up too much...
 
Next up was time to drain the tank to think about prep'ing it for paint in a couple of weeks. I've put this off for years to hopefully prevent rust...


I was pretty sure I saw some rust flakes coming out while syphoning the old fuel...

But didn't look too bad underneath:


Until I removed the fuel tap:


Ooops... gotta do the damn rust treatment and POR 15 liner after all:


The fuel tap won't budge either, so that needs repair or replacing as well... charming.

So it looks like my week off won't be painting, but rather will be fixing the rust in the tank...

Anyway, last off I got a bit of time to revisit my 'bar mounted choke lever adaptor and smooth off all the sharp edges and make the bits that are supposed to be round a bit rounder:


This thing is getting more fun by the day... man I can't wait to get it on the road again!
 

Looking at it side on like that makes me realise my idea of a long flat seat would look out of proportion with the tank length, so I'm glad I ditched that idea.

So far I don't think I've screwed things up too much...

I don't think you have screwed up that bad at all..:D. Though now that I have seen it all together I will throw in my $.02 okay maybe more like $.002 but anyway... I like the rear fender and all but it seems to stick out awful far... to me kind of like the crayon that went outside the lines in the coloring book. I would try and bring it back in till it is more conforming with the tire. Other than that its looking good. I like the red paint maybe do a red and white theme on it. Keep up the good work.

Paul

You know I looked at that pic tonight as I was posting it and yeah it looks a bit out there, however in person it's not that bad, so I think partly it has to do with the angle. If you look at where the frame rails end it doesn't protrude too far, and once I get the duck tail sorted I think it should work well as the area between the indicators and seat will be filled in.

This one's a bit more side on, and definitely not quite as out there as the main pic shows, but definitely getting there. I am going for a scrambler look though, so I'm hoping that will work in my favour somewhat...


However, I'll get it into the GIMP first to see how it looks before doing anything with it.

One thing I'm battling with that rear guard is that I need the end of the guard to be in a certain position where a line from the rear axle going upwards and backwards at a 45 degree angle intersects with it, so bringing it in will also need it to move down, which I can't see an easy way to do at the moment. This is a requirement for the Dept of Transport, and I need to get a safety certificate done, so considering that requirement is very obviously stated in their published modification guide, I reckon it's one they'll probably check for.

As to the existing colour, it's more of a maroon but very poorly done. It's a PO job with maybe two or three base coats and no clear coat, so I definitely want to do something better than that.

Think a burgundy or deep blue at the moment, but I really need to see what's available first...

Thanks for sharing Paul, I want honest feedback :D
 
Ok, watched MotoGP (no spoilers), did some searching, and know what I'm going to do about the tank.

POR 15 motorcycle kit is $75 and there's a reseller round the corner from my house mate's work, so will try to get one after pay day, although I expect it will have to wait for my week off.

I'll also get some aquarium rocks as these seem the best bet to give a roll around the tank before using the marine clean as well as again with the marine clean (in the POR 15 kit).

The kit also includes a mirror which will give me a better idea of how bad it is inside as I can only see what's immediately below the filler hole, but I really don't think it's too bad, just enough to clog the fuel tap and carbs...
 
I think it looks really good Pete. What were you doing again to prevent the pipes from burning your leg like that? I don't remember.
 
You are really getting there now Pete, good work, I like the rear mud gaurd, looks perfect for a scrambler. Remember, off road bikes = flat colours, no metalics or candy apple. have you thought about doing the vinagar in the tank thing, then misting the inside with Q20 or WD40 to keep out the flash rust, may save you from going with a lining. I am going that route, I ain't putting no lining in my tank, it has also been standing for about 4 years with about 5 litres of fuel in, so we shall see, when we get there one day.
 
One thing I'm battling with that rear guard is that I need the end of the guard to be in a certain position where a line from the rear axle going upwards and backwards at a 45 degree angle intersects with it, so bringing it in will also need it to move down, which I can't see an easy way to do at the moment. This is a requirement for the Dept of Transport, and I need to get a safety certificate done, so considering that requirement is very obviously stated in their published modification guide, I reckon it's one they'll probably check for.

I wouldnt stress too much about this. I have mates who have had bikes passed that have a very big "RACE USE ONLY" stamped on the outside of the exhaust.
Having said that, when you get it all together i dont think the guard will look too bad.
 
I think it looks really good Pete. What were you doing again to prevent the pipes from burning your leg like that? I don't remember.

Cheers Scott, I'm pretty happy so far.

At the moment the only thing definitely being done is getting the pipe ceramic coated, but I'll talk to them some more about a heat shield when I get down there. The way he spoke I'd have to make one up myself, but I may have misinterpreted that.

You are really getting there now Pete, good work, I like the rear mud gaurd, looks perfect for a scrambler. Remember, off road bikes = flat colours, no metalics or candy apple. have you thought about doing the vinagar in the tank thing, then misting the inside with Q20 or WD40 to keep out the flash rust, may save you from going with a lining. I am going that route, I ain't putting no lining in my tank, it has also been standing for about 4 years with about 5 litres of fuel in, so we shall see, when we get there one day.

Cheers Flyboy, thanks for the feedback :)

Good call on the paint choice and while I want it cleared, gloss, and looking deep, I definitely won't be going candy or metalic, just a nice solid colour.

I did lots of reading/searching on cleaning up the rust and if it was just surface rust that I could see then I'd probably do the vinegar or something similar, but given the flakes coming out with the syphon and the state of the fuel tap, I decided I'd best go the whole hog and do a proper lining.

Don't worry, as much as it pains me to take more time to do this part, I'll be sure to do it exactly as directed and take my time doing it properly. We have an old hair dryer for drying the cats after a bath, so I should be able to use that to dry it out properly too.

I reckon I got 8.5 to 9 litres out of it too, nearly filled the 10 litre can I was using.

I wouldnt stress too much about this. I have mates who have had bikes passed that have a very big "RACE USE ONLY" stamped on the outside of the exhaust.
Having said that, when you get it all together i dont think the guard will look too bad.

Hmmm I see, I need to find where they're getting them passed :-\\\

I'm going to need to get a "dodgy" home made ignition setup passed as well which will at least be out of sight under the seat, so hopefully if everything else is good they won't go digging for things like that...

And I hope you're right, don't really wanna go moving or adjusting that guard any more if I can avoid it, although I think the tail light may be a touch crooked looking at the rear pic, but that's an easy fix by adjusting the mounting holes a tad.
 
I'm not sure why some people object to tank linings. I can understand not wanting to go the DIY route, as I've heard horror stories of Kreme flaking off and floating up in a tank, but I had mine done by a radiator shop. They removed the rust, then coated it with some special kind of tip that goes in the tank and hits it from every conceivable angle so as to fully coat the inside. It has a lifetime warranty as well. It looks sort of like raspberry jelly:

DSC05345.jpg


DSC05346.jpg


here's what it looked like before it was coated:

DSC05144.jpg
 
Pete, if you're going to line the tank, you should probably replace the petcock/fuel tap while you're at it.
 
Given that you have had the bike registered in your name in the past i think you will only need a roadworthy to get it registered.
I would use a mobile RWC guy, i got one for my landcruiser in 3 minutes because the guy was busy, and there were definitely things on my car that should not have passed.
 
Hi davidduarte, I am not against it as such, I am just not sure what we have to do it here on the tip of the dark continent, and the radiator shops rip a person off here.
I am 5500ft above sea level and 600km away from the coast, so we don't have rust and corrosion issues here, any rust we do get, tends to be nothing more than surface rust.
But I do understand, if you need to do it, to save a tank, then it has to be done.
 
I'm not sure why some people object to tank linings. I can understand not wanting to go the DIY route, as I've heard horror stories of Kreme flaking off and floating up in a tank, but I had mine done by a radiator shop. They removed the rust, then coated it with some special kind of tip that goes in the tank and hits it from every conceivable angle so as to fully coat the inside. It has a lifetime warranty as well. It looks sort of like raspberry jelly:

Cool, thanks for the tip! I haven't looked at actually ordering the POR 15 kit yet or anything, and the one thing I actually do have near me at work is a radiator shop.

Might wander over tomorrow and see if they do this or not.

Pete, if you're going to line the tank, you should probably replace the petcock/fuel tap while you're at it.

Yup definitely, and you'll see exactly why shortly in my update :rolleyes:

Given that you have had the bike registered in your name in the past i think you will only need a roadworthy to get it registered.
I would use a mobile RWC guy, i got one for my landcruiser in 3 minutes because the guy was busy, and there were definitely things on my car that should not have passed.

Yeah ok that'd be cool if it worked out that easy! I still have my old number plate too, and I was thinking of a mobile RWC guy to save me paying more towing costs to get it to somewhere for the inspection.

I know they've changed it so you can legally ride straight there and back these days, but you've gotta get CTP insurance organised and all that crap, much easier just to get a mobile guy I think...

Hi davidduarte, I am not against it as such, I am just not sure what we have to do it here on the tip of the dark continent, and the radiator shops rip a person off here.
I am 5500ft above sea level and 600km away from the coast, so we don't have rust and corrosion issues here, any rust we do get, tends to be nothing more than surface rust.
But I do understand, if you need to do it, to save a tank, then it has to be done.

Yeah sounds like you got it easy up there Flyboy :p

While I don't think the tank's too bad I really want some peace of mind that no rust is gonna go and clog up my freshly cleaned carbs...
 
Well I managed to get down to Bunnings today to try to get some rod and mesh to start on the duck tail.

I realised that if I'm gonna change tact and get that fibreglassed during my week off rather than painting (due to the tank rust), then I need to get the framework at least started while I still have the bike! Would be very difficult to work out what I needed with the bike down at Tranzac...

Anyways, ended up buying about a 3 metre length of 6.3mm galvanised steel rod as all their 1 metre lengths were sold out:


Had to get the guy to cut it so I could fit it in the car, my wife's Festiva just ain't that big...

Then I looked around for some sort of mesh that would flex to the shape I want but still be stiff enough to retain it, and the only thing I could find was this stuff:


That's a lot of mesh! At least it was relatively cheap... and it says on the packet "retains shape"... we shall see.

So tonight, my workbench was giving me the s*&^s and I haven't seen the full and complete working surface for months with all the stuff I've been doing, so time to commit another rare tidiness:


So much easier to work on when it's not strewn with parts and tools and partially completed voltage monitors etc.

Anyway, I wanted to see how bad my fuel tap was tonight as I couldn't rotate the tap at all and it seemed to be stuck solid. Sorry for you fellas in the US, but I just can't bring myself to call it a petcock... I don't know about other Aussies, but I find that name weird... :rolleyes:

So here it is, just brushed all the rust particles off that were sitting on it:


Quick close up to remind me which way the tap goes on if I repair it:


And amazingly enough the four screws on the back came out with almost no effort and a small amount of prying with a small flat blade got it apart:


You can see some rust particles around the place there as well as the discolouration on that plastic bit as well.
 
So, removed the O ring and it's shot, very sticky and not very elastic any more, probably wouldn't be too long before it became brittle or just perished completely:


I removed this bit from the front with a flat blade, no idea what it's for, maybe a primer of some sort?


And then to the important bit... removing the diaphragm, and that's where it all goes pear shaped.


I think this is why it's been so hard to turn the fuel tap previously and why it's stuck solid now.

That disk is in a few pieces there and I'm guessing that's why it just doesn't wanna rotate any more. Definitely new fuel tap time!

So, after removing stuff from the white board the other week, I've now added some stuff like fixing the tank rust and getting a new fuel tap:


Anyway, onto looking into making the duck tail.

The first thing I did was just whack the original duck tail back on the frame and have a good look at it:


The front section can be just like the original and that would work best, so I can just copy the lines of the front there onto the new one, but then I need to curve it down just after the seat lock there and the rear needs to go lower than the original also.

Definitely need to get something into The GIMP to visualise it, but I also have no idea at the moment as to how I'm going to bend the rod to curve it like I need.

My house mate will hopefully be bringing his welder back from his mum's place this Sunday. While I probably won't get a chance to try my hand at welding the frame work up before it gets towed down to Tranzac, I should at least be able to have all the bits ready and maybe I can use some wire to tie the bits together ready to be welded or something. See how I go...
 
Well, first things first...

After talking to a couple of guys at work today the radiator shop across the road apparently has a good reputation for good work and reasonable prices, however after talking to them, I discovered they subcontract their fuel tank work out to another guy.

I gave him a bell and there's no way I'm getting him to do it!

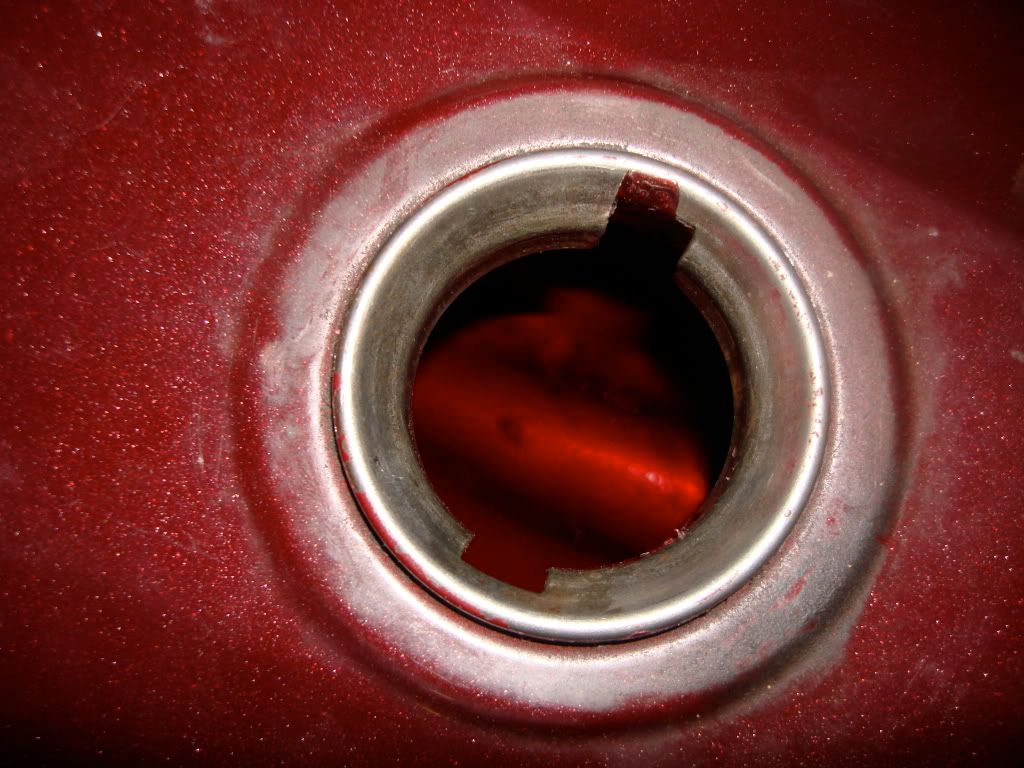
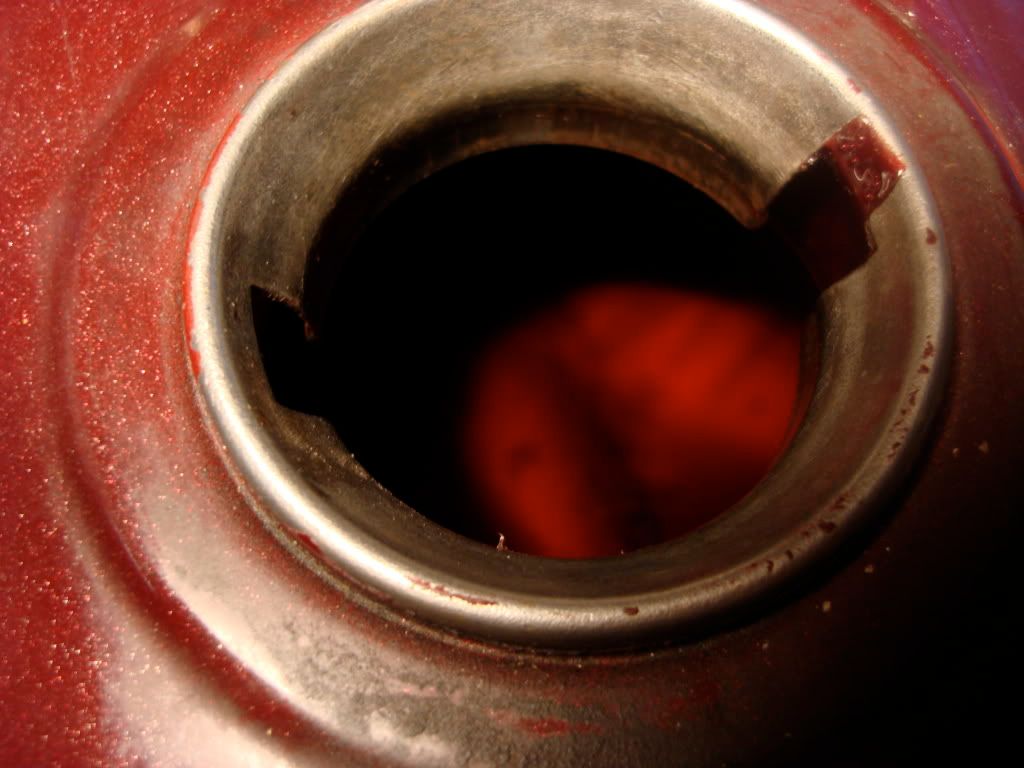
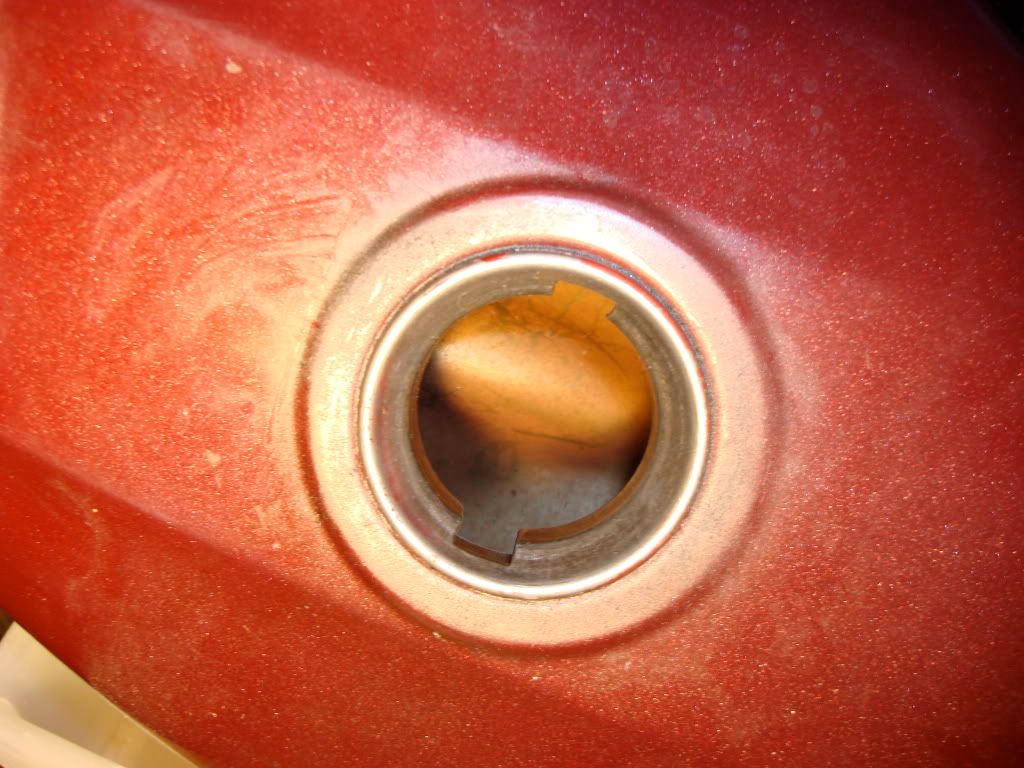
I have to strip the paint before giving it to him, and then he will charge me $160 for the pleasure of sitting it in a bath of some chemicals to de-rust it, and then he will sell me a liner I can put in myself. I didn't even bother asking what sort of liner it is.

I figure I'm much better paying the $75 for the POR 15 kit and a few extra for some aquarium rocks and taking it nice and slow and doing it properly myself, considering I'd have to do half the job myself anyway and pay over twice as much...

Anyway, went hunting in the garage tonight for something round to bend the wire over to start making up the framework for the duck tail.

Came across this:


The last remaining part of a cat scratching post that had seen better days.

It's made of thick cardboard with plastic inserts in the ends and covered in sisal rope.

I figured if I mounted it right and reinforced it right, I should be able to use one end to bend around without the cardboard caving in.

So, unwound the sisal rope and screwed it into the side of the work bench:


Bent up a scrap of metal to use as a lever point:


And got the first bit of bending done on a short piece of rod:


It should work pretty well I think, not quite curved all the way over but that might be ok. I'll think on it and might straighten it a tad and curve the middle a little yet.

Anyway, I noticed part way through that the brackets weren't doing a very good job of supporting the tube, so I added a strap to hold it in place:


That started off ok, but by the time I finished bending that piece, I found I was supporting the bottom of the tube with one hand while bending with the other which wasn't making it as easy as it could be, so I trimmed a bit off my remaining sheet of steel and made a supporting strap to go all the way round:


Didn't get to try anything on that yet, but hopefully that will give it the extra bit of support it needs.
 
Oh man I can't stand working with fiberglass! Good luck with the duck tail. Wish you were local so we could just make you a metal tail!
 
Back
Top