-
Required reading for all forum users!!!
Welcome!
Register to access the full functionality of the GSResources forum. Until you register and activate your account you will not have full forum access, nor will you be able to post or reply to messages.A note to new registrants...
All new forum registrations must be activated via email before you have full access to the forum.A Special Note about Email accounts!
DO NOT SIGN UP USING hotmail, outlook, gmx, sbcglobal, att, bellsouth or email.com. They delete our forum signup emails.A note to old forum members...
I receive numerous requests from people who can no longer log in because their accounts were deleted. As mentioned in the forum FAQ, user accounts are deleted if you haven't logged in for the past 6 months. If you can't log in, then create a new forum account. If you don't get an error message, then check your email account for an activation message. If you get a message stating that the email address is already in use, then your account still exists so follow the instructions in the forum FAQ for resetting your password.Have you forgotten your password or have a new email address? Then read the forum FAQ for details on how to reset it.
Any email requests for "can't log in anymore" problems or "lost my password" problems will be deleted. Read the forum FAQ and follow the instructions there - that's what we have one for...
-
Returning Visitors
If you are a returning visitor who never received your confirmation email, then odds are your email provider is blockinig emails from our server. The only thing that can be done to get around this is you will have to try creating another forum account using an email address from another domain.
If you are a returning visitor to the forum and can't log in using your old forum name and password but used to be able to then chances are your account is deleted. Purges of the databases are done regularly. You will have to create a new forum account and you should be all set.
-
In order to help others find info on a particular bike, be sure to put the year, make or model of bike that you are asking a question about, in the Topic Title. This will allow people to pass by posts they have no interest in.
You should upgrade or use an alternative browser.
1981 Kawasaki KZ750 Resurrection
- Thread starter Nessism
- Start date
What do think of the quality of those particular crimpers?
I need to get a pair of those myself.
What do think of the quality of those particular crimpers?
Love um Dale. Can't say they are better quality than the $10 Harbor Freight crimping pliers I also have, but the jaws have the roll over feature and they work perfectly.
jwhelan65
Guest
 P1010741 by nessism, on Flickr
 P1010740 by nessism, on Flickr
 P1010739 by nessism, on Flickr
 P1010743 by nessism, on Flickr
 P1010742 by nessism, on Flickr
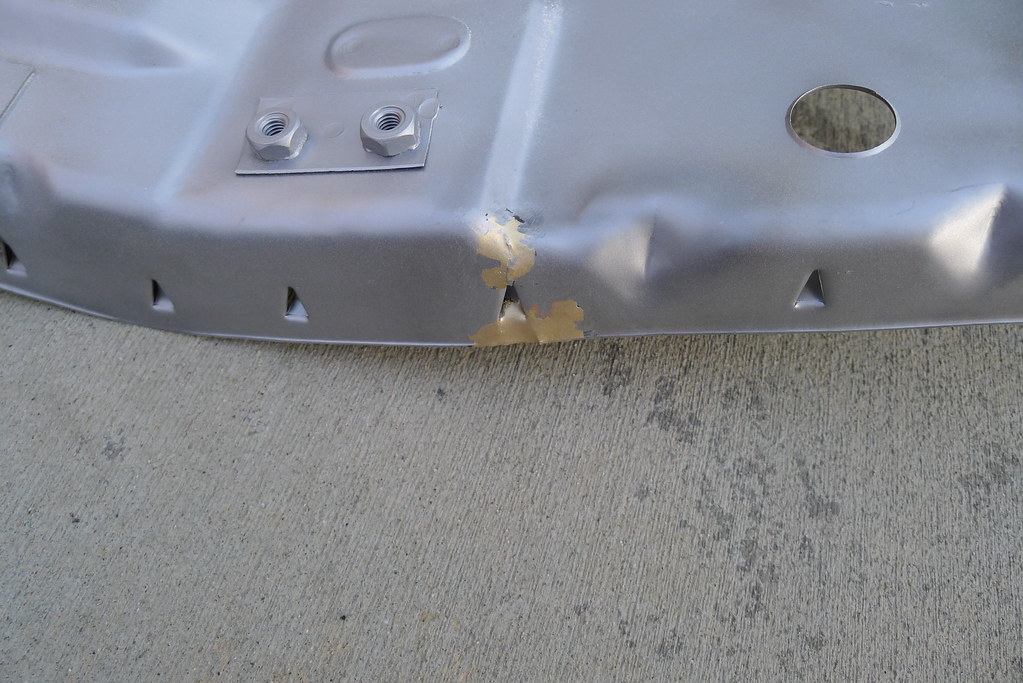
Preped seat pan for paint. Had to fix one crack but otherwise it's in great condition. Bead blasted the underneath side of the front fender too to remove some light rust.
 P1010750 by nessism, on Flickr
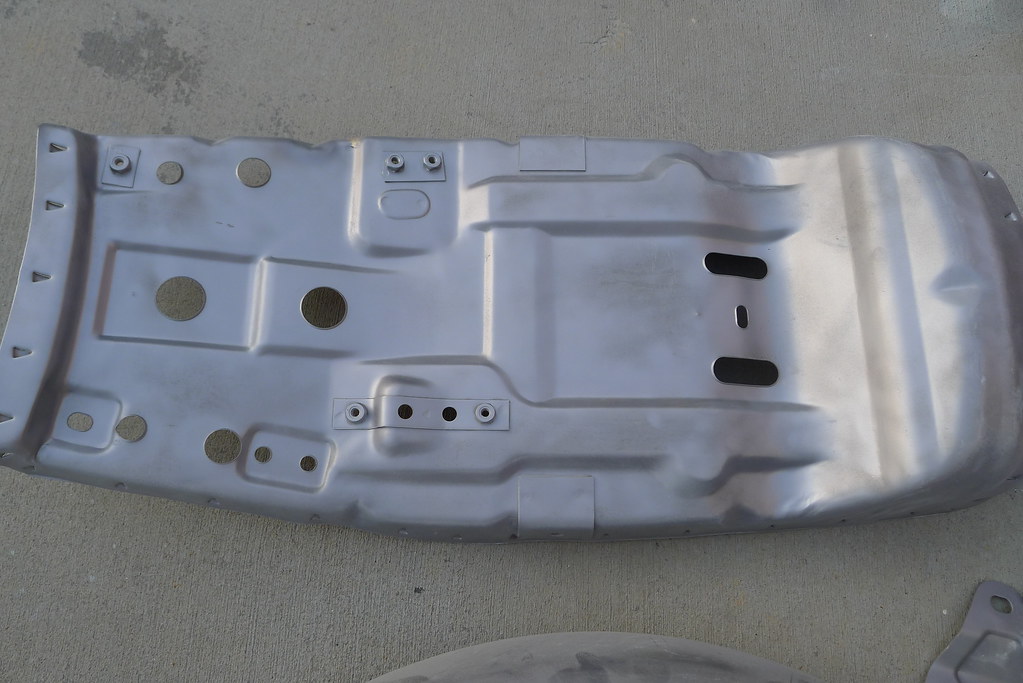 P1010749 by nessism, on Flickr
 P1010748 by nessism, on Flickr
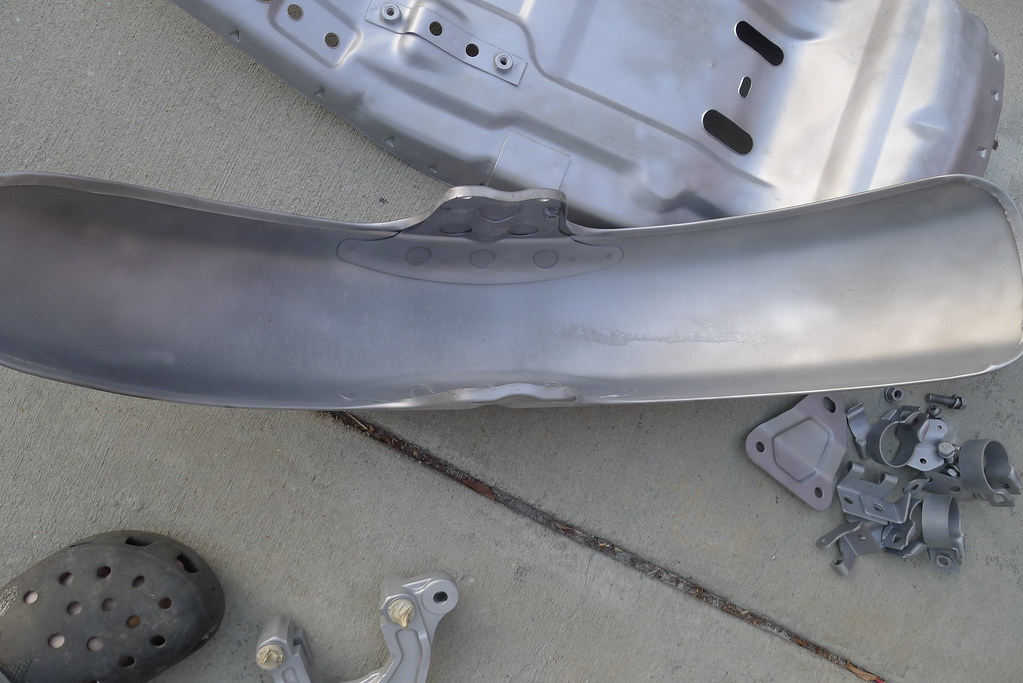 P1010752 by nessism, on Flickr
Interestingly, down here the "screw together" brake lines are illegal, apparently because they are not as reliable as the crimped type :-k
Probably because there's nothing preventing a total bonehead from putting them together with a hammer and some glue.
Wester Cooley
Guest
Probably because there's nothing preventing a total bonehead from putting them together with a hammer and some glue.
Yea, there are people out there that could screw up a one car funeral!!!
There are some people out there that can turn a simple oil change, or replacement of spark plugs into a major project because of their lack of basic mechanical skills.
I had my neighbor out looking for a brass magnet after his wife dropped her ring down the sink!!!!
PRICELESS the look on the clerk's face when he asked him for one!!!
 P1010782 by nessism, on Flickr
 P1010779 by nessism, on Flickr
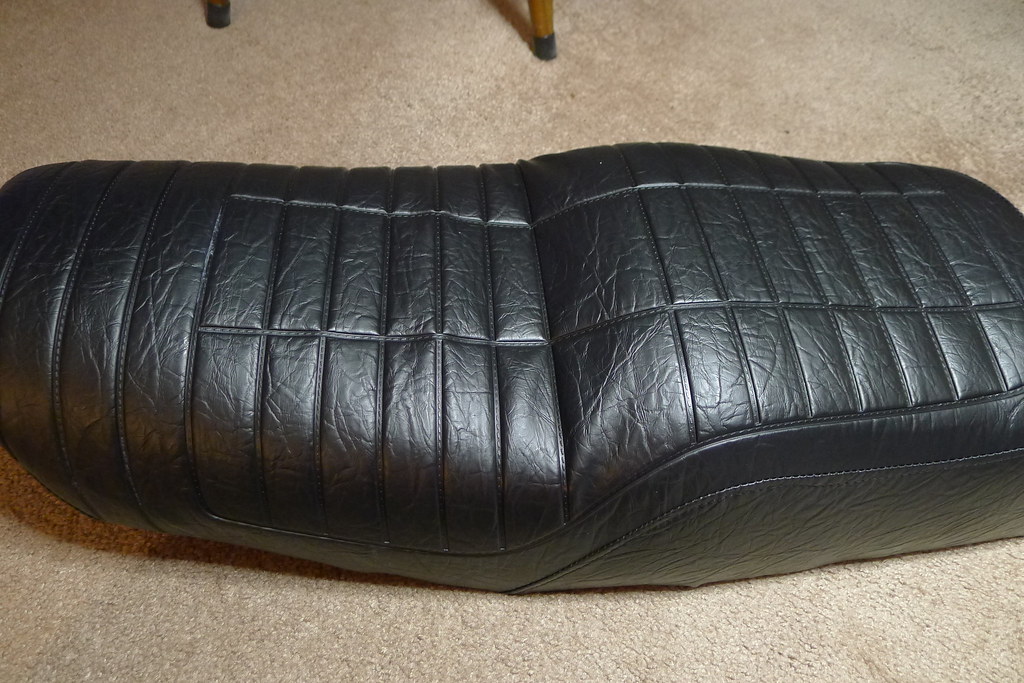 P1010780 by nessism, on Flickr
Guest
Guest
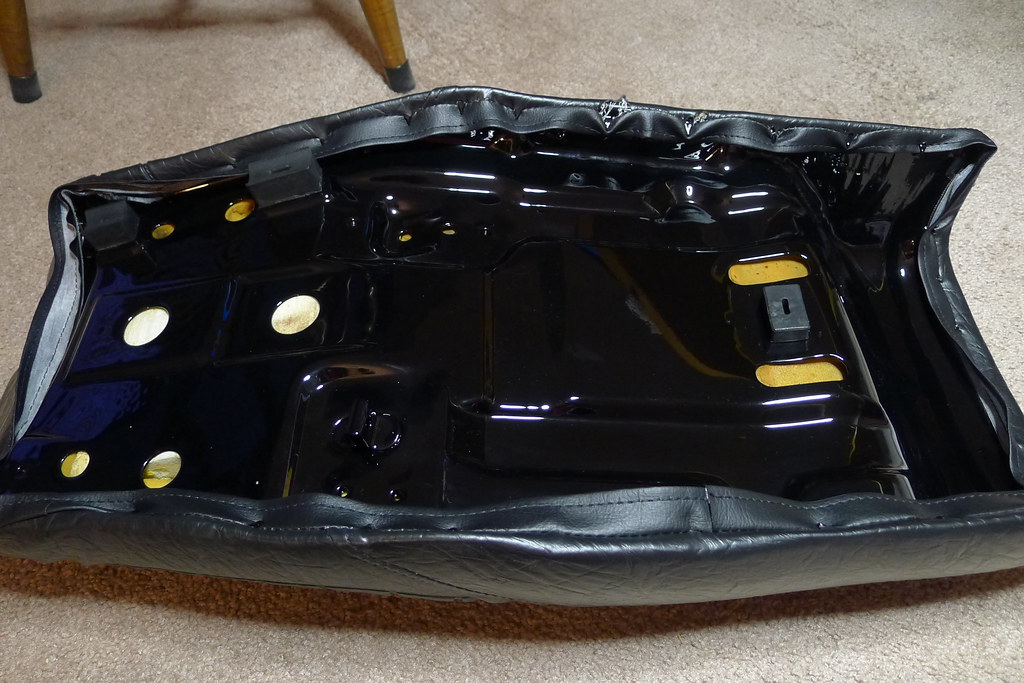
Looking at the pictures again ... I'm wondering if the cover is double layered at the edges between the two rows of stitching? Or is that just cosmetic stitching?
In any case I'm thinking that piercing the fabric right on the stitching line may have caused it to rip, as the stitching already weakens the fabric in that area.
If there is a double layer at the edge then I guess that would be an ideal area where to hook it?
Yeah, on further thought, don't think I should have pierced the cover where I did. Piercing it closer to the edge will alleviate that problem, but the cover will be loose in places then.
Also, that stitching is way to close to the retaining spikes. Maybe email pit replica and see if they can drop the stitching in that area, or try adding an extra inch of foam on top of existing foam?
I know this is a bit after the fact, but my Ex-wife used to work for a 'seating division' installing seat covers. Abet their types of seat covers are different than what you are installing but the material has to be similar. They used to throw the covers into a cabinet which heated them with steam for a few minutes before they pulled them over the seat foam. Maybe you could use your 'easy bake' paint box to do something similar.
Also, that stitching is way to close to the retaining spikes. Maybe email pit replica and see if they can drop the stitching in that area, or try adding an extra inch of foam on top of existing foam?
Hi Dale,
Yes, steam. I've been inside OEM auto seat plants before and watched them heat the covers and they have portable steam wands too, so they can apply localized heat.
Regarding the cover itself, I'm not impressed with Pit Replica's edge design methodology. Or maybe it's just my fault for not piercing the cover in the proper place. Leaning toward ordering another one and maybe having it modified to reinforce the seam.
Since the original paint is so chalky and tore up I'm removing as much as possible before prime. Two part epoxy for that of course. One of the side covers had a swale in it so filled it with body mud. Good fun...
 P1010790 by nessism, on Flickr
 Capture by nessism, on Flickr
 P1010788 by nessism, on Flickr
 P1010789 by nessism, on Flickr
Did you get anything out of Pit Replica for that seat cover? Trying to decide who to get one from.
Ordered another and ate it. It does look original and there is no place to purchase a nicer cover. Thinking about taking it to a local shop for install and maybe reinforcement of the bottom seam. Not sure yet though...