• Required reading for all forum users!!!

    Welcome!
    Register to access the full functionality of the GSResources forum. Until you register and activate your account you will not have full forum access, nor will you be able to post or reply to messages.

    A note to new registrants...
    All new forum registrations must be activated via email before you have full access to the forum.

    A Special Note about Email accounts!
    DO NOT SIGN UP USING hotmail, outlook, gmx, sbcglobal, att, bellsouth or email.com. They delete our forum signup emails.

    A note to old forum members...
    I receive numerous requests from people who can no longer log in because their accounts were deleted. As mentioned in the forum FAQ, user accounts are deleted if you haven't logged in for the past 6 months. If you can't log in, then create a new forum account. If you don't get an error message, then check your email account for an activation message. If you get a message stating that the email address is already in use, then your account still exists so follow the instructions in the forum FAQ for resetting your password.

    Have you forgotten your password or have a new email address? Then read the forum FAQ for details on how to reset it.

    Any email requests for "can't log in anymore" problems or "lost my password" problems will be deleted. Read the forum FAQ and follow the instructions there - that's what we have one for...

  • Returning Visitors

    If you are a returning visitor who never received your confirmation email, then odds are your email provider is blockinig emails from our server. The only thing that can be done to get around this is you will have to try creating another forum account using an email address from another domain.

    If you are a returning visitor to the forum and can't log in using your old forum name and password but used to be able to then chances are your account is deleted. Purges of the databases are done regularly. You will have to create a new forum account and you should be all set.

79 550 Cafe-"ish" Build

There hasn't been a whole lot of reportable progress on this project in the last few weeks due to my work travel schedule, but I did get a couple of things done.

I spent a few hours cleaning the swing arm and rear wheel, then installed a new chain and sprockets:
IMG_3157_zps2d8f97b3.jpg

IMG_3159_zpsa2cfb02c.jpg


I also set the front fork oil level and installed some 1.5 inch spacers in the forks to set the front sag where I wanted it (aprox 1 inch) and it also raised the front ride hide to where it should be. The static sag seemed a bit too excessive before.
Since the fork tubes are just a bit too small for 3/4" inch PVC, I used 1/2" PVC and some 1" fender washers to keep everything flat (pictured are the 2" spacers that I started with, and found did not allow enough sag):
IMG_3166_zpsb1616f77.jpg


Ride height before:
GSSig_zps742bc017.jpg

Ride height after:
IMG_3167_zps2a58a4bd.jpg


I also had an OCD moment. When I adjusted the valves, I rotated the engine without the shims in the buckets (shim over bucket arrangement). I found out later that this is not good on a GS engine, although not as catastrophic as I was first led to believe. Yes I did score the edges of my cam lobes, but I dressed them with a small file and I made sure that no filings were in the valve cover area. This was a few weeks ago.....my OCD kicked in and I removed the valve cover again, today, to double check for metal filings and shavings in the top deck. All is good and I should start carb tuning tomorrow. Hopefully I will have some warm, dry days soon to do some plug chops.
 
Out for some test/tuning runs.


Running a bit lean, still.

This is the part of bike building that gets tiresome QUICKLY!!! This is, also, why I like fuel injected bikes sooooo much!!! Not working some where? A little off idle stumble? Flat spot at 5000 RPM? No problem! Hook the laptop up the the PowerCommander...a few clicks...<Enter>, and boom! put the computer back in the backpack and try out your new tweaks. No pulling the bike apart...No draining carb bowls...No gasoline smell all over your hands (and clothes so your wife makes you get undressed in the garage and leave them there).


Tank off and carbs about to be removed......again..


Float height is good. cyllinders 1 and 4 seem slightly richer than 2 and 3. Wonder if one coil is weaker than the other. Easy to check out by swapping the coils. input to both of the coils is 11.94 Volts. Batt voltage is 12.29 (with the bike not running and headlight off) With the bike not running and the headlight on, the coil volts are 10.97 Volts. Nope, not the issue.

Ended up with 100 mains on the outer cylinders, and 102.5's on the inners. #3 is still slightly lean. Checked for leaks around the intake boot. Found none. made sure the clamp on the carb had a good bite Some duct tape between the clamp and the boot helped.

Sync'ed pretty good (#4 gave me a little trouble)...


Revisited the idle circuit settings and went for a quick ride before it started to rain. Running much better. Very smooth power and pulls good, but I still think the #3 is a tad on the lean side......

...it sucks having this particular form of OCD!
 
Last edited:
fun thread to read through, nice looking bike. if you don't mind can I ask a couple questions?

what do you mean by flat spot? like it stops pulling hard at a certain RPM or MPH? if so, what did you do to get over that? my bike almost wants to wheelie from a stop, but at highway speeds feels dead. carbs are synced perfect, but no power above 5k. this may be normal I don't know. it will go fast just no pull.

thinking of stealing your brake light idea now too.

I was just describing the difference between tuning a carbureted bike verses a fuel injected bike. Those were just hypothetical examples of fueling issues, and how simple it would be to fix with fuel injection. Sorry for the confusion.

A flat spot is an RPM range that the bike tends to stop accelerating or falls off, then picks back up.

For your situation, I would need a little more info.
1. Is your set up stock or has it been modified (exhaust, intake, filters, etc.). This would make a difference whether your issue is a maintenance one, or a need for carb re-jetting.

2. If you accelerate from a stop, does it fall on it's face at 5000 RPM?

3. Also, what carbs do you have?

But from what you have provided, my first guess is that you need more fuel in the mid-range on up, (ie. raise the needles and/or bigger main jets).

Like I said, tuning a Carb'ed bike is a PITA!!
 
Last edited:
WOW! I haven't updated this in a while. Let's see if I can bring it up to date.

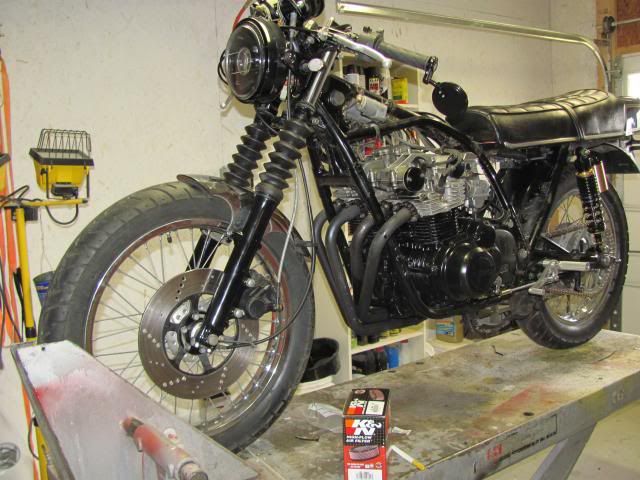
So I did a little tweaking....


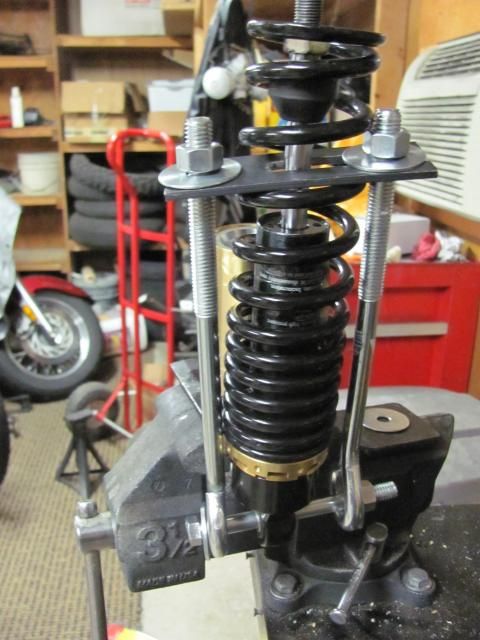
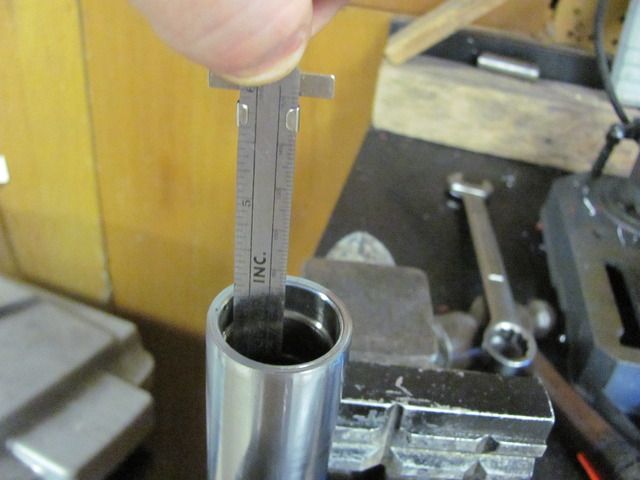
The front end was very harsh. I had originally set the fork oil level at 140 mm (compressed with spring removed), which translated to 200cc. The service manual called for 165cc, but the stock ride height has the forks sitting about 2 1/2 inches into the fork travel, and the front seemed too low. So I set the fork level closer to what I used to run on my old race bikes in the 90's which also had damper rod forks.


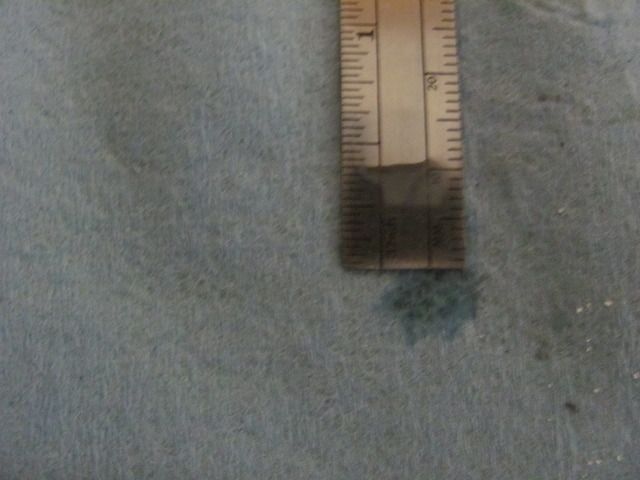
I took the fork oil out and measured what the service manual calls for and that translates to 205mm fork oil level, a difference of 65mm. I raised it slightly to 195mm, because I have raised the static ride height with pre-load spacers. And the front end feels 10 times better!


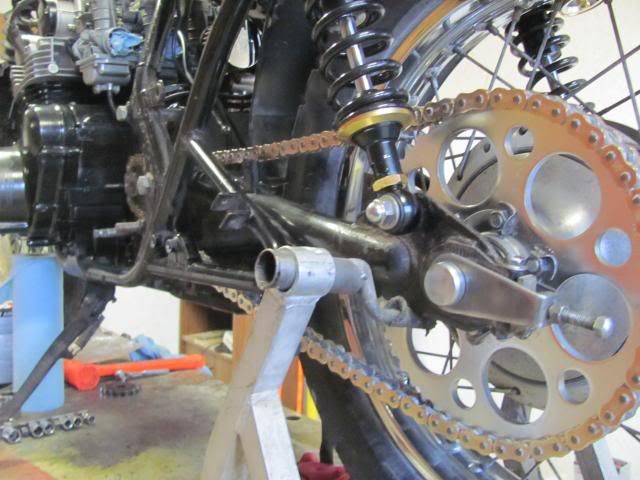
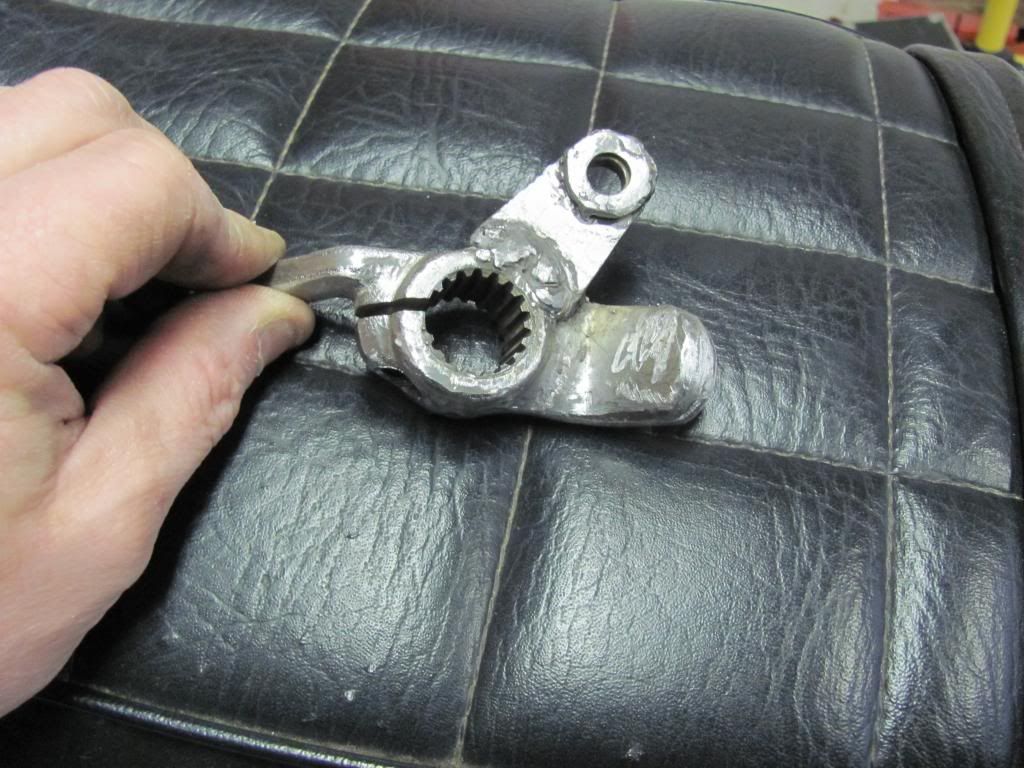
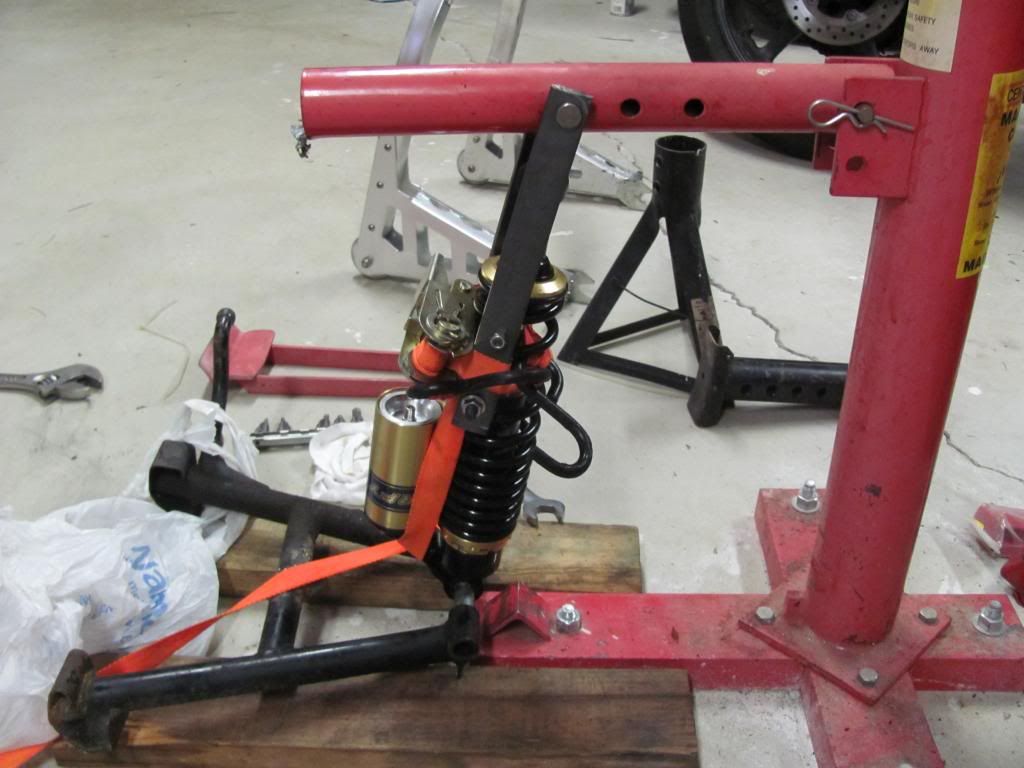
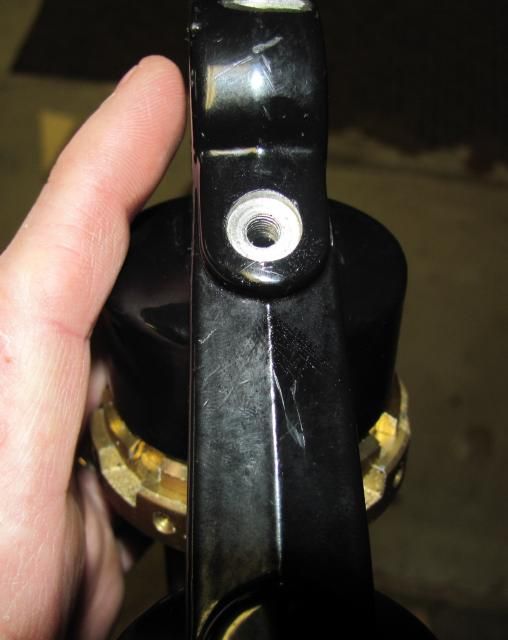
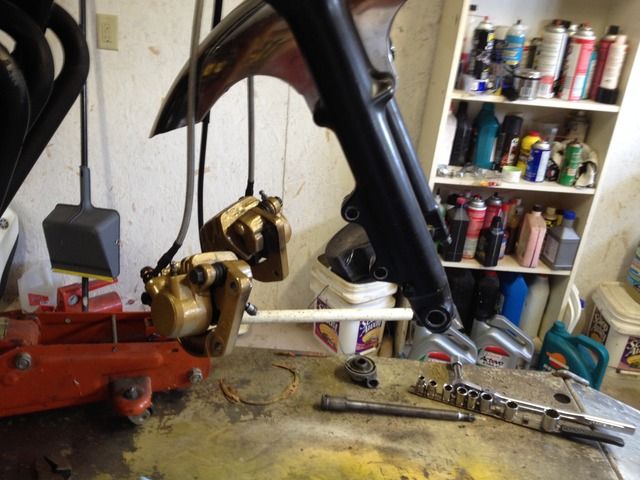
Next I needed to deal with the rear brake. The linkage set up I made for the rear sets was a bit.....well, not effective. I couldn't even get it to slow the bike down. I don't use the rear brake, usually, but since the front brake on this bike is pretty weak, The rear needs to work....at least some!


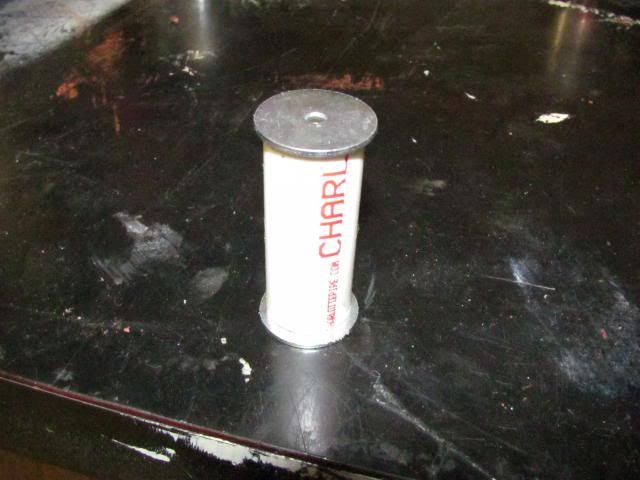
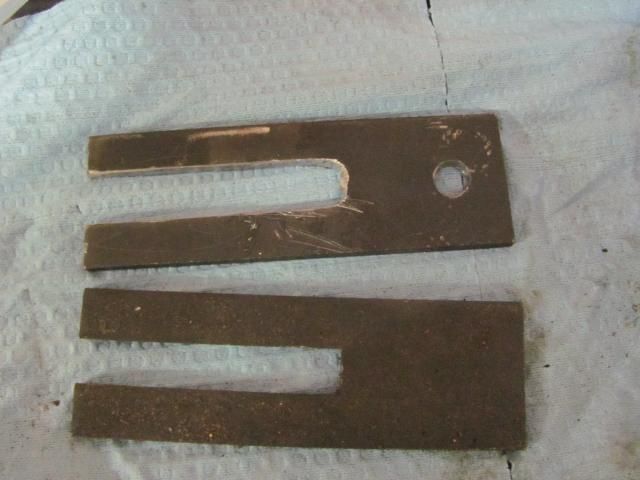
The link I welded to the collar was too short:
IMG_3076_zps0d661027.jpg


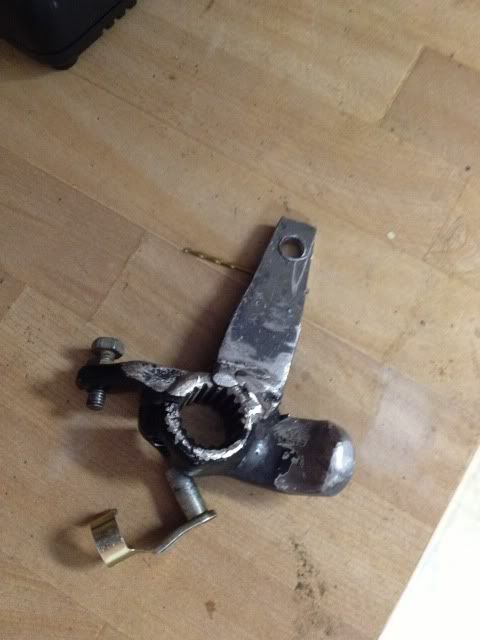
....so I made a new, longer one:
386D6D39-D214-4153-9AC3-9C641BA66BDE-17785-00001DA7B048A8BD_zps6badf3e0.jpg


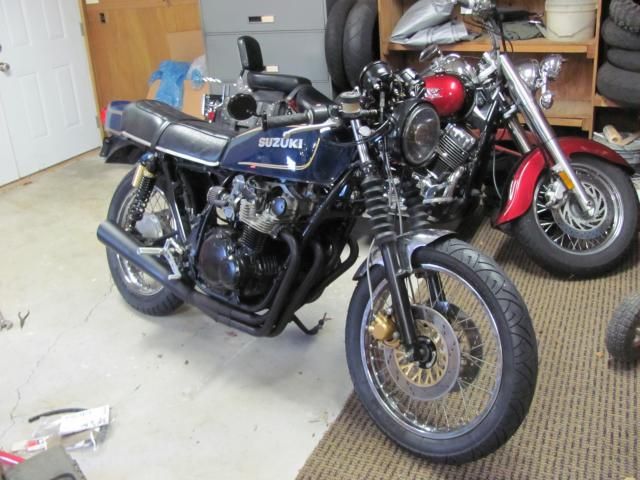
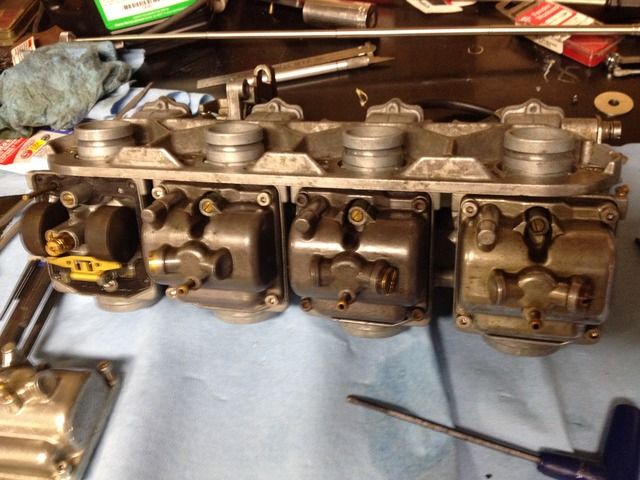
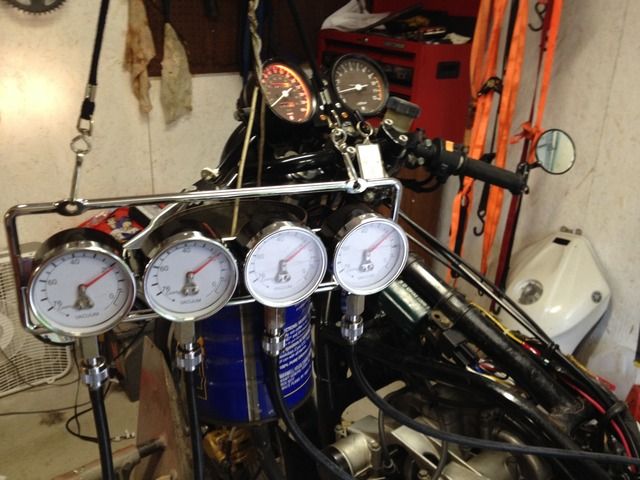
Now I can lock up the rear...with a little effort...but it is plenty. I will clean it up a bit, paint it and be done with that part. Aside from some more carb fine tuning, the bike should be good enough for the rest of the season, to ride around and figure what needs to be done next winter.


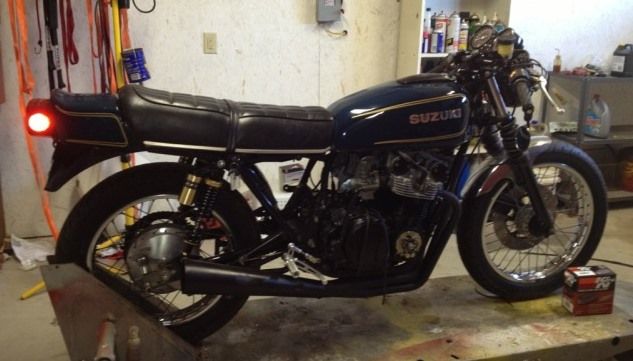
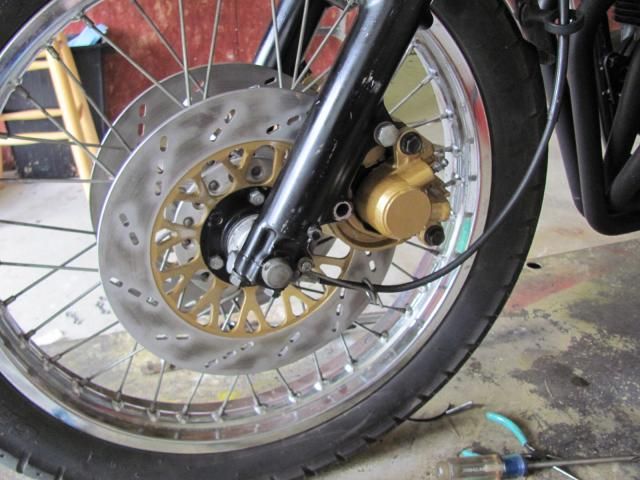
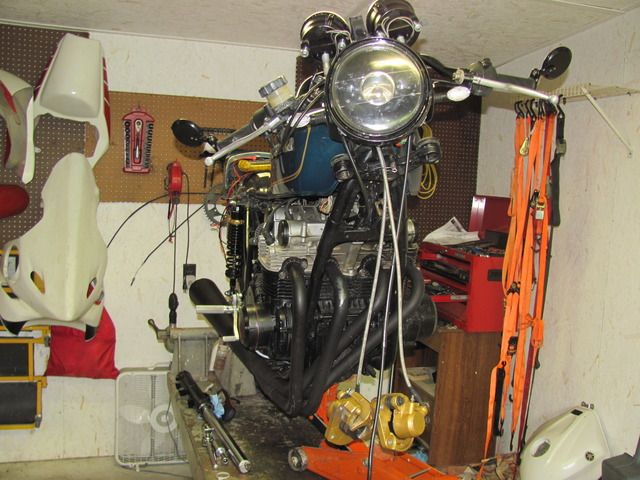
Next I have been planning the next phase of the build and I want better brakes, maybe get some super bike bars (not sure) and maybe another seat (if I can find a stepped one that doesn't look like crap and fits the stock tail). In preparation for the brake upgrade, I looked at a few options. One option was to swap out a modern front end (and consequently, rear end). But to be honest, you lose a bit of ground clearance and in my opinion some of the character. Another option was to get a set of dual disk forks, and put modern rotors and calipers on it. That would require hub spacers and caliper brackets made and getting the rotor offsets and the caliper positioning right. That is totally do-able, but I don't have access to machine shop, and would require a bit more money. But it was the direction I was going, until....


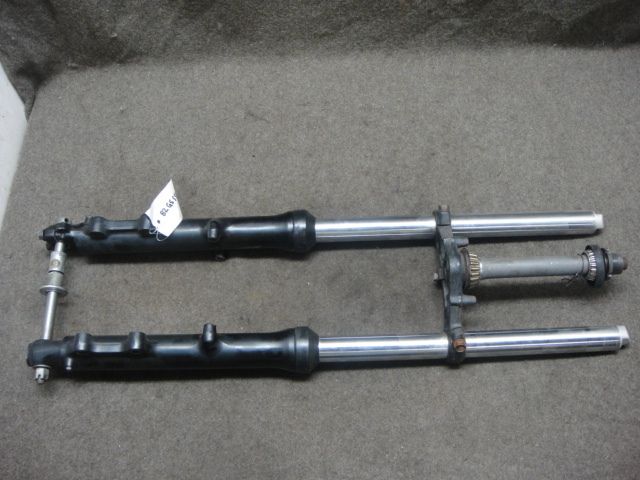
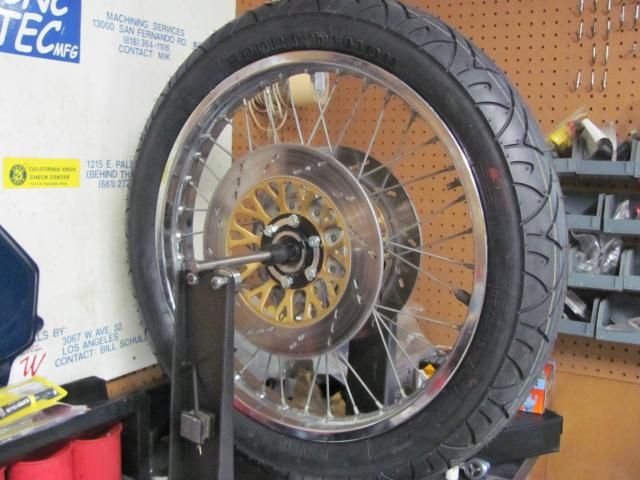
....While looking for a dual disc front end, I came across a good deal on a set of forks from a 1982 GS550M (Katana). It has the same diameter fork tubes (so I can use my current triples) and it uses the same axle part number, so I can use my current front wheel (Suzuki was nice enough to drill and tap the rotor mounting holes on both sides of my hub).


GSmforks_zps445324b5.jpg


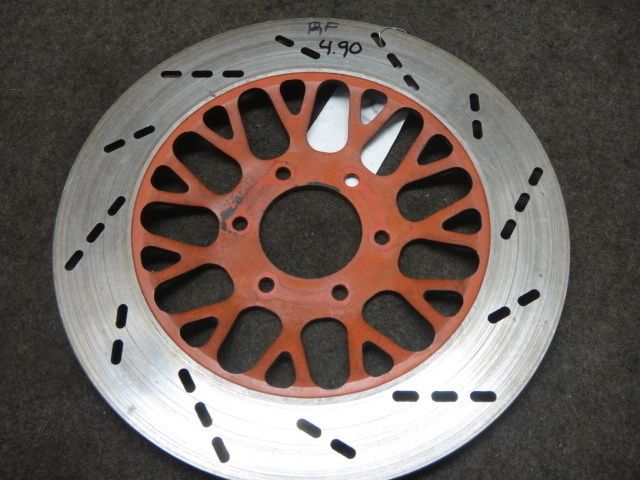
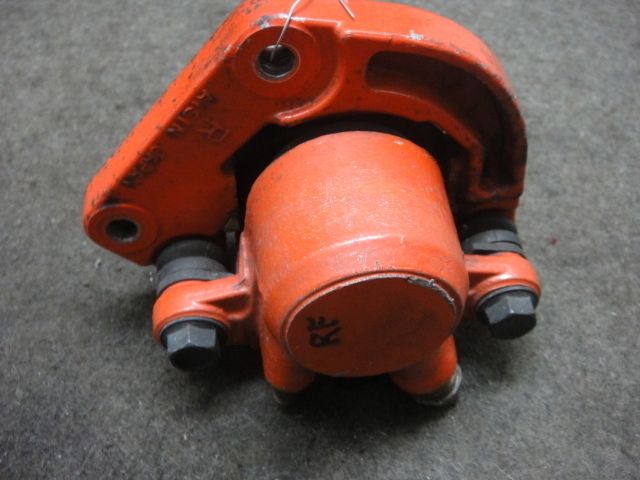
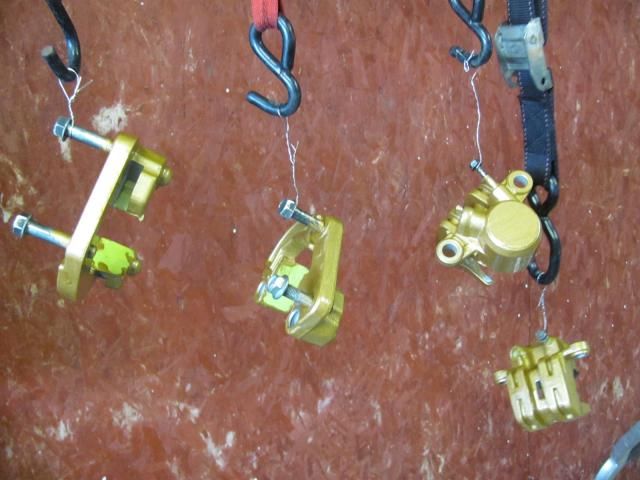
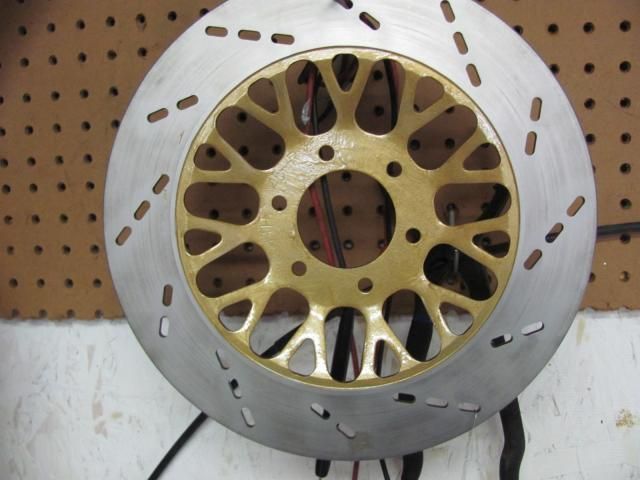
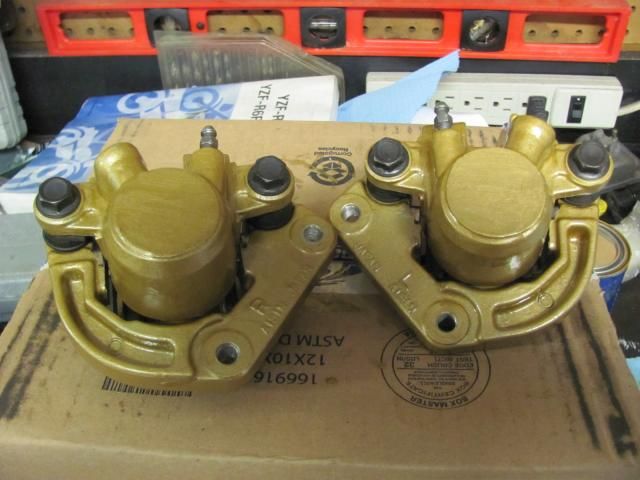
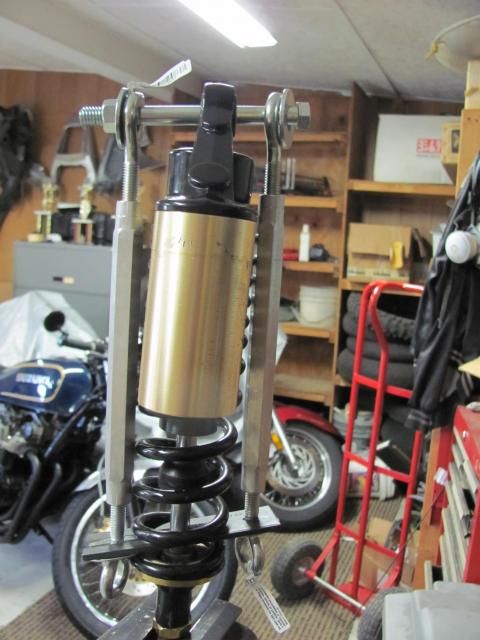
I also found the rotors and calipers from the same seller so I got a package deal.
GSmrotor_zps5690934d.jpg

GSmcaliper_zpscaa0e3fb.jpg


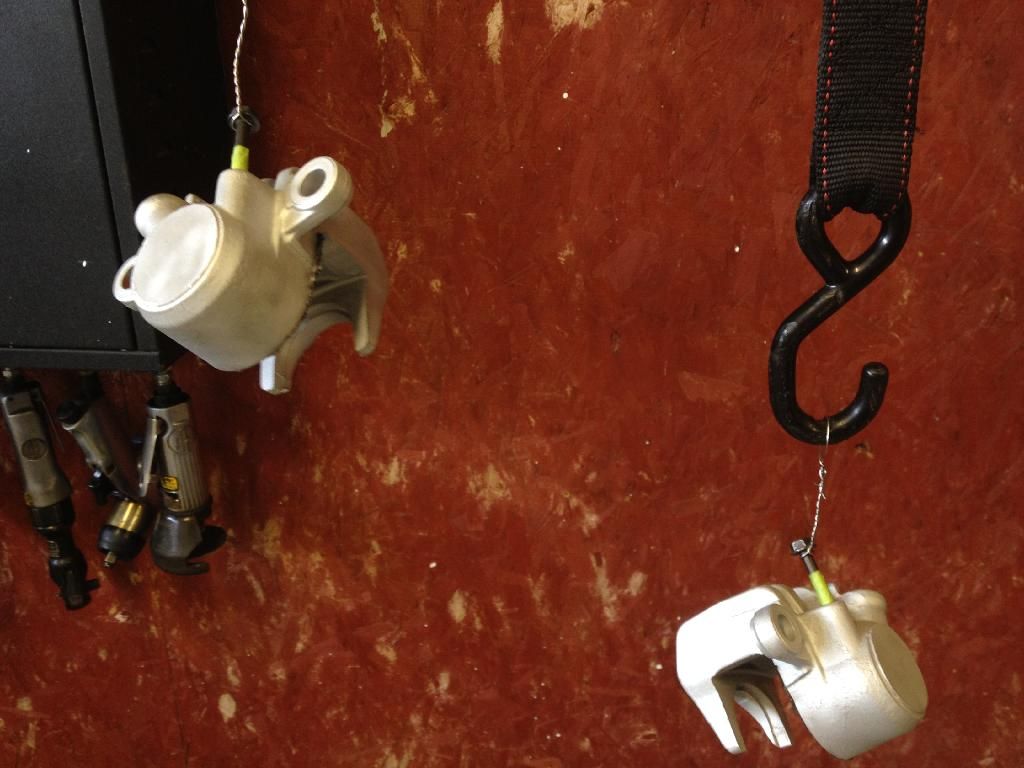
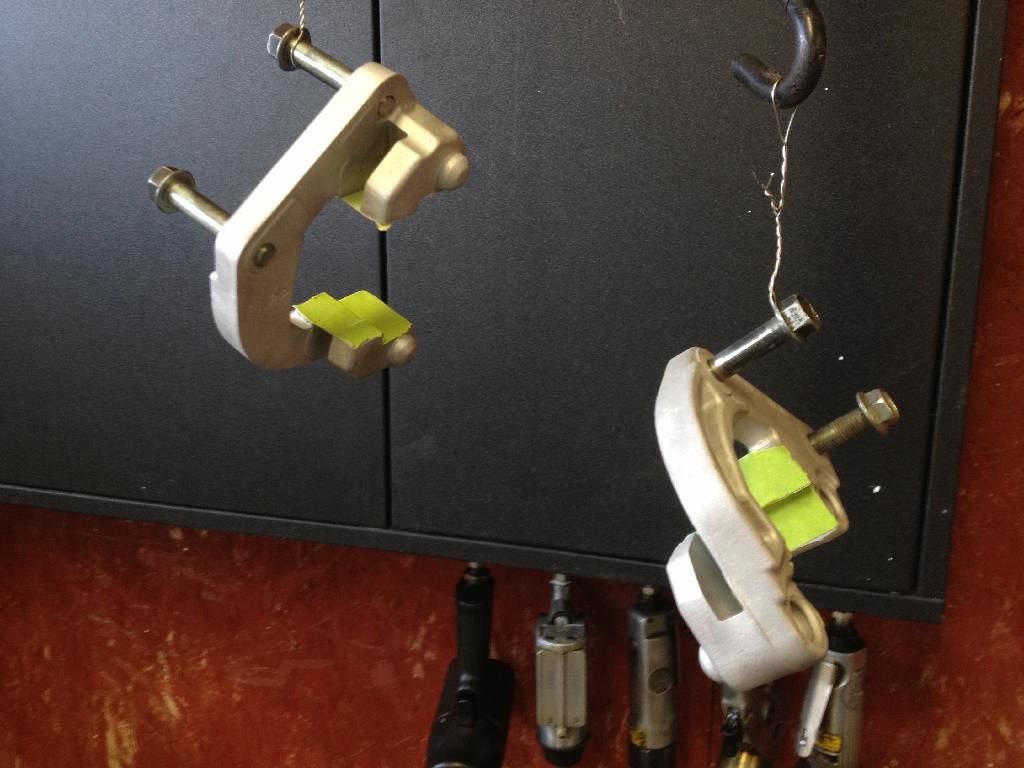
I will need to paint the carriers and calipers, cause the red won't go too well.
 
Disassembled the new calipers and had them media blasted, as well as the rotors.
4535C731-99AF-4713-BC42-F1ACA6A5E198_zps9oifusjq.jpg

4C76DCFB-2053-4076-8177-2CD72FE0C641_zpsputdhyfs.jpg

BE899C63-E214-4969-92AA-46A1E8FA0444_zpshyr4uabo.jpg


Painted them with G2 epoxy Gold paint
IMG_5432_zps113eab19.jpg


IMG_5436_zps9a337800.jpg


They came out OK, but it was a brush-on application, and I probably would have been happier if I had put the paint in a HVLP sprayer, but it isn't bad.


Here are the calipers after rebuild:
IMG_5437_zps5d159af4.jpg


I mocked-up everything to test alignment and fitment.

IMG_5439_zps32af658e.jpg

IMG_5442_zps2dc57efb.jpg


I still need to order one brake line, rotor bolts and retainers, right side wheel bearing cover and brake pads before the final install.

I got all the hardware and lines in to finish up the 2 disc front end install, and took it out for a short blast through the foothills to bed in the new pads and see how it works. I left the stock '82 springs in and put 7 psi of air in the forks to see how they would work before going with conventional spacers and new springs. Actually, that set up seems pretty good. The front and rear seem to work together, and it steers fairly well (still feels like a Mack truck compared to my R6, but hey it is what it is).


I put the GSX-R master cylinder back on (the one that felt like a block of wood with the single disc set up) and with the twin calipers it works well.


77042FB5-258B-4F7F-A95D-2701F7DFAB6D_zpswpcg0gne.jpg


BC8E4332-EC6C-4F50-B57D-E12E97FE784A_zpsl71yx759.jpg


0E61C691-42F5-4A17-8F39-F8749B1608AE_zpsip2rcfue.jpg
 
Last edited:
Sticky Buns!


Pirelli Sport Demons...
IMG_5481_zps4f0a0384.jpg


I find it is harder to mount tires on shallow wire spoked rims than deep sport bike rims. Had to use a combination of tire irons and my mount/demount bar.
IMG_5482_zps0110c6f1.jpg


Balance front and rear:
IMG_5483_zpsb15d7d4e.jpg

IMG_5484_zps6c7894d0.jpg


Installed...Would have been easier on my lift, but since the R6 is occupying that space, it was kickstand and floor jack time!
IMG_5487_zps27d3d880.jpg

IMG_5488_zps337186f1.jpg


Tire testin' went well...
OldBike1_zpsdc32d4ad.jpg
 
The last time I had the GS out I noticed a slight weeping of shock oil, so I figured, I'll just get some seals and re-do the build on them. The first time was more of a learning experience, and just to see if they could be made to work. They could, but I can do a better job, this time.....


First of all, my first version of a spring compressor was ....a little....well, Mickey Mouse:
IMG_3149_zps3985166b.jpg


This time I tried a little more finesse.


I had some Piston holders for assembling a four cylinder top end, and modified one of them:
IMG_5601_zps5b2c1d75.jpg


I got some turnbuckles, a bolt and some nuts....and tried that:
IMG_5603_zpsf3bff6d9.jpg


That worked, but the hex on the turnbuckle came in contact with the spring as I turned them, so I modified the assembly by using some large eye bolts. And that worked much better:
IMG_5635_zpsc9511968.jpg


Next, I had bleed holes machined into the top bosses of the shock bodies. They are drilled and tapped for a 1/4-20 button head screw with a counter bore for an o-ring. This allows you to get ALL the air out of the shock. This is particularly useful if using the original seals, because they are very tall and you cannot get the air trapped in the seal out when you install them (this became less of an issue, for me as I will discuss momentarily):
IMG_5627_zps384cae90.jpg


The original seals are 12.5mm (ID) x 32mm (OD) x 15mm (H). I could not find these seals ANYWHERE! I found a distributor in China that sells them, but had no way to sell them to me.
I did find some 12 mm x 32 mm x 7 mm from SKF, and figured I'll stack them and see if that works. The ID is .5 mm smaller, but it doesn't seem like it binds, at all:
IMG_5632_zps87e430b7.jpg

IMG_5633_zps4e0f49e1.jpg


The two stacked seals are only 1 mm shorter than the original seal, and theoretically will provide twice the sealing around the shaft. I did put some grease between the two seals to keep the outer one lubricated. I am not recommending anyone take this approach....yet. Once I put some miles on them, I will report back on how the seals perform. Of course, at this point in the season, I may not get a chance to do that until spring. But I will report my findings, good or bad.


Ready for a Nitrogen charge and installation.
IMG_5637_zpsb8d7bf53.jpg


All up to date, now.....
 
It's been a bit sine I've updated....

The basic function of the bike has been tested, and I think it is going in the right direction. I still have some tweaks to go....ie. cartridge emulators and figure out a better headlight solution. (It's fine during the day, for visibility, but the light beam is not so good at night for seeing the road)


My first priority was to update the electrical system. It is, after all 35 years old, and a Suzuki to boot. That's two electrical strikes against, for anyone counting.


I Ditched the points for a DynaS:
IMG_5638_zps4shubplo.jpg


Upgraded the Coils:
IMG_5645_zpsizehznqr.jpg


Added a relay to supply the coils and DynaS ignition directly from the battery:
IMG_5646_zpsjbinaujj.jpg

IMG_5647_zps9hohb16v.jpg


Replaced the old shunt type reg/rec with a modern Series SCR type from a Polaris:
IMG_5642_zpselonbodj.jpg

IMG_5651_zpsm8a7rcv9.jpg


I did a static timing adjustment and was perplexed that I had to have the plate almost completely retarded to get it timed. Once I got it started and did a dynamic timing check it did need a little advancement, but not much! I still find it odd that the adjustment is so far to one extreme. I don't like any adjustments that are set at one end or the other. Maybe they figure that the user may want a bit more advance for performance, and they give you room to do that. It is unlikely that anyone would retard the timing from the factory setting. I dunno. That's my theory....and I'm stickin' to it! Regardless, it fires up and the timing is spot on,and the charging is strong with this one, Obi Wan.

Now I need another warm dry spell to road test, but Mr. Weatherman isn't cooperating!
 
Last edited:
Since I broke my knee this winter, my riding season has not gotten off to a ....well, non-existent start. So instead of riding the GS to evaluate the front forks from the 82 GS and making changes in increments, I decided to go ahead and install emulators and the stiffer springs that were installed in the original forks, along with pre-load spacers to eliminate the air assist that the 82 forks had.

E4D27846-3E3E-4222-A046-96CDD1281BC5_zpstbikwzwo.jpg


Then I went to put it together, and found on of the forks has a slight bend! AARRRRGH! I had checked them before, and hadn't noticed any bends, but this time when I put them on, the fork lowers were about 1/4" too close together to put the wheel back on. I loosened the pinch bolts on the tri[le clamps, one side at a time, and spun the forks in the clamps. Left side was straight, but sure enough, the right fork has a slight bend. CRAP!!!

77B5BD45-E787-45F8-9328-5F916E2ED94E_zpstgiv5ygl.jpg


I have a suspension guy locally that has the v-block and press set up to straighten it, but he is heading to Road Atlanta for the MotoAmerica races this weekend, since he is the K-Tech rep. He won't be back until next Wednesday, so I guess it'll have to wait. But since I have to disassemble the fork again, it'll give me the chance to take the pictures that I failed to do during the emulator install.........
 
very cool build n glad you've been updating it! hope your knee is doing better :encouragement:
 
I made a few adjustments. I've had some rough running cruising at less than 1/8 throttle (just off fully closed). The idle circuit looked rich....black sooty plugs when doing plug chops after running (intentionally) in the "sputter zone" for a couple miles. I had gone up one size on the #1 pilot jets (from 15 to 17), so I put the originals back in, synched the carbs and adjusted my pilot air and fuel screws. Now the plugs look much better at idle and after the "sputter zone" test....yes, still had a sputter. #1 cylinder was still running rich......another tweak of the air pilot screw and it seems better, now. I will need to take it for a test ride today, or tomorrow. I still need to remove the front end and take it down to Cycle Tech to straighten out the leg......

D88193AA-2DA0-4365-BE83-3983D71813DF_zpsxefjscn9.jpg


Synched up OK......before, 1 and 2 were at 40, while 3 and 4 were at 20

D16AF58D-7F3C-4862-8D5A-EB91D11729A1_zpsf3caue99.jpg
 
Last edited:
Really nice work and nice bike
I was thinking when is this going to go south and turn into a hatchet job but it didn't
 
Really nice work and nice bike
I was thinking when is this going to go south and turn into a hatchet job but it didn't

Thanks. My priorities have always been function first. I thought I wanted a bump stop styled tail, but honestly, the cafe style just doesn't fit the late 70's 4 cyl bikes, IMO. I like doing the subtle changes that most would not see, but those that do know what they are looking at, would pick up on.
 
The last carb adjustment seemed to solve my off throttle issues, on to that pesky bent fork leg. Front end removed....

IMG_5745_zpskhy2nckl.jpg


Right leg disassembled:
IMG_5747_zpssxrrrms6.jpg


As far as the emulator installation, these two 5/16" holes had to be drilled into the damping rod, and the existing hole enlarged to the same size:
IMG_5749_zpsy81wvepw.jpg


Set up on my press, so I could see how bent the for was:
IMG_5752_zpsilg9wdwi.jpg

IMG_5751_zpsgszrkdht.jpg


Reassembled the fork, and set the fluid to 140mm (15wt oil):
IMG_5754_zpslbjjugik.jpg

The slide on the scale is set to 150mm, - the 10mm showing on the bottom = 140mm
IMG_5762_zpskn4l3k8m.jpg


I also reduced the pre-load spacer from 20mm to 10mm because the front felt a little harsh. This brought my static sag from 23mm to 37mm.

All back together, again:
IMG_5764_zps0xcugawy.jpg
 
Out playing, today. Carburation is much better, and the suspension is pretty close. I couldn't really throw it into the turns because of my knee. I can't get my left foot back enough to keep the ball of my foot on the peg, and I don't have the strength to hang off in the lefts. But I could push it enough to tell it doesn't seem to want to do anything weird, and the front and rear are working together, like they should.

 
Last edited:
thats a nice looking bike you have,.. that fork was really bent wasn't it?
 
Back
Top