• Required reading for all forum users!!!

    Welcome!
    Register to access the full functionality of the GSResources forum. Until you register and activate your account you will not have full forum access, nor will you be able to post or reply to messages.

    A note to new registrants...
    All new forum registrations must be activated via email before you have full access to the forum.

    A Special Note about Email accounts!
    DO NOT SIGN UP USING hotmail, outlook, gmx, sbcglobal, att, bellsouth or email.com. They delete our forum signup emails.

    A note to old forum members...
    I receive numerous requests from people who can no longer log in because their accounts were deleted. As mentioned in the forum FAQ, user accounts are deleted if you haven't logged in for the past 6 months. If you can't log in, then create a new forum account. If you don't get an error message, then check your email account for an activation message. If you get a message stating that the email address is already in use, then your account still exists so follow the instructions in the forum FAQ for resetting your password.

    Have you forgotten your password or have a new email address? Then read the forum FAQ for details on how to reset it.

    Any email requests for "can't log in anymore" problems or "lost my password" problems will be deleted. Read the forum FAQ and follow the instructions there - that's what we have one for...

  • Returning Visitors

    If you are a returning visitor who never received your confirmation email, then odds are your email provider is blockinig emails from our server. The only thing that can be done to get around this is you will have to try creating another forum account using an email address from another domain.

    If you are a returning visitor to the forum and can't log in using your old forum name and password but used to be able to then chances are your account is deleted. Purges of the databases are done regularly. You will have to create a new forum account and you should be all set.

'79 GS850 Grenade.

  • Thread starter Thread starter keepsailing
  • Start date Start date
K

keepsailing

Guest
Hey Everyone,

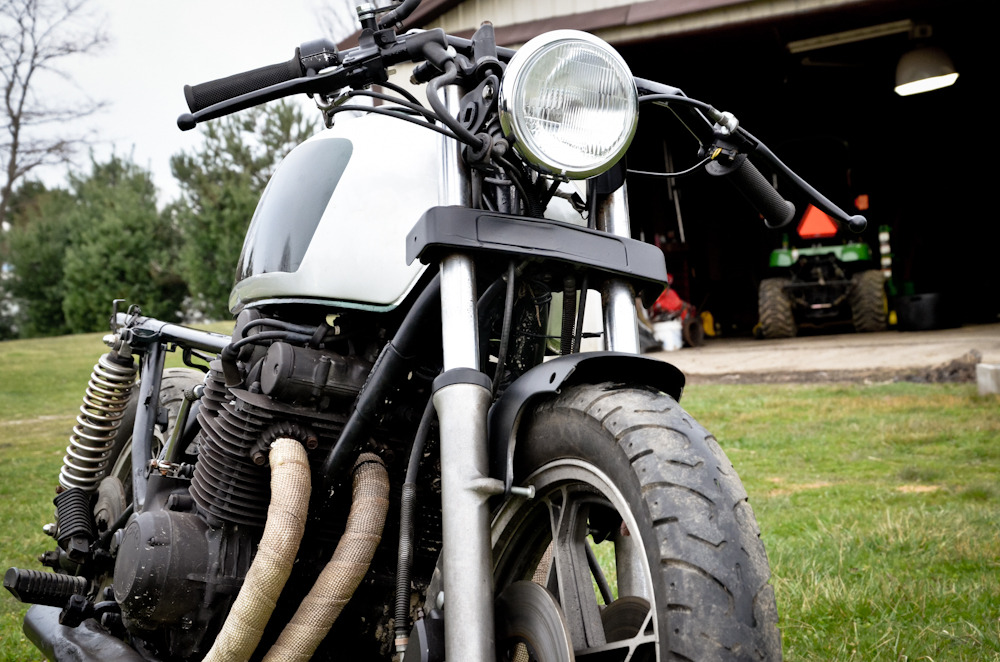
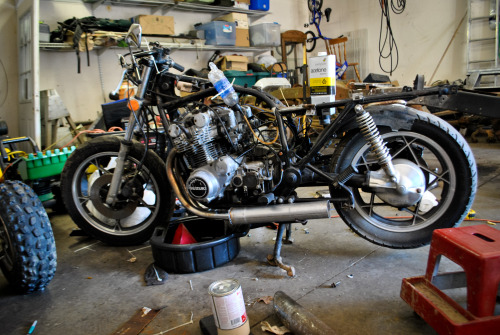
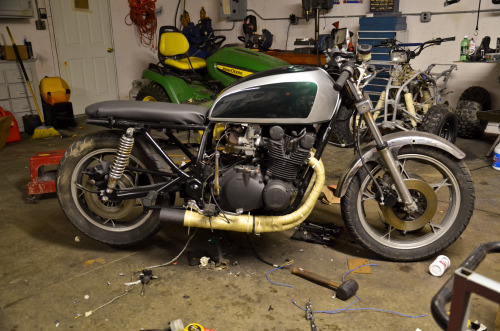
Even though this is my first bike build, I thought I'd create a thread to keep all of you updated on how it's coming. I bought the bike back in Sept for 300.00, looked just like this;
tumblr_mu0rjxUznA1qkod1lo1_400.jpg

The PO had cut the wiring harness, and exhaust. So the wiring harness was pieced together and is on the list of things to be completely redone.
tumblr_mu7q804cKX1qkod1lo7_500.jpg

Needless to say, it wasn't one of my better purchases but I've loved every second of working on it and can honestly say that I've learned a lot from it.
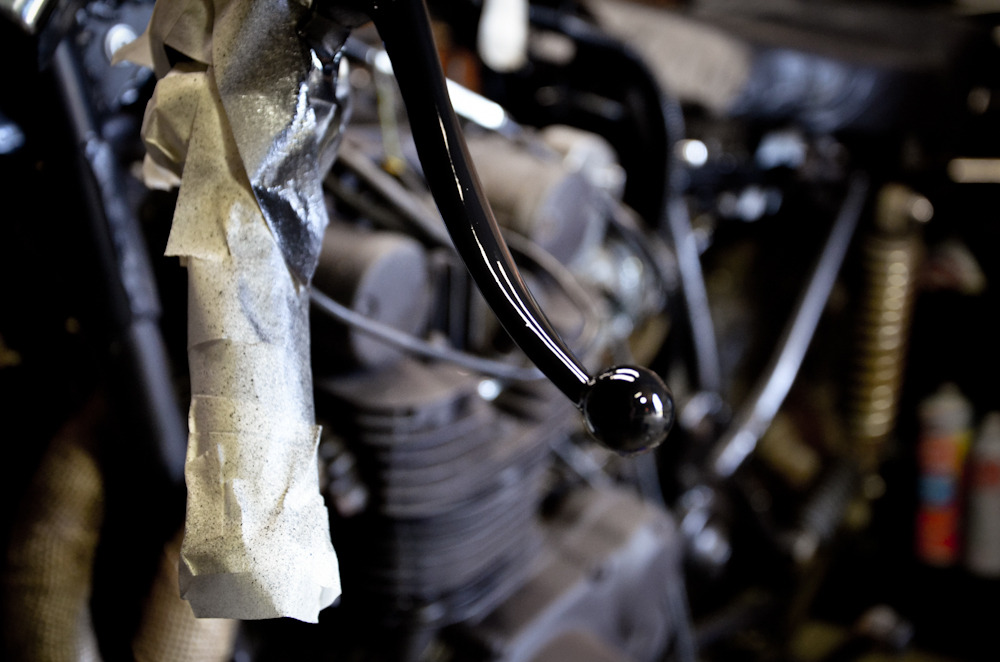
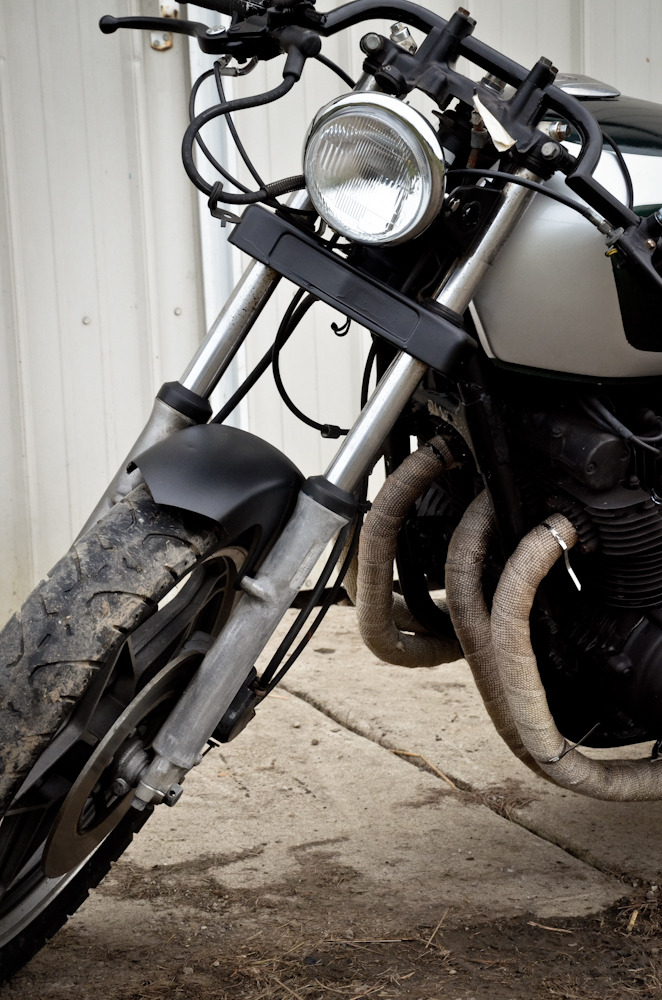
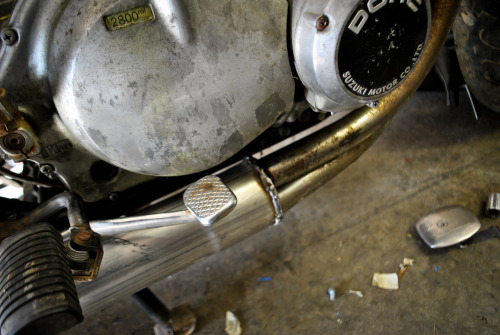
Deciding that buying exhaust was out of the question at the time (I worked for minimum wage) I decided to make exhaust. "enter the horrible exhaust photos"
tumblr_mubstb3Hkf1qkod1lo1_500.jpg

tumblr_mubstb3Hkf1qkod1lo3_500.jpg

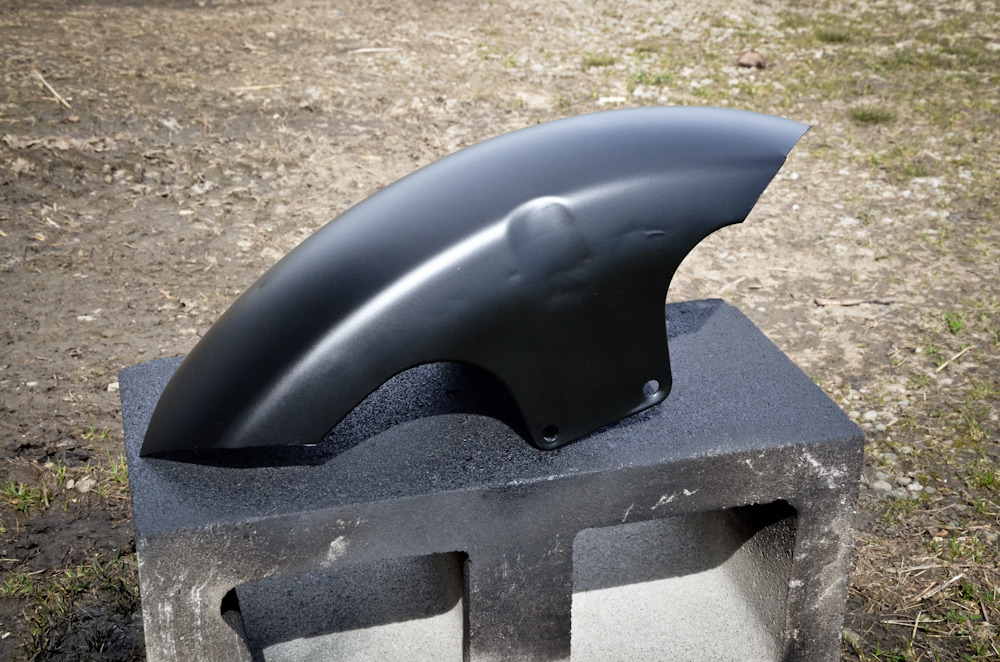
Here are a few photo's of the horrible gas tank I had to deal with as well;
tumblr_muonnlf5991qkod1lo3_500.jpg

tumblr_muonnlf5991qkod1lo4_500.jpg

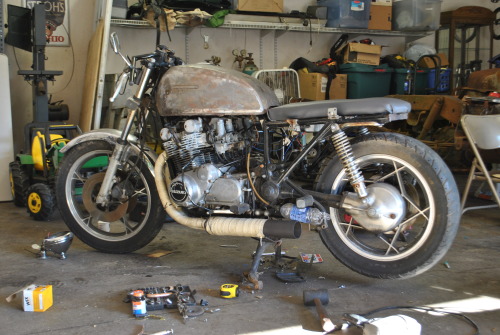
and....after cleaning out and resealing the inside of the tank, I let a friend of my experiment with a paint scheme and now she looks like this
tumblr_mxihzhG9aD1qkod1lo3_500.jpg

Notice that awesome seat I made for it!! Haha.
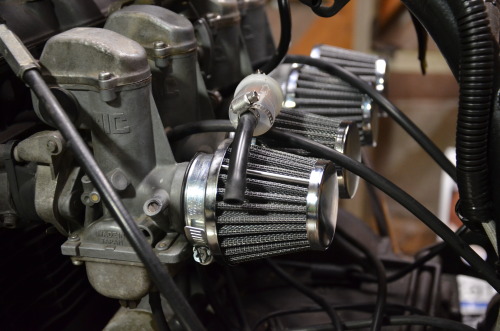
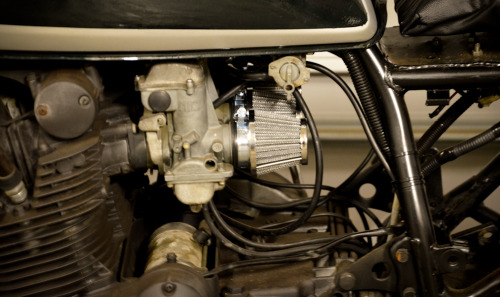
After purchasing some pod filters (a mistake after reading the Big Welcome) oh well live and learn.
tumblr_n3rtkciRrq1qkod1lo1_500.jpg

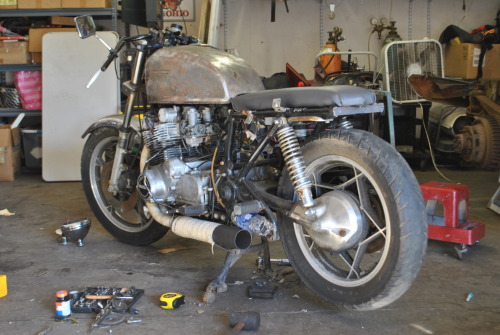
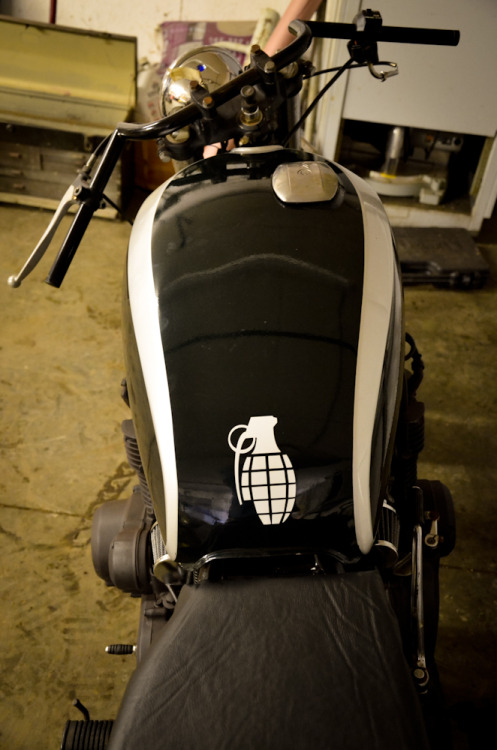
and finally for now, the reason she's named "the Grenade"
tumblr_n3rtkciRrq1qkod1lo2_500.jpg


Seat#2
tumblr_n3rtkciRrq1qkod1lo4_500.jpg


not pictured is the brand new Nissin front brake assembly, or the awesome headlight I had to order.

Now that I've made most of you guys on here cringe at what I've done to the bike (this was all before I made it to GSResources), let me make you feel better and rattle off the parts I have recently ordered in the last few days;
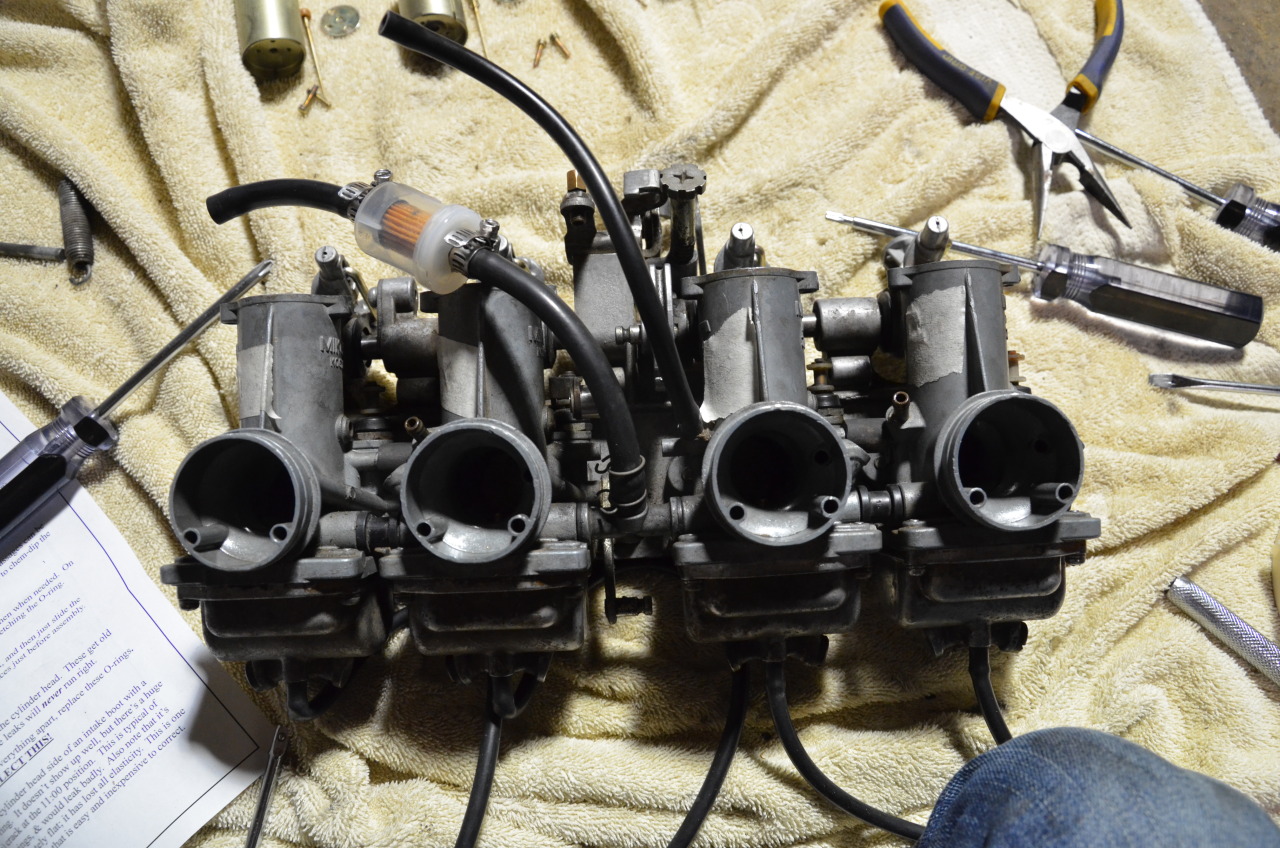
Carb O-Rings
Intake Boots
Intake O-Rings
Feeler Gauges
Motion Pro Shim Tool
NGK Spark Plug Resistor Caps
and I opted on getting 120 Main Jets.

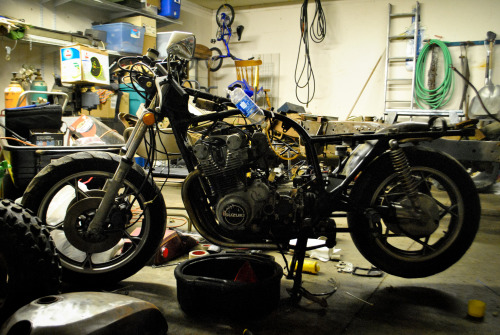
I have gone through and done a few other preventive maintenance items; plugs, oil, cleaned the carbs, but never to the extent that I've read on here. So it's time to do it all over again (once the parts get here of course). If you can't tell I've landed a hell of a lot better job in the last month or so haha.

From what I've read on the site (and my eyes hurt I've read so much), this should be a good start and should hopefully get her back on the road. She still needs;
New Petcock
Brake Light
Speedometer
Tachometer
A Decent Seat
and Mirrors.

It's a slow progress and a long read, but thanks for taking a look and I'll keep you all posted as I dive into the rest of the bike.

A big thanks to Big T for putting up with all of my questions.

Brandon
 
Last edited:
I think you did a great job , very resourceful , paint looks great!!
 
Thank you! It's definitely still a work in progress.
It definitely needs tires as well.
 
Last edited:
Thanks! I'm definitely glad I found this site and realized I have a lot of small but essential parts that need replaced.

Does anyone have any ideas or a link or 2 to making a decent seat? The bike came with no seat, seat pan or anything..
 
Last edited:
Since none of my parts I ordered have shown up yet, I decided to do some cosmetic work on the GS850. Painted the headlight, clutch lever and cut the front fender, the original fenders' style just didn't appeal to me. She's still missing gauges, mirrors, and a taillight. The seat is a work in progress...and hopefully might get done tonight.
tumblr_n4eknk2arl1qkod1lo5_1280.jpg

tumblr_n4eknk2arl1qkod1lo1_1280.jpg

tumblr_n4eknk2arl1qkod1lo2_1280.jpg

tumblr_n4eknk2arl1qkod1lo6_1280.jpg

tumblr_n4eknk2arl1qkod1lo3_1280.jpg

tumblr_n4eknk2arl1qkod1lo4_1280.jpg

tumblr_n4eknk2arl1qkod1lo8_1280.jpg

tumblr_n4eknk2arl1qkod1lo10_1280.jpg


Thanks for taking a look, just keep all of you updated on her.
 
Another one here to say "nice job on the paint".
icon_thumbsup.gif


Not real keen on the grenade, but it's not my bike. :-\\\

I have thought about a similar scheme, but using black where you have the silver and a very dark (Indigo) blue where you have the black.

Your choice of colors really highlights the lines of the tank and looks really great. :D

.

Thank you! I am pretty pleased with it as well..and I appreciate you not completely bashing the grenade haha.
 
... and I appreciate you not completely bashing the grenade haha.
I am not a fan of skulls and crossbones, "tribal" graphics and other such stuff, but they are not on my bike, either. :p

One grenade graphic can make an interesting name for the bike and even initiate a few conversations,
but is certainly not enough to ruin the entire bike. :D

.
 
I am not a fan of skulls and crossbones, "tribal" graphics and other such stuff, but they are not on my bike, either. :p

One grenade graphic can make an interesting name for the bike and even initiate a few conversations,
but is certainly not enough to ruin the entire bike. :D

.

If the grenade sticker doesn't initiate a conversation, then I'm pretty sure the ghetto exhaust on the bike will haha :-\\\
 
New O-Rings and Main Jets (120's) came in the mail yesterday, so I decided to conquer that task today. Took the carbs completely apart and well...4 hours later I was done haha.
tumblr_n4gklsrlmo1qkod1lo1_500.jpg

tumblr_n4gklsrlmo1qkod1lo2_1280.jpg

tumblr_n4gklsrlmo1qkod1lo3_1280.jpg

Also replaced the intake boot gaskets as well today. Still awaiting the arrival of the new intake boots themselves, I figured new o-rings would be enough for a quick start and ride tonight. Adjust the jet needle clip so that it was all the way at the top as well.

On the first initial start up the bike idled a whole heck of a lot better than it ever has and revved up decent. After taking it down the road, I realized I didn't have much gas and put it on reserve for the ride back. Surprisingly the bike did pull a quite a bit as I shifted through the gears. The bike does back fire a lot though at higher RPMs. Any ideas? I think it might just be the exhaust..
The bike idles fine, doesn't seem to miss or anything.

I did make a video after the ride of the bike just idling and revving it up. It does backfire in the video as I rev it up a little, hopefully this might help with a diagnosis. Too much fuel? Too little?

The air screw is out 5 turns from the bottom. I didn't honestly know how to set them (a turn would be A---B to B---A) (if A represented one side of the screw and B the other).
The needle jet (assuming I have correct terminology [the screw on the bottom of the carb, that can be adjusted while it's on the bike] ) is in 12 turns using the same method as I stated before.

The carbs have not been tuned, all I did was basically bench tune them. I don't have a manometer to really sync them, nor do I know how.

Another thought of mine, might of been that the bike was low on gas and I'm not running premium.

Did I do any of the correct, because I flat out guessed.

The video is HERE
 
Last edited:
New O-Rings and Main Jets (120's) came in the mail yesterday, so I decided to conquer that task today. Took the carbs completely apart and well...4 hours later I was done haha.
tumblr_n4gklsrlmo1qkod1lo1_500.jpg
You really think you are "done"?
crackup.gif
rofl1.gif


You have just added pods. Your fun is just beginning. :p
Even more so, because you have the cheap EMGO pods. :oops:

Stock mains are 102.5. For pods, something in the 110-115 range would be fine. Add in your "ghetto" exhaust, the 120s are probably a good starting place.


Adjust the jet needle clip so that it was all the way at the top as well.
Clarify, please. Did you put the clip in the top groove or did you set the needle as high as it would go?

To put the needle as high as it will go, you need to put the clip in the BOTTOM groove.


The air screw is out 5 turns from the bottom. I didn't honestly know how to set them (a turn would be A---B to B---A) (if A represented one side of the screw and B the other).
The needle jet (assuming I have correct terminology [the screw on the bottom of the carb, that can be adjusted while it's on the bike] ) is in 12 turns using the same method as I stated before.
First of all, please use the same terminology and methods that everyone else uses. A "turn" is a full, 360-degree circle, not a half-turn. With the pods and 'pipes' that you have, turn the fuel screw (the one on the bottom) all the way IN (gently), then back it out 1 1/8 turns. As a general rule, the air screws (the ones on the sides) will start out twice as far as the fuel screws, so turn them out 2 1/4 turns from lightly seated.

There is no consistency achieved by turning screws "in" from the top. You need to know how far the screws are OPEN, so you close them completely, then open them up a prescribed amount.

After the bike is warmed up, slowly adjust the air screws, listening for highest idle speed.


The carbs have not been tuned, all I did was basically bench tune them. I don't have a manometer to really sync them, nor do I know how.
You may as well get a manometer and learn to use it. Carb sync will change whenever you do a valve adjustment, so it is something that you will end up doing SEVERAL times over the years.


Another thought of mine, might of been that the bike was low on gas and I'm not running premium.
"Low on gas" is not much of a problem, but your bike does NOT need "premium". :-\\\

.
 
You really think you are "done"?
crackup.gif
rofl1.gif


You have just added pods. Your fun is just beginning. :p
Even more so, because you have the cheap EMGO pods. :oops:

Stock mains are 102.5. For pods, something in the 110-115 range would be fine. Add in your "ghetto" exhaust, the 120s are probably a good starting place.


Clarify, please. Did you put the clip in the top groove or did you set the needle as high as it would go?

To put the needle as high as it will go, you need to put the clip in the BOTTOM groove.


First of all, please use the same terminology and methods that everyone else uses. A "turn" is a full, 360-degree circle, not a half-turn. With the pods and 'pipes' that you have, turn the fuel screw (the one on the bottom) all the way IN (gently), then back it out 1 1/8 turns. As a general rule, the air screws (the ones on the sides) will start out twice as far as the fuel screws, so turn them out 2 1/4 turns from lightly seated.

There is no consistency achieved by turning screws "in" from the top. You need to know how far the screws are OPEN, so you close them completely, then open them up a prescribed amount.

After the bike is warmed up, slowly adjust the air screws, listening for highest idle speed.


You may as well get a manometer and learn to use it. Carb sync will change whenever you do a valve adjustment, so it is something that you will end up doing SEVERAL times over the years.


"Low on gas" is not much of a problem, but your bike does NOT need "premium". :-\\\

.

Greatly appreciate the information. I put the clip on the top of the needle, so I went the wrong way with it...Which means that could be why is was still acting like it was starving a bit for gas? I'll adjust the screws in the morning and I apologize for the way I explained myself, I guess I could of just divided m numbers in half haha.

Much Appreciated,
Brandon
 
You took essentially nothing, and turned it into something, and something cool at that. Good for you. Have fun with it.
 
You took essentially nothing, and turned it into something, and something cool at that. Good for you. Have fun with it.

Thank you! It really means a lot. I have blood, sweat and tears in this dang thing and I'll be dammed if I'm not gonna finish it haha. It's definitely getting...closer.
 
By not separating them completely from the back bracket, because I had no means to dip them. So yeah they probably are poorly cleaned, but they are cleaner than they were and I got all of the o-rings changed and every jet cleaned out..which makes it a little progress.
 
Back
Top