• Required reading for all forum users!!!

    Welcome!
    Register to access the full functionality of the GSResources forum. Until you register and activate your account you will not have full forum access, nor will you be able to post or reply to messages.

    A note to new registrants...
    All new forum registrations must be activated via email before you have full access to the forum.

    A Special Note about Email accounts!
    DO NOT SIGN UP USING hotmail, outlook, gmx, sbcglobal, att, bellsouth or email.com. They delete our forum signup emails.

    A note to old forum members...
    I receive numerous requests from people who can no longer log in because their accounts were deleted. As mentioned in the forum FAQ, user accounts are deleted if you haven't logged in for the past 6 months. If you can't log in, then create a new forum account. If you don't get an error message, then check your email account for an activation message. If you get a message stating that the email address is already in use, then your account still exists so follow the instructions in the forum FAQ for resetting your password.

    Have you forgotten your password or have a new email address? Then read the forum FAQ for details on how to reset it.

    Any email requests for "can't log in anymore" problems or "lost my password" problems will be deleted. Read the forum FAQ and follow the instructions there - that's what we have one for...

  • Returning Visitors

    If you are a returning visitor who never received your confirmation email, then odds are your email provider is blockinig emails from our server. The only thing that can be done to get around this is you will have to try creating another forum account using an email address from another domain.

    If you are a returning visitor to the forum and can't log in using your old forum name and password but used to be able to then chances are your account is deleted. Purges of the databases are done regularly. You will have to create a new forum account and you should be all set.

Can you help me read my plugs?

  • Thread starter Thread starter The_Flash
  • Start date Start date
T

The_Flash

Guest
My bike won't idle at the normal 1100 rpm or so that it usually does. It just dies. So I held the throttle just BARELY open so it was at 1200-1250 rpm for about a minute and then flipped the kill switch (correct me if I'm wrong but I believe this is a plug chop). This is what they look like:

Sorry about the crappy quality...
IMG_6230.jpg


IMG_6231.jpg


IMG_6232.jpg


IMG_6233.jpg


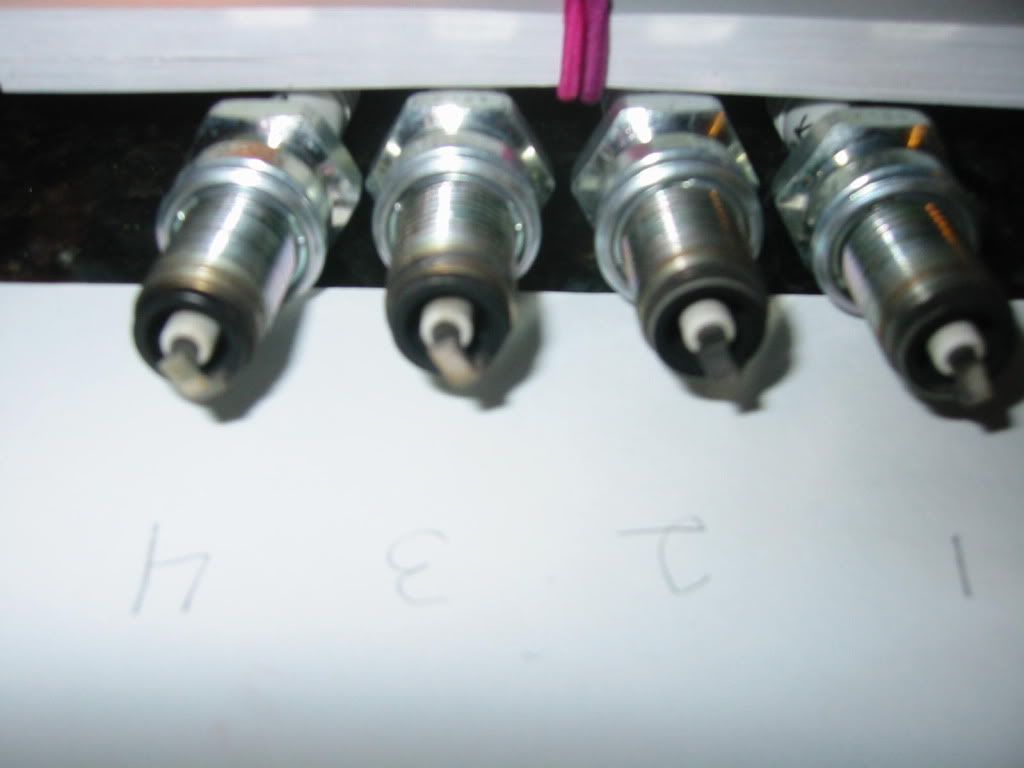
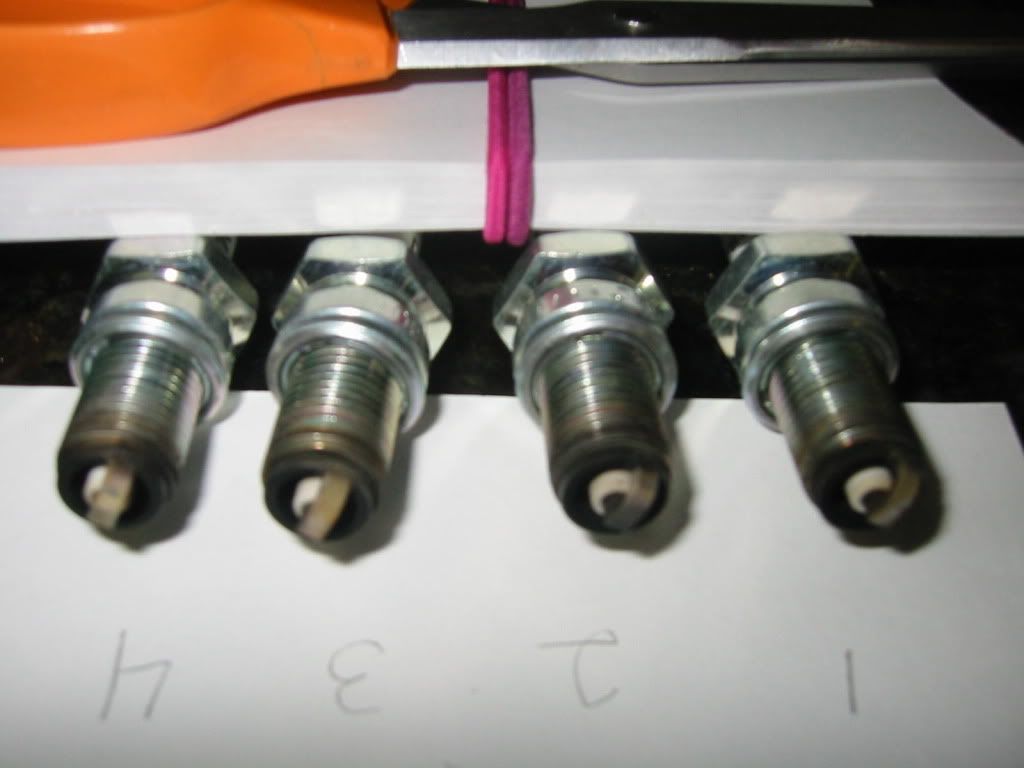
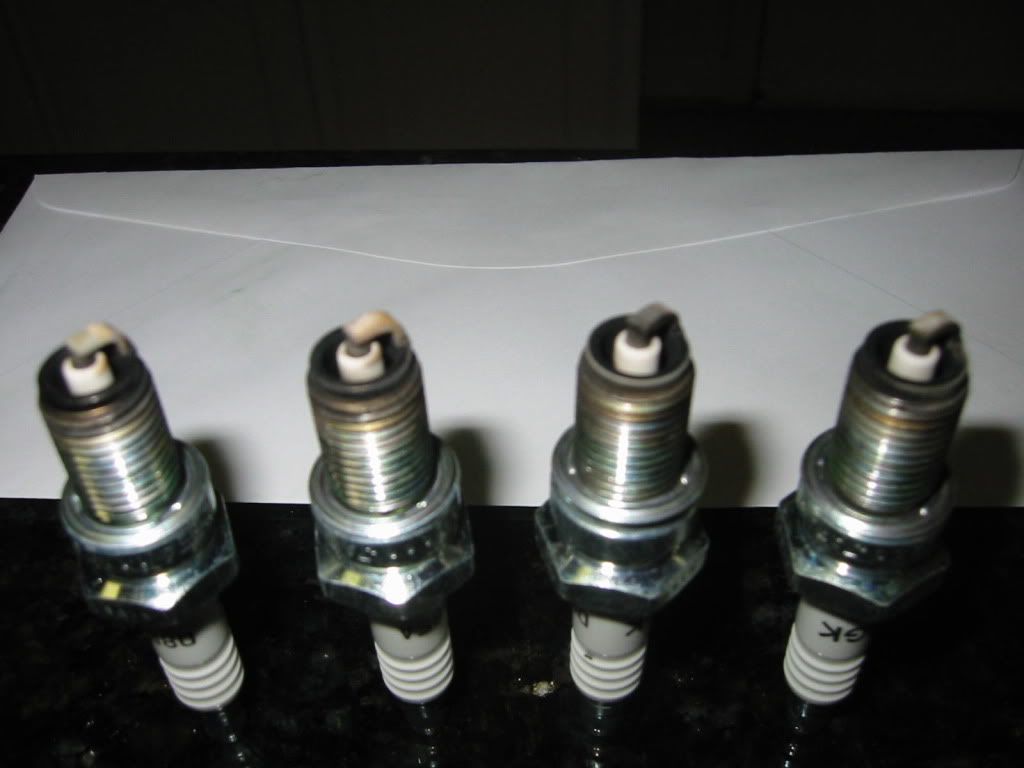
I think they look rich. But that confuses me since I was under the impression that my issue is caused by the intake o-rings that I haven't replaced yet:o

Also has anyone had problems before when using the terminal nuts that screw onto the end of the spark plugs? I feel like they are always loose and I'm thinking that could lead to a weak spark.:-s

Thanks in advance everybody!
 
When was the last time you did a valve adjustment and carb synch?

The little splotch of tan on the insulator says you are fine. Knowing that camera flash usually washes out the electrodes, the only ones that might be considered rich are #1 and #2, as they look a little sooty. From the pics, #3/4 might be a little lean

I wouldn't worry much about the idle chops yet. If you can get it to run and out somewhere safe, start with your WOT chops and work your way down.

What is your jetting (stock?) and air/fuel idle mix and what is your carb/airbox/exhaust setup?

I need to do a valve adjustment and I've never done a sync (but the carbs have never been separated so...)

I have stock everything on this bike except for the horn and the coils. But most of it is still original.

One coil fires 1+4 the other fires 2+3. When I pull the wire off of the #1 plug it runs pretty much the same. When I pull the #2 plug it dies. The nuts that screw on to the terminals of the spark plugs were loose so I tightened them really good cuz I thought that could cause trouble. It runs good in every throttle position except idle. But that's only as far as I know because this is my first bike and I don't really know how it's supposed to run.:confused:
 
I don't think they look bad as a whole.
But I'd be more concerned that they don't all look identical, if you could bring up the richness a little in 3 & 4 and bring down the richness in 1 & 2, I'd think you'd be where you need to be.
 
i have no advice on the plugs, but i do have on the camera pictures.
use "macro" its the little flower symbol on the camera. use it for taking close shots so it comes out clearer
 
Flash, if those carbs have never been separated I would start there first. They need to be properly dipped and have orings replaced to start. While they are soaking, do your valve adjustment. Once the carbs are done, your replacement shims and orings from www.cycleorings.com will be in and you can put everything back together properly and do a bench sync. Then do the carb sync using a good manometer, many of us like the carbtune, and adjust for highest idle.
 
i have no advice on the plugs, but i do have on the camera pictures.
use "macro" its the little flower symbol on the camera. use it for taking close shots so it comes out clearer

Those pictures were taken with the macro setting lol. I think I was just plain too close. You don't realize how blurry they are when they are on the little digital camera screen. Besides the camera was new in like 2000 so it's a little outdated.
 
Flash, if those carbs have never been separated I would start there first. They need to be properly dipped and have orings replaced to start. While they are soaking, do your valve adjustment. Once the carbs are done, your replacement shims and orings from www.cycleorings.com will be in and you can put everything back together properly and do a bench sync. Then do the carb sync using a good manometer, many of us like the carbtune, and adjust for highest idle.

I took the slides out bowls off jets emulsion tubes needle valve seats floats you name it. Then I dipped all of that and all the carb bodies and scrubbed all of it with a toothbrush. The ONLY thing I didn't do was degang them, they have never been apart and I don't think that they can get out of sync without separating them from each other so I figured if I could dip them without deganging then I wouldn't have to worry about syncing (this is called cutting a corner:p). I guess I'll break them down all the way and do it all again with a sync just so I can rule that out.:|
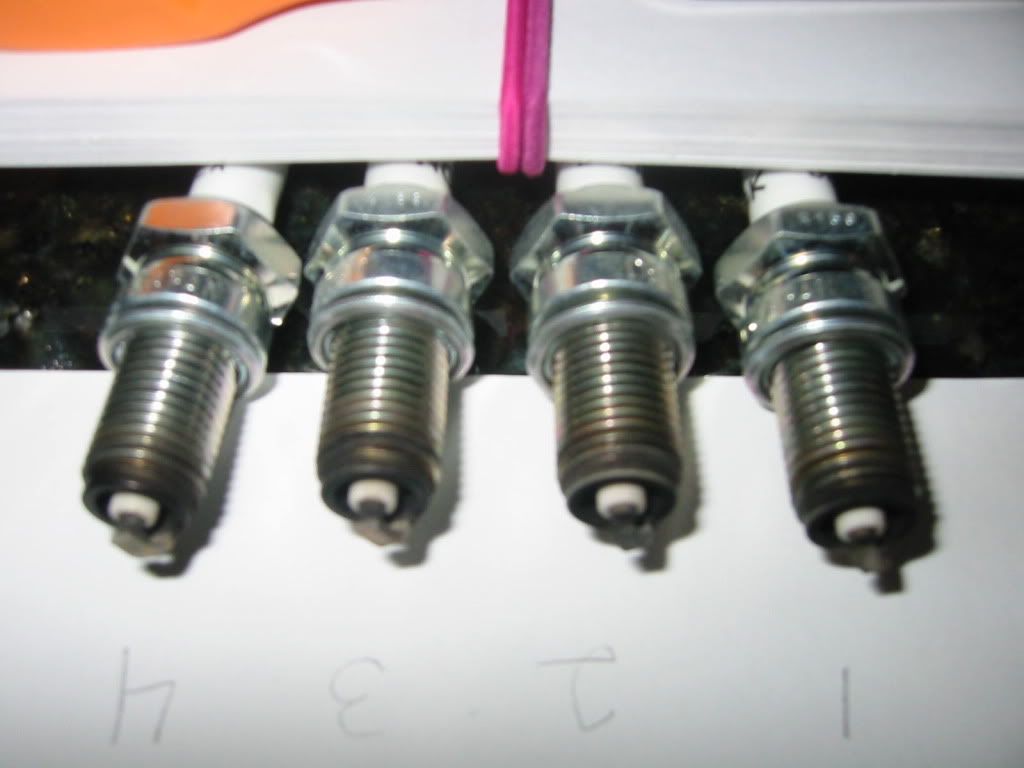
A couple of questions though:confused::

So you're saying I can get tappet shims AND o-rings from cycleorings.com? Can I get the carbtune for syncing there too? What about adapters to hook up the carbtune? And I'm pretty sure I know already but can you explain how to use the highest idle method to adjust the mixture screws? Oh, and how to bench sync too, you just match up the throttle valve to the little holes on the carb body right?

Thanks:D
 
I don't think you can get shims from cycleorings, but there is a shim club here, and you will not be able to get a CarbTune or adapors there either.

Ray (Ghostgs1) is your member in charge of that and here's your link to the thread in the member's services section:

http://www.thegsresources.com/_forum/showthread.php?t=122394&highlight=shim

There must be a member in your area with a synch tool. I prefer the Morgan Carbtune Pro, but there are certainly other, serviceable tools that you can use. Z1 sells adaptors, but beware they are very soft brass, and a few people have snapped them off.
 
Alright, here's my to do list:

Take carbs completely apart
Soak everything
replace o-rings
replace carb fasteners
replace intake boots and/or o-rings
seal airbox
check/adjust valves and get the right shims
replace valve cover gasket
clean/replace air filter element
bench sync carbs
sync with manometer
adjust mixture screws by highest idle method

Questions:

What is the proper way to care for an air filter and not over-oil it?
To use the club am I supposed to measure my valve clearances and then make a request and send in the ones I've replaced afterwards?
What is the right way to do a bench sync?
I live in Alpharetta, GA is there anyone nearby who has a carbtune and can make sure I do it right?
In order to do the sync do I need anything besides a manometer and four adapters?
What is the right way to do the highest idle method?

Thanks:D
 
Alright, here's my to do list:

Take carbs completely apart
Soak everything
replace o-rings
replace carb fasteners
replace intake boots and/or o-rings
seal airbox
check/adjust valves and get the right shims
replace valve cover gasket
clean/replace air filter element
bench sync carbs
sync with manometer
adjust mixture screws by highest idle method

:clap:

Questions:

What is the proper way to care for an air filter and not over-oil it?
To use the club am I supposed to measure my valve clearances and then make a request and send in the ones I've replaced afterwards?
What is the right way to do a bench sync?
I live in Alpharetta, GA is there anyone nearby who has a carbtune and can make sure I do it right?
In order to do the sync do I need anything besides a manometer and four adapters?
What is the right way to do the highest idle method?

Thanks:D

You want to lightly oil it so go real gentle with whatever you are using.

As far as the club, yes you'll want to measure first. Make sure you email Steve for his spreadsheet to track everything. You'll be able to determine from your measurements and the spreadsheet which ones you can move around from one cylinder to another AND making sure you DON'T turn the engine without a shim in place. Once you know what you need, send GhostGS1 a PM and tell him what you need. He'll mail them out and you return the old ones.

You'll find Basscliff's site has the Bench Sync procedures in Nessism's carb rebuilding tutorial and the Highest Idle Method instructions. If you haven't already started reading Cliff's site you need to quickly before doing much else.

You'll want to fashion up some sort of temp tank; I am using a tank from a lawn mower that a repair shop gave me for $5. Others use gear oil bottles, fuel bottles from REI, or whatever they can find. Finally, you can find a carbtune from www.carbtune.com. It will be a useful tool as you'll need to ensure they are still synched everytime you do a valve adjustment (4000 miles or so).
 
Man you guys are awesome!:) So back to spark plugs, when it comes time to tune the idle air/fuel mixture can I use the ones in the pictures? They have maybe 200 miles on them and should still be gapped correctly.
 
Those plugs should NOT be a problem. If you want, you can dip the tips in vinegar for a short while to clean off that carbon, but it (the carbon) will burn off once you get the A/F mix set fine and you get some miles under your belt.
 
Look what I got today! And there's more on the way :)
image-1.jpg

That's a new petcock, intake boots, intake boot o-rings, carb o-rings, intake boot fasteners, and valve tappet feeler gauges.

Oh, and a Z1 sticker;)

I'll try to post more pics tomorrow.
 
Here's how far I got the other night.

0730122308.jpg


When I was taking out the airbox I noticed these metal rings inside, they looked like that had been pushed backward into the passages. Are they in the right place or do I need to fix them?

0730122233a.jpg


Thanks
 
Still making progress...

0802121854.jpg


To do::eek:
Get 8 replacement fasteners for bottom gang plate (M6 x 12mm)
Measure Tappet Clearances and put in spreadsheet
Send/Receive shims from pool
Adjust shims
Install new intake boots and o-rings
Clean engine and airbox
Rinse/Dry/Reassemble carbs and install new o-rings
Set float height
Check fuel level
Bench sync carbs
Install airbox/carbs
adjust pilot screws engine running
synchronize carbs engine running
put it back together and ride it!
 
What is the liquid in which the bodies are soaking?

.

That's Pine-Sol :) I found out about it on another forum and tried it before with good results. I usually mix it 50/50 with hot water so I don't have to buy as much.

Update:

I got the vavle cover off and measured my tappet clearances today.

The following is in order from cylinder 1-4 left to right:

Intake - .063mm .102mm .063mm .102mm
Exhaust - .076mm .076mm .063mm .127mm:eek:

Those are the largest feeler gauges that would fit for each valve.

Has anyone heard of getting two different measurements on the same valve by checking it with the lobe both perpendicular and parallel to the head?

And my breather cover didn't have any wire mesh in it :( look...

0804120014.jpg


What is the best place to get replacements for the half moon plugs that go to the valve cover?

Thanks
 
So apparently the GS650G has two valve cover designs. One with 16 bolts and one with 17 bolts. Mine has 17. The gasket I got from realgaskets.com has 16:(

image_2.jpg


You'll see my problem if you count the holes.

image-2.jpg


At least I got all the old gasket scraped off. And for anyone interested, the correct valve cover gasket for a 1982 Suzuki GS650GZ with a 17-bolt valve cover is part# 11173-34212
 
Back
Top