-
Required reading for all forum users!!!
Welcome!
Register to access the full functionality of the GSResources forum. Until you register and activate your account you will not have full forum access, nor will you be able to post or reply to messages.A note to new registrants...
All new forum registrations must be activated via email before you have full access to the forum.A Special Note about Email accounts!
DO NOT SIGN UP USING hotmail, outlook, gmx, sbcglobal, att, bellsouth or email.com. They delete our forum signup emails.A note to old forum members...
I receive numerous requests from people who can no longer log in because their accounts were deleted. As mentioned in the forum FAQ, user accounts are deleted if you haven't logged in for the past 6 months. If you can't log in, then create a new forum account. If you don't get an error message, then check your email account for an activation message. If you get a message stating that the email address is already in use, then your account still exists so follow the instructions in the forum FAQ for resetting your password.Have you forgotten your password or have a new email address? Then read the forum FAQ for details on how to reset it.
Any email requests for "can't log in anymore" problems or "lost my password" problems will be deleted. Read the forum FAQ and follow the instructions there - that's what we have one for...
-
Returning Visitors
If you are a returning visitor who never received your confirmation email, then odds are your email provider is blockinig emails from our server. The only thing that can be done to get around this is you will have to try creating another forum account using an email address from another domain.
If you are a returning visitor to the forum and can't log in using your old forum name and password but used to be able to then chances are your account is deleted. Purges of the databases are done regularly. You will have to create a new forum account and you should be all set.
You should upgrade or use an alternative browser.
De-stinking Penelope
- Thread starter rustybronco
- Start date
Flyboy
Guest
Guest
Guest
Guest
Guest
I agree with Mike and Chuck. Hoard the best stuff for yourself.")
Dale,
Looks like I was in good company as for keeping what's best for your bike. Remember, you'll be keeping the bike, over time you'll be glad that
you kept the best parts for yourself. And quality parts for these bikes
are getting harder to come by.
However, should you give up your best parts, you'll be kicking yourself in the butt for as long as you have the bike and the dollars you lose to the sale of less than perfect parts you'll get back should you sell the bike.
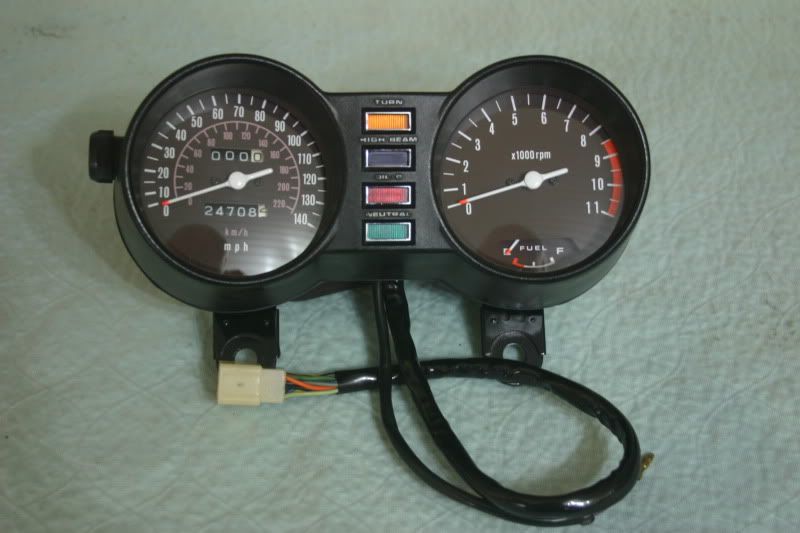
I went shopping today and picked up some modeling paint for the ends of the indicator needles. I think it looks like a very close match to what should be the original color on the needles.
In my opinion, the best way to apply the new paint to the tip is to lightly scrape the old tip colour off with a razor blade and dip the tip of the needle into the jar of paint. remove the indicator needle and lightly touch the fresh paint to the side of the jar removing some of the excess. then let it hang with the tip pointing down until it's dry. I taped the needle to the side if a shelf so it couldn't fall. dipping the tip into the paint instead of applying it with a brush will leave the tip perfectly smooth looking just like it came from the factory.
Guest
Guest
Allrighty then, that settles it, the good stuff goes on Penelope.
I went shopping today and picked up some modeling paint for the ends of the indicator needles. I think it looks like a very close match to what should be the original color on the needles.
In my opinion, the best way to apply the new paint to the tip is to lightly scrape the old tip colour off with a razor blade, then dip the tip of the needle into the jar of paint, remove and let hang with the tip pointing down until its dry. dipping the tip into the paint instead of applying it with a brush will leave the tip perfectly smooth looking just like it came from the factory.
Now *that's* what I call attention to detail... bravo Dale, I applaud your thoroughness

Guest
Guest
Pete, I spent 30 minutes deciding which colours were best to use. I even walked around the store with various shades of paint drying on the finger tip of one hand while the tach was in my pocket. when I got home I dipped that spare needle into the paint and my Wife asked, 'is that all you bought that for?' yep...
Hahaha nice Dale... bet you got some strange looks in the store too right? I spent a while wandering around Supercheap and Woolworths today trying to find the right size bag for my tools to go on the tool tray in the tail piece with no joy.
I reckon I'll also get some funny looks if I need to take them out as my wife gave me one of her old coin purse type things... embarrassingly enough it's an absolute perfect fit in there...
If you feel you'll be embarrassed whipping out the Wife's old coin purse, stitch one up out of vinyl or leather that I'll fit in the tail piece. if it were me personally, I'd care less what people think of using it. kind of similar to if you choose to ride a 125 or a 1200, it's none of their concern.
Guest
Guest
Pete, I've long since cared if people think I'm in my right mind or not. it's my music, I'll march to it.
If you feel you'll be embarrassed whipping out the Wife's old coin purse, stitch one up out of vinyl or leather that I'll fit in the tail piece. if it were me personally, I'd care less what people think of using it. kind of similar to if you choose to ride a 125 or a 1200, it's none of their concern.
Yeah I get ya Dale... I'm mostly over that stuff myself... however if I was to stitch one up I reckon the result of that would be even more embarrassing...
 (I failed sewing in high school... big time)
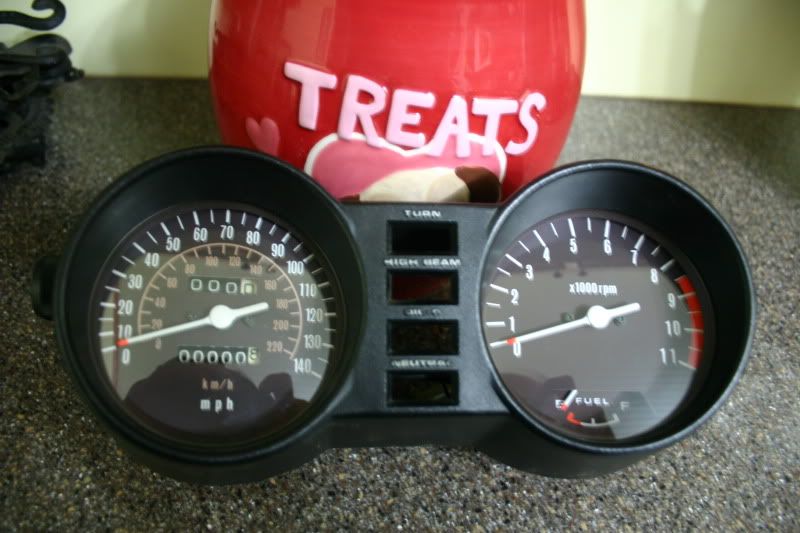
One gauge is completed.
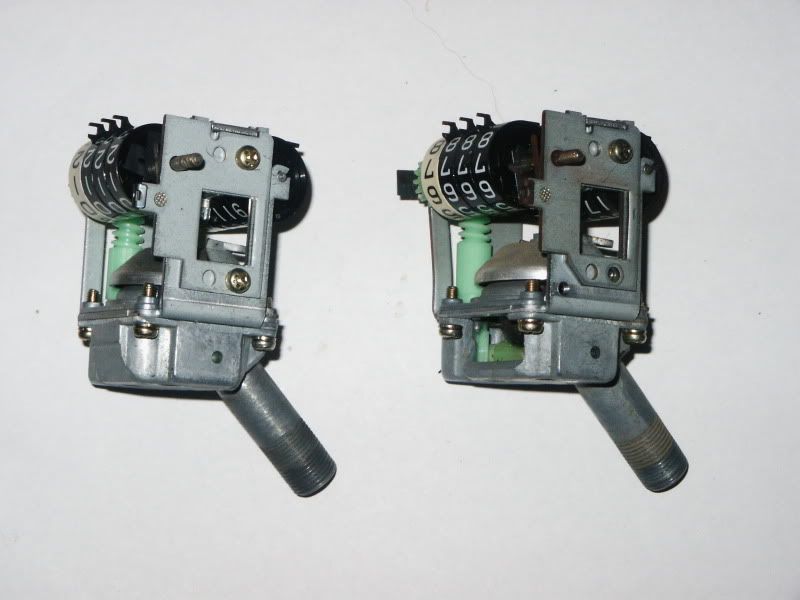
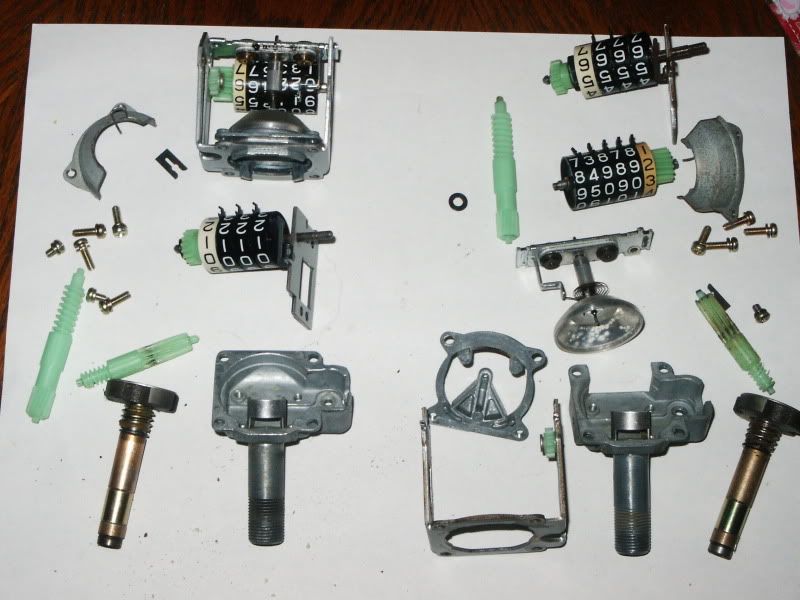
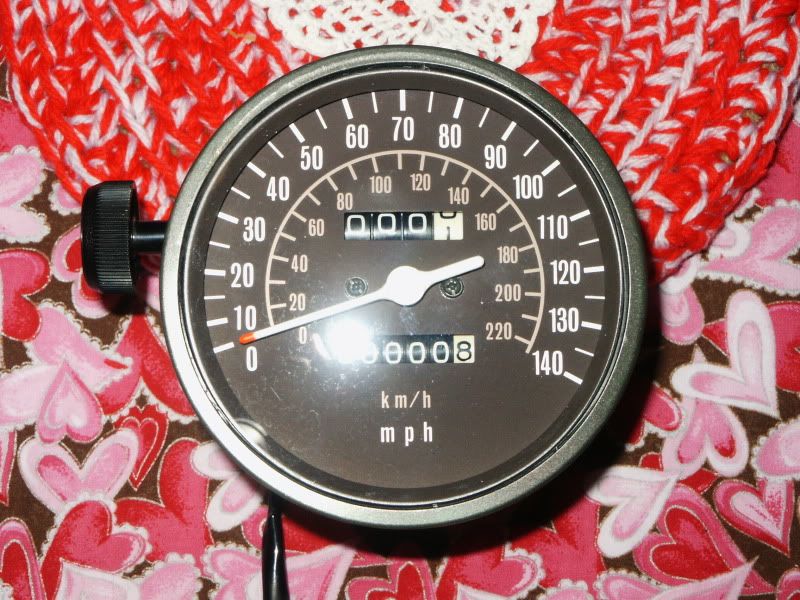
I had to convert the 1000C speedo to a 1000E style gauge by adding the speed sensor (reed switch). a bit easier to say than it is to do, especially when the E gauge I took the parts from was damaged. I even repainted the needle
")
notice the mileage? 00000.8 just like the NOS gauges. I thought that would be a nice touch!
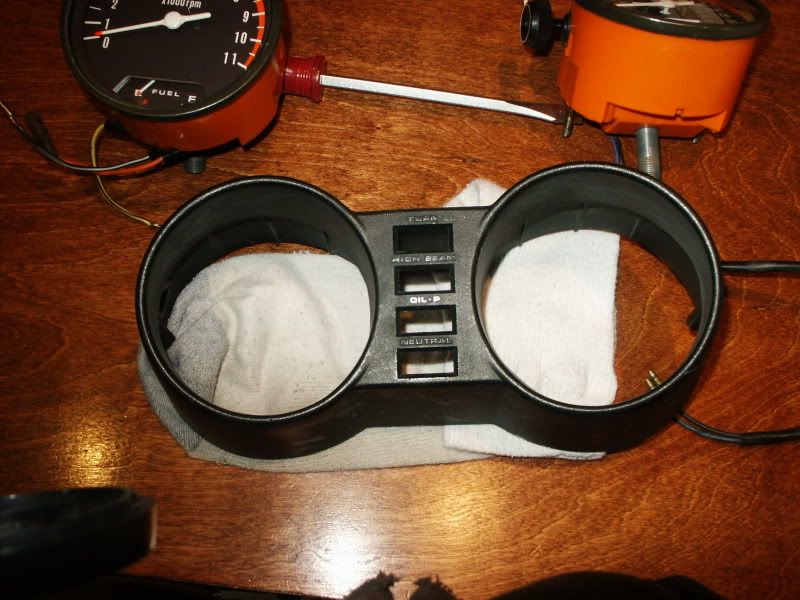
I hand painted the oil-p on a spare gauge housing to see how well that method will look.

Flyboy
Guest

Guest
Guest
Pete, all you need is a desire to learn and the right teacher.
One gauge is completed.
I had to convert the 1000C speedo to a 1000E style gauge by adding the speed sensor (reed switch). a bit easier to say than it is to do, especially when the E gauge I took the parts from was damaged. I even repainted the needle
notice the mileage? 00000.8 just like the NOS gauges. I thought that would be a nice touch!
After looking at the guts to these, I now know why they call them "clocks"
Dale, you should've been a surgeon. "Kids, don't try this at home!"
I don't think mine would've worked had I taken them down that far.
)
Stan, as I've said before, that song won't play very well in Peoria. http://en.wikipedia.org/wiki/Will_it_play_in_Peoria?I am thinking I need to strip Jennifer to the frame and start again, she looks like a beater compared to what is going on there.
your kidding 'Nooone' here.
Flyboy
Guest
(it also helps when you work on clocks as a hobby...
That is interesting, a good friend of mine who now lives on your side of the pond in Boca, collects clocks as a hobby, Carriage clocks and Grand Father clocks mostly, but all kinds really.
When he packed up to move over there, his collection filled a 12ft container, on its own.
brslk
Guest
Bruce.
Guest
Guest
My shakey hands would never cope with such delicate work, I'm lucky enough to be able to hold a soldering iron steady enough to get a half decent job...
And yes, I get ya on the sewing thing... in fact I need to sew up the end of the zipper on my tank bag that came adrift on the GSR run, guess I should probably do that soon...
I wish you could see them in person
As they really look that nice!
I even cut off the old wiring sheath and replaced it with one in much better condition.
okay, so I'm a nut job...