G
Guest
Guest
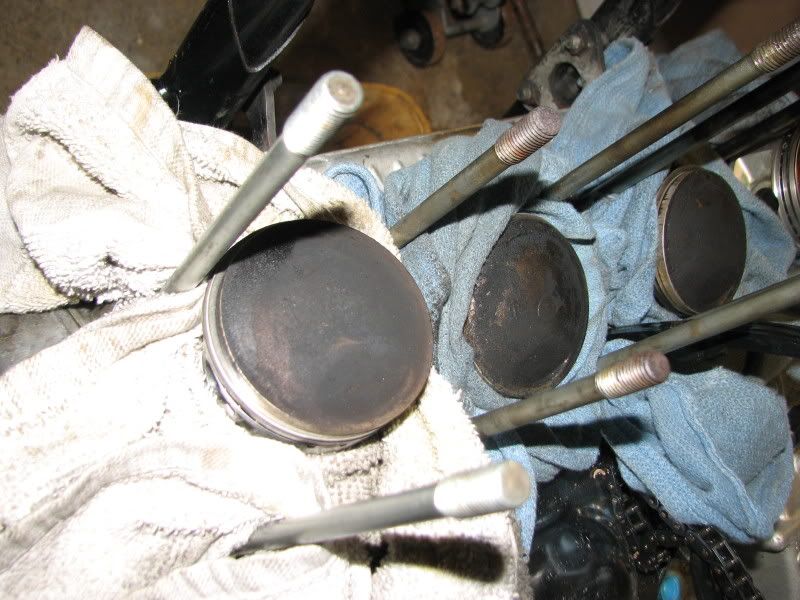
I can see the dead moth on a piston.
Required reading for all forum users!!!
Welcome!
Register to access the full functionality of the GSResources forum. Until you register and activate your account you will not have full forum access, nor will you be able to post or reply to messages.
A note to new registrants...
All new forum registrations must be activated via email before you have full access to the forum.
A Special Note about Email accounts!
DO NOT SIGN UP USING hotmail, outlook, gmx, sbcglobal, att, bellsouth or email.com. They delete our forum signup emails.
A note to old forum members...
I receive numerous requests from people who can no longer log in because their accounts were deleted. As mentioned in the forum FAQ, user accounts are deleted if you haven't logged in for the past 6 months. If you can't log in, then create a new forum account. If you don't get an error message, then check your email account for an activation message. If you get a message stating that the email address is already in use, then your account still exists so follow the instructions in the forum FAQ for resetting your password.
Have you forgotten your password or have a new email address? Then read the forum FAQ for details on how to reset it.
Any email requests for "can't log in anymore" problems or "lost my password" problems will be deleted. Read the forum FAQ and follow the instructions there - that's what we have one for...
If you are a returning visitor who never received your confirmation email, then odds are your email provider is blockinig emails from our server. The only thing that can be done to get around this is you will have to try creating another forum account using an email address from another domain.
If you are a returning visitor to the forum and can't log in using your old forum name and password but used to be able to then chances are your account is deleted. Purges of the databases are done regularly. You will have to create a new forum account and you should be all set.
Youre going to need to fabricate a wrist pin puller if you dont already have one.. I know how, but you'll need some supplies. Honestly, I would just go at it with some carb cleaner, a wire brush and some steel wool and fine FINE sandpaper for the piston skirts. Pulling the pistons is IMO unnecessary and time consuming. You just need to get the domes and the sides PRETTY clean, spotless, in this time frame, is a luxury. Just my opinion though.Yeah, calipers and mics too. I just haven't got to that step yet. Good grief, I just got the cylinders off tonight before the game. (I got on base 3 times, 3 RBIs and a fly ball straight to me in right field and we still lost. Heckuva good game though.) Tomorrow I'll go 'round the corner to HF and get set up for the walnut shells. I might even go to the HW store and get a chunk of pipe to make a valve spring compressor. I have to cut the stupid grass tomorrow evening, though.
I bought a can of Berryman's to clean my front master cylinder back in the spring. I guess I can get the pistons started in there too. I heard somewhere that the snap rings that hold the wrist pins need to be replaced if you remove them. Is true?
I've reused wrist pin clips with no problem.
Replace the clips for sure on the side you remove. Regarding the need for a piston pin press, much of the time it's not necessary - I've never had the need.
I think some of you guys are jumping to a conclusion about the condition of the parts before everything is measured. When rebuilding my 1000 engine I checked three different cylinder heads before I found one with valve/guides within the service limit. Wound up purchasing a used head off ebay that was relatively low mileage before finding one that was decent. Pistons and cylinder bores wear as well. And sorry to contradict Josh but I'd never sand the piston skirt - you don't want to take off any material or the clearance will increase. Some scuffing won't hurt anything, just decarbon the pistons in carb dip and then measure them.
Good luck.
Not to contradict Ed but since the piston itself never comes into contact with the cylinder wall, and your not sanding the ring grooves, and with some 1000 or 2000, or even 2500 grit sandpaper just to clean the burmishing (im not talking going to town with a Dremel on it) isnt going to take that much material off How much is that really going to change the spacing? ....but whatever. At any rate, Carbon shold be removed at the given opportunity because excessive carbon build up will actually change the compression ratio within the cylinder. Not to mention the fact that you let it stack up TOO much and you might start touching valves...HA!Well, I didn't see anything that looked like scuff marks on the skirts. More like burnished. Looking back at the pics, #4 does look like it has some marks on it. I'll take a closer look when I inspect the rings. I am a little nervous about the idea of taking material off the skirts. I cut my finger on #3, so something is thin already.
Thinking about it now, instead of at 2:00 AM, if I can just brush the piston tops clean and be good enough, I'd rather do that.
Now here's a theory question: Why does the carbon have to some off? Is it likely to flake off someday and score the cylinder or something?
Youre going to need to fabricate a wrist pin puller if you dont already have one.. I know how, but you'll need some supplies. Honestly, I would just go at it with some carb cleaner, a wire brush and some steel wool and fine FINE sandpaper for the piston skirts. Pulling the pistons is IMO unnecessary and time consuming. You just need to get the domes and the sides PRETTY clean, spotless, in this time frame, is a luxury. Just my opinion though.

Not to contradict Ed but since the piston itself never comes into contact with the cylinder wall, and your not sanding the ring grooves, and with some 1000 or 2000, or even 2500 grit sandpaper just to clean the burmishing (im not talking going to town with a Dremel on it) isnt going to take that much material off How much is that really going to change the spacing? ....but whatever. At any rate, Carbon shold be removed at the given opportunity because excessive carbon build up will actually change the compression ratio within the cylinder. Not to mention the fact that you let it stack up TOO much and you might start touching valves...HA!
Gonna have to disagree with my mechanic on this one. The skirts are there for no other reason than to touch the cylinder wall and keep the piston straight. Otherwise pistons would be nothing more than the face, ring grooves, and wrist pin mounts in order to keep the mass down and get higher revs.
Do I sound like an engineer? Head full of information and opinions, still can't do it myself (yet).
")
...do what you think is best, and I will continue to do what I think is best
")
+1 but also stuff some paper towel in the socket. I also used my hands to put them back on instead of a home-made compressor--but I'd guess that's much easier on a 16-valve 550.You can remove the valve locks by placing a socket over the retainer and giving it a good wack with a rubber mallet. Stuffing a wadded up rag in the combustion chamber helps by keeping the valves seated. I've used this trick several times with success. Lynn mentioned this trick in a thread a few years ago so she gets credit.
MY way??? What are you talking about???Arright. I had a couple little wire wheels so I did it Steve's way.
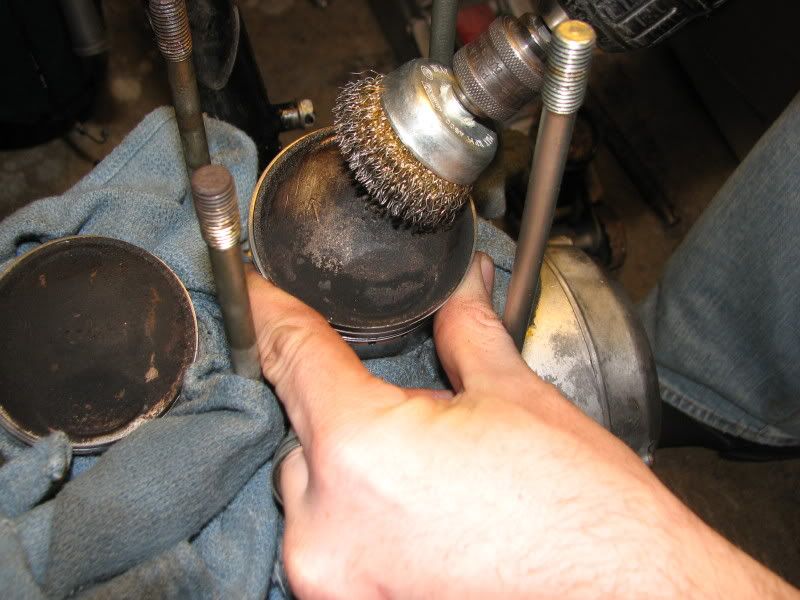
I have a spare set I am about to send back because they werent the right ones for the 550 i just did. They WILL work on your 850 tho. Changing the fork seals takes me about an hour, Ive got lots of practice in this week...lol Let me know if you need them, if you can by tomorrow, and I wont send them back. I take it you DID get ahold of Pearsons after all?Arright. I had a couple little wire wheels so I did it Steve's way. I can see the T-shirt now: "GS riders do it Steve's way". Anyhow, the results are the same as his, so I didn't take a picture.
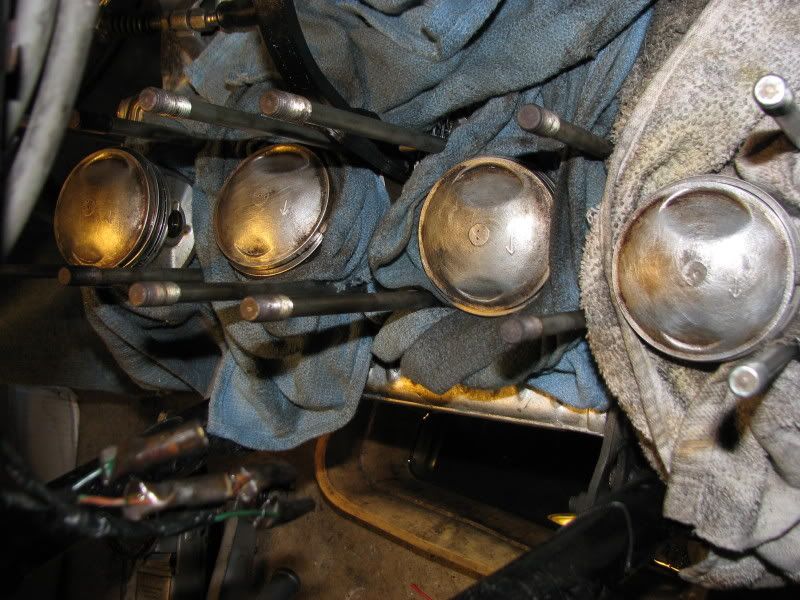
I also got some inspecting done. Piston diameter at the skirt, ring to groove gap, and free ring gap were all easily within normal limit, not even the service limits (according to Clymer). Consistent across all four, too. Basically, it's like new in there, except for the carbon. I didn't take the rings off and stuff them up the bore to check the gap there though. Not looking forward to that chore. How easy is it to accidentally break rings removing them? I'm thinking I should use snap ring pliers to expand them.
I also picked up ingredients for a valve spring compressor. I hope to get the valves out before I take the head to Pearson's on Saturday. I sure hope he can get it done on Saturday. I'll be in great shape if I can get the seals and valves back in this weekend.
Speaking of seals... the left fork seal decided to make a puddle sometime in the last 24 hours. Just wonderful. Well, Jim predicted those pitted tubes would cause an early failure. Time to swap on the new set, I suppose. That'll give me something to do if I don't get the head back this weekend. Let's hope those seals are still good.
I have a spare set I am about to send back because they werent the right ones for the 550 i just did. They WILL work on your 850 tho. Changing the fork seals takes me about an hour, Ive got lots of practice in this week...lol Let me know if you need them, if you can by tomorrow, and I wont send them back. I take it you DID get ahold of Pearsons after all?

MY way??? What are you talking about???
The posters, so far, in order of appearance:
Dogma - Dale
First timer - ??
Posplayr - Jim
Nessism - Ed
Steve - Steve
TheCafeKid - Josh
Chef1366 - Bill
Dreef1999 - ??
Tkent02 - Tom
Dave8338 - Dave
I seem to be the only "Steve" so far, and all I suggested was smaller pictures. :-k
But, ... since you are under the impression that I suggested wire wheels, let me confirm that impression.
This is how we cleaned the pistons in #2 son's 850 last summer:
[pics deleted]
.