Went to my buddy Randys shop this afternoon and he schooled me on cutting valve seats and now I have another skill in the file cabinet to use. Went to the specs as posted in the factory service manual. Washed the head real good and its drying overnight so I can paint and bake it tomorrow afternoon. It wasnt as complicated as i thought.
-
Required reading for all forum users!!!
Welcome!
Register to access the full functionality of the GSResources forum. Until you register and activate your account you will not have full forum access, nor will you be able to post or reply to messages.A note to new registrants...
All new forum registrations must be activated via email before you have full access to the forum.A Special Note about Email accounts!
DO NOT SIGN UP USING hotmail, outlook, gmx, sbcglobal, att, bellsouth or email.com. They delete our forum signup emails.A note to old forum members...
I receive numerous requests from people who can no longer log in because their accounts were deleted. As mentioned in the forum FAQ, user accounts are deleted if you haven't logged in for the past 6 months. If you can't log in, then create a new forum account. If you don't get an error message, then check your email account for an activation message. If you get a message stating that the email address is already in use, then your account still exists so follow the instructions in the forum FAQ for resetting your password.Have you forgotten your password or have a new email address? Then read the forum FAQ for details on how to reset it.
Any email requests for "can't log in anymore" problems or "lost my password" problems will be deleted. Read the forum FAQ and follow the instructions there - that's what we have one for...
-
Returning Visitors
If you are a returning visitor who never received your confirmation email, then odds are your email provider is blockinig emails from our server. The only thing that can be done to get around this is you will have to try creating another forum account using an email address from another domain.
If you are a returning visitor to the forum and can't log in using your old forum name and password but used to be able to then chances are your account is deleted. Purges of the databases are done regularly. You will have to create a new forum account and you should be all set.
-
In order to help others find info on a particular bike, be sure to put the year, make or model of bike that you are asking a question about, in the Topic Title. This will allow people to pass by posts they have no interest in.
You are using an out of date browser. It may not display this or other websites correctly.
You should upgrade or use an alternative browser.
You should upgrade or use an alternative browser.
Pretty nice barn find!!!!!
- Thread starter chuck hahn
- Start date
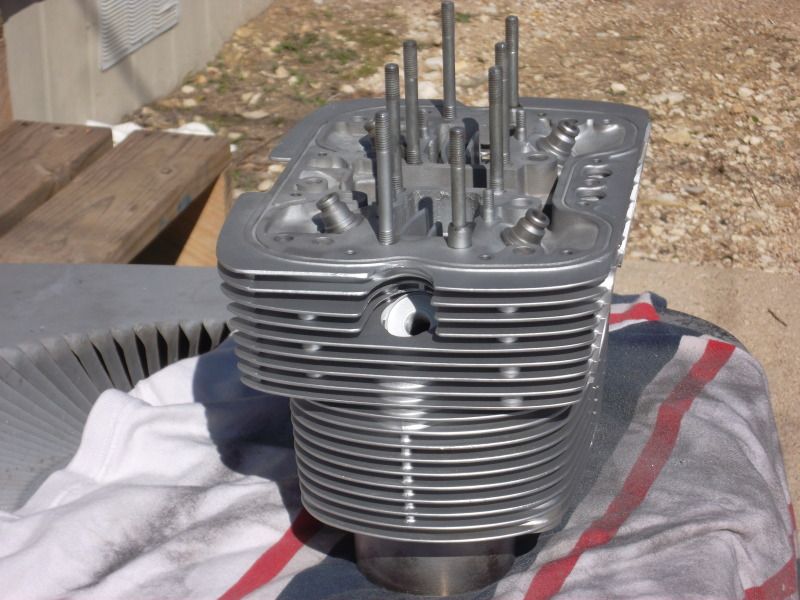
Sand blasted the head also before we did the valve job... heres where its at right now. Waiting on painting.


G
Guest
Guest
Chuck,
You are doing a fantastic job on that bike. Makes me wish I had kept my old '76 Yamaha 650. Lots of torque, tons of vibration. Ballsy!
You are doing a fantastic job on that bike. Makes me wish I had kept my old '76 Yamaha 650. Lots of torque, tons of vibration. Ballsy!
Well seeing that its all original and probably one of the few remaining actual road worthy ones..I think she is worth the effort. I have been to A LOT of bike events and shows and havent ever seen one there. I wouldnt venture to guess an actual number left still running, but it cant be that many. I will post a few more pics in a moment..realised I didnt take any side pics of the cleaned up head.
Last edited:
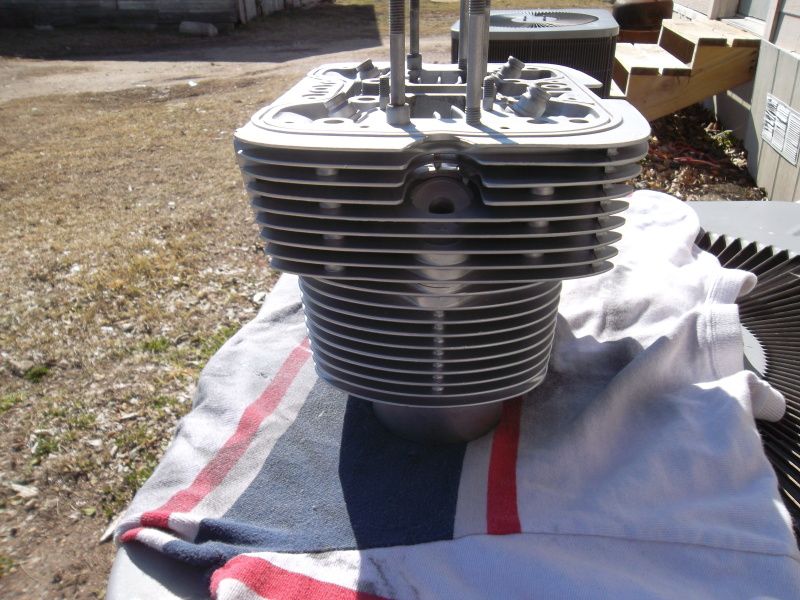
Sand blasted head
Sand blasted head
randy uses a media called sugar sand..very very fine and leaves a silky smooth surface. Pardon the finger prints all over it!!!


Sand blasted head
randy uses a media called sugar sand..very very fine and leaves a silky smooth surface. Pardon the finger prints all over it!!!
Last edited:
G
Guest
Guest
Well seeing that its all original and probably one of the few remaining actual road worthy ones..I think she is worth the effort. I have been to A LOT of bike events and shows and havent ever seen one there. I would ventire to guess an actual number left still running, but it cant be that many. I will post afew more pics in a moment..realised I didnt take any side pics of the cleaned up head.
As long as I have been interested in bikes, I can't ever recall seeing even one of them.
Hit a bit of a snag, but got it sorted.
I was setting the cam chain guide in the jugs and checking the bolts out and couldnt get them to start. seems when i blew the holes after the sand blasting some was stuck...which mixed with some paint that over sprayed. Took a small pair of scissors and had to chip the gunk from the tops of the holes to start the bolts.
I then ran the bolts in a little and blew more air..repeated the process till the bolts all bottomed out and were easy to turn. I then ran more air in the head holes and made well sure they were clean also.
Talked to Eric Bang on the phone and got some good suggestions from him as well. My next trick would have been to go buy a tap and chase the holes per Dales suggestion.
Got the head painted this morning.. need a new bolt that will need to be ordered from Fastenal. It hs some chipped threads and will be a problem with reuse so I will replace it.
Head and cylinders together
Head and cylinders together
Just took them outside and took a few pics of them married up...looking good

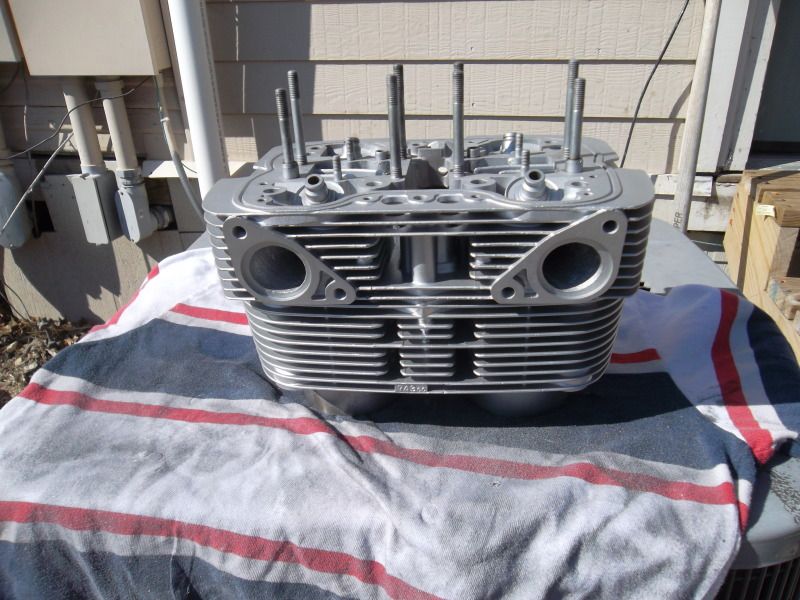
Head and cylinders together
Just took them outside and took a few pics of them married up...looking good
OOOPS.....Was moving some stuff around on the bench and next thing i see is the lower cam chain guide broken...they got a few on Ebay but I am broke as a window right now.
Got the pistons back on the connecting rods and set the cylinders back on. Still waiting on the Three Bond 1207B I ordered so I can seal the cam blocks when I install them back on the head. Then its just a matter of torqueing the bolts, put the cam cover on, and slap the engine back in the frame.
Plus waiting for the gaskets and the tap to be sent.. Hopefully my son Russ had a chance to pick them up. I'll be in Yale Sunday if he did.
Yes i will need the intake manifold gaskets. I was referring to the MAJOR stuff as far as reassembly of the engine itself. Talked to Randy and he has some case sealer, so i will get that and have a new tube for future projects. Might have her buttoned up by next weekend. I will snap pics and probably be religated to Imageshack again because of Photobucket dropping the bucket...so to speak.
Took the camera with me and got some pics of yesterdays project progress..slow but surely I am getting it done.


..............................

.............
........
In your first post, must be you are the guy on the left.
Looks like you have been a lot of good work on it.
.
Last edited:
Yes redman..I am the fatazz on the left. the other guy is my buddy "Jap Bike" Randy..also know as the Bike Whisperer.
I rode the bike all summer and even down to The Harvest Classic last October. I knew she had a real little "tick" in her and once the rebuilding began we found the valve stem damaged and the adjuster hammered from the original owner not doing maintenance. It quieted down a lot after doing the adjustment, but i knew it wasnt quite right.
I will take some pics of her when she is back together and do a before and after picture thread. It will be quite the contrast!
Really sucks having that gouge in it from whenever it was dropped, but it is what it is..maybe I will find another better cover later, but then again maybe i should judt keep it with all the original parts...what do you guys think???
Last edited:
Held my opinion 'til I knew better?
Held my opinion 'til I knew better?
Sure am glad to know that wasn't your wife standing next to you.")
Held my opinion 'til I knew better?
Sure am glad to know that wasn't your wife standing next to you.
Helll yeah......meeeeee tooooo!!!!!!
Went over and got some torque wrenches from my buddy Randy and some Three Bond 1207B sealer and finish up the engine today. There will be 2 picture posts because of the 10 pic limit. Hope it passes muster and I look forward to your comments. Around post 15 or so are pics of the engine just after we rescued it from the barn. There is quite the difference in how she looks now!!!
Got that cam chain tool Eric Bang found and it works like magic..there are pics of the new link being added too. Adjusted the valves and all I need to do now is put the bike back together. .Next and last thing to do is clean and polish the forks
I used welding wire to fish the cam ahin back up and then hung tools on the wores to hold them while i was prepping the cam blocks. I oiled everything up well before putting the cam cover on
Last edited: