Announcement

Collapse
No announcement yet.

1981 gs750 (gs750e) Retro Racer project

Collapse
X
 
  • Filter
  • Time
  • Show
Clear All
new posts

  • LarsKroghStea
    replied
    Hope you got it sorted quickly
    Here's the description from the ebay ad:
    2021-06-20_03-17-10 by Lars Krogh-Stea, on Flickr
    Keep in mind that I haven't mounted or tested it yet, but it should be the correct parts

    Leave a comment:


  • John Kat
    replied
    Originally posted by LarsKroghStea View Post
    Well.. Today I'm both happy and annoyed with my self. Last summer I spent hour after hour trying to get the petcock to flow enough gas to make the bike pull at higher RPMs. I overhauled the carbs, changed fuel-filter and more. I was convinced that the only thing I had changed from when the bike ran well was the little pocket-bike fuel-tank. I heard of someone that had the same problems and found out that it was a faulty coil. These bikes seem to run quite smooth on low RPMs, even when firing on only two of the cylinders. As the spark wires are in bad condition and one of the coils seemed to have leaked, I ordered a set of green Dynas with wires.
    While I waited for the Dynas I found an old clip from when I did the first test run. And what do you know.. The bike was wired up with only the bare essentials, and with spring loaded connectors. Seems like I was wrong about the fuel tank, and I decided to check the wiring. There was all sorts of tings wrong with the weather pack connector for the coils:


    It's a bit hard to see, but it's supposed to be three pins in this connectors in this plug. The middle one is 12V, the two outer pins are for each coil. One of them is pushed back by the bent plastic guide-pin. This was one of the first connectors I made, and I didn't have any previous experience. I managed to get two different pins mixed up. They are almost identical, but when you use the wrong one the won't lock in place. This error made one of the coils go dead of course, and I'm pretty sure the bike will run as it should after fixing this
    Pretty annoyed that I wasted countless hours, and only got one trip on the bike last summer :/ But pretty happy that I found the error. I was going install the Dyna coils, but it seemed like they needed some adapters:

    I decided to just fix the connector in stead. After I put everything together, I noticed it's possible to remove the adapters from the old ones. Doesn't matter.. I wanted to test the old ones anyway. I'll change coils later

    I have a lot more wires to sort out, but I'm getting the hang of it and taking the time it needs to be done correctly.
    I also ran into an issue with the wiring of my coils....
    In fact during one iteration of the bike setup, I had pulled a wire from one of the coils to an electronic tachometer.
    When I reverted the bike to OEM, it would refuse to take full rpm among other running issues!
    The reason was that I had "borrowed" the wire that is normally used for the fuel gauge to carry the tacho signal.
    When reverting to OEM, the tacho signal went to ground through the OEM defective fuel gauge.
    BTW, I'd like to buy some Dyno coils but what's your model and what cables are you using?

    Leave a comment:


  • LarsKroghStea
    replied
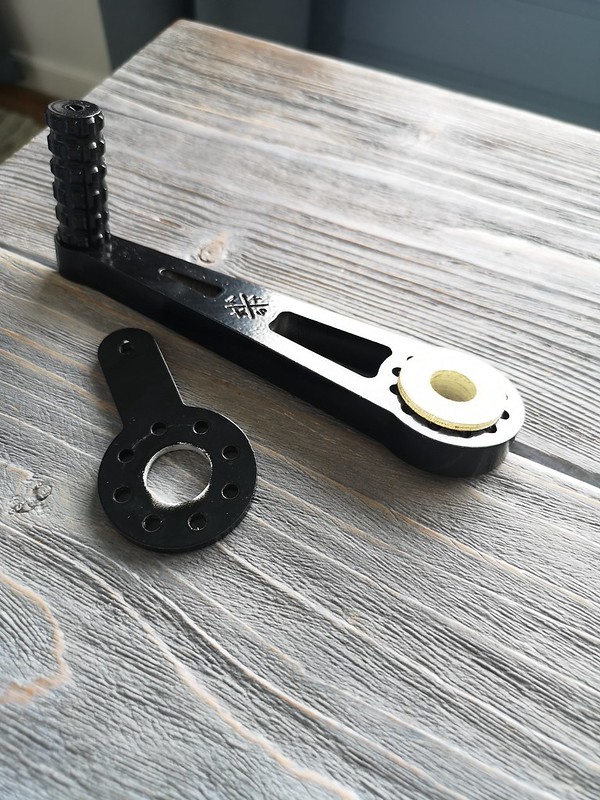
    By the way, I'm also working on the last piece for the rear-sets:

    Leave a comment:


  • LarsKroghStea
    replied
    Well.. Today I'm both happy and annoyed with my self. Last summer I spent hour after hour trying to get the petcock to flow enough gas to make the bike pull at higher RPMs. I overhauled the carbs, changed fuel-filter and more. I was convinced that the only thing I had changed from when the bike ran well was the little pocket-bike fuel-tank. I heard of someone that had the same problems and found out that it was a faulty coil. These bikes seem to run quite smooth on low RPMs, even when firing on only two of the cylinders. As the spark wires are in bad condition and one of the coils seemed to have leaked, I ordered a set of green Dynas with wires.
    While I waited for the Dynas I found an old clip from when I did the first test run. And what do you know.. The bike was wired up with only the bare essentials, and with spring loaded connectors. Seems like I was wrong about the fuel tank, and I decided to check the wiring. There was all sorts of tings wrong with the weather pack connector for the coils:


    It's a bit hard to see, but it's supposed to be three pins in this connectors in this plug. The middle one is 12V, the two outer pins are for each coil. One of them is pushed back by the bent plastic guide-pin. This was one of the first connectors I made, and I didn't have any previous experience. I managed to get two different pins mixed up. They are almost identical, but when you use the wrong one the won't lock in place. This error made one of the coils go dead of course, and I'm pretty sure the bike will run as it should after fixing this
    Pretty annoyed that I wasted countless hours, and only got one trip on the bike last summer :/ But pretty happy that I found the error. I was going install the Dyna coils, but it seemed like they needed some adapters:

    I decided to just fix the connector in stead. After I put everything together, I noticed it's possible to remove the adapters from the old ones. Doesn't matter.. I wanted to test the old ones anyway. I'll change coils later

    I have a lot more wires to sort out, but I'm getting the hang of it and taking the time it needs to be done correctly.

    Leave a comment:


  • LarsKroghStea
    replied
    Originally posted by Berti View Post
    Thanks! Sounds great. I'm eyeballing that DIY CNC for a while. Unfortunately I don't have the appropriate space (yet). Otherwise I would have already printed it... Maybe next winter
    Awesome, keep me updated! Would be great to exchange ideas and info about making motorcycle parts

    Leave a comment:


  • Berti
    replied
    Originally posted by LarsKroghStea View Post
    Hi! Yes it's the MPCNC (Mostly Printed CNC) from v1 Engineering. It's the new model and they have redesigned most of the parts for greater stability and accuracy. I haven't had time to assemble it yet, and probably won't before fall. When I do get it up and going, I'll post some videos from the triple clamp project
    Thanks! Sounds great. I'm eyeballing that DIY CNC for a while. Unfortunately I don't have the appropriate space (yet). Otherwise I would have already printed it... Maybe next winter

    Leave a comment:


  • LarsKroghStea
    replied
    Originally posted by Berti View Post
    Hi! Could you please elaborate a little bit more about the CNC?! Is it this: https://www.v1engineering.com/ ???

    Thanks, much appreciated
    Hi! Yes it's the MPCNC (Mostly Printed CNC) from v1 Engineering. It's the new model and they have redesigned most of the parts for greater stability and accuracy. I haven't had time to assemble it yet, and probably won't before fall. When I do get it up and going, I'll post some videos from the triple clamp project

    Leave a comment:


  • Berti
    replied
    Hi! Could you please elaborate a little bit more about the CNC?! Is it this: https://www.v1engineering.com/ ???

    Thanks, much appreciated

    Originally posted by LarsKroghStea View Post
    Well.. stuff always seem to happen. My father in law bought a Creality Ender 3 Pro 3D printer a while ago. He was the one who printed the "speedo converter" I designed:

    IMG_20200416_223222 by Lars Krogh-Stea, on Flickr

    I ended up with another solution, but at least I now know I have the skills to design parts that are printable

    A couple of weeks ago, he handed med the 3D printer. It had become an object of annoyance to him, as he never got it to work well. He recently moved into a new house, and had decided he didn't want to use any more time on it. It is now mine, if i print some parts for him now and then. I've gotten the printer to print perfectly now (took some work), and it's an awesome tool to have at my disposal. But what do you do when you have a machine that can make parts of alomst any shape? You make another cool machine Looking for solutions, he upgraded the controlboard, and he gave me the old board with the printer. I bought 5 used stepper motors for 20$, and the rest of the parts on Ebay for about 120$. If everything goes well, I'll have a CNC-router capable of milling aluminum at the cost of about 150$ As I have access to a lathe at my dads, the ability to make cool parts for my bike should now only be limited to my own CAD-capabilities

    Heres a picture of the printer:


    Here's a picture of the parts I'm printing:


    And here's a picture of what the router will look like. Most People in the US use Makita or DeWalt, but I'll print a tool holder for the blue Bosch grinder I already own. It's the same power as the Makita, 27k rpm and variable speed. Should mill alu with no problem;

    Lang versjon by Lars Krogh-Stea, on Flickr

    I'm really exited to add these parts to my shop, and I thought it would be cool to post about it. I'll make som updates on the bike soon

    Leave a comment:


  • LarsKroghStea
    replied
    This is the mess I stitched together last summer to get the bike rideable.. Hurts my eyes to look at it


    This is the new electronics box with the M-unit Blue and ignition module. I also integrated a copper ground terminal.


    I'l draw some sketches to see how to best route the rest of the cables and make Weather Pack connectors for the different cable clusters.

    Leave a comment:


  • LarsKroghStea
    replied
    Originally posted by John Kat View Post
    Hi Lars,
    Normally you can rotate the banjos as you can see below on the probrake hoses.
    Braided brake lines for your SUZUKI GS 1000 S (GS1000) 1979-1981 fron, 79,95 € (probrake.de)
    I use the end of a drill bit and a pair of pliers to delicately turn the banjos.
    Thanks! I'll try with the short one first, in case i screw it up

    Leave a comment:


  • John Kat
    replied
    Originally posted by LarsKroghStea View Post
    And for those of you that thinks this has become a 3D-printing thread, I'll soon be doing the linkage for the gearshifter and the front brakes.


    In that regard, I have a question about steel reinforced braided hoses. The set I ordered earlier are for the original fork. Those are too long for the GSX-R fork with clip-ons. They are long enough that I can run one of them from the master down to the right caliper and the other one from the right caliper, over the fender and down to the left caliper. They're not long enough to ron two separate lines from the master.
    The problem is that the banjos aren't properly lined up for this. Is it possible to rotate the banjos without ruining the brake lines?
    Hi Lars,
    Normally you can rotate the banjos as you can see below on the probrake hoses.
    Braided brake lines for your SUZUKI GS 1000 S (GS1000) 1979-1981 fron, 79,95 € (probrake.de)
    I use the end of a drill bit and a pair of pliers to delicately turn the banjos.
    Last edited by John Kat; 06-02-2021, 03:07 AM.

    Leave a comment:


  • LarsKroghStea
    replied
    And for those of you that thinks this has become a 3D-printing thread, I'll soon be doing the linkage for the gearshifter and the front brakes.


    In that regard, I have a question about steel reinforced braided hoses. The set I ordered earlier are for the original fork. Those are too long for the GSX-R fork with clip-ons. They are long enough that I can run one of them from the master down to the right caliper and the other one from the right caliper, over the fender and down to the left caliper. They're not long enough to ron two separate lines from the master.
    The problem is that the banjos aren't properly lined up for this. Is it possible to rotate the banjos without ruining the brake lines?

    Leave a comment:


  • LarsKroghStea
    replied
    As I'm redoing parts of the electrical system, I will also replace this:


    with this:


    It takes 15 hours to print, so I hope the measurements are right

    Leave a comment:


  • LarsKroghStea
    replied
    Another 3D-printed part finished. This one is a bracket for making the rear light level when mounted on a surface that sits at a 45 degree angle:


    Leave a comment:


  • LarsKroghStea
    replied
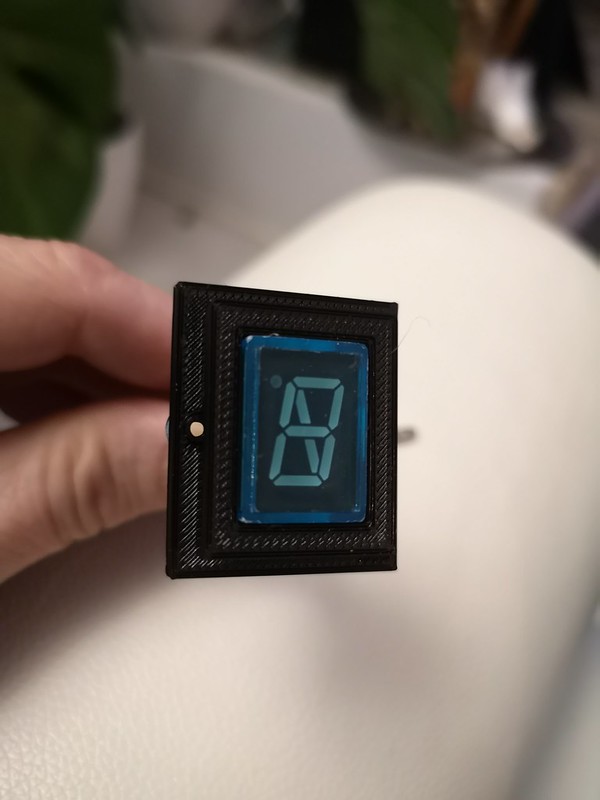
    And I made one for the gear-indicator:


    I think that's the last part I need to print for a while. There's some wiring left and connecting the front brakes, and then the front conversion is done. Then the bike will be rideable again Still need to make a proper mount for the registration plate, finish the rear brake and left side rear set before I can take it for a longer spin. Then, there's the right hand side cover and proper mounts for the rear sets. I should stop reminding myself of how much work I'm putting into this.. but it's a great hobby

    Leave a comment:

Working...
X