• Required reading for all forum users!!!

    Welcome!
    Register to access the full functionality of the GSResources forum. Until you register and activate your account you will not have full forum access, nor will you be able to post or reply to messages.

    A note to new registrants...
    All new forum registrations must be activated via email before you have full access to the forum.

    A Special Note about Email accounts!
    DO NOT SIGN UP USING hotmail, outlook, gmx, sbcglobal, att, bellsouth or email.com. They delete our forum signup emails.

    A note to old forum members...
    I receive numerous requests from people who can no longer log in because their accounts were deleted. As mentioned in the forum FAQ, user accounts are deleted if you haven't logged in for the past 6 months. If you can't log in, then create a new forum account. If you don't get an error message, then check your email account for an activation message. If you get a message stating that the email address is already in use, then your account still exists so follow the instructions in the forum FAQ for resetting your password.

    Have you forgotten your password or have a new email address? Then read the forum FAQ for details on how to reset it.

    Any email requests for "can't log in anymore" problems or "lost my password" problems will be deleted. Read the forum FAQ and follow the instructions there - that's what we have one for...

  • Returning Visitors

    If you are a returning visitor who never received your confirmation email, then odds are your email provider is blockinig emails from our server. The only thing that can be done to get around this is you will have to try creating another forum account using an email address from another domain.

    If you are a returning visitor to the forum and can't log in using your old forum name and password but used to be able to then chances are your account is deleted. Purges of the databases are done regularly. You will have to create a new forum account and you should be all set.

'81 GS550 Cafe Build

  • Thread starter Thread starter D-Mac
  • Start date Start date
September 27, 2012

Progress continues and is picking up again??

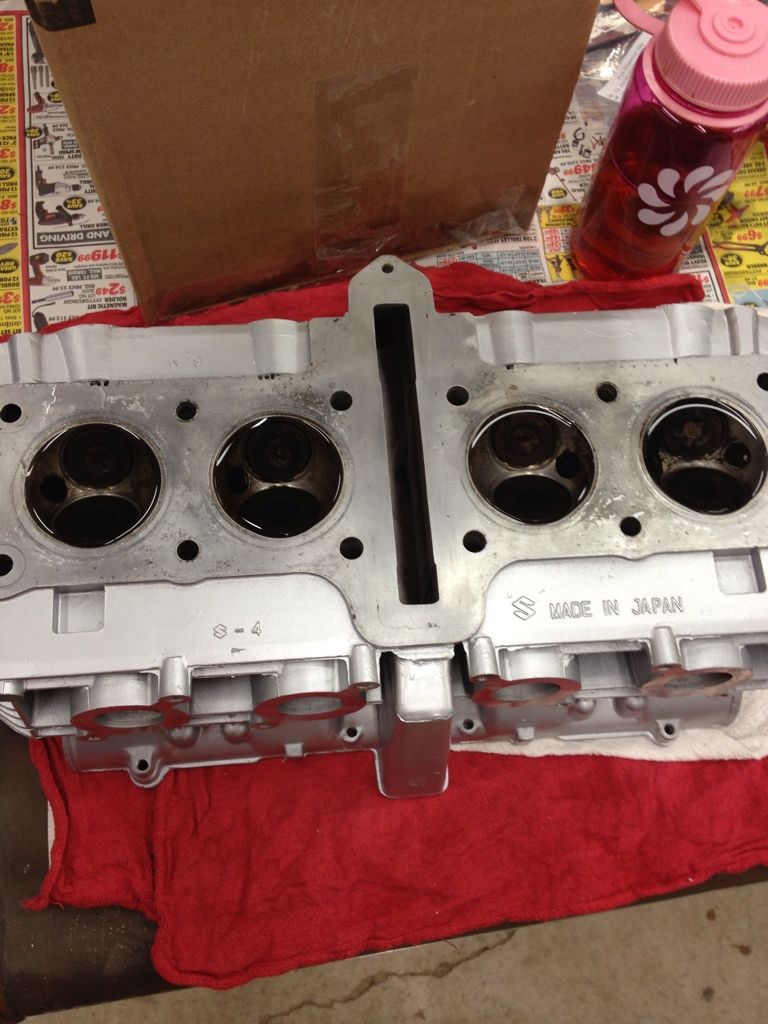
First off, I got the top end removed from the original engine. It didn?t come apart as easily as the spare that I?m using, but it all looked OK. I might use the camshafts from it, but the rest of the head is probably scrap. Unfortunately, the front bolt where the head meets the cylinders was broken and glued on somehow (?!) As a result, the head had leaked a lot and it might even be a little warped. The fact that the head also has five broken exhaust studs (one reason I?m using my spare), means I probably won?t be using it on another project. At least engines are cheap for these things. Pistons looked ok, but I?ll be using the ones that match the other cylinders.

Anyway, here?s a shot of how it looked during cleaning (don?t worry ? I very gently rested the connecting rods on the engine just for this pic ? they are wrapped otherwise). Despite cleaning, and cleaning, and cleaning it, it was still hard to keep debris from going into the bottom end. I also cleaned up the threads on the engine studs.

8056FE18-E34E-4D94-970D-CC1D4F1EB22D-187-000000074E3A1872.jpg


465E6B89-17A1-4EEA-9917-B5FB9D9469E1-187-0000000753300161.jpg


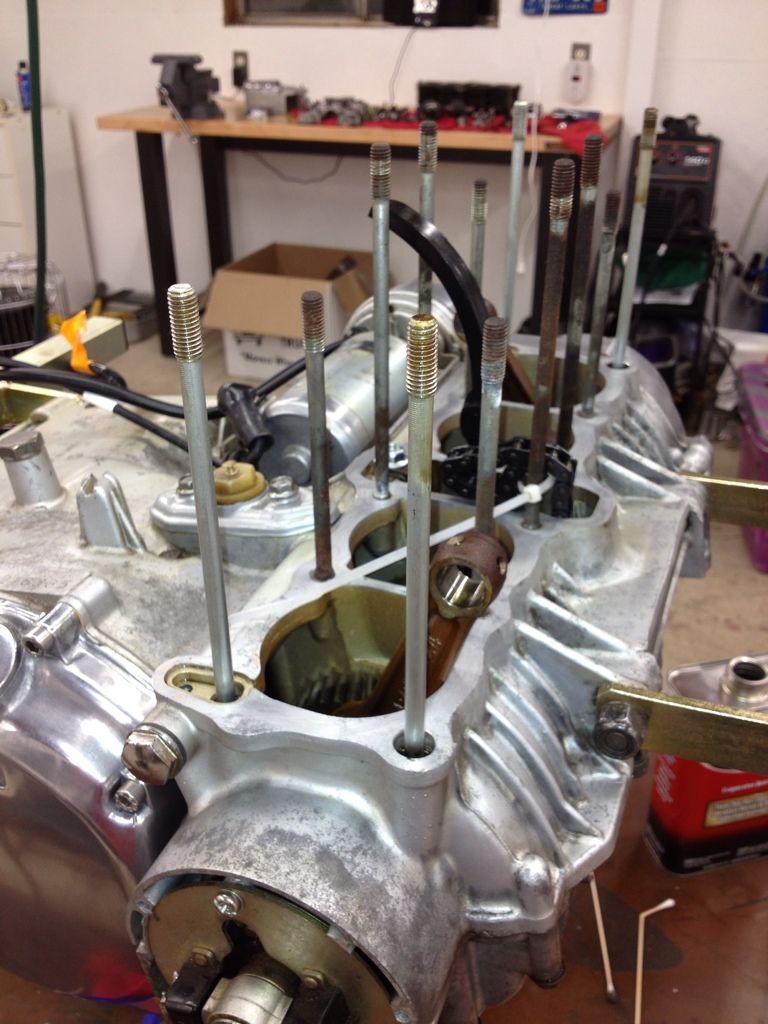
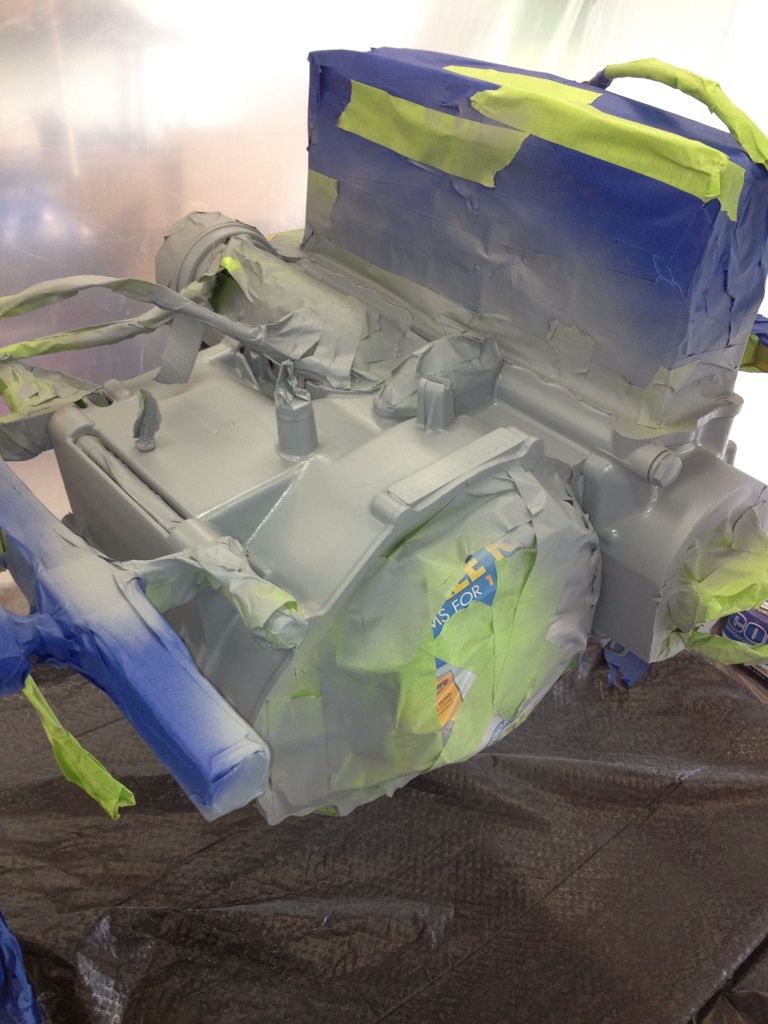
I carefully removed the base gasket residue, cleaned for many more hours with an assortment of pics, brushes, cleaners (mostly a lot of acetone), and rags. Then I spent many more hours carefully taping everything off. I pulled the right cover and oil filter cover and taped the mating surfaces off, but decided to tape carefully over the stator cover rather than removing it.

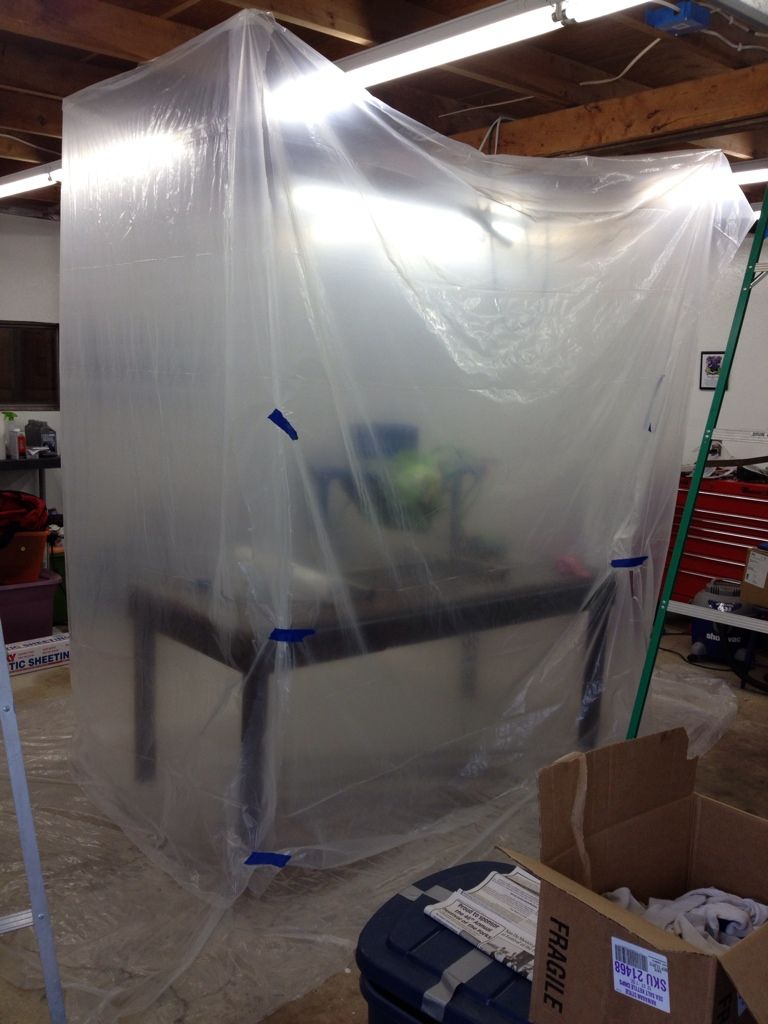
Then I set up a little painting tent?..
53F35A06-F0A6-4AD1-9C25-59A484B074DF-187-0000000775CE2A3F.jpg


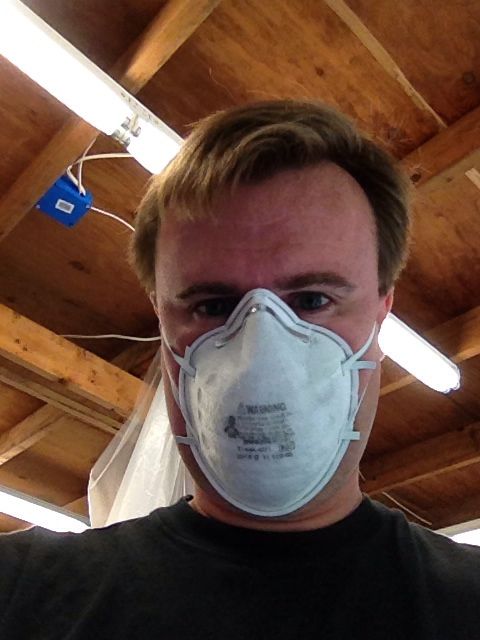
Donned a mask and gloves (I look a little red here!)
477A1C5C-05B2-44AE-8F84-DA4415191F21-187-000000077D96E39B.jpg


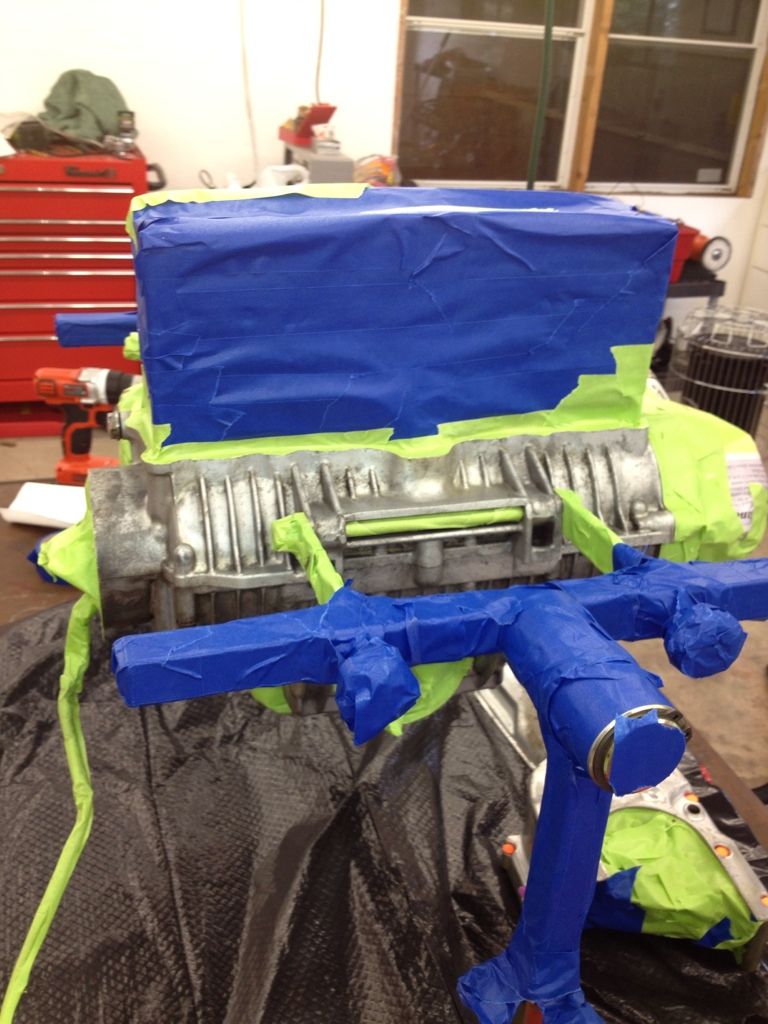
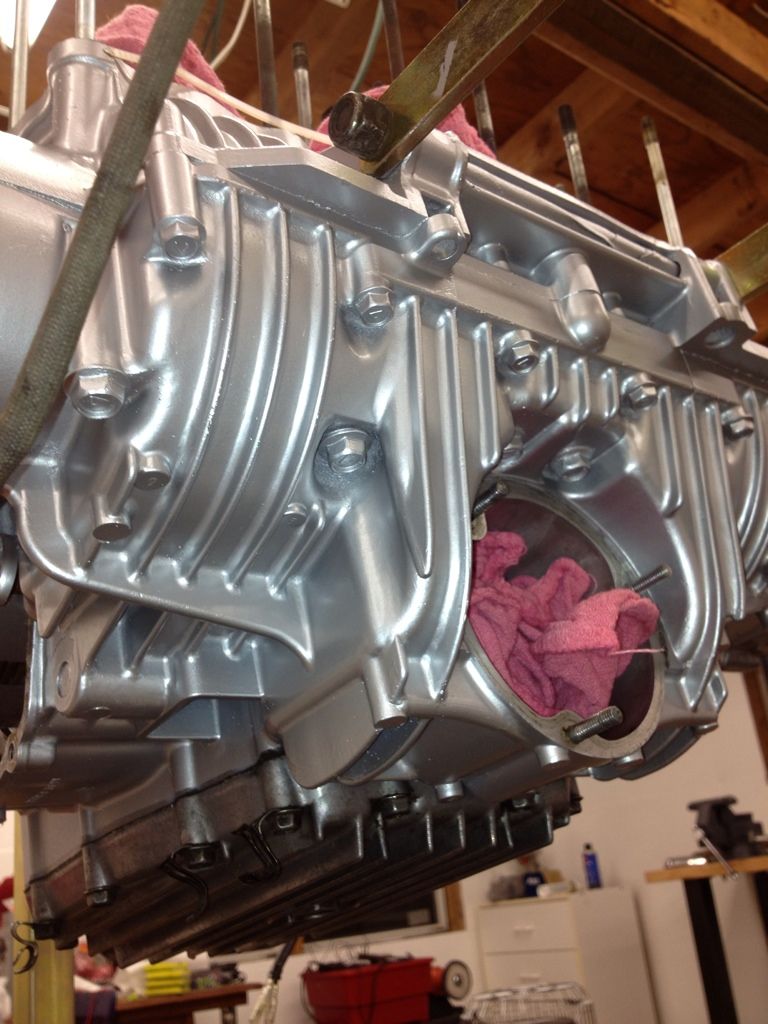
And started painting (finally!) Here?s the primer coat done.
844F1822-9A7E-45C9-B30E-5E82008D5AE1-187-000000077990F961.jpg


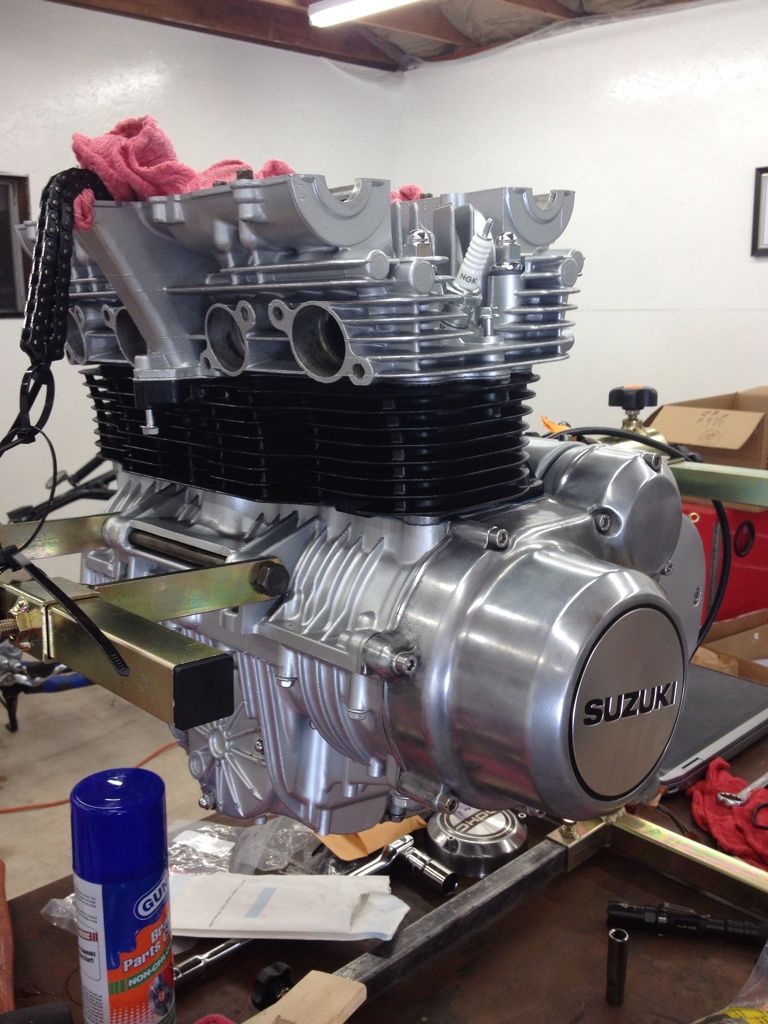
At the last minute, I changed my mind and went with ?universal aluminum? instead of black. So the only black is the cylinders ? just like an old caf? bike.

Top coat
ACC8FBAC-F26B-415B-8050-FB3408E29271-187-0000000792903C21.jpg


57968619-66E1-401B-A4FA-E9C9C8B20F9A-187-000000078E5AC2B5.jpg


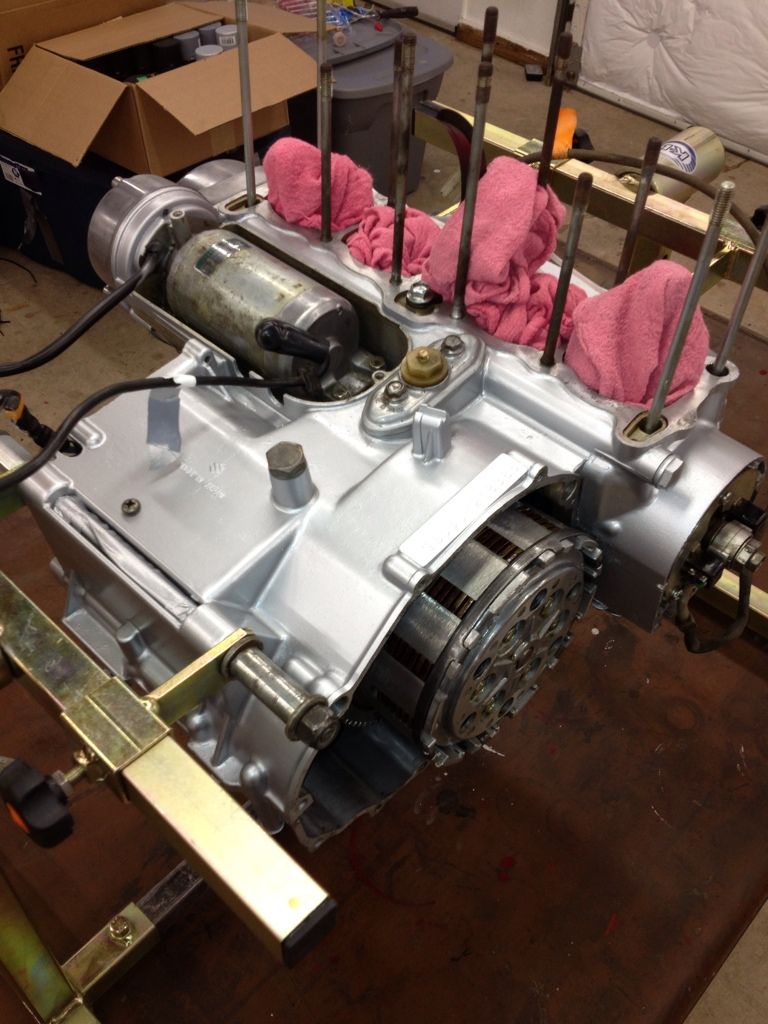
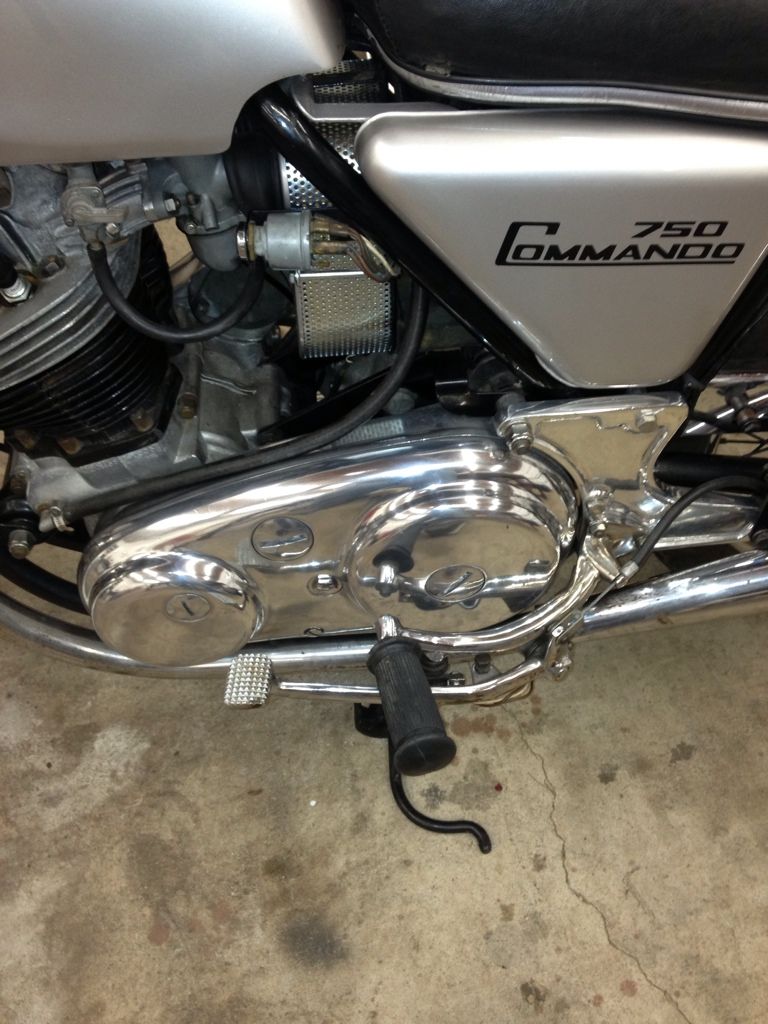
I also painted the top starter cover, oil filter cover, and outer sprocket cover.

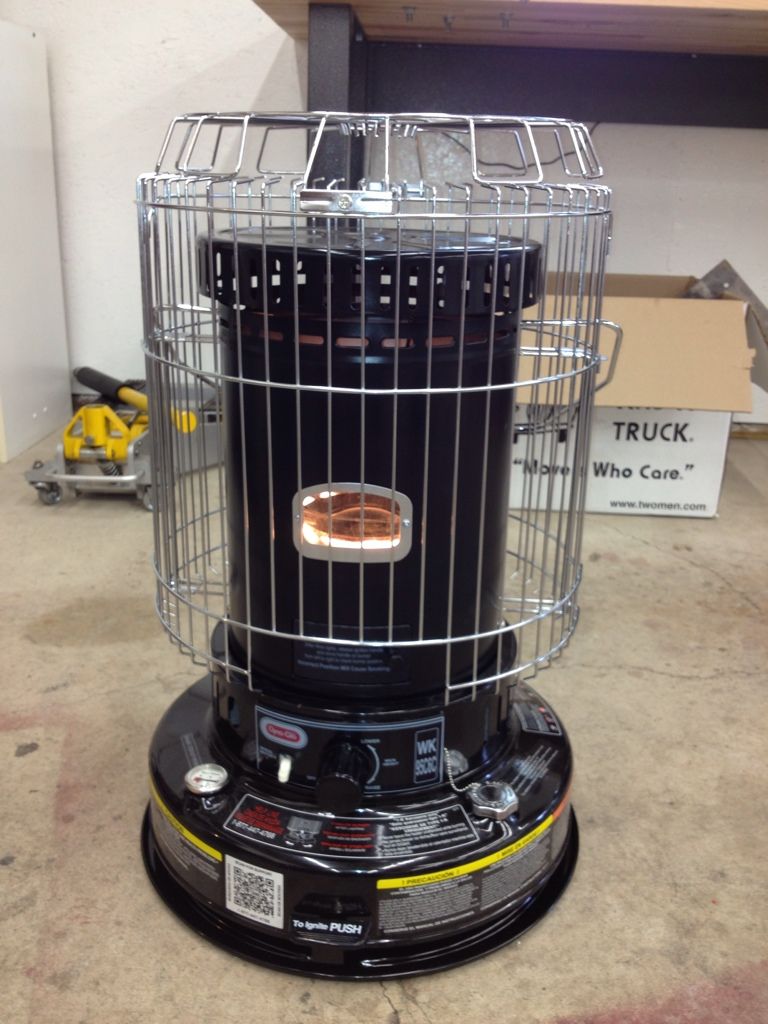
Since my last post, I?ve decided to put a cheap heater in the shop. I really want a fancier one, but this one fits my current budget and works great.
ED30EAE8-635A-4E02-92A0-B402862A3494-187-000000073EBFB190.jpg


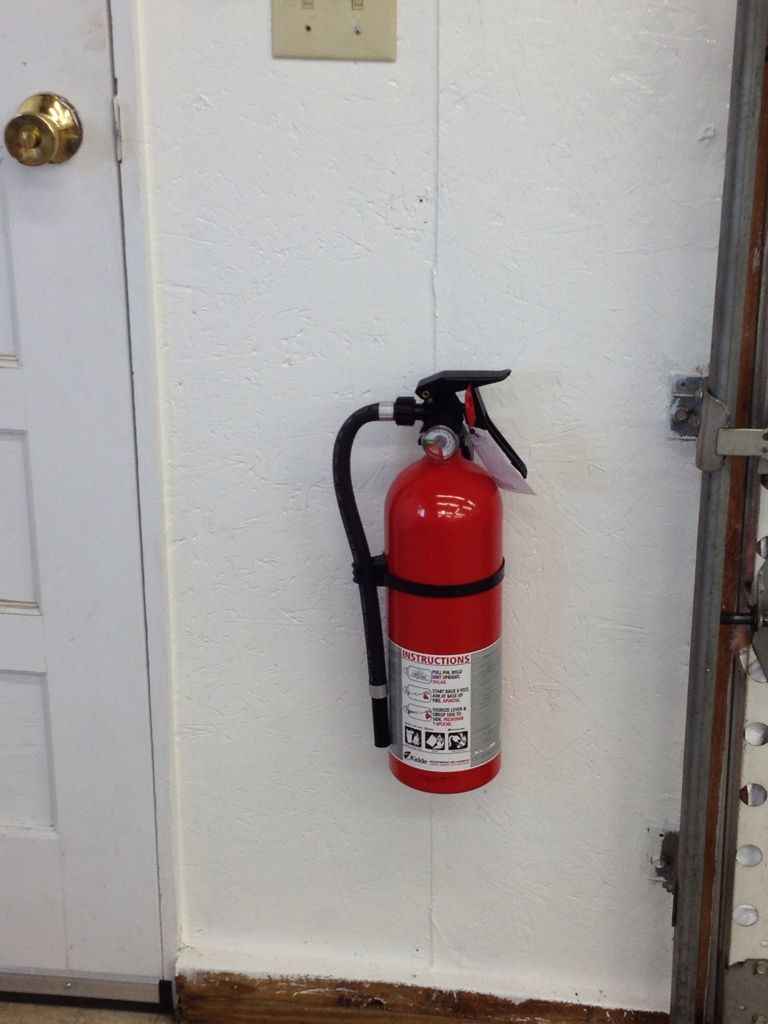
Safety first. So I added some other items ?.

Fire extinguisher. I?ve also put a carbon monoxide detector and smoke detector in the shop.
83C9AE70-CDCE-4FF0-9692-99C2B621EF59-187-0000000743541DF5.jpg


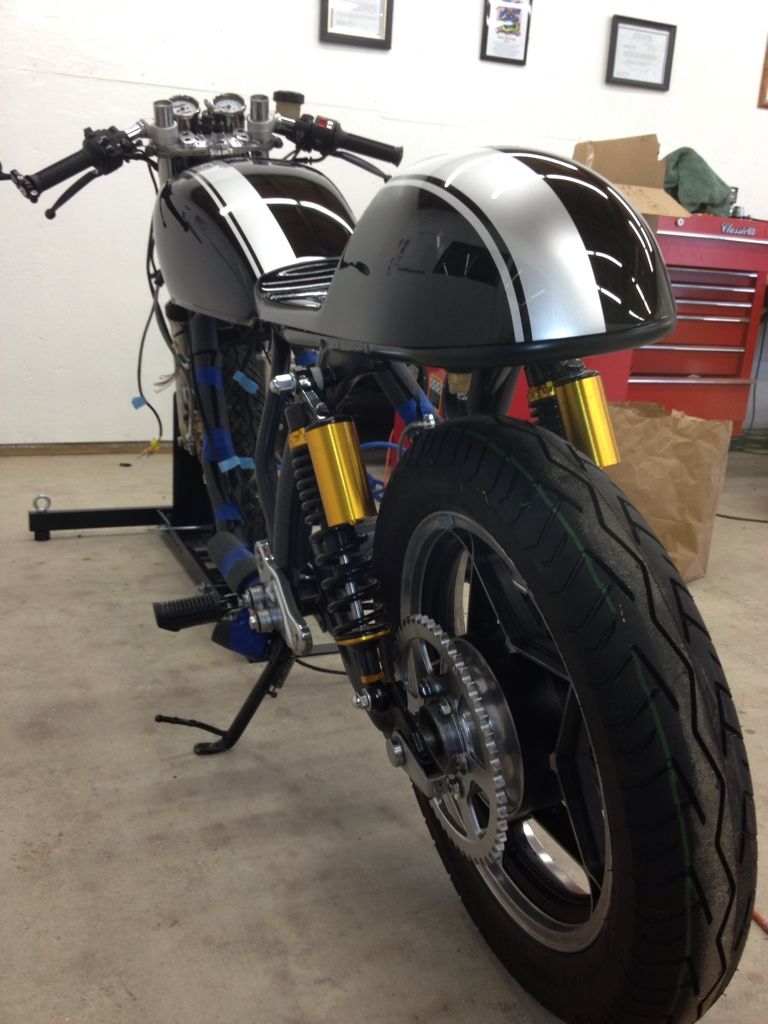
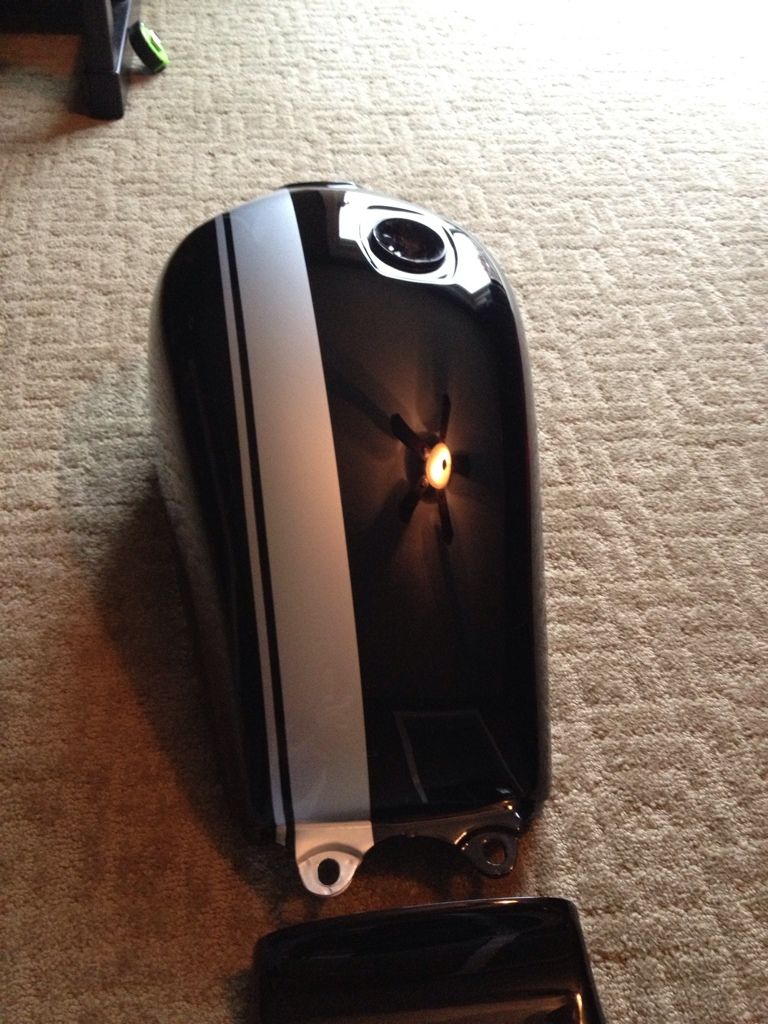
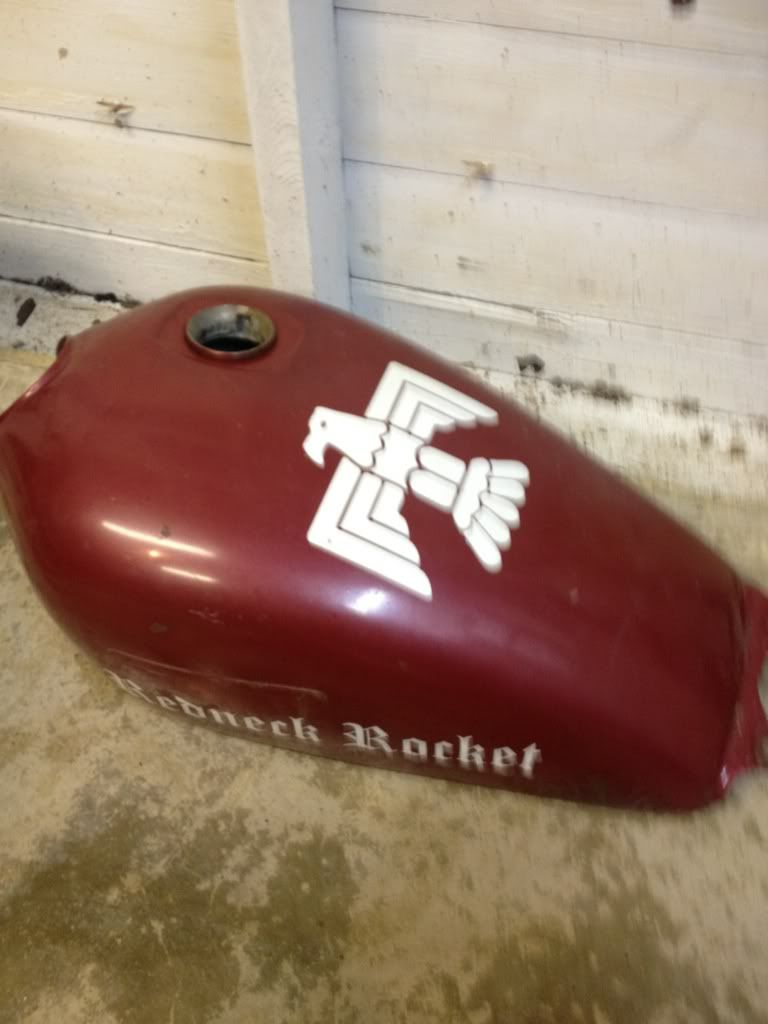
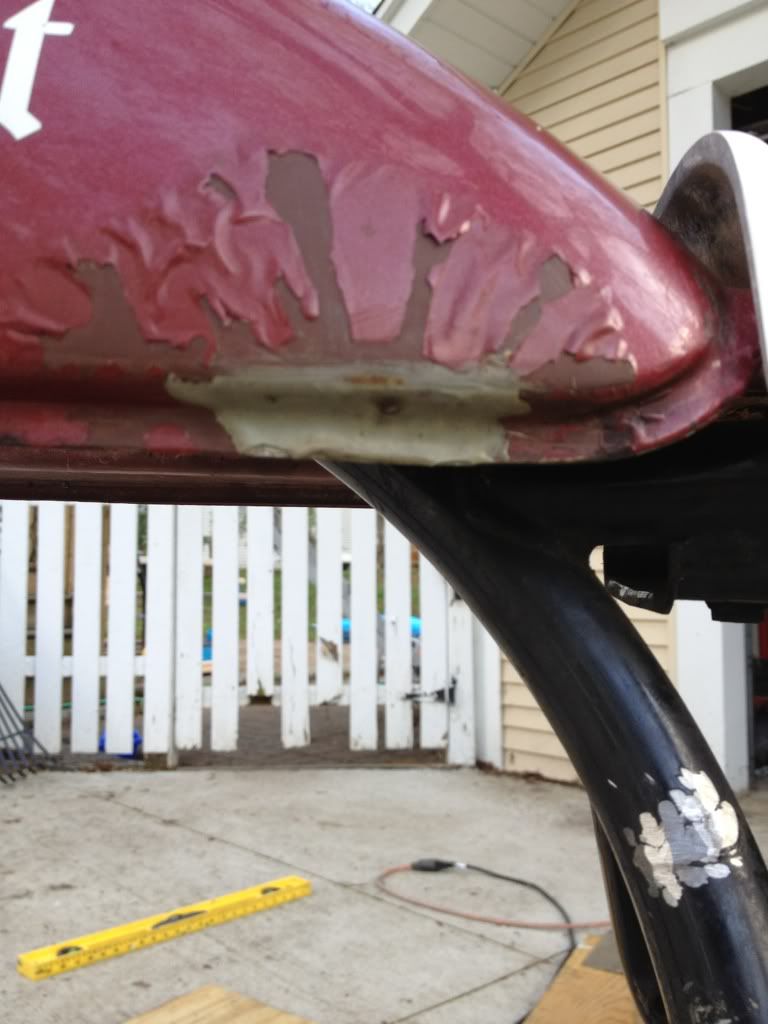
I also have some BIG news about the fuel tank and seat cowling. My wife went to pick up her car from a body shop this week that specializes in European cars. They know her quite well because her BMW has been there FOUR times over the past year (it was hit hard three times while parked and she also hit a deer). Anyway, she noticed that the owner has some nice custom bikes, so she suggested having them shoot some paint for me. They were excited about the idea, so she took the parts to them and a note I wrote with some suggestions. They will fix the dings in the tank, smooth over the original side plates, and shoot some paint within the next 3-4 weeks.

In other news, I ordered K&N air filters and a drive chain this week.

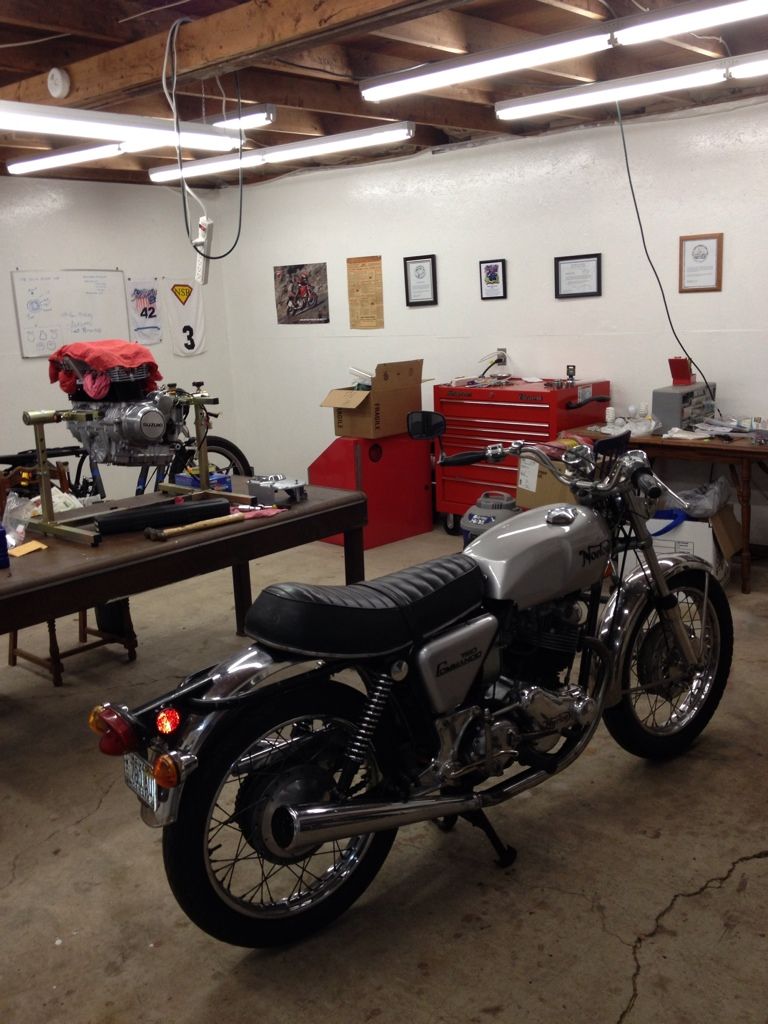
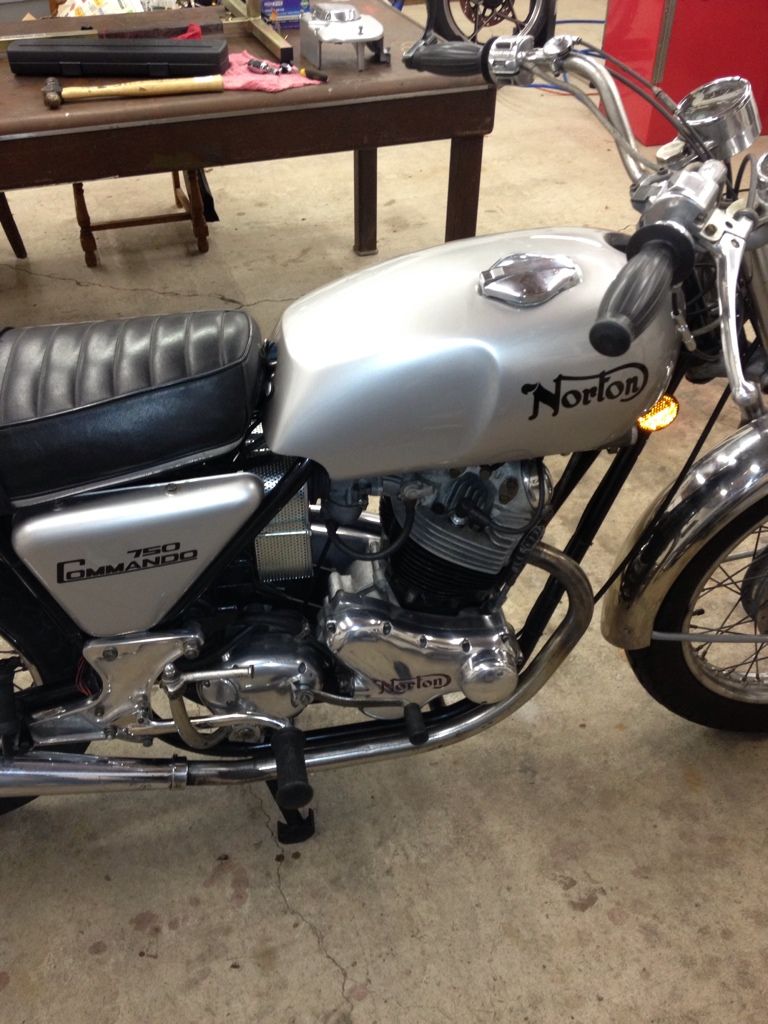
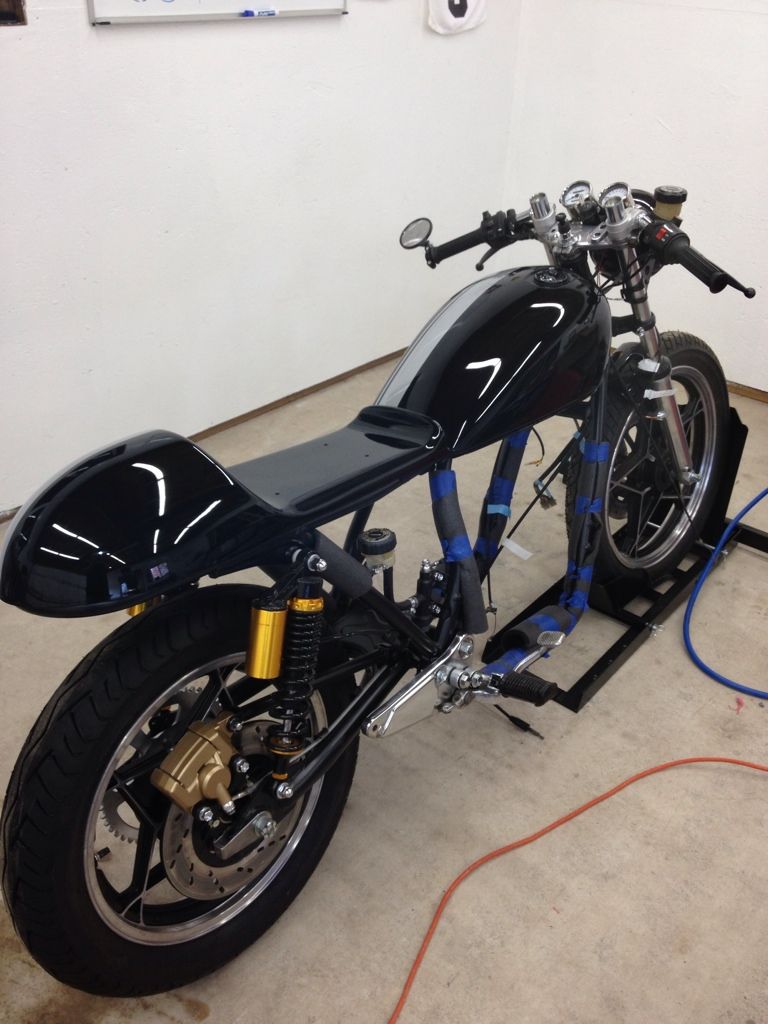
Next up?..engine reassembly and putting it back in the frame! I hope to start that this weekend.
 
Just noticed that the clutch pushrod seal looks shot. Looks like an easy replacement (screw in drywall screws and pull old seal; carefully tap a new one in).

My clutch rod also came right out the left side. I thought it was supposed to be threaded in tight. No matter I guess.....the right-side cover is off anyway and the part it pushes on looks to be accessible enough to hold from that side. Hopefully I can just thread it back in without having to remove the dreaded basket and mess around in there (I didn't look closely, but the parts diagram makes it look like a threaded rod).

What ISN'T wrong with this bike?!
 
Nice work on the engine D-mac. And yeah, I feel the same way as do many on here. I'm on my third try with with stinkin gas tank paint job doh!
 
Well, it?s been an interesting couple of weeks, but I do have a little progress to report.

After checking the ring end gaps, I put the new rings back on the pistons, reattached the pistons, and got the cylinders back on.
I had a lot of pics of the process, but I managed to drop my smartphone in a lake last week (!), and the pics were lost.

After the phone fiasco, I was busy finding a home for this?.a pig we bought from 4H (mmm bacon!)
E6940A2B-47A1-4374-9461-960236890DD7-1618-000001EBE6310CFC.jpg


?.then my old lawn mower blew up. I don?t know why. The oil level was fine, but it came with my house and had over 1800 hours on it, so I suppose it might be due for a rebuild. I picked up a new mower, but there?s more money gone from my ?project? fund. :(
E9AC3ED1-4A3F-4BAA-BE05-BADA4F393CF0-1618-000001EBE32281B8.jpg


Anyway, here are a few pics of cylinder installation?

The procedure for installing the cylinders calls for placing the middle two pistons up and lowering the cylinders down over them first. I had trouble getting the first two pistons in ? even though the cylinders are tapered at the bottom. After trying a couple of times myself (along with a few pieces of wood to hold them in place), I decided to get some cheap ring compressors. Hose clamps would work too, but I figured I might as well buy the tool for the long-term. Here are the middle rings compressed and ready for the cylinders.
9340F9CF-7032-4F33-B58B-477BDF76AB0E-1618-000001EBE8EAAE64.jpg


After getting the cylinders over pistons #2 and #3, I had a little trouble sliding the cylinders down to meet the outside pistons. It turns out I wasn?t able to hold the crank steady and it was getting turned over. I had the cylinders a little cocked too. With some help from my kids, I was able to keep things steady and compress the rings for pistons 1 and 4 enough to get them in easily. Then it was just a matter of gently tapping down the cylinder the rest of the way, and it was done! New base gasket and o-rings were used of course.
C0613D1E-A4D3-4593-B540-E81606CB7AF5-1893-000002092410EA99.jpg


E8752EF3-BD94-4314-8415-4CB575A738C6-1893-0000020929E8B79E.jpg


Before re-installing the head, I decided to test my freshly lapped valves. I poured some kerosene into each combustion chamber. After 30 min there were no leaks, but I?ll check again in the morning.
87237547-717D-42C5-B6CF-2D1E979CCDEF-1893-000002092CCCB9E4.jpg


Over the weekend I plan to install the head and begin the long process of getting the valve lash correct. There was no lash clearance anywhere when I began the project, and with re-lapping the valves I?ll have even less now. That, and I also managed to mix up a few buckets. The only way I can get the proper-sized shims is to use thin enough shims so that I can measure SOME gap for each valve, and then place in the appropriate ones based on a known shim used and whatever lash is remaining. Not a quick job methinks.
 
Looking good d-Mac! You know the best thing about this time of year? Asking for things you needed for the bike project for Christmas!
 
Two steps forward.......

One set of valves failed the test. Both leaked a little and the chamber was empty after 12 hours.

So I removed and re-lapped those valves a little more. I reinstalled them and the second test was MUCH better. I still had one valve leaking a little more than I wanted, so pulled it yet again, lapped a little more, and tried again. A tiny bit better still (good enough I think - no visible weeping until after ~8 hours, and then only the tiniest amount).

Then, as I was cleaning up, I realized that I'd missed replacing a guide pin between the cylinders and bottom end. :mad: 
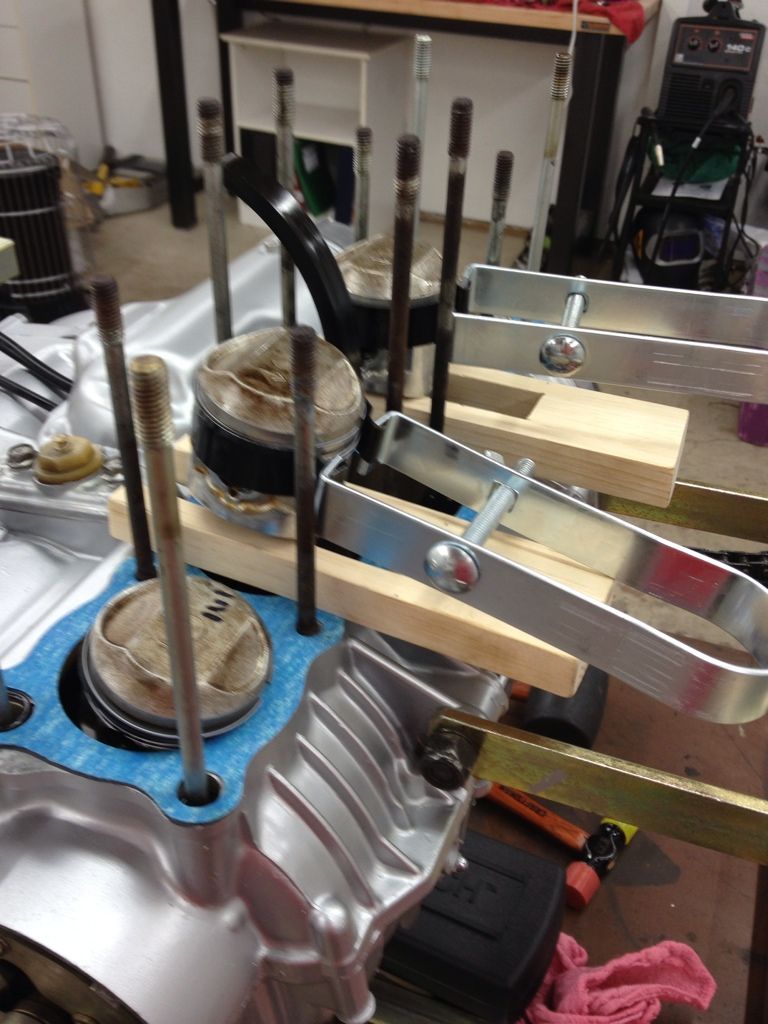
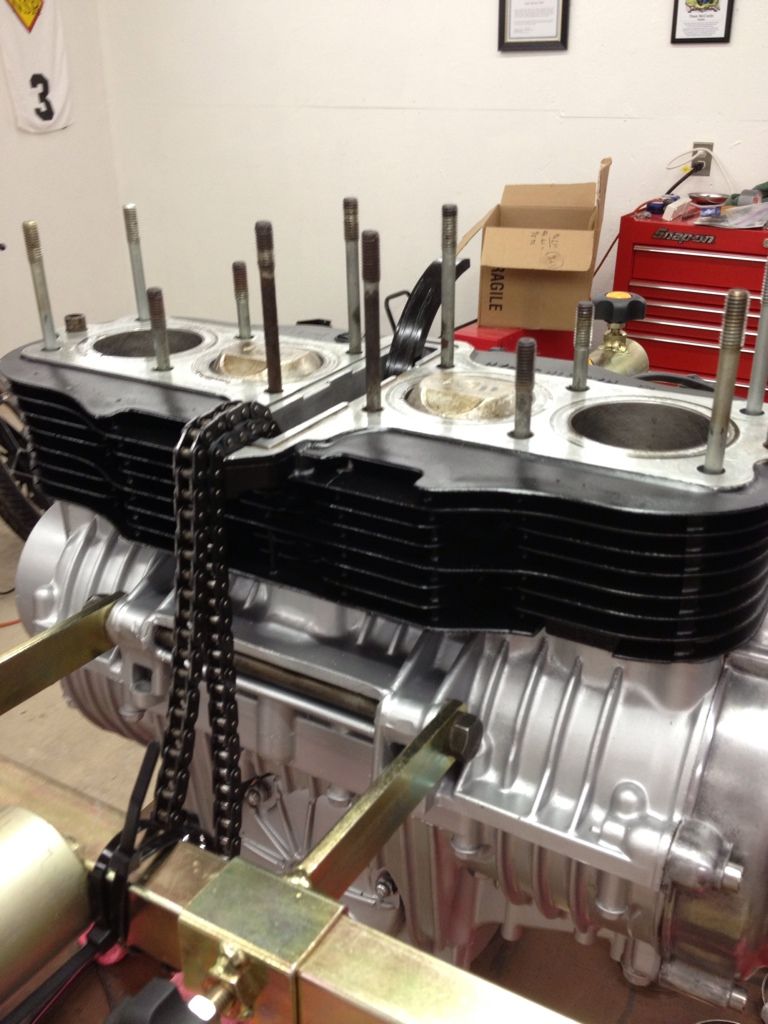
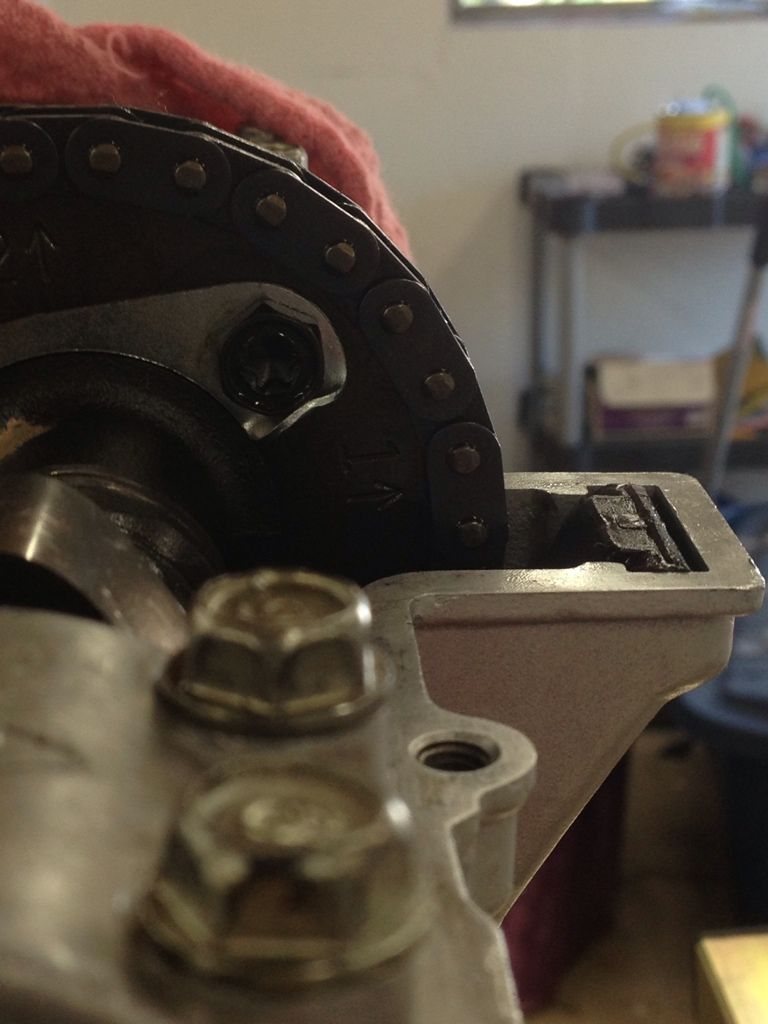
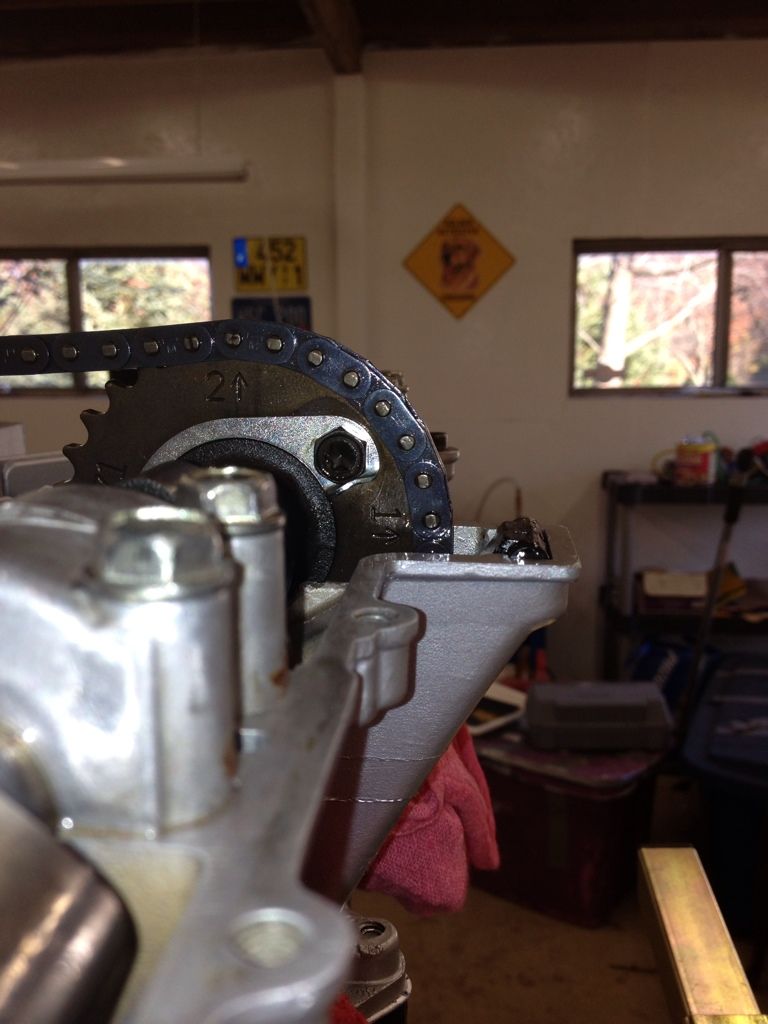
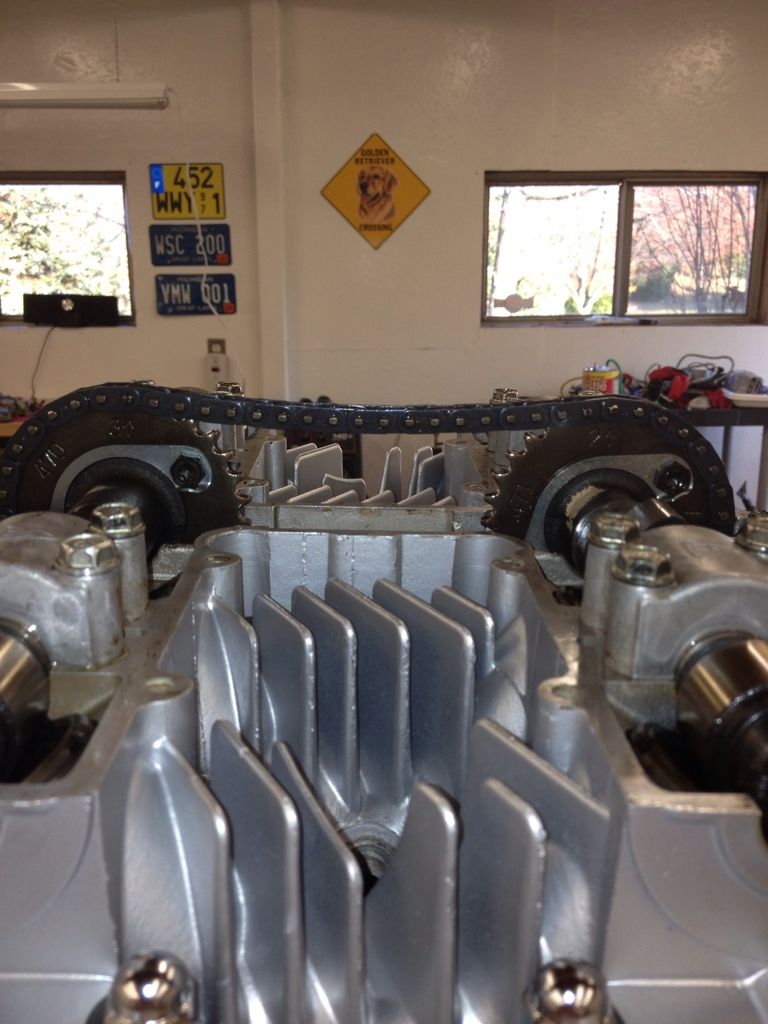
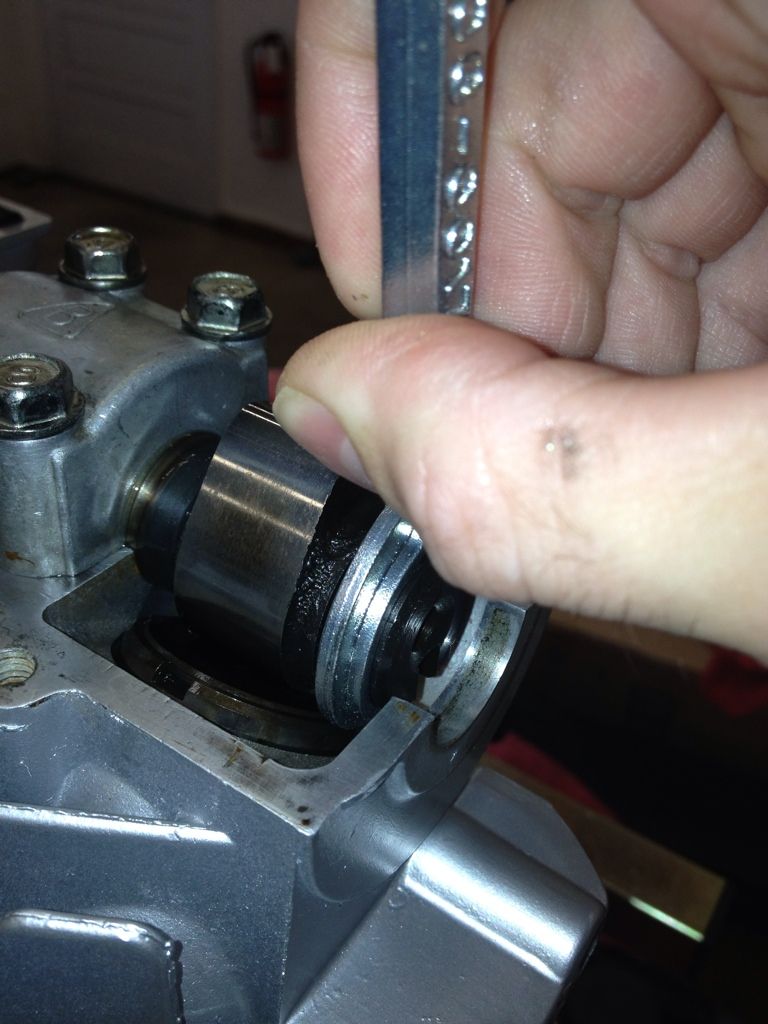
It goes around one of the studs, so the "easiest" thing to do was to pull off the cylinders, install the pin, and replace the cylinders again. It was easier the second time, although I still had to get one kid and my wife to help out.

I'm FINALLY ready to get the head back on.
 
As usual, I didn?t manage to get anything done over the weekend. Too many kids birthday parties and such.

As I mentioned the other day, I ended up removing and replacing the cylinders to get the guide pins in, so next up was the head, which was now ready FINALLY and not leaking. The only other thing I did was knock down a fine edge on one part with a jewlers? file (I?m sure it didn?t matter much, but I didn?t want a fine burr on an outside edge to prevent a proper seal on the head gasket).

It took a little juggling to get the cam chain up through the head without any help. I went with a Suzuki head gasket and o-ring, even though they are fairly pricey. Then I torqued the various fasteners in the designated order in 4 steps. I used all new fasteners because the old ones were a little beat and rusty.

Pretty. Note that I hadn?t tightened some of the fasteners down when I took this photo (like the bolt on the front of the head/cylinder).
C931C0EB-BB4E-4204-B794-103A27BC06C8-1056-0000015CC573DE71.jpg


8657FC85-53BA-4A16-BDC7-86A58F65226D-1056-0000015CCAB759F6.jpg


Now to tackle valve lash/cam chain tensioner, timing, etc. This will take a while.
 
Big news! Yesterday, I got my seat and tank back from paint. Here are a few pics (things are a little dusty, but you can get an idea; I still need a new gas cap and I have to get the seat upholstery done). I?m very happy with the quality of the work. The shop filled in the various dents and the original side plate attachment points. A few pages back you?ll note that I stripped the tank and re-lined the inside with Caswell tank liner.

2F206063-34F5-4BE5-9D81-9A7EE8B291CC-4156-0000051A75BEBF8F.jpg


BBACA599-F9B3-4A20-BA1C-408D48EEF631-4156-0000051A66FD2E15.jpg


2212E289-3823-44F1-9430-EC14AF0B6710-4156-0000051A7AF909D0.jpg


0042C564-FABF-486C-9125-8CDD1EF2E3CC-4156-000005124286AAE1.jpg


03D0BE59-0C04-4492-ACEB-CF1D00AB27F2-4156-000005123BFEFB41.jpg


My wife surprised me with a professional paint job, but the cost ended up being waaaaay more than I had planned for this bike. Suffice it to say that the paint cost nearly as much as I have in the entire rest of the project budget, so this will be my Christmas present! Before I do another project, I am going to take a couple of courses on painting.

Recall what I started with?.. No more ?Red Neck Rocket!?

54e28fa2.jpg


e7e543ad.jpg

Since my last update, I also started on re-shimming the valves. I started by removing the shims from the buckets of both engines and checking their measurements and markings. The markings are accurate, although they are generally +/- 0.01 in accuracy. Many are marked with an ?x? at the end, which seems to indicate that they are considerably thicker than the number marked on them, but still smaller than the next thicker shim size.

My issue is that most (all) were tight and a little mixed up, so I want to start with thin shims, measure the ?extra? gap, and then get the right ones in there. Luckily, nearly ALL of the shims on the extra engine are thinner than those from the top-end of the one I?m using, so I swapped each ?original shim? with a new one in a way that should give me the greatest gap in each case (assuming I didn?t mix them up too badly when I took the head apart). One was only 0.02mm smaller, but most are now closer to 0.10mm smaller than what was in there before. We?ll see what happens.
Shims, shims, and more shims!

E1B1B324-FC48-413D-B607-B05C354930F0-4156-00000512654E0B8F.jpg


Some of my notes (since entered into a computer so I can track this stuff).

3BDB46A4-86AD-4CC7-B23A-2A707B5D8D2C-4156-00000512623E25A1.jpg


Before I reassemble the cam shafts, I?m going to prepare the cam chain tensioner so that it?s ready to go back on. I now have the replacement parts I need, so I should get to it this week, and then (hopefully) check valve clearances.
 
Why not get Steve's Valve Adjustment spreadsheet to make that job a little easier?


Love the look of the tank.
 
Why not get Steve's Valve Adjustment spreadsheet to make that job a little easier?


Love the look of the tank.

Good idea. I have a similar spreadsheet from a motorcycle class I took, and it's a GREAT advantage. I actually entered the data at the same time I was writing it out.

At least this isn't a 16-valve engine!
 
OK. Some steady (albeit unsexy) progress to report.

First order of business was getting the cam timing set. It?s a bit hard to tell when you first line things up because the cam shafts aren?t fully down in their journals until the caps are bolted on. Things looked OK, but after getting the shafts on, you can see here pretty clearly that I?m a tooth off. The ?1? is supposed to point forward ? in line with the valve cover.

8011F7EE-B5CE-43A0-A8C1-C082226C4A63-5694-0000064EC12710A0.jpg


This one (below) is better. The ?1? on the exhaust sprocket now points forward, level with the top of the head, the ?2? on that sprocket points straight up, and the ?3? on the intake sprocket points up. Counting the start and end points, there are 20 pins on the chain between 2 and 3. Got all that? The most important part (of course) is to be sure that you have the correct cylinders at top-dead center when installing the other shafts, or very, very bad things can result?.. The markings on the crank are tough to see on this bike, so the easiest way to be certain was to look at the pistons and watch the cams to make sure everything was where it should be.
Correct. It looks like the ?1? is above the mark, but it?s actually level with the top of the head, as it?s supposed to be.

F8957EC2-CE6D-4E94-9488-C35AC281210E-5694-0000064EE42E0FFC.jpg


Intake camshaft in position relative to the exhaust camshaft.

61503BF1-5B0C-4E8B-8079-F32BF49AAEC7-5694-0000064EEE75601A.jpg


Next up, I needed to get my cam chain tensioner reassembled before turning the engine over. Sorting out the large spring on the outside of the part took a few tries (it can be wound to varying degrees; I probably shouldn?t have taken the whole thing apart earlier!) I think I have it set up ok. I didn?t bother to polish it ? just cleaned it up a little and lubed the various parts. It?s an ?automatic tensioner? so you put it in place and then loosen it ? allowing slack to be taken up, but it cannot be backed off unless you turn the large knob in reverse. The test procedure calls for twisting the large knob and turning the crank a little backwards to allow slack to reappear. Then you move the crank forward and make sure the big wheel turns by itself ? taking up the slack. Yup. It works! You don?t tighten the tensioner screw (or it wouldn?t be automatic anymore!) but it?s locked down with a nut so that it won?t do anything weird, like lock itself or fall apart, by itself.

EFF5EA4A-8C56-40DD-87FD-EEFC46BFB9CB-5694-0000064EF2198133.jpg


Next up was checking valve clearances. On this bike, it?s important to use the procedure from the Suzuki service manual, which calls for checking clearances on a pairs of tappets of one side of a cam sprocket separately, when both tappets on that side are ?unloaded? (cams not pressing on any valves). To do otherwise can throw off the readings (I checked, and it does throw them off as much as 0.05mm).

Here?s the GREAT NEWS! As mentioned earlier, I started off by placing shims in buckets in a way that would maximize clearance for all buckets (since I had all 0s for clearance on this engine when I started). With my pile of shims from the other engine being thinner, most valves ended up with shims 0.05-0.10 thinner than what they had started with. It really paid off, and I got very lucky. ALL of the intake shims were within spec on first check! (spec = 0.03-0.08mm; all 0.04-0.08mm). Woot! One of the exhaust shims was in spec too, and two others were just a shade loose (two were 0.10mm, which is only 0.02mm beyond spec, although my next feeler gauge up was 0.13mm, so they could technically have been as much as 0.049 beyond spec). Checking my pile of leftover shims, I had the right ones to get the three loose ones back in the middle of spec. FOR ONCE this bike seems to be cooperating with me!

Here is the procedure for replacing a shim: After moving the cam away from the bucket, I can spin the bucket around (with finger) so that I will be able to pry up the shim once the bucket is depressed. The tappet depressor tool is now in position and ready to press down on the bucket without pressing on the shim (so the shim can be lifted out). The trick is to press the tool against the camshaft before pulling it down. You can see the tool here ? in position to be used.

91FDC397-0E28-4759-91A6-6E01327DFDC4-184-0000000E3F3A8F83.jpg


Tool is now in position and the old shim is extracted. Tweezers can be used to help it ?pop? up and then to grab it. The tool takes a little getting used to, but once you have it down you can change a shim in about a minute!

7EEAD3D7-8BEA-442D-B2A9-0CBBEE4EFA7D-184-0000000E4F21B16F.jpg


When I did a final check, ALL clearances were well within spec! A lot easier than I had feared.

Feeling good about things, I realized that I was ready to put on the valve cover. Oops. When digging out the gasket, I immediately noticed I was sent the wrong one. I then ordered a replacement and requested a refund on the unopened one.

Without too much to work on, I went a little crazy (again) with some other orders this afternoon.

First, I ordered a bunch of bits I?ll need to reinstall the engine (mostly a lot of small bolts and nuts to replace the corroded ones that came off). I then picked up the pushrod seal I need to replace (I will do this with the engine in the stand), and I ordered some bits to install a new stock petcock. I held off on getting the actual petcock for now, since I won?t need it for a while and need the money for other things. I completed my order with a new rubber piece for the sidestand, and a new drain plug + crush washers.
I then ordered an imitation ignition switch off ebay (the old one was broken and corroded) and managed to locate the correct chrome gas cap for the tank (new part).

Thinking that it won?t be long until I start some electrical work, I broke down and ordered new Dyna coils and plug wires/caps. The stock coils were ?sort of? working (spark was present), but the wires ?permanently? epoxied to them are toast. One coil also has some kind of leakage from it (!) which can?t be good. I thought about trying to remove the old wires or graft new ones on (the stockers aren?t designed to be replaced separately from the coils), but I?ve come too far to be frustrated by ignition problems. When I redo the harness, I will likely do the popular ?coil relay? mod as well, which uses the convoluted wire routing through various switches only as a relay to fire coils (coils are wired directly to the battery), rather than using the ?long route? to power the coils directly. With a harness this old, I?d like all of the juice from the battery to actually reach the coils.

More later this week?
 
Great progress D-Mac! That is going to be such an amazing ride when you are done. I fired my 550 up for the first time last week and I can tell you that 550 puts out an amazing, addicting, sweet sound. Oh, and I really love the paint scheme. Beautiful!
 
D-Mac where did you get your guages from? That is a sweet build one to be proud of. I am just not brave enough to dig that deep in my engine
 
The paint looks really nice. Make sure you seal off the raw edge around the filler opening on the tank, otherwise the fumes will peel the paint back in no time.
 
D-Mac where did you get your guages from? That is a sweet build one to be proud of. I am just not brave enough to dig that deep in my engine

Gauges are pretty generic ones that I've seen around the web. Mine came from Dime City Cycles.
 
The paint looks really nice. Make sure you seal off the raw edge around the filler opening on the tank, otherwise the fumes will peel the paint back in no time.

Yup. The neck is still sealed from the tank liner. I got a new square gas cap, though it doesn't seem to fit perfectly. It could be that I need to clean up the lip a little, but I suspect it's just my knock-off part that's a little off.

I will check the seal and play around a little before I put gas in the tank. It'll be a while before I get to that point anyway.
 
Update time:

Talk about unlucky with orders! I?m STILL waiting for the valve cover gasket and some bits to mount the engine (since October 28th). To make matters worse, it appears that I?ve been scammed on the ignition switch I bought off eBay. The seller has disappeared, deleted his/her eBay account, and ran off with my $20. Between eBay and PayPal, I?m hoping to recover my money?..eventually.

In the meantime, I?ve started looking ahead to what I have left. Once I get the engine finished and back in the frame, most of the work left is electrical. Ugh. To prepare, I?m registering for a motorcycle electrical course that begins in January at a community college about an hour away. The class also happens to be the last course I need to complete their service tech program, so ?what the hell.? I figure I?ll start fixing up the harness over the next couple of months, and then finish and improve on it when as I take the class.

My garage is getting cold, so I?ve decided to move indoors to work on the wiring harness. Unfortunately, long-term use of the kitchen table and home office is out of the question, so I?ll be retreating to a basement workshop. Only problem? I didn?t have a work table in my new place.

So I made one. I?m not too good with wood-working, but I reverse-engineered and expanded on the design of the table in my old house. I made a few upgrades, like a ??-thick oak top. It?s 8x3? x 36? high. Once I add a little lighting to the basement, I should be good to go. Working on the Suzuki has given me all sorts of confidence to do other things I would have written off just a year ago.

AD344D46-B89F-4A1E-8533-D718D075C8EA-4287-000004FEF50B6AFC.jpg


There has also been another development in my shop. A friend dropped off this beauty a few days ago. 1971 Norton Commando 750. :cool: 
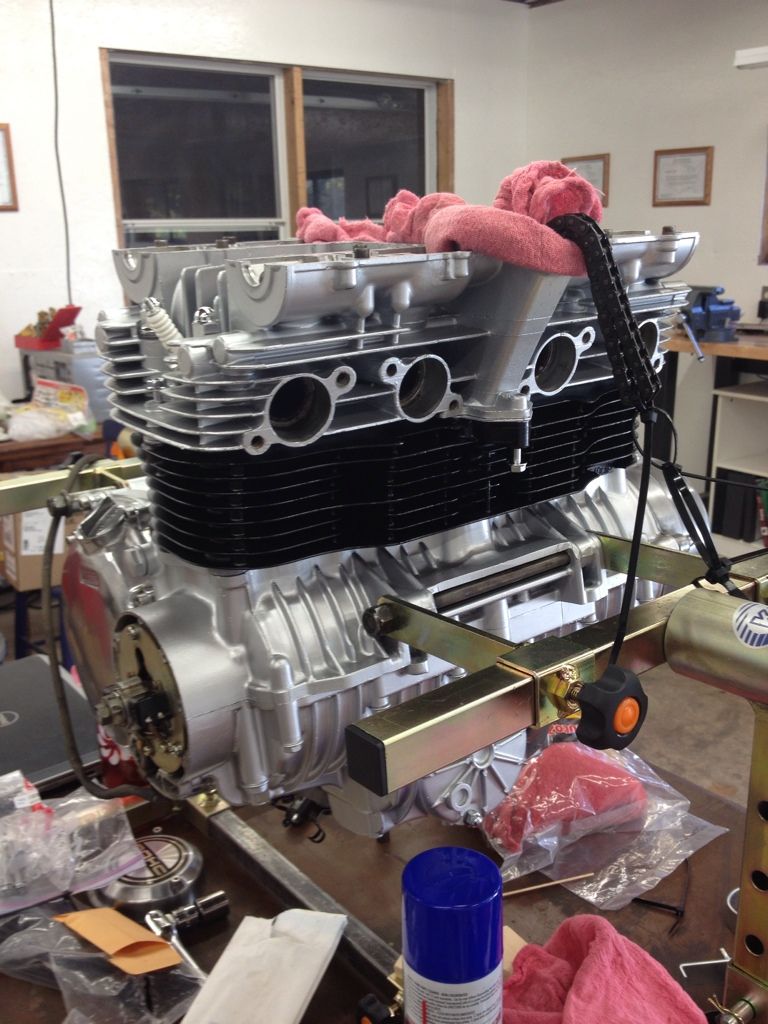
His dad bought it new, and they've been been working to get it road-worthy. A local shop had it for OVER A YEAR, and from what I can tell they charged him about 4 grand to polish some covers, clean the carbs, do a less-than-stellar paint job (surfaces are rough and bubbled, decals aren't cleared, and they managed to chip it badly in one spot). They also replaced a speedo drive unit. The owner got tired of the run-around from the shop and being asked for money with no explanation, so he finally went to pick it up (which was a story unto itself).

It has only about 8200 miles on it (with the requisite two engine rebuilds I believe). It still needs new tires and a tank re-line (which is what the owner went to the shop to have done!) The exhaust will be replaced too. The best thing about this bike is that it makes my shop look ?legit? (it even drips oil on the floor). There?s nothing like having a REAL caf?-inspired bike sitting in front of you for motivation.

A few pics?.
FDDE8B48-7E64-41CF-8C53-DCFBA85CB99B-3544-0000046A82B16FDD.jpg


F475E91C-FD83-4CC3-A027-DED695D29768-4287-000004FEE7F4C3DA.jpg


021613A7-0444-4A13-8EC1-156624595812-4287-000004FEECDE1964.jpg


4F48F4A8-39B5-4DBF-9486-3C6AC0DF69E3-4287-000004FEF0D7B9BA.jpg


I?m nearly ready to order a new battery. I?ve been saving for a Shorai lithium battery, which will be much lighter and easier to fit under the seat than anything conventional.
 
Got word today that my parts are on the way and should start arriving tomorrow.

More soon.
 
Back
Top