• Required reading for all forum users!!!

    Welcome!
    Register to access the full functionality of the GSResources forum. Until you register and activate your account you will not have full forum access, nor will you be able to post or reply to messages.

    A note to new registrants...
    All new forum registrations must be activated via email before you have full access to the forum.

    A Special Note about Email accounts!
    DO NOT SIGN UP USING hotmail, outlook, gmx, sbcglobal, att, bellsouth or email.com. They delete our forum signup emails.

    A note to old forum members...
    I receive numerous requests from people who can no longer log in because their accounts were deleted. As mentioned in the forum FAQ, user accounts are deleted if you haven't logged in for the past 6 months. If you can't log in, then create a new forum account. If you don't get an error message, then check your email account for an activation message. If you get a message stating that the email address is already in use, then your account still exists so follow the instructions in the forum FAQ for resetting your password.

    Have you forgotten your password or have a new email address? Then read the forum FAQ for details on how to reset it.

    Any email requests for "can't log in anymore" problems or "lost my password" problems will be deleted. Read the forum FAQ and follow the instructions there - that's what we have one for...

  • Returning Visitors

    If you are a returning visitor who never received your confirmation email, then odds are your email provider is blockinig emails from our server. The only thing that can be done to get around this is you will have to try creating another forum account using an email address from another domain.

    If you are a returning visitor to the forum and can't log in using your old forum name and password but used to be able to then chances are your account is deleted. Purges of the databases are done regularly. You will have to create a new forum account and you should be all set.

'81 GS550 Cafe Build

  • Thread starter Thread starter D-Mac
  • Start date Start date
Two fuses, a bunch of false starts, a small fuel spill, a bunch of missed meetings at work (I work a block away so I sneak home often), and one mental lapse, but IT RUNS!!!! :):):)

Now I can re-do the compression test on a warm engine and find out what's wrong with the charging system too (previous owner says it won't charge - I didn't even have time to check the battery level while it was running).

More info soon. Gotta fix a dishwasher and ferry my kids around first....
 
Lots of updates - some good, many not so good. The electrical problem has been isolated (bad R/R, although I'll probably replace the stator as well).

I've entered the "tear down/assessment" phase now.

I'll post lots of pics later today.
 
Edit (I think I'm messing up the Display Mode - I'm reposting this in an attempt to fix it).

Update time!

Since the petcock is completely blocked (even on prime I can?t get any fuel to come out, and the PO disconnected all the vacuum lines long ago) I rigged up an old fuel cell to the bike to try and start it.

Below is a video of the bike running. Note the backfiring through the carbs and out the pod filters. Nice. With holes in the exhaust and loose aftermarket filters it?s obviously very lean. Carbs are probably pretty clogged as well and compression readings are still in the basement too. No matter ? I will eventually run a leak-down test and likely rebuild the top end anyway. Carbs will get a full cleaning, rebuild, and complete rejetting on a dyno (I have some access to one and I?ll be doing a complete tune once it?s back in running order?..which will be a loooong time).


Click on the video to watch it?..

Now that I?ve determined that the R/R and possibly the stator are gone, it?s time to start pulling stuff off the bike. The next task was removing the exhaust pipes. Recall those rusted bolts on the headers? I soaked them in PB blaster+WD-40 for three days with cycles of heating and cooling. All were nice and loose when I started to remove them. Result? Less than ideal?.
cb5323e1.jpg

Only THREE exhaust bolts came out cleanly. It turns out that another three were ALREADY broken off in the collar (!) and held on by some sort of glue/JBWeld/wire!? Lovely. I guess the previous owner decided that it would be ok to just glue the old bolt heads back on and forget about it!? The two that I broke snapped off with very little torque. Crap.
444f1fb2.jpg

I broke out into a bit of a cold sweat when the first one snapped off, but all but one stud is protruding a little, so there?s still some hope. I will continue to PB-Blast them. Worse-case scenario I?ll deal with it when I remove the cylinder (a little EDM can always save the day if I decide not to drill it out).
Behold the OEM exhaust. Really heavy! It will likely be replaced with a 4-1.
e164457c.jpg

Up next was removing the rear wheel. It went well, but I rushed a bit and everything got hung up on the rear axle. A little maneuvering and it was out (needs grease, and I probably should check the run-out too).
6d4787c7.jpg

I removed the carbs next. Boots were stiff, but it?s very easy on this bike compared with some of the twins I?ve worked on. Note how they?re ?bleeding? fuel on my work bench??right near a charging. I really gotta get a fire extinguisher for the garage.
722a1303.jpg

Then I removed the intake rubber pieces?..
897d57ba.jpg

?.and I saw LOTS of this inside the engine!
bffee0a1.jpg

It looks like the PO was in love with gasket sealer. It flaked off in huge pieces in my hands. I wonder how much of this stuff the engine has digested?
More in the next post?.
 
Still more updates....

Still more updates....

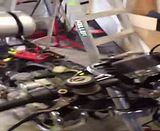
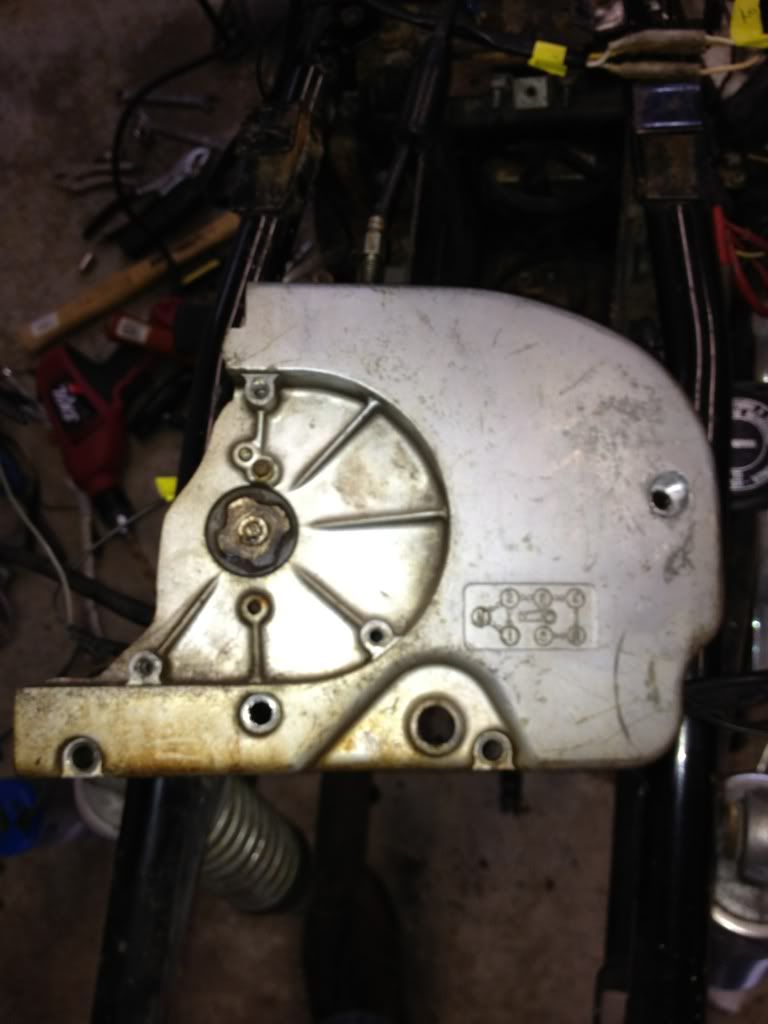
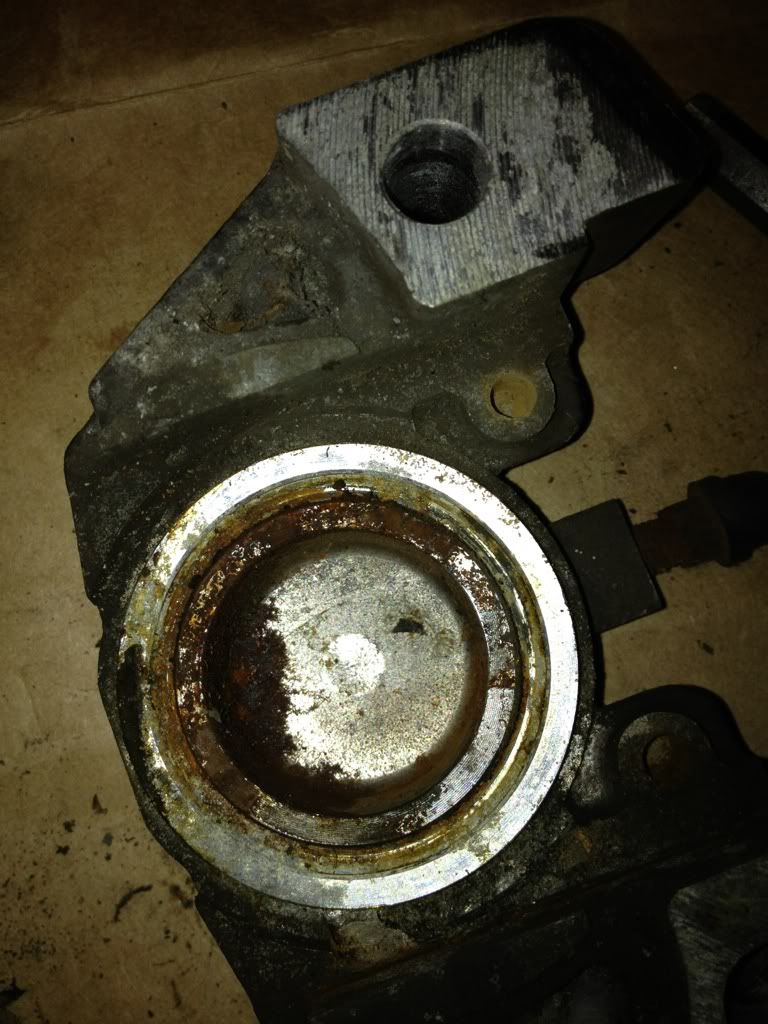
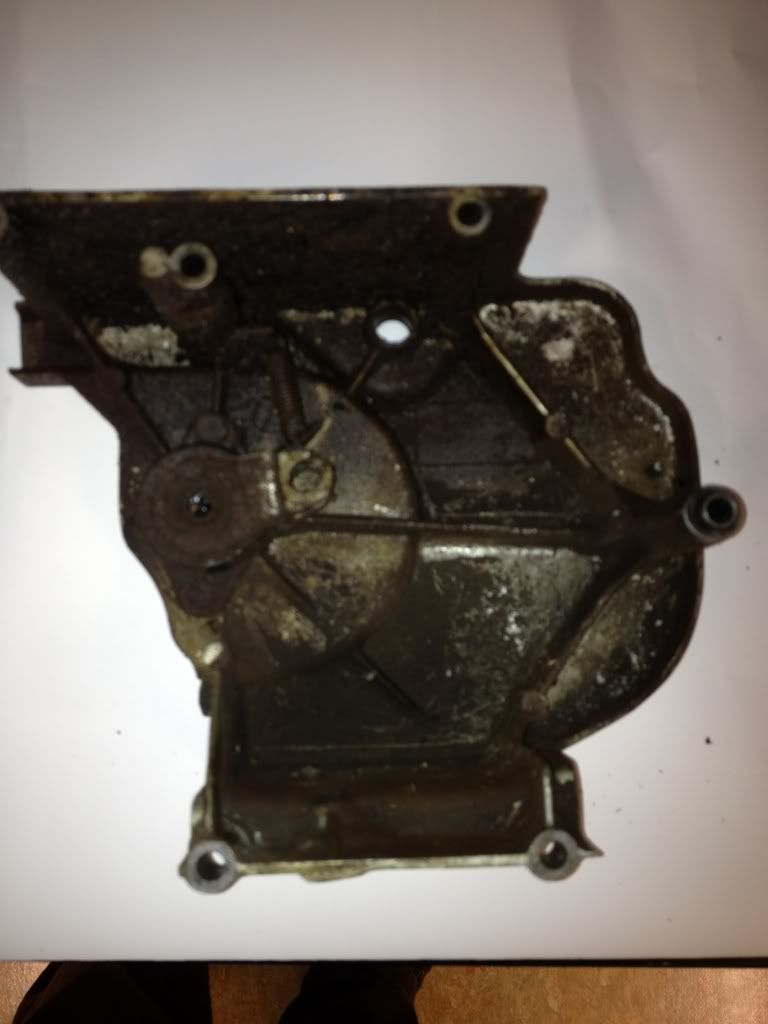
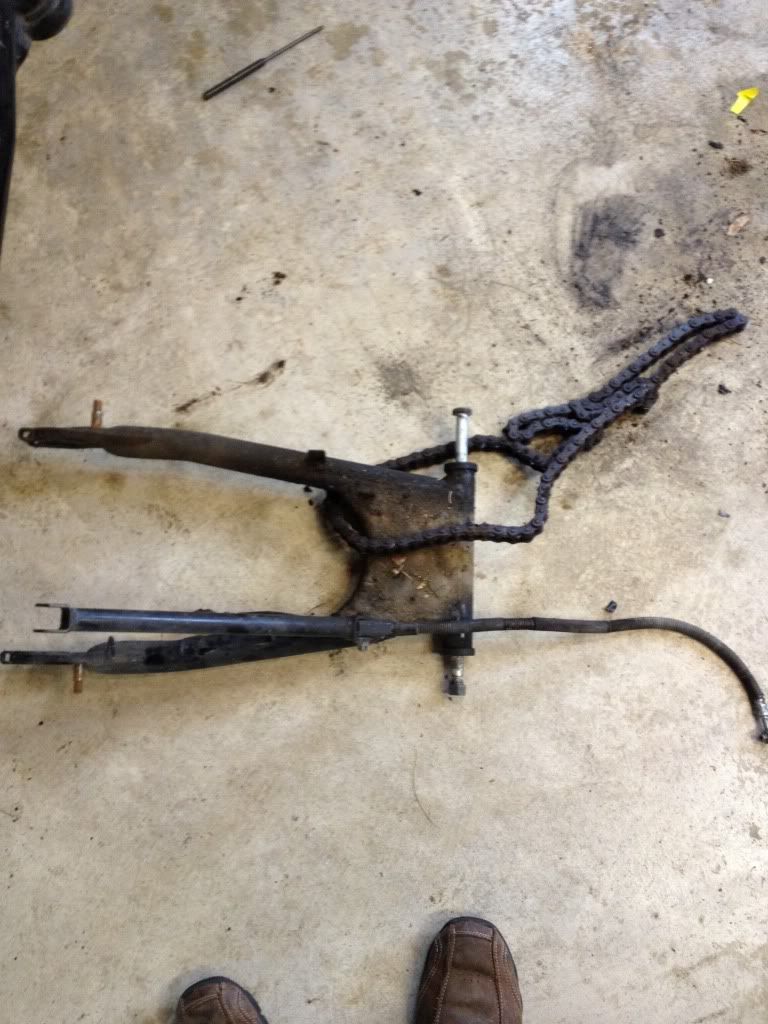
Next up I removed the counter-sprocket cover??the screws were already pre-stripped. Here it is removed.
357f7761.jpg

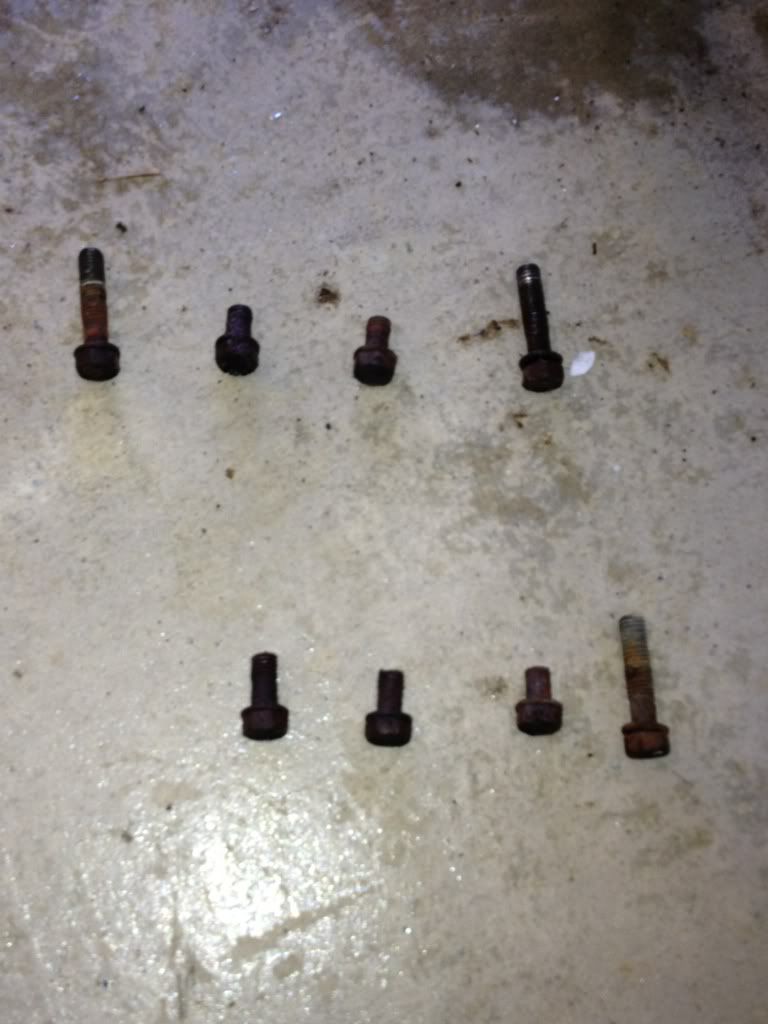
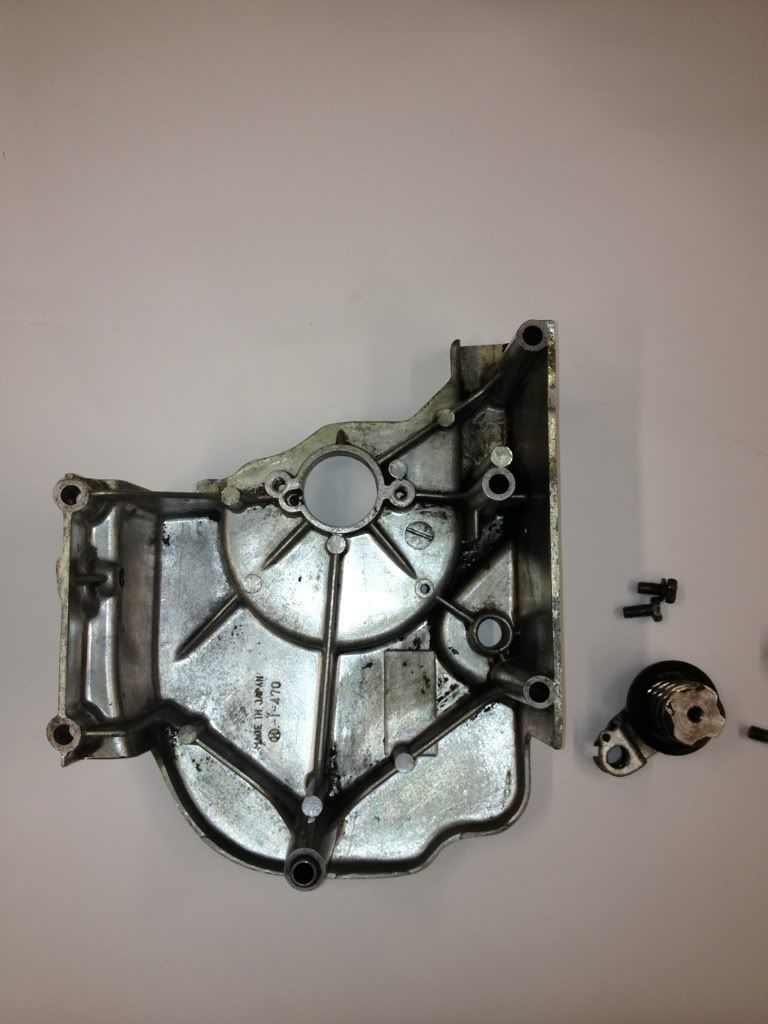
My little impact driver was having no effect, so I ran off to Sears and bought a much larger one. Heh heh. It made short work of three screws. The other three were too far gone, so I dremeled slots into two of them and got them off! This is my first time struggling this much with fasteners (small impact driver and heat has always worked for me before). I also have a set of Japanese screwdrivers, which usually helps, but these were just too far gone.
e0d15c31.jpg

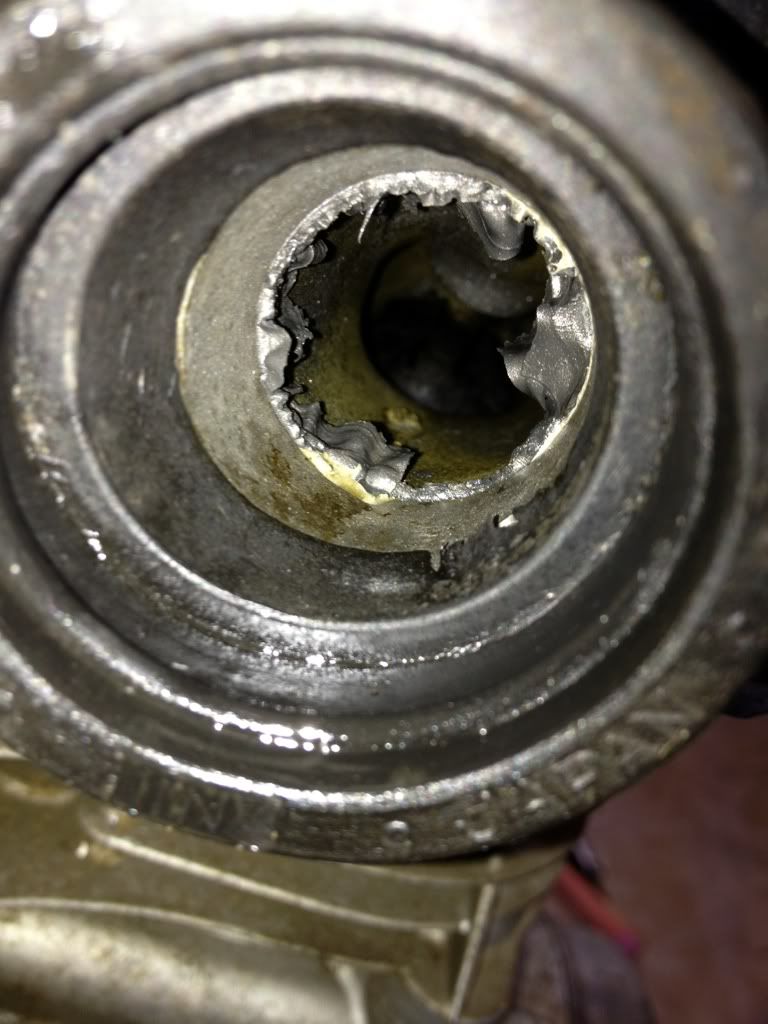
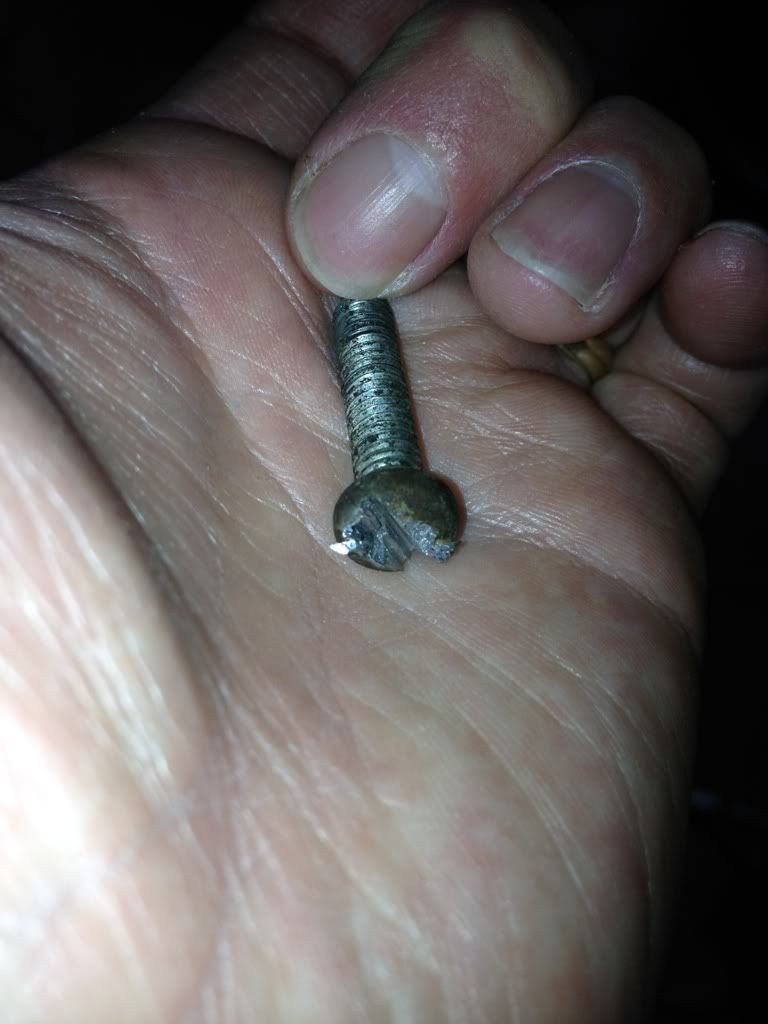
The big problem was the one remaining screw at the back of the sprocket cover. It?s recessed, so all attempts to dremel a slot in it resulted in me carving a slot into the cover! Doh! I ended up drilling it off, and the release in clamping force allowed me to spin the shank off with my fingers. Unfortunately, since I couldn?t get the drill centered, I accidentally machined a little out of the cover. Argh.
cad69b23.jpg

It?s a minimally important screw since it?s not fastening anything that holds in oil. I?ll probably stick an o-ring in there and see if that works. Replacement on Ebay is only $14 if that fails. It?s a bummer that I got so close to getting it off flawlessly. I?ll need to be more careful with the cases.
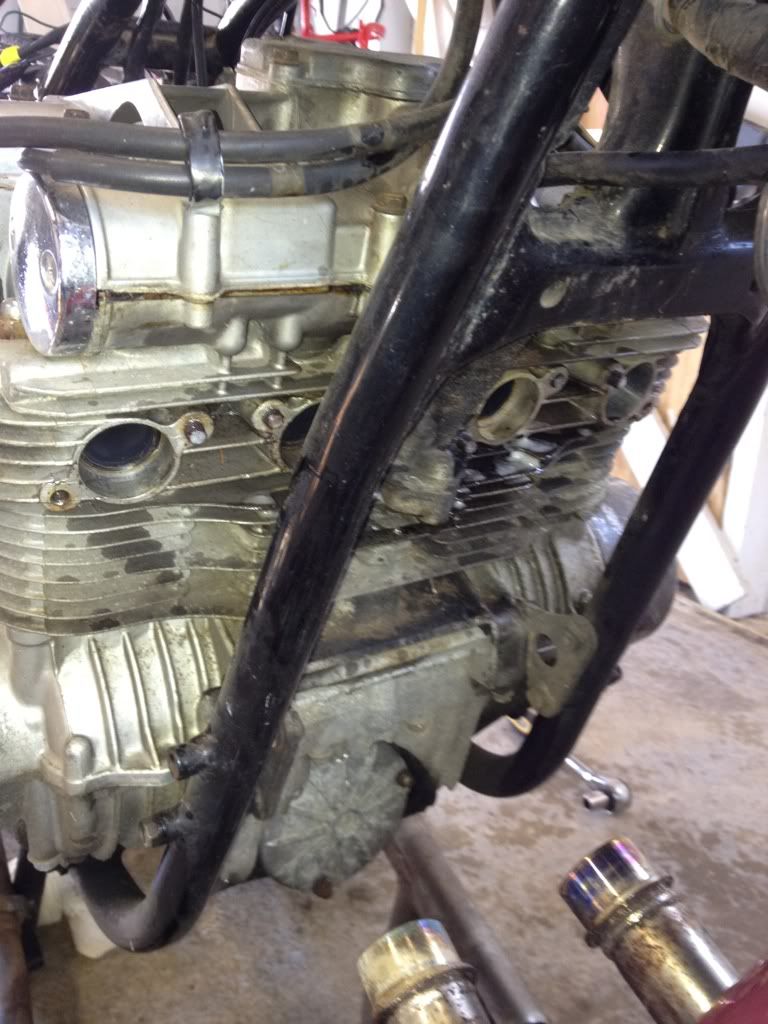
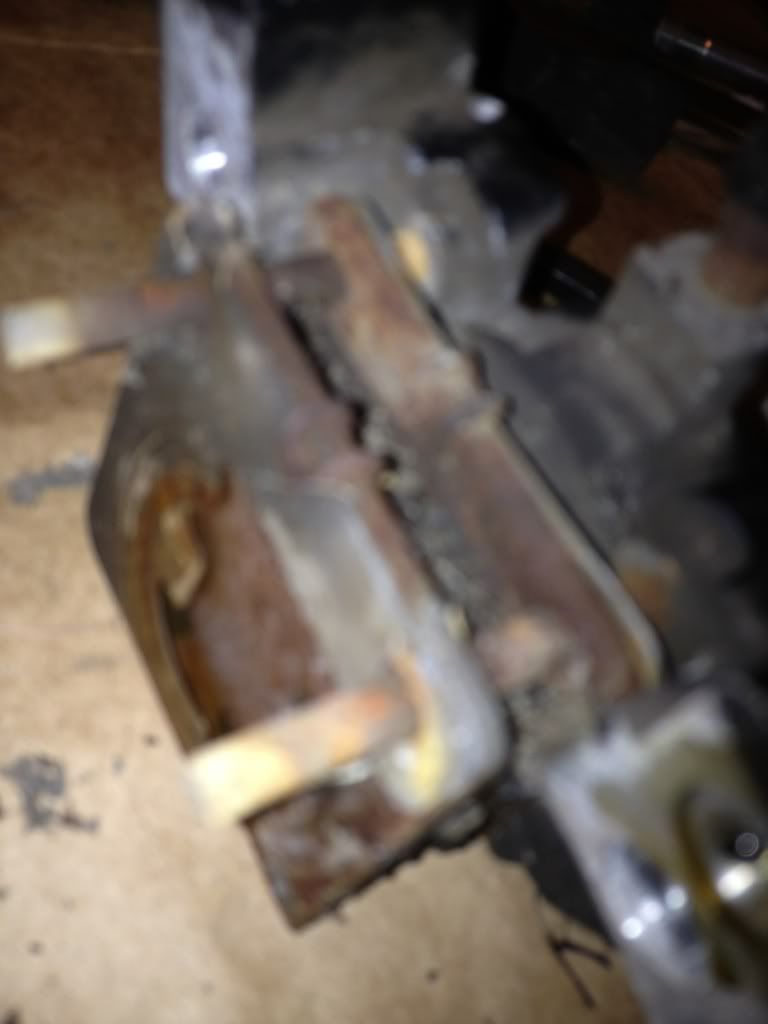
Check out what was behind the sprocket cover. This is AFTER I removed about 2lbs of soil, pine needles, and pine cones from back there!
1d4f4733.jpg

Upon removing the sprocket cover, I discovered that the counter-sprocket was COMPLETELY LOOSE (not even hand tight). The only thing holding it on was a single bend in the locking piece! The sprocket is badly worn and looks to be an original (it has the right number of teeth anyway and it looks like a sprocket with 20,000 miles on it).

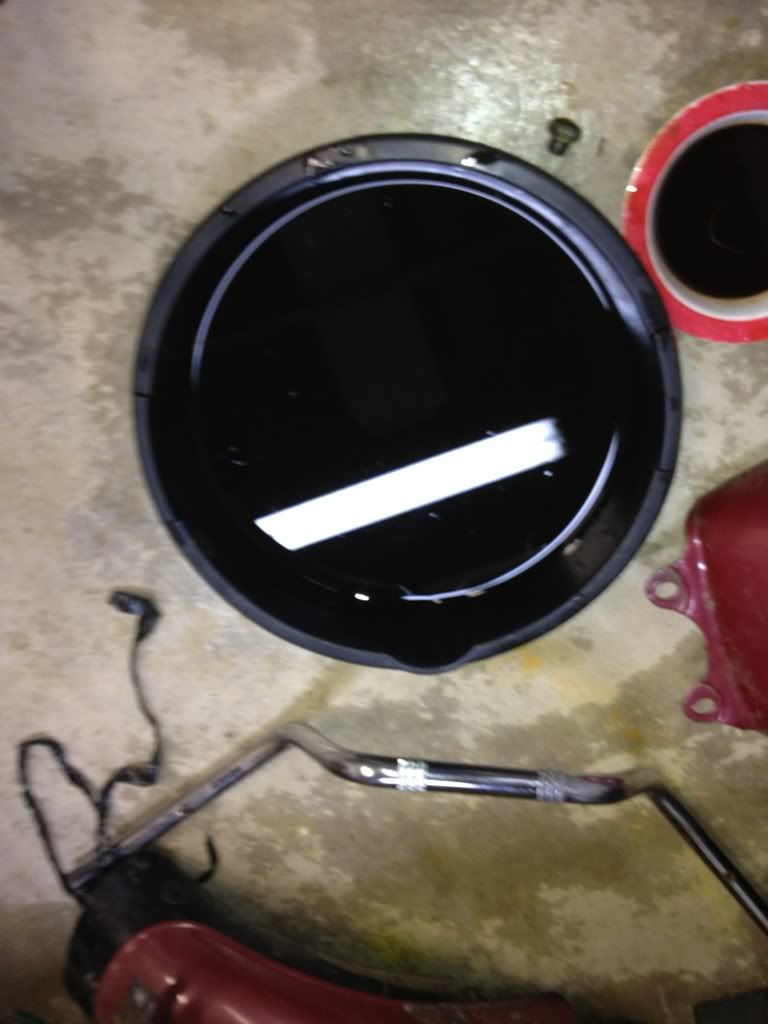
Then it was off to the store for a 21mm socket to remove the oil drain plug. There was definitely some gas mixed in with the oil - likely from the stuck float bowls combined with the lack of a vacuum operated petcock shut-off. I was careful to check the oil level before I started the bike (made sure it wasn?t too full or thin), but I?m glad I didn?t run it too long like this! (The smaller dish to the right contains old brake fluid).
6784a1e6.jpg

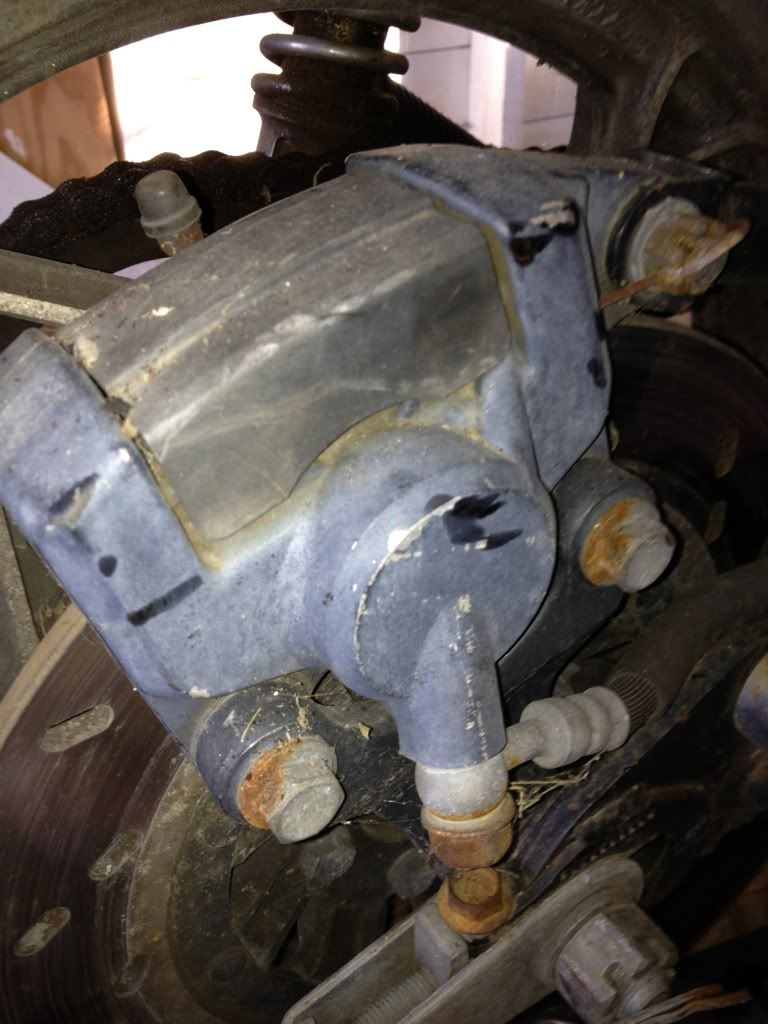
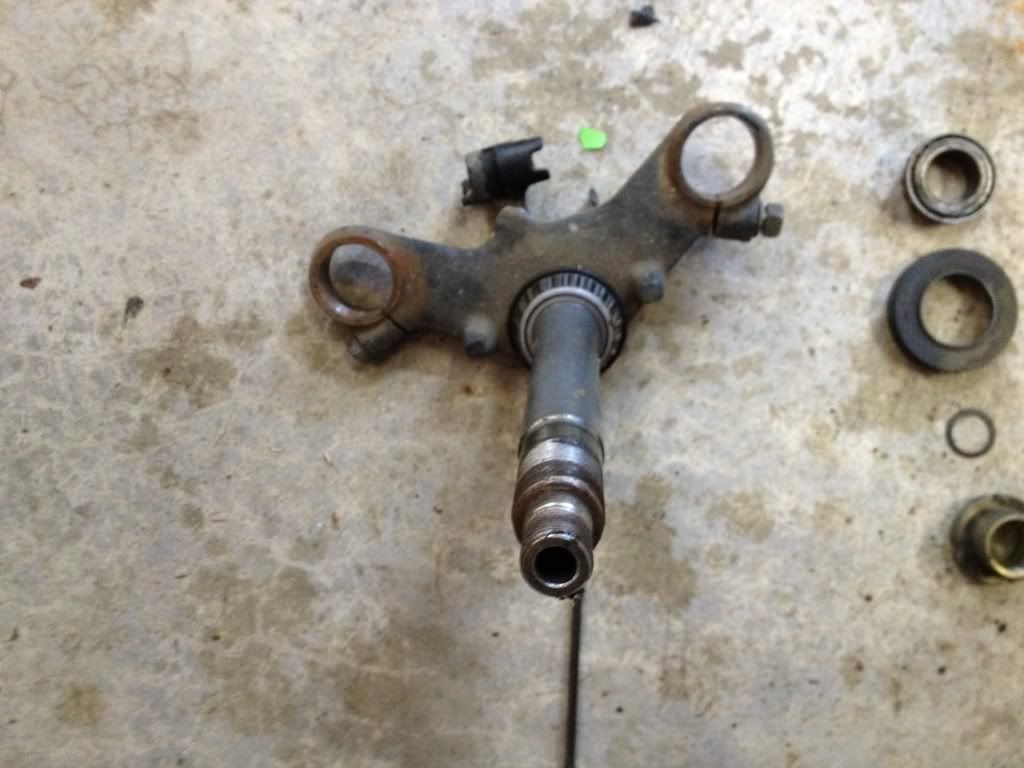
My last project for the weekend was to remove and disassemble the calipers ? also a first for me.
I got them off the bike easily enough (although I forgot to loosen the rear ones on the bike so I marred the cover getting them apart in my undersized bench vice. Here?s the rear, which looks worse than the front.
b8f36fed.jpg

Would you trust your life to this?
12a4ebf8.jpg

Inside, the seals and boots looked worn, but intact. The pads will be replaced along with all of the seals, etc. (no sense taking a chance on brakes!) Getting the caliper pistons out was a BEAR ? especially one of the rear ones, which was rusted in place. After applying high pressure air, I got the worst one to turn enough to grab it and pull it out. I marred it in the process, but it is definitely getting replaced anyway.
Ugh.
5d3380f3.jpg

I?m now boxing up everything I?ve removed so far. I?m off to buy a small parts washer (and fire extinguisher) tomorrow and then I?ll be looking over the calipers, removing and looking at the master cylinders, and pulling off more bits in preparation for removing the engine.
I will have lots of time to work on the bike over the next couple of weeks.

I?m a little ahead of myself, but any suggestions for a color scheme? I really like red/black/silver, but I?m clueless about what colors to put where. I?ve looked over all sorts of caf? bike pics but I have trouble making up my mind, so I?m very open to options. Everything is getting repainted except the engine if I can help it (although I might paint the cylinders to set them off from the bike a little).
 
Good luck with this! You definitely have your work cut out for you, but believe when I say that once you get past the dirt and the grime, the broken bolts and headaches, it's going to be so nice when you see progress in the direction of something "clean and new"
 
I picked up a small parts washer today, a lot of Simple Green concentrate, and a bunch of brushes. Rather than trying to set this up at home (where I have almost no space in my poorly-ventilated basement and it’s freezing and condensing rain in my unheated garage), I made the decision to temporarily re-locate to my office. It’s only a block from my house and I have thousands of square feet of lab space to use (complete with chemical-resistant tables/floors, air supply, vacuum lines, gas lines, de-ionized water, fume hoods, heavy-duty ventilation, comfy chairs, music, enormous sinks, and bad coffee). Best of all, we already use Simple Green to clean everything in the labs, so the smell of my parts washer will be familiar to everyone who works there.

Here is my parts washer station.
79d8f0f5.jpg

Note the fume hood.
f9be9164.jpg

My first attempt was to scrub 30-years worth of grime from behind the sprocket cover. This is easily the dirtiest piece on the bike.
28d1bc13.jpg

10 minutes of scrubbing and nearly all of the crud was off. Not perfect, but good. This is the piece I drilled into, and I also discovered a crack along the bottom that goes all the way through. The washer pump was so clogged that the pump was dying, so I had to empty it out when I was done.
0138105d.jpg


I like working in the lab so much that I’ve made the decision to move the ENGINE there as well. I’m close to removing it (should happen later today).
More pics soon. Once I get the engine out, I’ll split my time between it and the other major components (tank/forks/wheels/seat/wiring…..ugh). After Christmas I’ll take it down to the bare frame for modifications and painting.

Off the top of my head color ideas…..

Option 1: SILVER+BLACK - Black frame, black/silver wheels (returned to the way they came from Suzuki), a little more silver on the triple trees (strip paint and polish), black headlight (?), and maybe a silver tank (painted since it’s steel) with a little black accent of some sort on it. Silver engine with black accents (perhaps the ends of the valve covers and the cylinder could be done in black). Sear cowling painted silver to match the tank with a black cushion. The more I think about it, the more it sounds like the colors on my RT!

Option 2: RED HELL – Bright red frame (ok, maybe silver), wheels mostly silver/black, with a little red accent (calipers + inside of the wheels perhaps), red tank and seat cowling with a white racing stripe down the middle.

Option 3: ????
 
Latest discovery: The stud on one of the three cap screws that hold on the oil filter cover is stripped. The filter cover was "glued" on with a ton of sealant (looks like the same stuff used on the engine intakes).

Needless to say, I'm going to replace the stud and use a proper o-ring to seal the cover. Can these studs be removed with the standard "double nut" technique? I've never done it, but I think that makes sense....
 
Needless to say, I'm going to replace the stud and use a proper o-ring to seal the cover. Can these studs be removed with the standard "double nut" technique? I've never done it, but I think that makes sense....

Yep, they usually come right out.
 
Why bother if it's stripped? Just get a pair of vice grips on it and twist. You're replacing it anyways right?
 
Big day today. Went out to the garage, pulled out some electrical connectors, undid some bolts, and before I knew it there was something not quite right??
e67fd2f4.jpg


Ah there?s the missing ?piece!? All set up for a warm winter inside.
b19885b0.jpg


Now that the engine is out (HEAVY for a little 550!) I can work on pretty much anything. I?m itching to pull apart the forks and start sanding/polishing them and the wheels. Brake calipers and master cylinders still need to be rebuilt. Hell, EVERYTHING needs to be rebuilt!


So much to do?...I feel like I?m a loooong way from seeing this bike on the road, so I?m going to split my time between further disassembly and making some improvements. It?s gotta go farther backwards before it can go forwards.
 
I hear ya there brother......

I am at the not so fun part of cleaning, sanding, polishing, etc

But no where near of being able to put things back on.....

We will get there.....
 
Here?s the latest on the build:

After I removed the engine, I thought I?d spend the rest of the week on the brakes, but I lost my motivation when I saw all of the exposed parts after the engine was out. I decided to remove the front wheel and forks, and take apart one of the forks so that I could polish it (one was leaking and the other didn?t seem to have much fluid in it).

Forks. Tough to tell here, but the fork lowers are in rough shape.
Bike307.jpg


Fork cap.
Bike310.jpg


To get the forks apart, you need to push down on the top cap to remove the snap ring. I?ve never dealt with forks like this before, but it wasn?t hard once I found a volunteer to help. Once one fork was apart I hit the lower with stripper and then sanded it with 220 to smooth the more severe pitting. This is gonna take a while! (and no pics until I?m closer to finishing). I went out and bought 220, 320, 500, 800, 1000, 1500 wet sandpaper, and lots of polishing supplies (buffer wheels and wire wheels for my new bench buffer, and some Dremel attachments). I?m not very patient, so this will be a good learning experience for me. I left the other fork intact so I have a reference in case I forget how it goes back together. :)

I also spent some time this week tearing down the rest of the frame. I labeled all of the wiring as I went along, which I hope will make reassembly easier. Compared with my last bike project, I?m starting to understand what all of the wires are for. Some pics??
Bike321.jpg

Bike331.jpg

Bike330.jpg

Getting some of the fasteners loose was a little tough, but the impact driver and punch set I picked up last week saved my bacon on several occasions. Finally, I was down to removing the last few bits from the frame. Might as well strip everything off I guess.

Swingarm. That chain has gotta go!
IMG_1018.jpg


Frame with steering head. Sorry for the crappy pic.
Bike385.jpg


Steering head removed. Only one set of races remain in the frame.
IMG_1017.jpg

I then packed up the various smaller bits and moved them to my shop/lab.
IMG_1019.jpg


Next up will be some cleaning/stripping/sanding/polishing. I?m also thinking I?ll start ordering a few replacement parts this week (new bolts/seals etc.) We?ll see how it goes.

At some point I?m going to start sorting out my design plans. I?m going to caf? this bike, but I haven?t decided exactly how much. Right now I?m leaning toward ?all out? which would include cleaning out the area where the battery/airbox sits and relocating all of that stuff to the rear. I?ve never done anything like this before, but I?m taking a welding class in January, so that ought to help. I?d like to powdercoat the frame too, but I?ll need to know exactly how everything will fit before I can send it out. I might go ahead and start looking over the tank and making a seat soon, and then design everything else around them. Make sense?
 
Great progress,,,,,,

and what a beautiful place to strip down a bike in, your office looks better than mine, and I can't bring in motorcycles to strip down and repair....

by the way, the chain, soak it in kerosene, then scrub it down really good, and it still might be OK to use, check that is has not stretched, and you should be fine, I did the same thing with mine and after I lubed it up, it was working as it should....
 
Wow, you really get after it! Mine is going really slow now that the cold has set in. I'm so jealous of your work area! That's is soon sweet. I need to invest in a insulated and heated garage if I'm going to keep doing this! Anyway, following your thread I feel really lucky with the bike I found. I did get my header bolts off today and luckily they all came out without breaking. Whew! Keep up the good work. It's been fun to follow along.

Sci85
 
I started the morning off looking over the front and rear brake calipers. Wow?.they?re BAD! I ordered OEM replacements for all of the various seals and fasteners on the front, along with some aftermarket pads. For the rear calipers I ordered pretty much everything except the caliper body (which is rough enough too but can be refinished). Not cheap, but I don?t take chances with brakes. I suppose I could have just gone with another set of calipers, but I would like to be somewhat true to the vintage of the bike. I also broke down and ordered the Haynes manual to go along with the OEM and Clymer ones (might as well have them all ? it?ll be worth it when I start the engine work).

I am planning to repaint the calipers soon. I didn?t take apart the master cylinders, but I think they?re in better shape.

Next I looked at the ignition switch. Unfortunately, none of the eBay sellers has this number available (my key is mangled). The switch itself is also bent at the top (!) and badly dented/faded, so I might just get a replacement anyway. We?ll see.

Putting that aside, I picked up the fork I?ve been working on. I measured the springs from the disassembled fork and they checked out fine. I then continued sanding the lower fork leg I removed last week. Here it is after a 220 grit sanding.
74f241da.jpg


I went up and did a little sanding with 500, 800, and 1000. I should likely have spent a little more time on 220-1000 (I spent forever with the 220 getting the pitting smooth), but I was trying to avoid having my hands bleed too much (!)Here is a leg in comparison to the one that hasn?t been touched. Ready or not this is ready for polishing!
81930589.jpg

4d8bfa33.jpg


I then set up my new bench polisher. Within 10 minutes the leg was looking like this (a little brown followed by white compound on a softer wheel).
8bcb408e.jpg


I didn?t really need this much shine, but it just came out that way and I kind of like it. It still needs a hand polish to be complete (and I polished it again after this pic was taken). It?s not perfect (if you look closely you can see varying degrees of cross marking), but it?s more than good enough for me. It?ll be faded soon enough anyway, but it looks 1000x better than when I started. FINALLY, some PROGRESS.

Should I clearcoat the leg or just leave it and polish it regularly?

I also dropped by the hardware store and picked up an angle grinder. I?m gonna need it to grind down the top triple tree and to cut off the rear of the frame.

I spent some time taking off the rotors from the wheels and I brought the wheels to my lab. I cleaned a little of the grime off the engine as well.

Tomorrow I won?t have any time to work on the bike, but I?m planning to do more stripping and sanding starting on Wednesday.
 
Great progress,,,,,,

and what a beautiful place to strip down a bike in, your office looks better than mine, and I can't bring in motorcycles to strip down and repair....

by the way, the chain, soak it in kerosene, then scrub it down really good, and it still might be OK to use, check that is has not stretched, and you should be fine, I did the same thing with mine and after I lubed it up, it was working as it should....

Good idea. Might as well try it and see what it looks like.
 
Nice job on the fork leg d-Mac. You've certainly got the "shiny" touch ;-)
 
Back
Top