• Required reading for all forum users!!!

    Welcome!
    Register to access the full functionality of the GSResources forum. Until you register and activate your account you will not have full forum access, nor will you be able to post or reply to messages.

    A note to new registrants...
    All new forum registrations must be activated via email before you have full access to the forum.

    A Special Note about Email accounts!
    DO NOT SIGN UP USING hotmail, outlook, gmx, sbcglobal, att, bellsouth or email.com. They delete our forum signup emails.

    A note to old forum members...
    I receive numerous requests from people who can no longer log in because their accounts were deleted. As mentioned in the forum FAQ, user accounts are deleted if you haven't logged in for the past 6 months. If you can't log in, then create a new forum account. If you don't get an error message, then check your email account for an activation message. If you get a message stating that the email address is already in use, then your account still exists so follow the instructions in the forum FAQ for resetting your password.

    Have you forgotten your password or have a new email address? Then read the forum FAQ for details on how to reset it.

    Any email requests for "can't log in anymore" problems or "lost my password" problems will be deleted. Read the forum FAQ and follow the instructions there - that's what we have one for...

  • Returning Visitors

    If you are a returning visitor who never received your confirmation email, then odds are your email provider is blockinig emails from our server. The only thing that can be done to get around this is you will have to try creating another forum account using an email address from another domain.

    If you are a returning visitor to the forum and can't log in using your old forum name and password but used to be able to then chances are your account is deleted. Purges of the databases are done regularly. You will have to create a new forum account and you should be all set.

  • In order to help others find info on a particular bike, be sure to put the year, make or model of bike that you are asking a question about, in the Topic Title. This will allow people to pass by posts they have no interest in.

"Bike In A Box" - A GS450-hearted FrankenScrambler

  • Thread starter Thread starter CrawlingForward
  • Start date Start date
C

CrawlingForward

Guest
So, I wasn't sure where this build actually belonged because while the title is a GS450, it's got just as much GS850, GS500, GR650, ZX250, ZX6, and completed fabricated components as any 450 components.

Also, this build is/will-be *extremely* slow. I've got a 2 year old and a pregnant wife who tends to give me the dreaded "fine" when I tell her I'm heading into the workshop or worse, buying a part.

That being said, I've gotten so much info from the site and Pete's and Big Rich's builds in particular that despite documenting most of it on Instagram, I told Pete I'd finally add a build thread.

Here is the inspiration sketch (still subject to change):


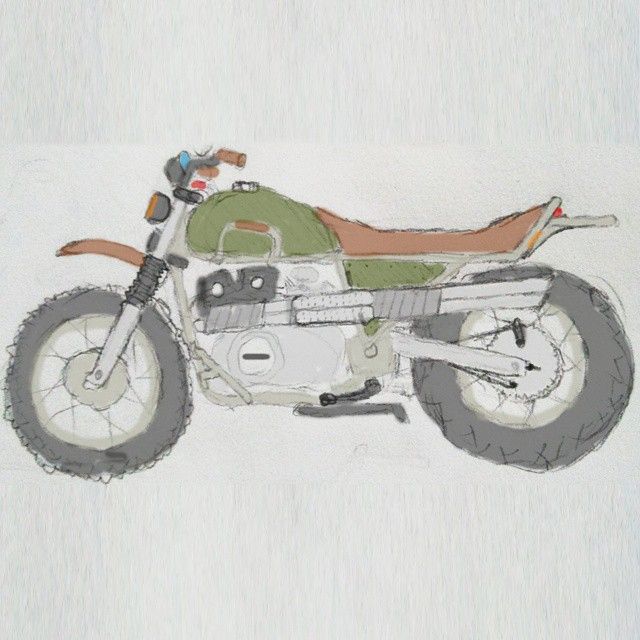
(So I'm essentially reinventing the Triumph Scrambler?)

The philosophy behind this bike is to build it from the ground up, learning as much as I can and DIYing/fabricating as much as I can. I want to touch, learn about, and customize/improve every single part on the bike.

So while the future updates will likely be "added a bracket!" every 3 months, here's the progress so far:

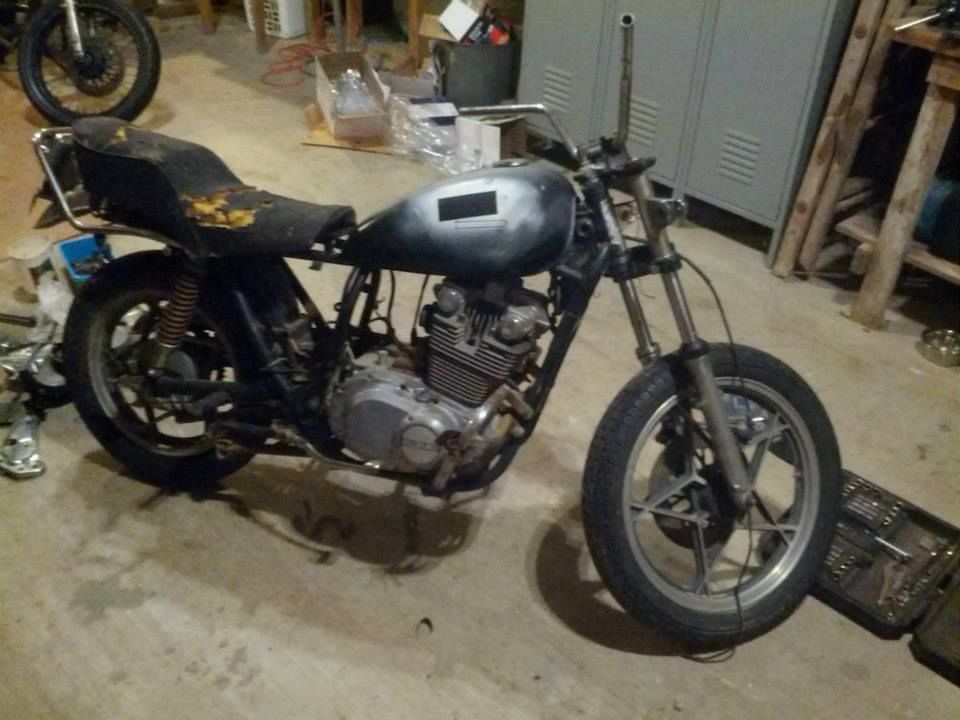
I know many users on this forum get very upset when people chop up perfectly good bikes, so let me assure you: It was *not* a perfectly good bike:


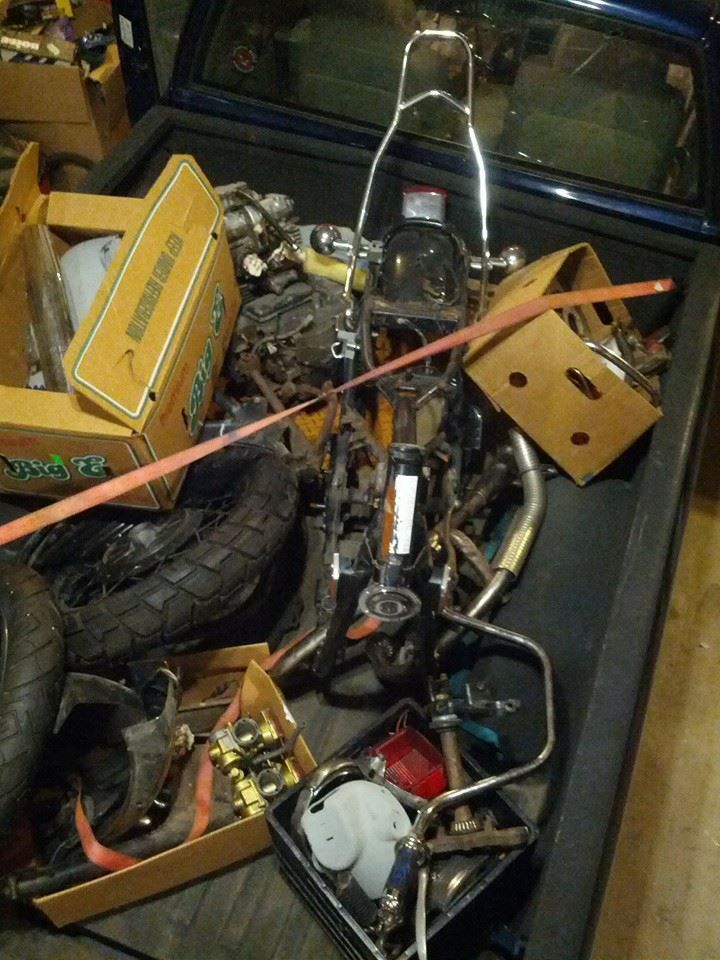
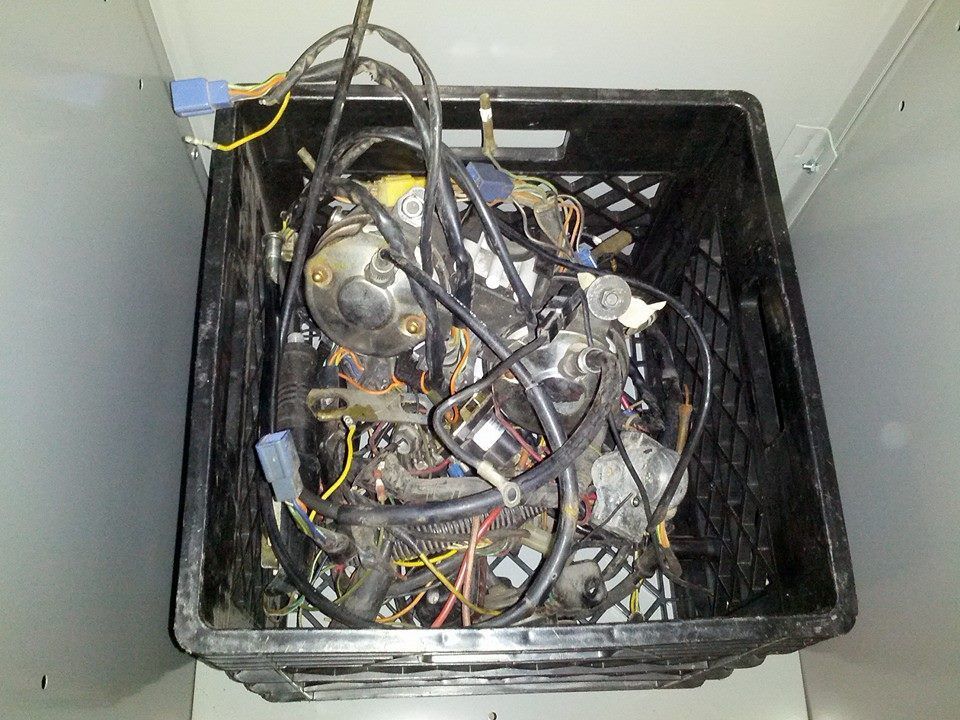
But hey, it was $250 and has a proper title.

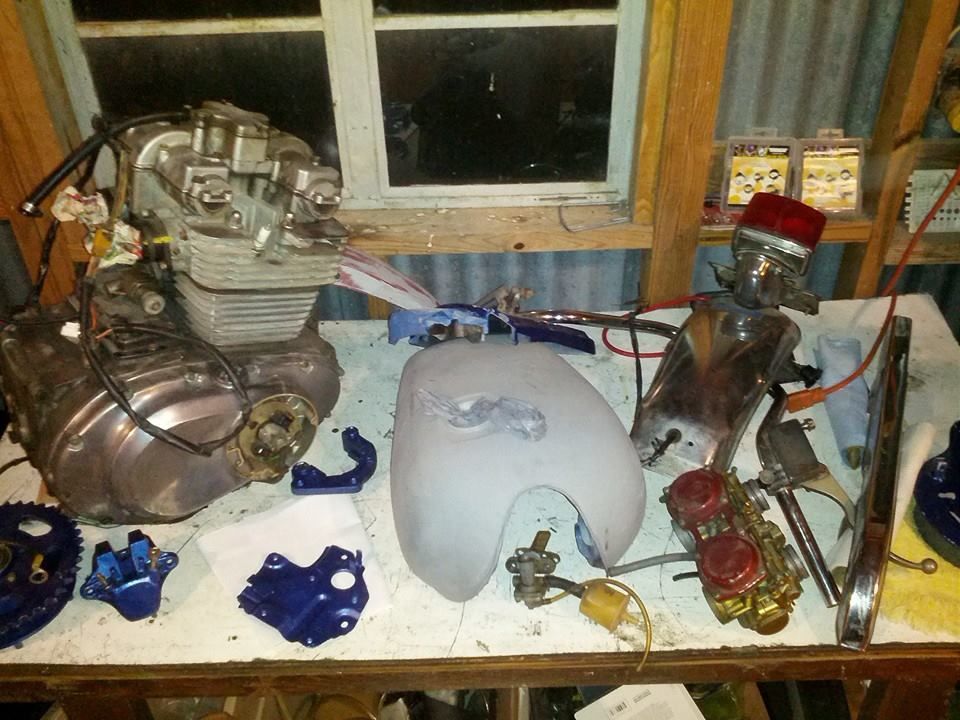
So to supplement the "Bike In A Box", I bought a friend's untitled GS450 project for another $100. Again....not in any sort of viable condition.


Did lots of sketching various ideas and figuring out what I wanted out of my bike and decided I really wanted a scrambler capable of comfortable highway, but most at home on fireroads and dirt trails and maybe some mild singletrack.


So first thing I did was cave to peer pressure of my buddy and decide I was going to upgrade instead of resto-mod. So I decided I'd go monoshock and dual disk front brakes, cause why not?

So with advice found on this site and confirmed on others, I decided to go with a GS850 front end and swap in a swingarm from a Ninja250 with a shock from a Ninja ZX6.

The front end swapped right in, but the swingarm needed a little less than an inch shaved off the sides and the bushings that were welded into the frame needed to be ground flush, but other than that, it fits perfectly!

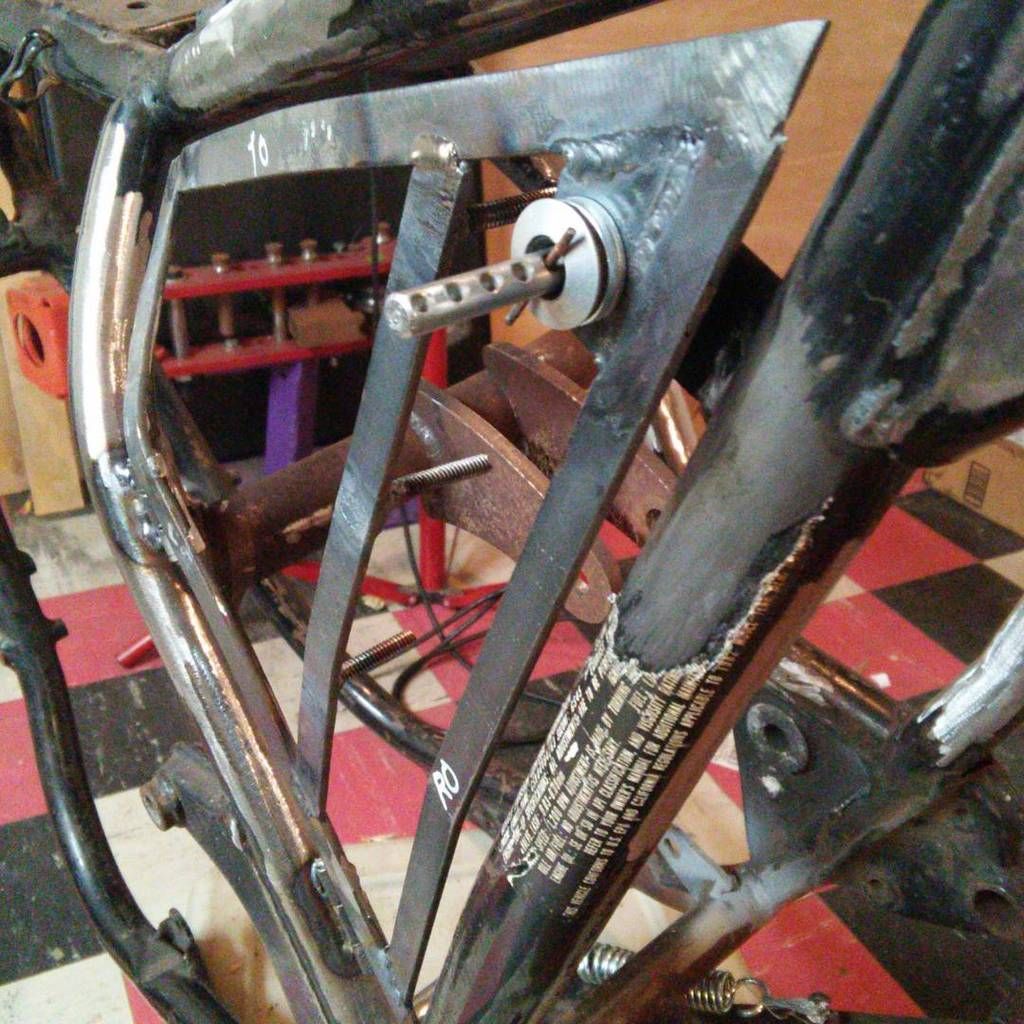
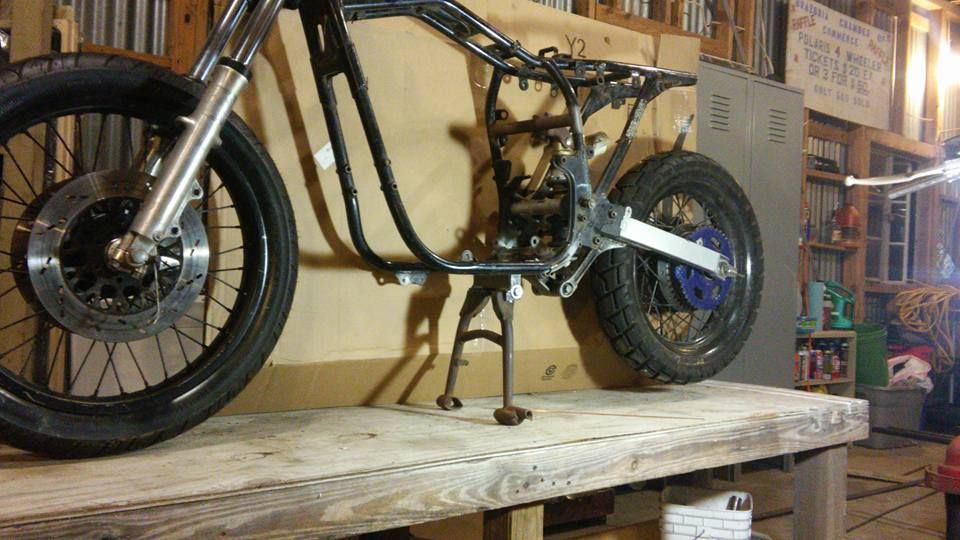
I visited Dave from Vudu Vintage in Austin (used to live in Houston, TX now I'm in Flushing, MI) and he helped me put in an upper shock mount, resulting in the new stance for the bike:


Next up, I got tired of having to lay the frame on it's side or lean it up against stuff, so I fabbed up new centerstand bracketry. (The monoshock interfered with both the side stand and the center stand. I've had both on most of my previous bikes and I pretty much only use centerstands, so I'm not even bothering with a side-stand on this bike). Biggest concern with the centerstand was clearing both the monoshock dogbone pivot and the oil pan. Very small window, but should fit once the engine is back in.


Ok, this is getting a little long-winded, so the next posts will mostly be pictures to speak for themselves!
 

Attachments

  • 12027767_10102679341465076_2119288214436999830_n.jpg
    12027767_10102679341465076_2119288214436999830_n.jpg
    99.6 KB · Views: 0
Last edited:
Chopped the frame:


Capped the open frame:


Invested in a tube bender (expensive, but I've got a back-log of projects that I need it for, #1 & #2 being roll cage upgrades for our Jeeps once the babies start going in the back seats) and played with some shapes for rear hoops:


Bent up a vertical rear hoop and another that will eventually be the luggage rack. Added some gussets as well.


Finished frame structure, and new tank (the old one was primed and lined, so I wouldn't have been able to weld on it, plus the new one has a fuel sending unit! A theme you'll notice throughout the build is I love cleanly incorporating gadgetry that has function)


I do lots of cardboard mockups:


I'm doing a full upgrade of the electrical system. I'll leverage some of the existing harness, but I'm fabricating an entirely new dash that eliminated the ignition switch and will use a power toggle and pushbutton start instead. (I've been teaching myself CAD and 3D printing to prototype, but the final version I'm planning on milling from aluminum.) The dash will also incorporate a color coordinated LED gear indicator array with a potentiometer to adjust LED brightness for night or daytime riding. The lighting will be completely converted to LEDs with a LED spotlight for the main light and an array of LEDs in the surrounding numberplate for the bright. LED turn signals will be incorporated into the number plate in the front and inserted into the old shock mounts in the back along with a custom 3D printed (possibly dyed resin?) taillight with integrated turn signals.

Because the heavy use of LEDs threatens to burn up my stator, I will be swapping the stock Rectifier/Regulator for a 3-phase unit from a Polaris.The old unit shunts excess power to ground, wheras the modern one only operates as much as needed, leading to more a efficient, cooler running oil/electrical system.


Because the monoshock takes up the space normally occupied by the battery and electrical box, I fabricated the sidecovers with hinges and mounting points for the major electronics to allow them to swing out for easy access to the battery, shock adjustment, air filters, etc.


(Video of it over on Instagram)


Last edited:
Next up will be fabricating the seat pan and the the rear inner fender that will double as the battery mount:


Other points of note:

Because of the donor, I have a spare engine. So I will put the original engine in the build to start and then rebuild the donor engine (despite all my years of motorcycles and Jeeps, I've never had to open an engine past the valve cover, so this gives me a chance to learn and do something cool). Not only a rebuild, but I'll be upgrading with GS500 jugs, the GS450 head with GR650 cams and a GS500 carburetor (the carb will be mated to both engines).

The exhaust will be a set of high pipes built from scratch, presumably I'll grab a 1.5" die and bend it from 1.5" .065 mild steel, then ceramic it and exhaust wrap it to lessen the inevitable burning of my right leg.

The seat is not going to be a typical cafe seat, but will be multi-level cushioning with a custom sewn cover with a tank strap and side straps that will double as attatching points. I am planning on originally prototyping it out of canvas and flannel, but I have a buddy who is a leathersmith who was planning on covering it for me eventually.

I planning on actually taking it offroad, so I'm going to figure out to not only add an engine cage and skid plate, but I'm hoping to add a strip of armor around the tank and Monstaline (an awesome bedline) the tank and sidecovers (possibly the frame?).

I was originally planning on tires that were a good compromise of dirt and street, but I've got two sets, so I might do one set of responsible street tires and one set of Kenda Big Blocks. We'll see.


So yeah, it'll be a *long* time before this project is completed, but it's been awesome learning so far and it's a nice background project to have.
 
Mate, I like where this is heading!

Definitely tuning in for the ride and keen to see you get her done!
 
Been spending a *lot* of time in the past few days working out all the specifics of the electrical system. Everything from components to gadgets to amperage calculations to layout and wiring color coding/circuits (with the state of the aging donor wires and some of the radical changes I'll be making, I am intending on wiring a new harness from scratch.)

Normally this would feel a bit premature, seeing as how I haven't even finished the frame, but because of the sidecover/electrical integration I needed to order (or build proxies of) all the final components.

So I ordered:

A new, more compact starter solenoid from a Kawasaki KZ750

$_1.JPG

(It also doesn't ground to the frame, which is key for two reasons 1) I wouldn't have a chassis ground where I plan on mounting it and 2) I'm planning on running dedicated grounds throughout the harness instead of using chassis grounds. Obvious exceptions being things like the spark plug, starter, etc., so I will still have to run a ground from the engine to the battery.)

Next, because of the various extras I'll be adding, for the sake of troubleshooting and to keep the wiring very slick and organized, I ordered a 4 fuse block.

blue-sea-5045-4-circuit-st-blade-compact-fuse-block-with-cover-4-circuits__4796_580.jpg


I've currently organized the wiring circuits into 1) Lighting 2) Engine 3) Instruments/Horn and 4) Aux. No plans for Aux yet, but I like having options in the future.
The positive bus will be supplied via a micro relay that will activate when the Master Control switch is switched on and all negative leads will be wired directly back to the battery.

Lastly, I ordered a LED-specific adjustable flasher relay to make sure I can adjust for running more than the usual 4 turn signals (plan is 6 9w amber LEDs on the number plate and 2 9w amber LEDs in the rear along with a yet-to-be-decided wattage of turn signals built into the epoxy-cast tailight.

41CohKEimkL.jpg


And while I haven't actually purchased them, I made wooden dimensional replicants of the future components of:


antigravity_small_case8_cell240_ca_lithium_ion_battery_zoom.jpg

and I'm super excited about this last one:

a Vololights Underseat Module!

vololightsdecelerationlightingcontrolmodule.jpg


For those not familiar it's an accelerometer-based brake light augmentor that flashes/modulates the rear brakes according to braking severity. I will be wiring it into the turn signals incorporatedin the taillight, leaving the side turn signals to operate normally and the central brake light to operate both normally and according to braking severity. It's a super cool product. A little pricy, but it adds safety and is just a cool gizmo.

So now that I had all the components and layout figured out, I could finally get around to completing the other half of the electronics mounting.

Last night's progress was getting the battery box built onto the passenger side hinged sidecover. My lovely foam stand-in did a great job of simulating the eventual fitment.

13408812_294278674242948_937725148_n.jpg


13388480_992290924220496_228355073_n.jpg


Next up? Adding mounts for the fuse block, solenoid, and micro relay socket. I've got a layout that I think should allow for some pretty slick wiring!
 
Last edited:
Looks like you're giving this lots of good thought, great stuff!

I like the modulating break light idea, unfortunately anything like that over here is purely illegal regardless if it improves safety or not.
 
I just installed the same speed/tach gauge on my bike. If you have any questions feel free to pm me. It seems like you are on the ball though with electrical.
The menu settings are tricky to figure out if you you got the same poor instructions I did.
So far it's working good. The tach is the only thing not working perfectly.
Looks like a great project. I really like it so far.

Awesome, thank you!

Mine didn't come with any instructions, so I'm just going off the little I can find on other eBay listings. I've got almost everything figured out but I'm still foggy on two things:

1) Do you connect the "RPM" wire by just splicing into one of the coil signal wires? Or maybe one of the hall sensor wires? I now you said yours wasn't working properly yet, but I was hoping you might have some insight. I know there is a setting where you tell it how many cylinders you have, so I'm assuming that's involved.

2) Is the battery fed (non-switched) hot necessary to preserve settings/odometer/etc? If you disconnect the battery, do you have to set everything up again? There's no clock that I could tell, so that's the only thing I can think of. Because the Anti-Gravity battery bricks itself at 10.5v, I don't want to put any sort of parasitic draw on it. If it *does* need constant power, I might make the main power relay a NO/NC relay that defaults to a pack with a 9v battery when the master switch turns off.
 
Last edited:
1) Do you connect the "RPM" wire by just splicing into one of the coil signal wires? Or maybe one of the hall sensor wires? I now you said yours wasn't working properly yet, but I was hoping you might have some insight. I know there is a setting where you tell it how many cylinders you have, so I'm assuming that's involved.

I don't know about this exact model but most tachometers that use a sensing wire pick up the signal via induction. You just wrap the sensor wire around one of the plug wires. You'll have to figure out how to let it know whether or not you have a wasted spark system. Usually the sensor wire also delivers the signal via induction so it is likely slipped through a loop or something at the tach side. If this isn't clear I can take some pictures of the installation on my kids' race cars, they use a similar system. Shot for 5 wraps on the plug wire for good pick up.
 
Wrapping the wire around one of the plug wires virtually did nothing. It would bounce around 100 rpm.
I hooked it to the blue wire from the signal generator. It gives a smooth idle reading , is semi smooth from 1000-4000 but after that it gets jumpy. Cruising at 4500+ it bounces +/- 500 rmp from your actual. It will wind the rpms all the way up tp 9+ but still bounces. I had no luck hooking it up straight to the coils So that is about how mine operates.
I have not disconnected my battery so I don't know if it saves settings. I set mine to 4 cylinder (the last digit) fyi.
The speed sensor setting is set to 900 for my 850G 19" wheel.
 
Another thing about the speedometer. I used the GPS phone app to set my speedometer so when it said I was going 50 I change the odometer setting ie wheel diameter setting until my speedometer read 50 miles per hour also.
That sounds great but it's not exact and requires some fine-tuning. I found out on the Brown County rally that when everyone else would fill up and say had 80 miles, my odometer would say I had travel 71 miles. So I kept fine-tuning the wheel diameter setting until my odometer setting match the other guys odometers better at fill up.
 
That's some good intel to have, thanks!

Speaking of speedometers, I was debating how to deal with mounting the sensor and doing a speedo delete on the wheel, but realized I might be able to modify the existing housing to both mount the hall sensor and the magnet internally.

So I pulled it apart and took a look. I think if I ream out the hole for the worm gear, remove the seal, and mount a magnet to the tabbed 'rotor', I think it should work!

13388513_1612210132428650_305446524_n.jpg
 
Don't know if it will help or not but for the Acewell tacho I hooked it directly to the ignitor output for one of the coils. I put a 10K ohm resister inline that they provided with it and it's pretty stable. There's a few bounces once the rev's get up but it's stable enough to still be useful.
 
Broke down more definitely the color schemes for the new harness and calculated the estimated current and fuses for the 3 primary circuits going on the bike.

Color Convetions:

Red - Unfused Hot & Component Hot
Black - Universal Ground/Signal Generator
Orange - Brake Lights
Blue - Right Signals
Brown - Left Signals/Signal Generator
Yellow - Lighting (Headlight/Taillight)/Generator
White - High Beam
Green - Engine Hot/Signal Generator
Violet - Tachometer Signal?
Gray - Switched Hot (relays, etc.)
Tan - Left Coil
Pink - Oil Pressure Switch Ground
Light Green - Neutral Ground
Light Blue - Right Coil (or tachometer signal)

Split fuse block into 4 circuits:

  • Lights: 18w Headlight + 15w (1.5wx10) Hi-Beam + 12w (1.5wx8) Amber Signals + 3w (1.5wx2) Plate + 18w (best guess) Taillight/Brakelight = 7 amp fuse
  • Components: 30w horn + 30w (best guess) Dash/gauge = 7 amp fuse
  • Engine: 80w (best guess) = 7 amp fuse
  • Aux: TBD = spare 7 amp fuse

All amperage besides battery/starter unfused circuits are <10amps, so use 18ga wire. (Battery cable to starter/solenoid should be stock. Battery/relay/fusebox and R/R power should be 16ga or maybe 14ga for peace of mind)

Generator puts out 200w @5000RPM, so roughly 17amps. Peak continuous draw should be less than 13 amps - 5 amps lights (hi+low+taillight+license) + 5 amps ignition + 3 amps dash


Can either of you confirm the current draw of the typical digital tachometer? I've gotten estimates ranging from under 2 to about 5 amps.

Also, I took the service manual and added up all the wattages of lights it gave (totaling around 9 amps), then subtracted that from the 15amp fuse and got a max of 6 amps for the ignition system current draw. I also saw some posts about coil current and ignitor current and they seemed to add up to a similar conclusion, but can anyone confirm that the engine/ignition current is under 7 amps?
 
I've been working on something similar for the Katana but haven't started narrowing down colours or deciding on fuse sizes yet.

I've never looked at current draw for the Acewell gauge but I can't see it being even 2 amps to be honest.

As for the ignition, each coil has an impedance of 3 to 5 ohms, so take the lower value which will cause the highest current draw (V = IR) and at 12 volts you get 4 amps. Of course your R/R will typically have the system at a higher voltage (say 13.2 to 14.8 or thereabouts) which means more current so just under 5 amps.

Make sure you give yourself room to move with the fuses, I would be running a 15 amp for the ignition circuit, and 10 amps for the other circuits except maybe Aux depending on what you plan on using there. Putting a fuse of exactly the right size in (or even just a small overhead) is asking for them to blow under a surge or peak type scenario.
 
Welcome to the forum and to Michigan. Your down the road from where I grew up, Flint. Check out the bikes on the bricks in flint.
Like how detailed you are. Why the gs850 front end, ground clearance? Gs500 front end fits and offers dual disks and lower weight. Try battery sharks for Li-ion batteries for cheap.
 
Last edited:
Welcome to the forum and to Michigan. Your down the road from where I grew up, Flint. Check out the bikes on the bricks in flint.
Like how detailed you are. Why the gs850 front end, ground clearance? Gs500 front end fits and offers dual disks and lower weight. Try battery sharks for Li-ion batteries for cheap.

Yeah, height was the main thing. I'm a relatively tall guy at 6' 1" and wanted a taller bike. Since I was doing the rear from scratch, getting height there was no problem, but I needed to be able to match it on the front as well.

I built my battery box specific to the anti-gravity battery dimensions, but if Battery Sharks has one of the same dimensions or similar, yeah, they're definitely a bit cheaper!

I hadn't heard of Bike on the Brick, I'll have to check it out!
 
Lots of little bits going on.

Got the 2nd gen GS500 carburetor and stripped it of all the emissions junk. Also ordered a choke cable that will mount next to the petcock on the left side. Same as others have found, the weight is almost half. I'm still trying to figure out what to do about the idle adjuster. I know Pete, you cut it down and glued the knob back on or something, right?

13398725_294478464234634_652666185_n.jpg


Finished the eletrical bits surrounding the battery box!

13414379_1547339508909109_242953439_n.jpg


Video here: https://www.instagram.com/p/BHEKQfXBBJN/

Figured out my Speedometer mod won't work, though, as Hall Sensors are plane-specific, so the parallel configuration wouldn't read.

Video here: https://www.instagram.com/p/BHyLxuTB7G_/

I was already planning on putting a rear license plate bracket on the rear swingarm, so I'll probably just mount it in that and put the sensor on the rear sprocket.

I'll still use the speedo to prevent the hub looking weird, I'll just cap it off with a bolt of something.

Lastly, I redesigned the front end (again...like 4th time) in order to utilize a *stupid* bright LED lightbar I bought as a high beam. So, no more number plate like I had planned, but I think it'll look really cohesive when I'm finished. I cut and bent all the pieces for the hi-beam/speedo/turn-signals/headlight/wire-hiding-plate last night, so hopefully I can get some pictures of that welded up sometime soon!
 
Back
Top