• Required reading for all forum users!!!

    Welcome!
    Register to access the full functionality of the GSResources forum. Until you register and activate your account you will not have full forum access, nor will you be able to post or reply to messages.

    A note to new registrants...
    All new forum registrations must be activated via email before you have full access to the forum.

    A Special Note about Email accounts!
    DO NOT SIGN UP USING hotmail, outlook, gmx, sbcglobal, att, bellsouth or email.com. They delete our forum signup emails.

    A note to old forum members...
    I receive numerous requests from people who can no longer log in because their accounts were deleted. As mentioned in the forum FAQ, user accounts are deleted if you haven't logged in for the past 6 months. If you can't log in, then create a new forum account. If you don't get an error message, then check your email account for an activation message. If you get a message stating that the email address is already in use, then your account still exists so follow the instructions in the forum FAQ for resetting your password.

    Have you forgotten your password or have a new email address? Then read the forum FAQ for details on how to reset it.

    Any email requests for "can't log in anymore" problems or "lost my password" problems will be deleted. Read the forum FAQ and follow the instructions there - that's what we have one for...

  • Returning Visitors

    If you are a returning visitor who never received your confirmation email, then odds are your email provider is blockinig emails from our server. The only thing that can be done to get around this is you will have to try creating another forum account using an email address from another domain.

    If you are a returning visitor to the forum and can't log in using your old forum name and password but used to be able to then chances are your account is deleted. Purges of the databases are done regularly. You will have to create a new forum account and you should be all set.

  • In order to help others find info on a particular bike, be sure to put the year, make or model of bike that you are asking a question about, in the Topic Title. This will allow people to pass by posts they have no interest in.

Goin' German and Italian for a change

nvr2old

Forum Sage
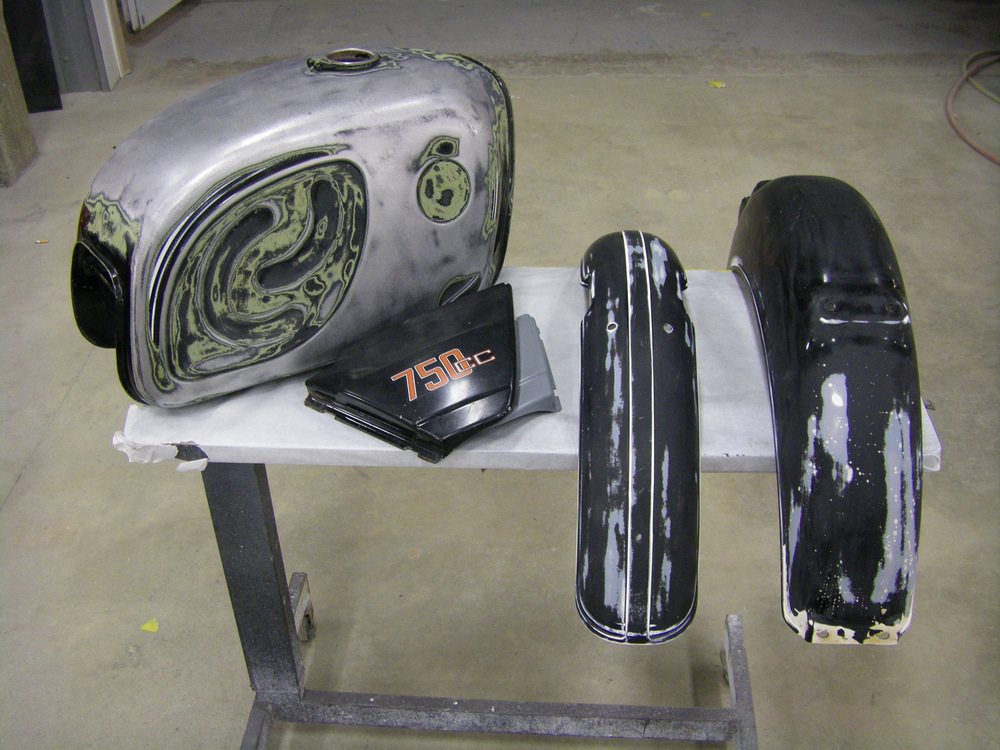
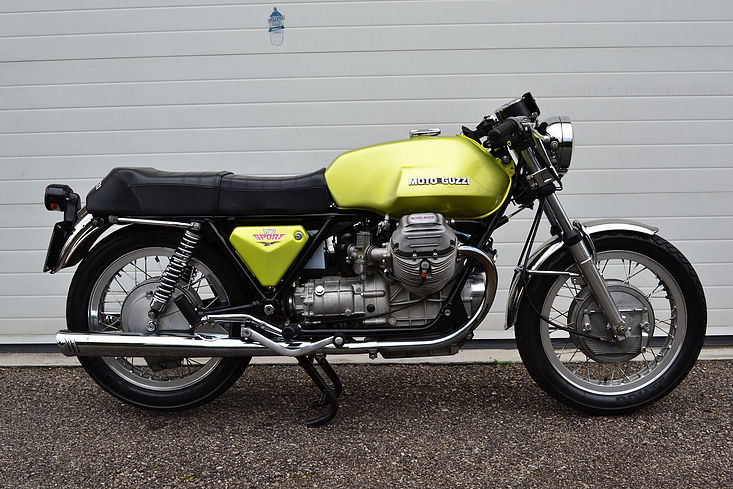
A couple of good friends of mine have these projects and asked if I would do their paint. Both are return customers from when I was doing it to survive. Tobin who owns the BMW was the guy who sold me the 400F for such a rippin' deal, how could I not try to pay back that generosity. Simon has a handful of other Guzzi's. Found this one leaning up against a fence post sitting outside for about 15 years, blasted with a shot gun..oh, the humanity..thus the NOS tank. He has the bike done and is just waiting for me..:p

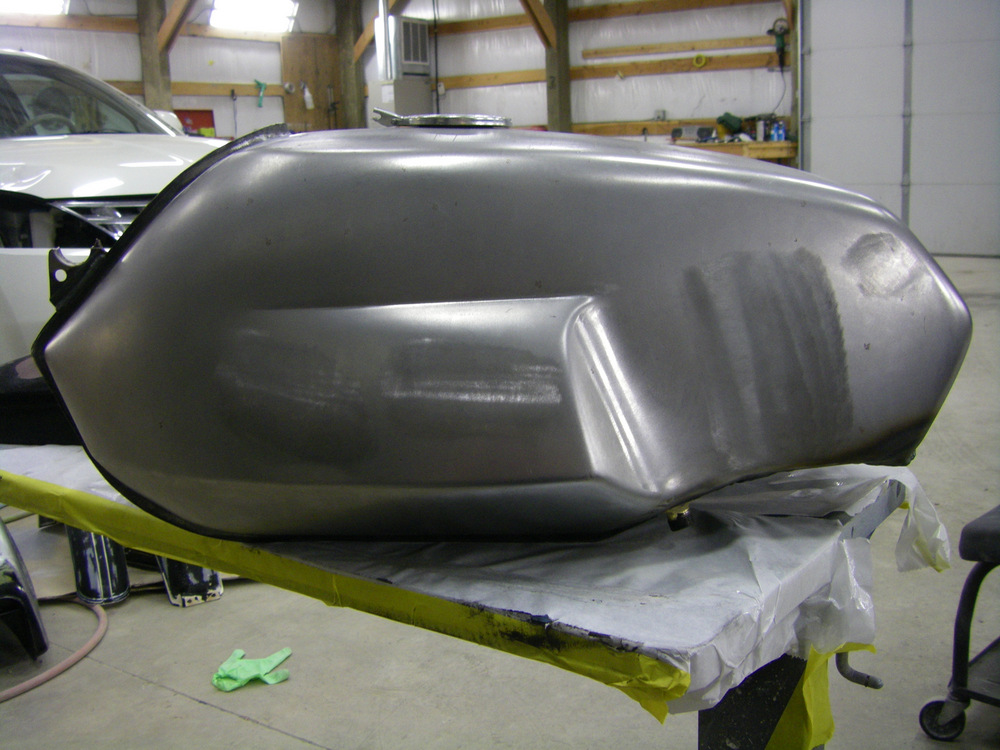
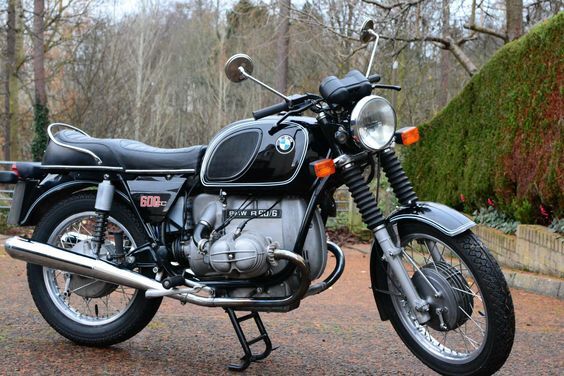
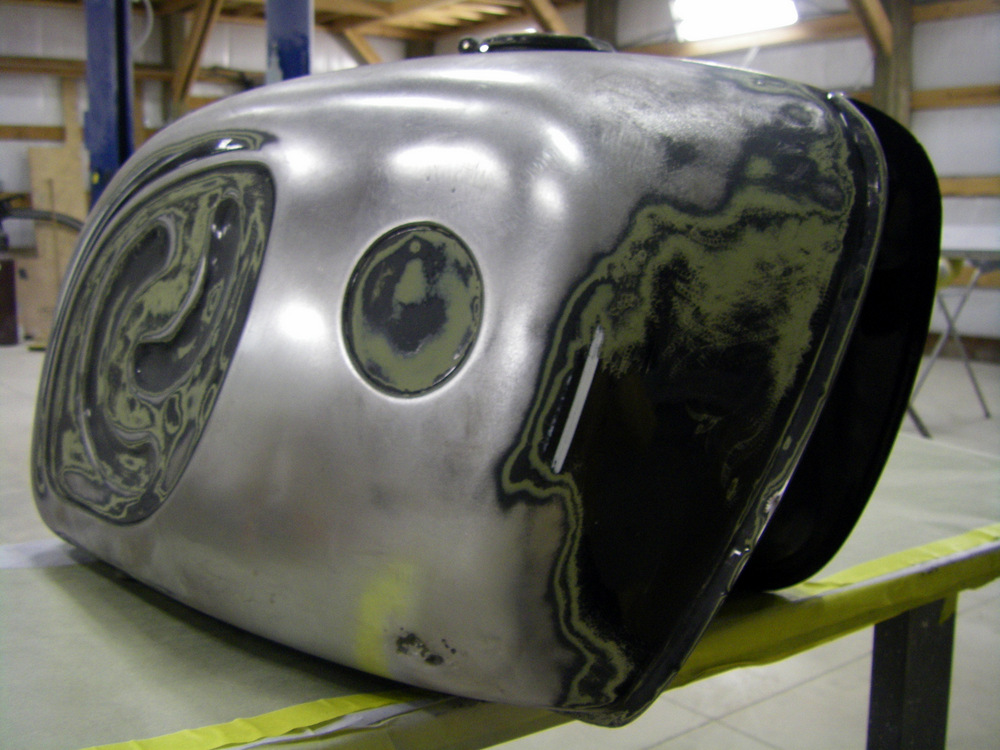
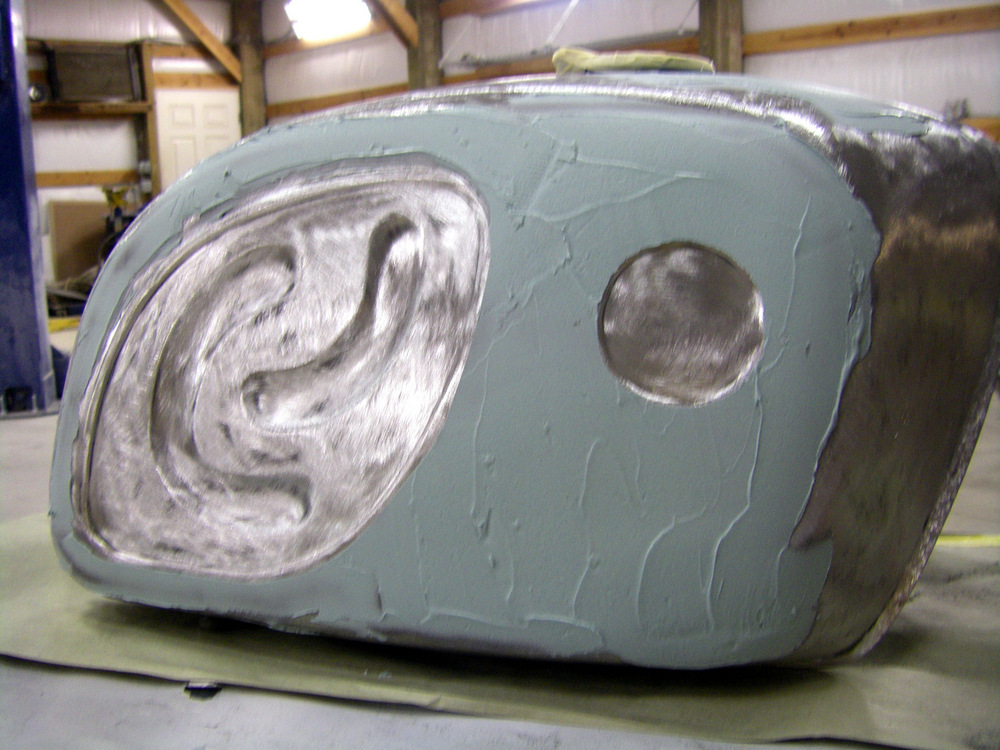
The BMW has a dent right above the emblem..argh..worse place possible as it extends into the recess. Will be a bear to get right. The dent below at the bottom front part of the tank will be easier.

This is how far he took it before handing it off to me.

1 by Larry Pearson, on Flickr

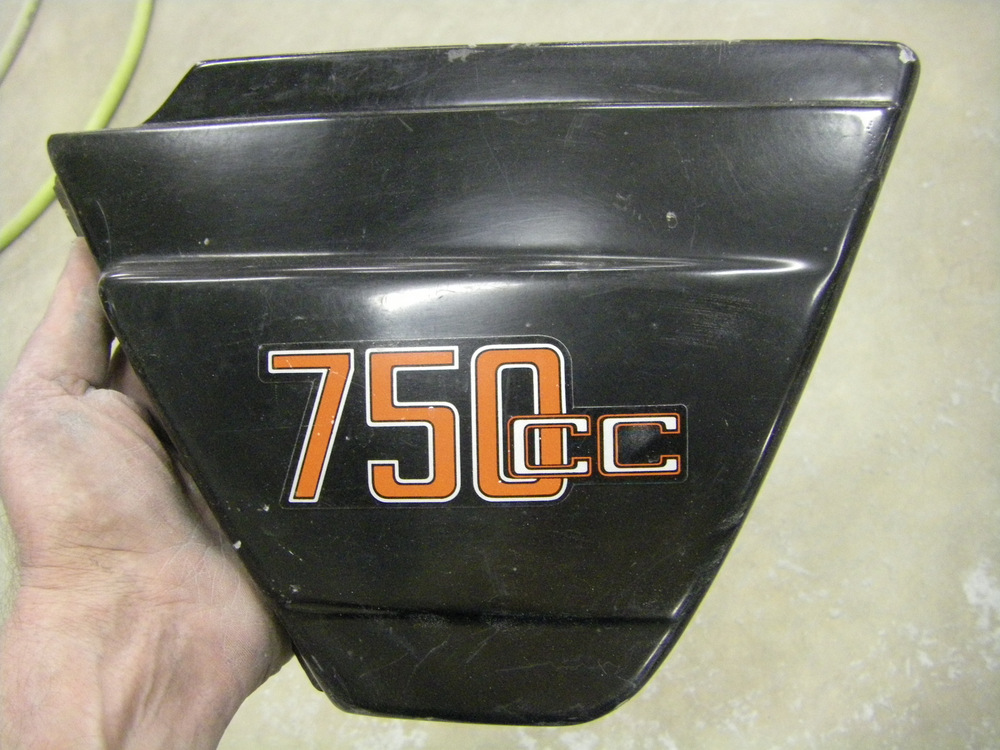
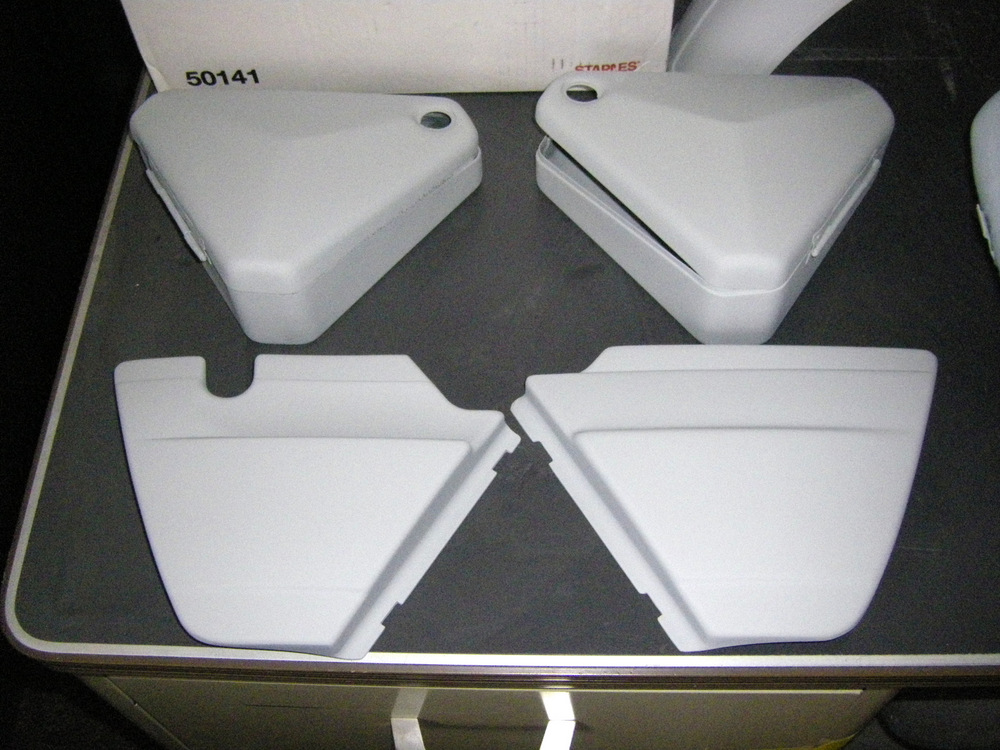
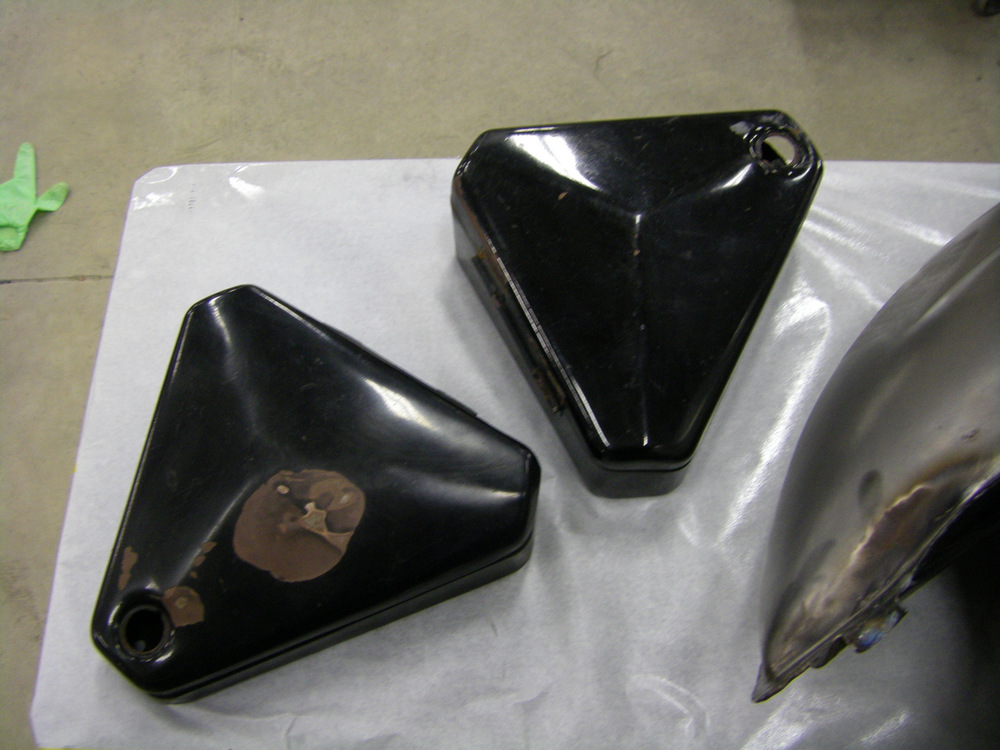
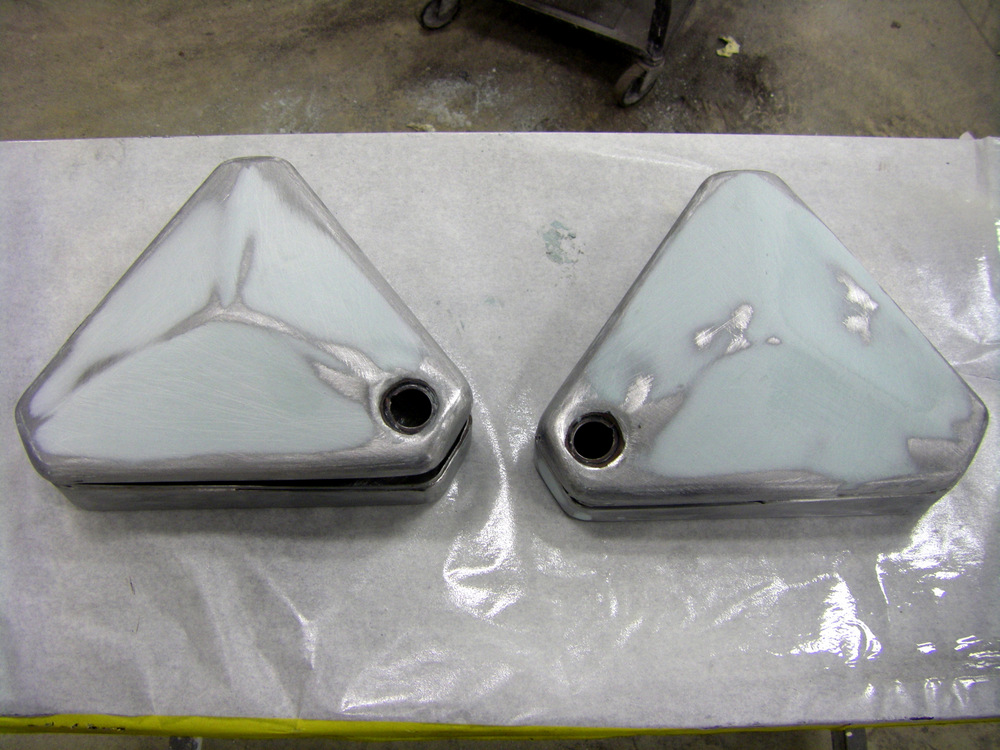
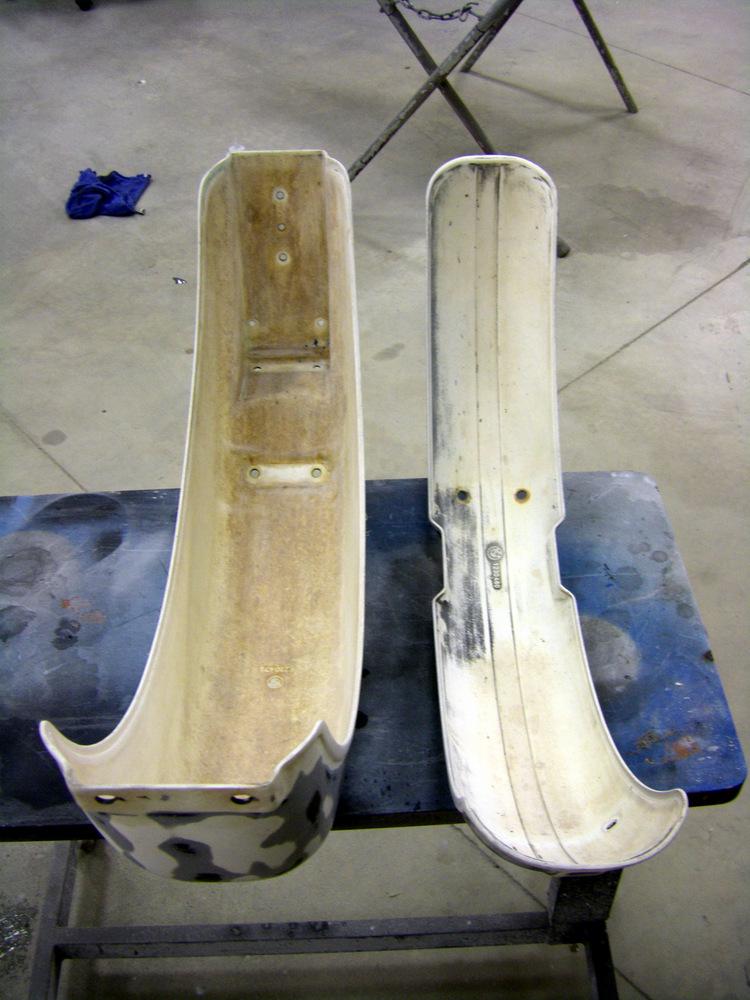
The Guzzi tank is beautiful, the side covers..not so much.

2 by Larry Pearson, on Flickr

3 by Larry Pearson, on Flickr

4 by Larry Pearson, on Flickr

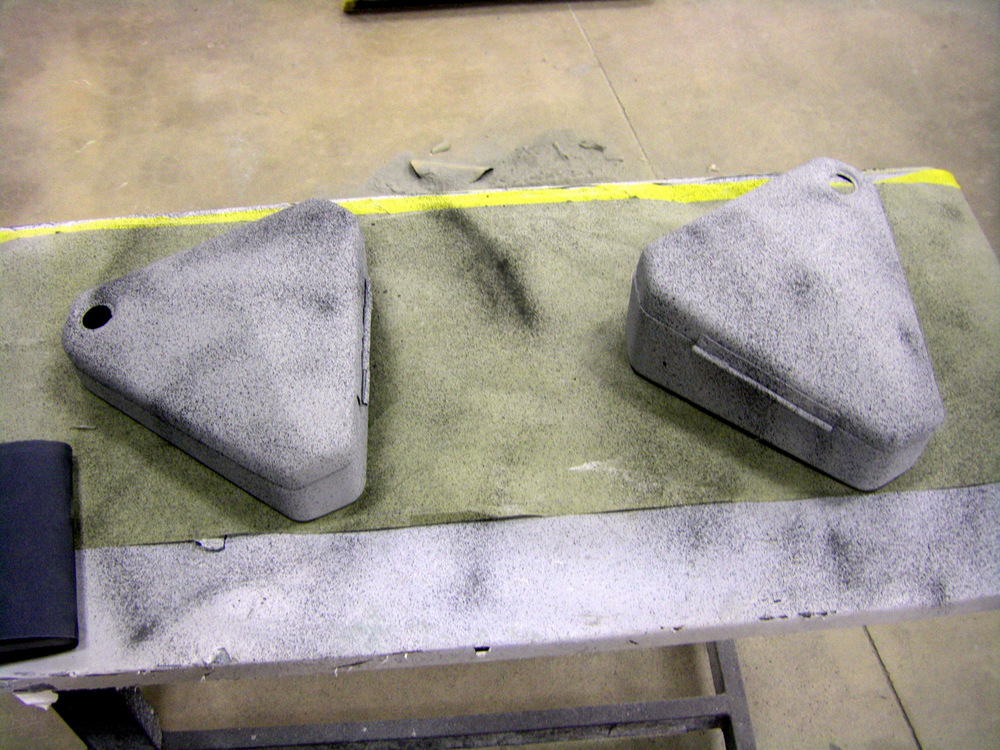
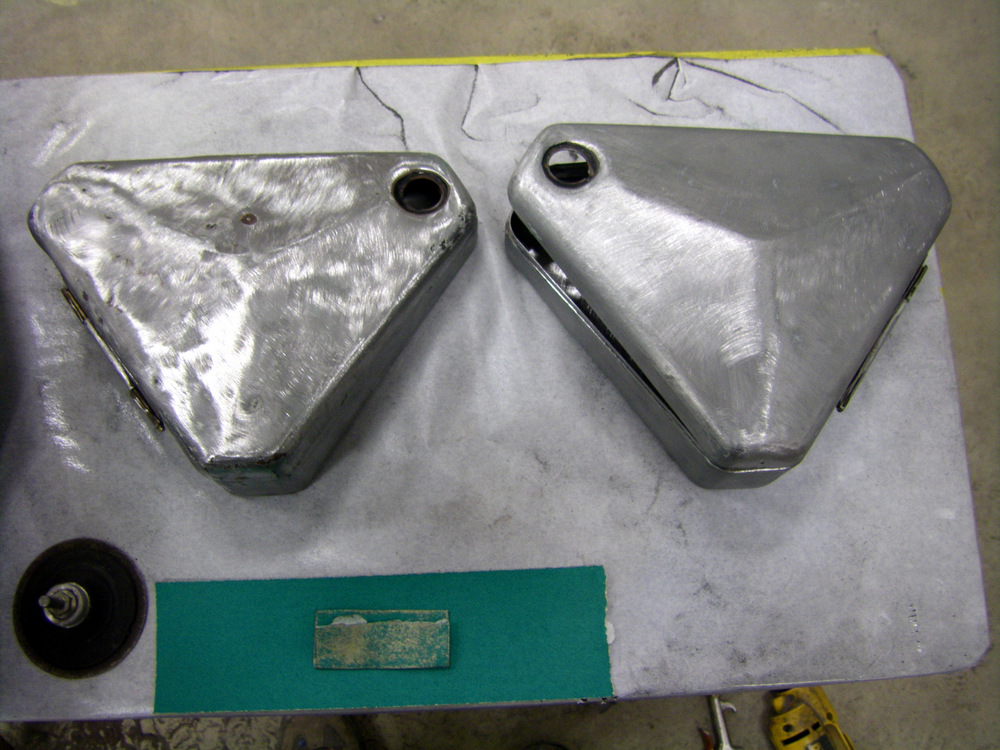
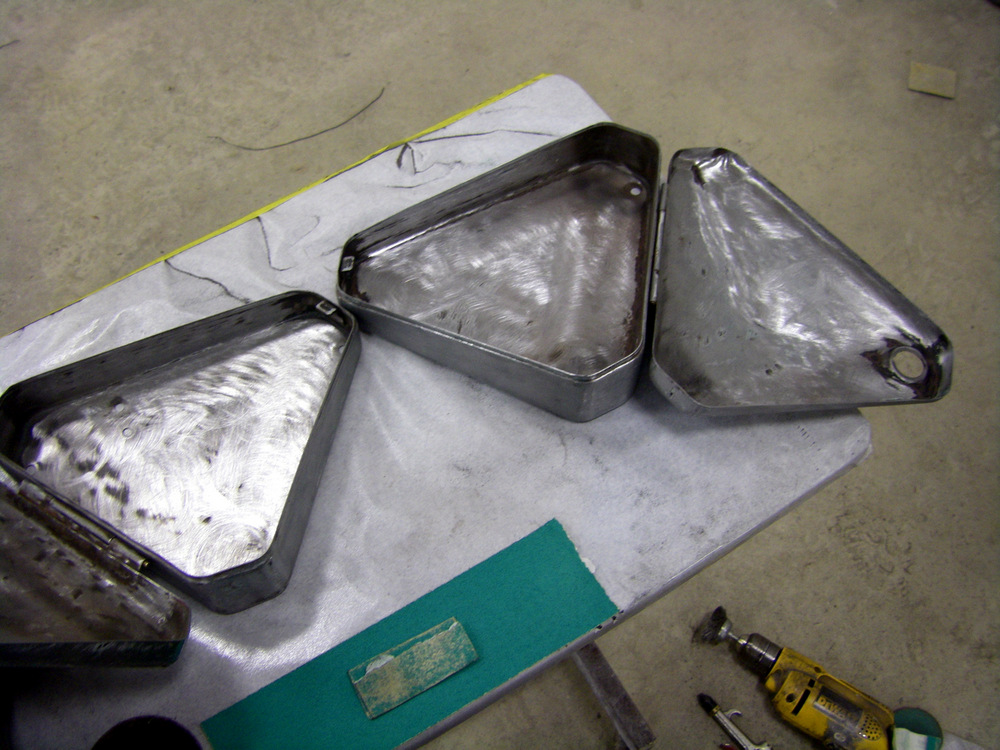
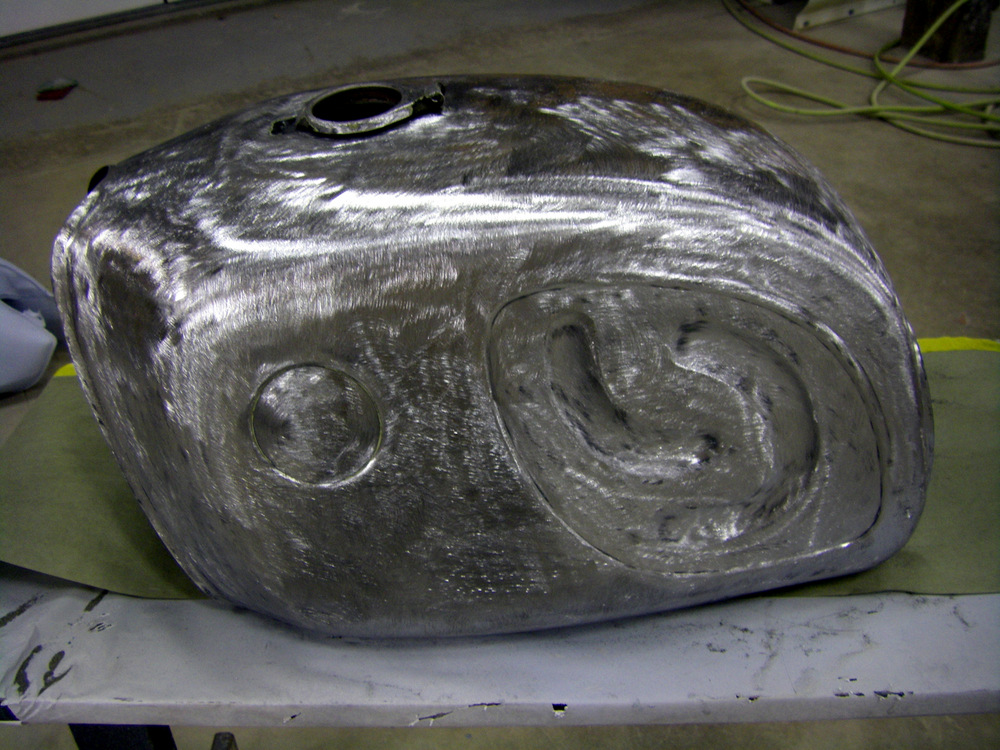
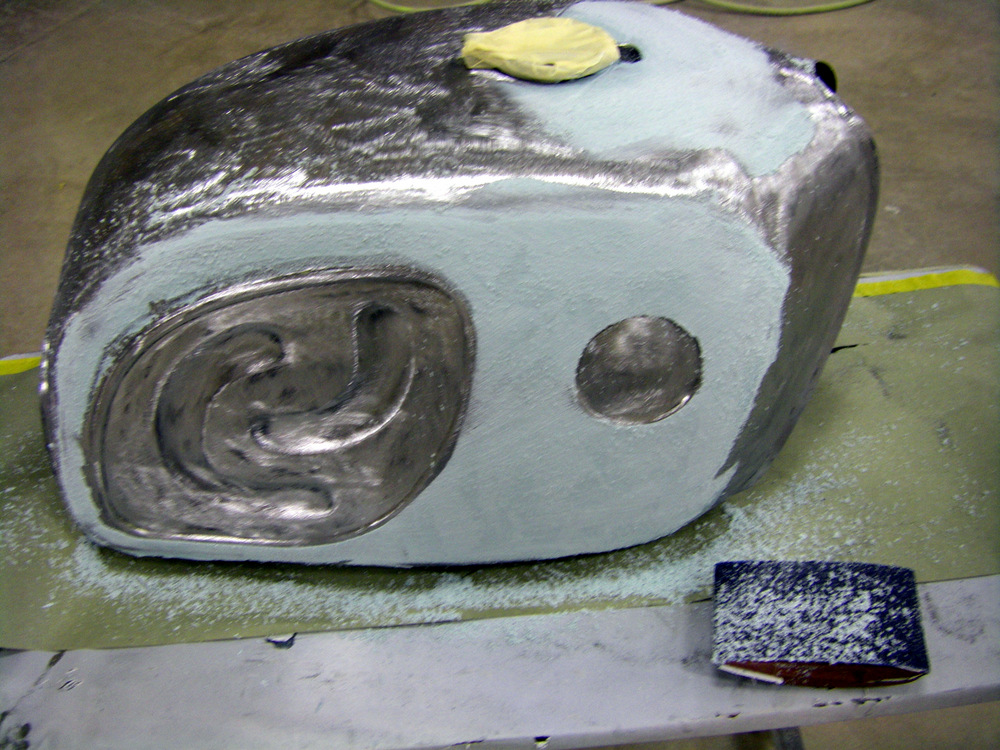
Every ounce of paint has to go. Took me 3 hrs. to grind and sand it all off. Actual "tins" with doors, hinges, lips, recesses..all has to go. This is where having a sand blast cabinet would have almost paid for itself..what a pain.

5 by Larry Pearson, on Flickr

7 by Larry Pearson, on Flickr

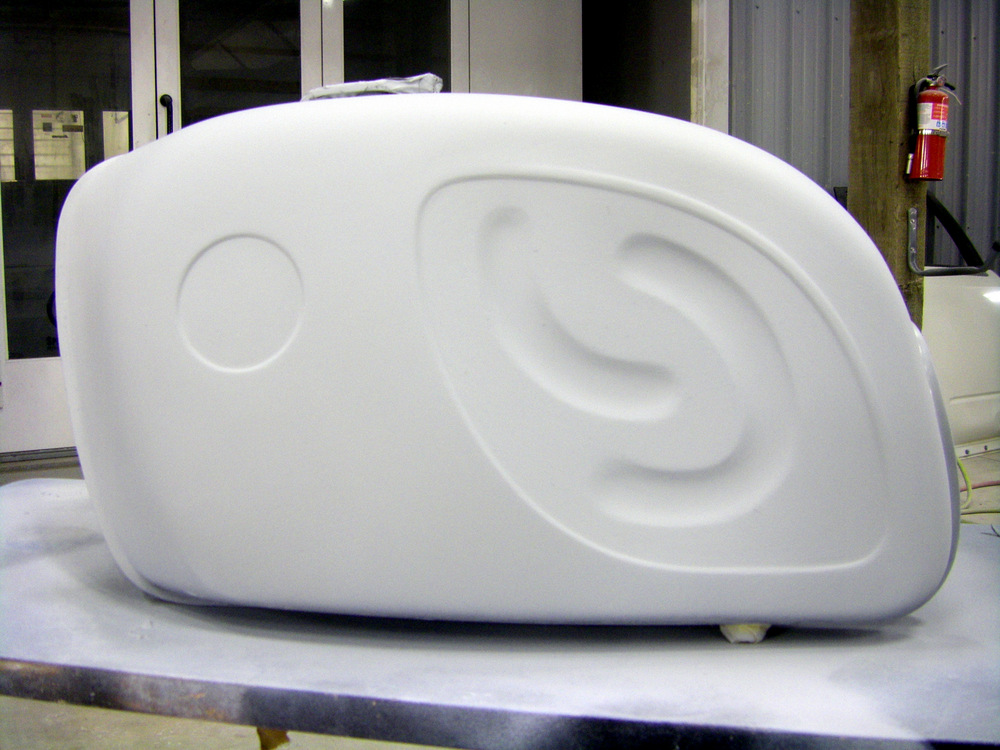
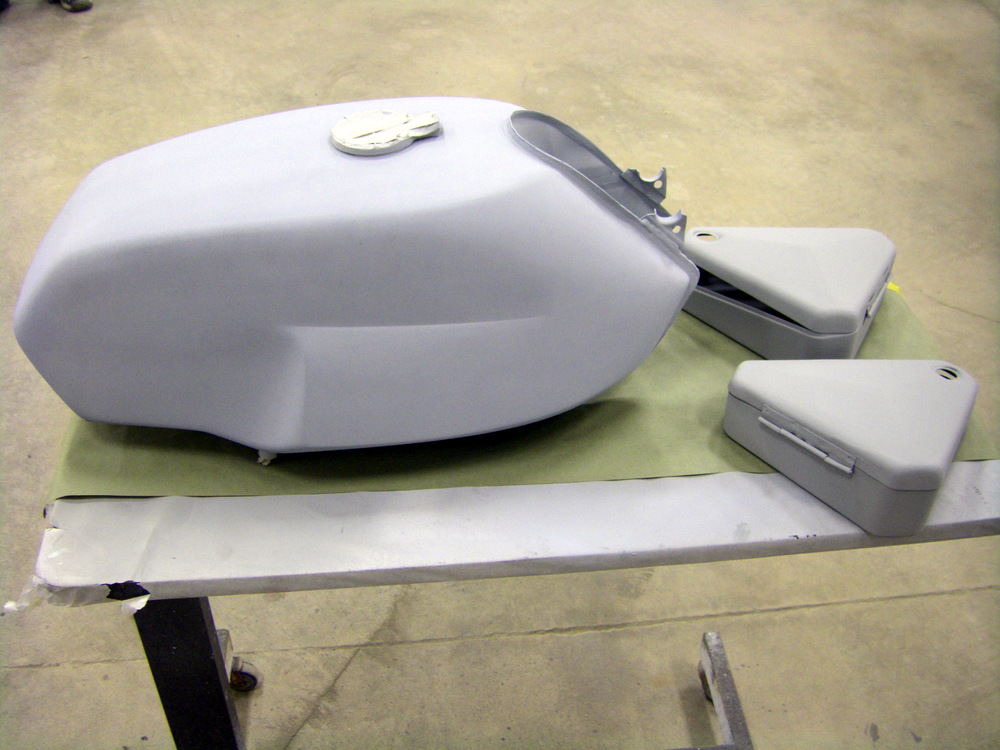
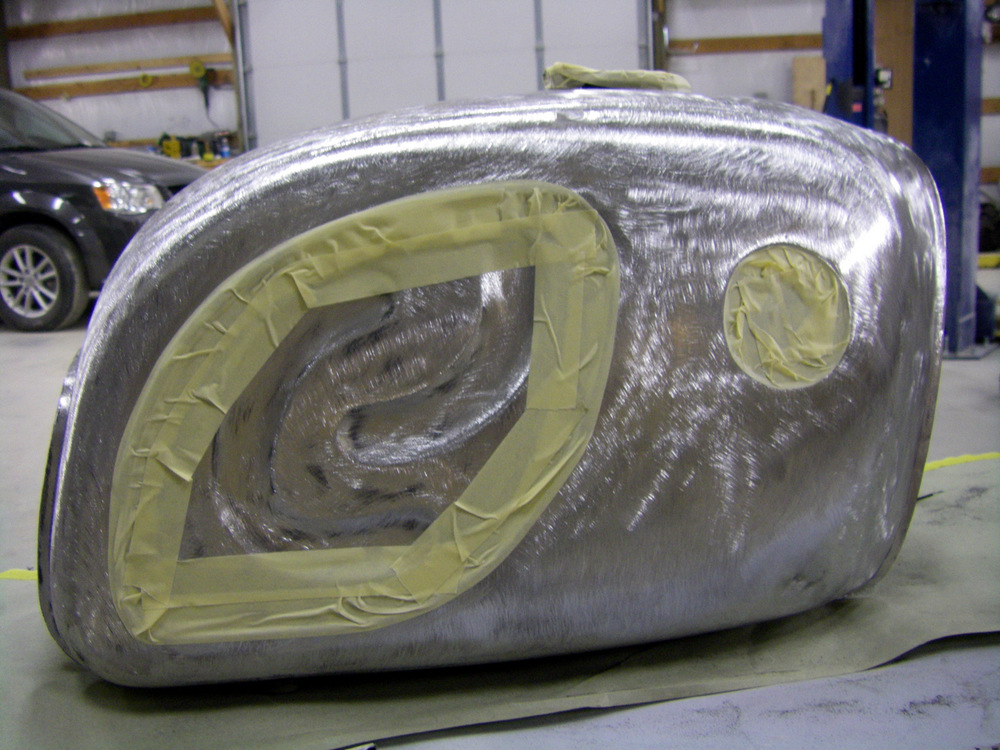
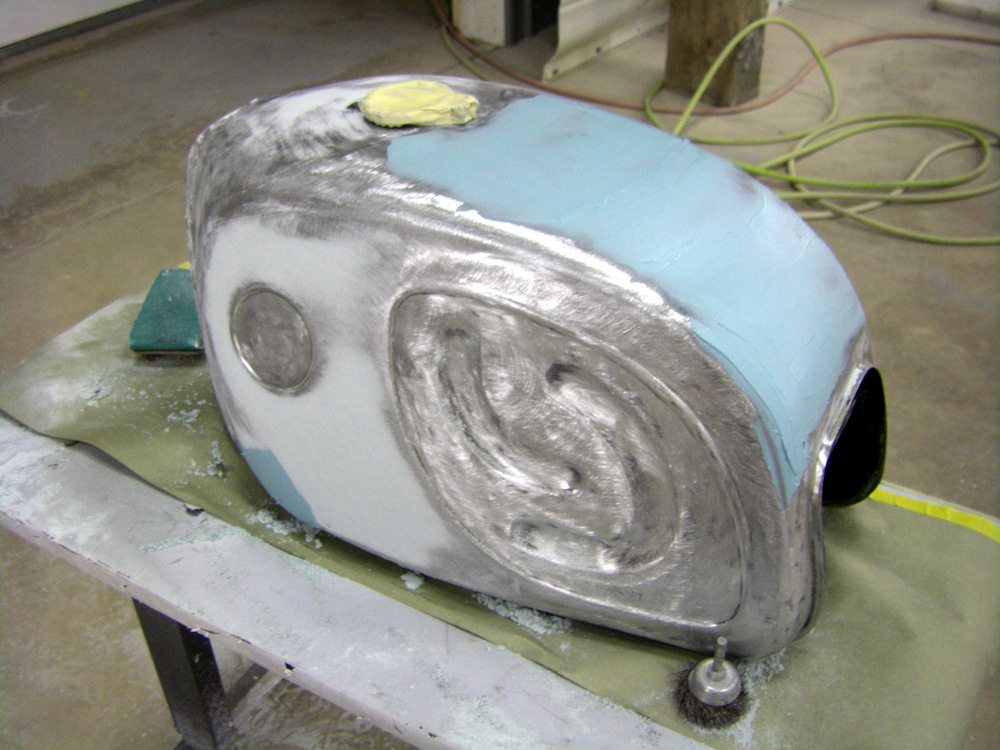
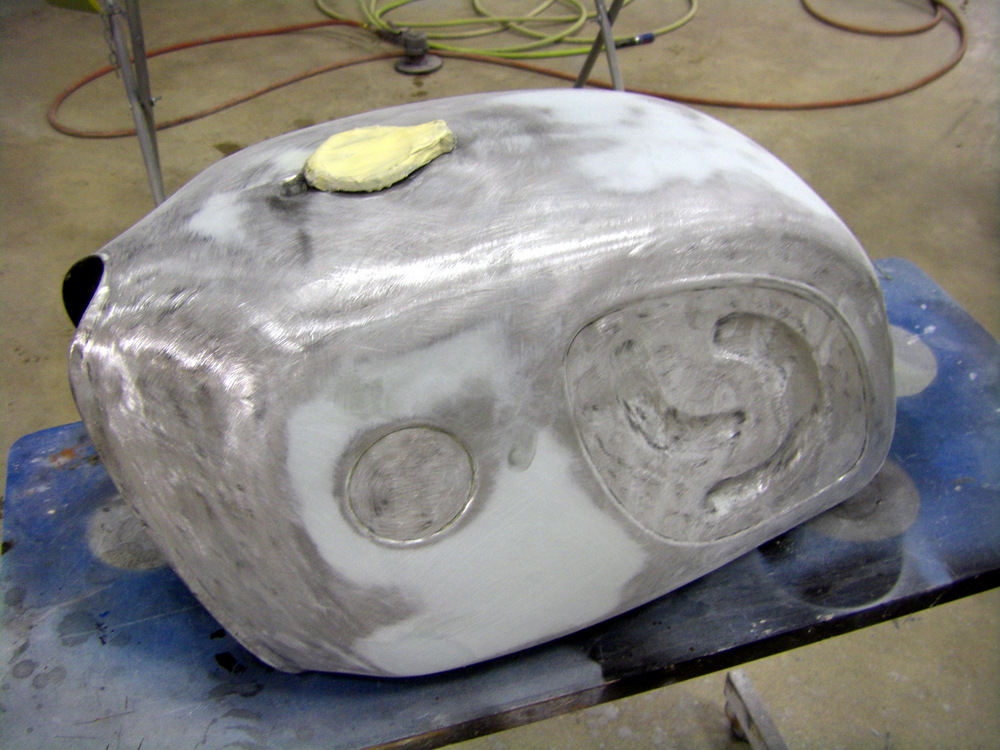
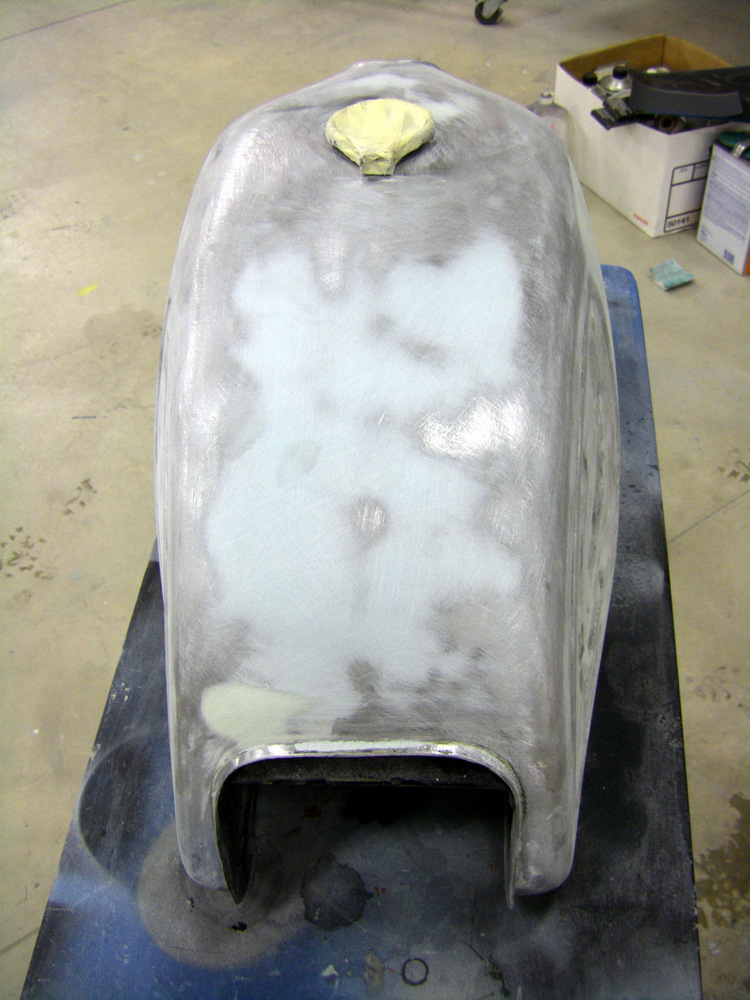
Had to give the tank some tooth before the epoxy primer. But zero dents..ahhh.

8 by Larry Pearson, on Flickr

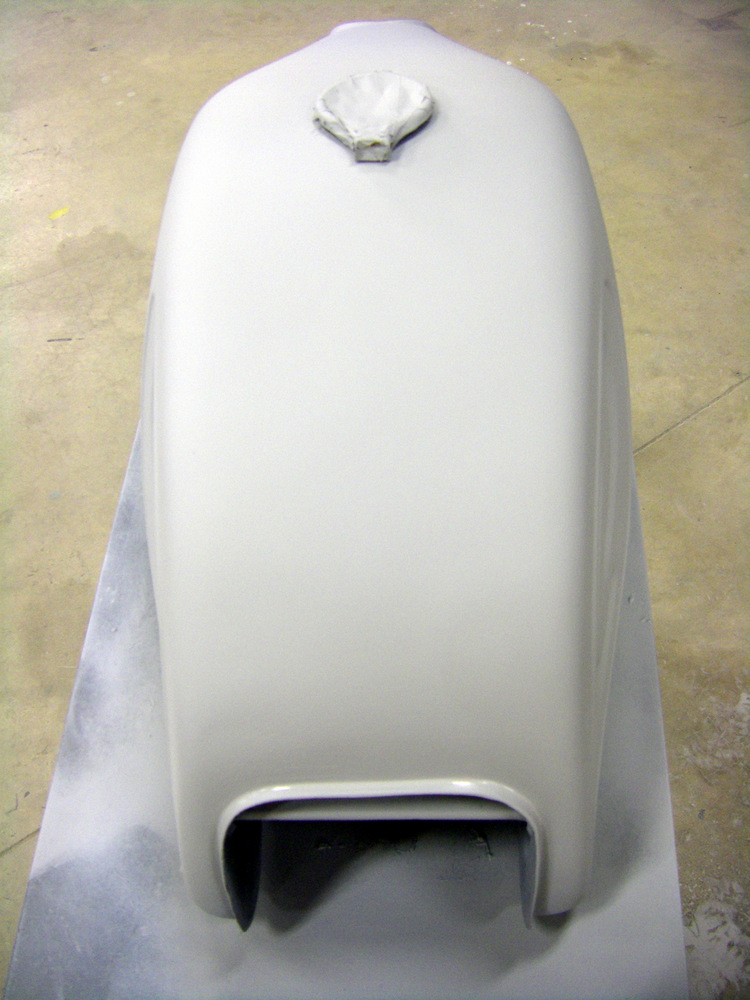
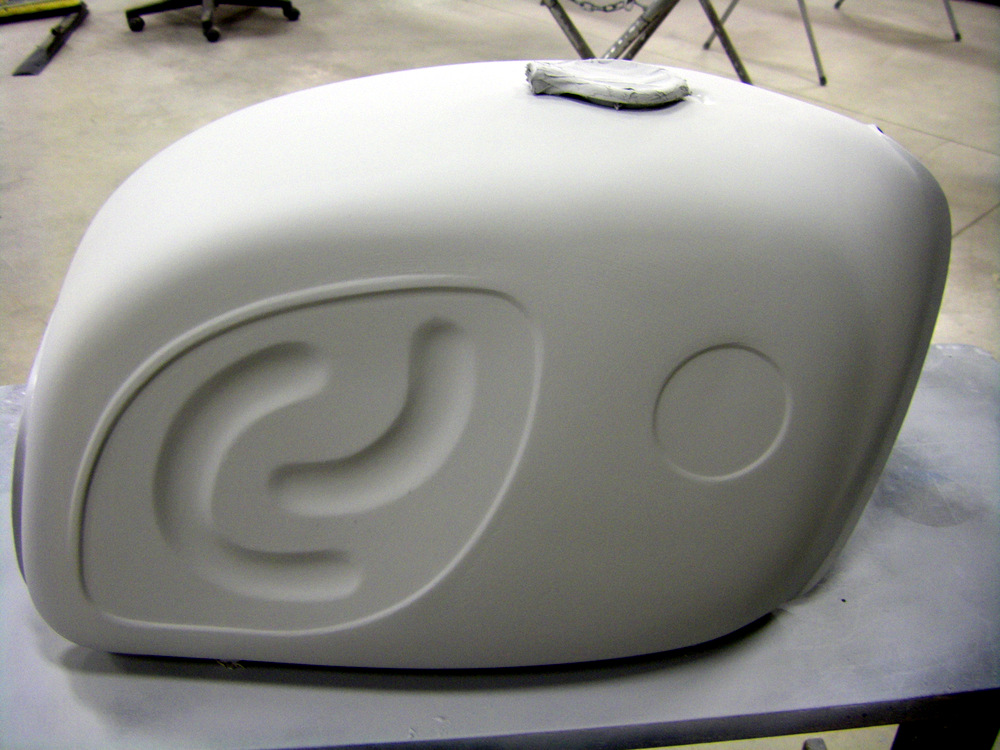
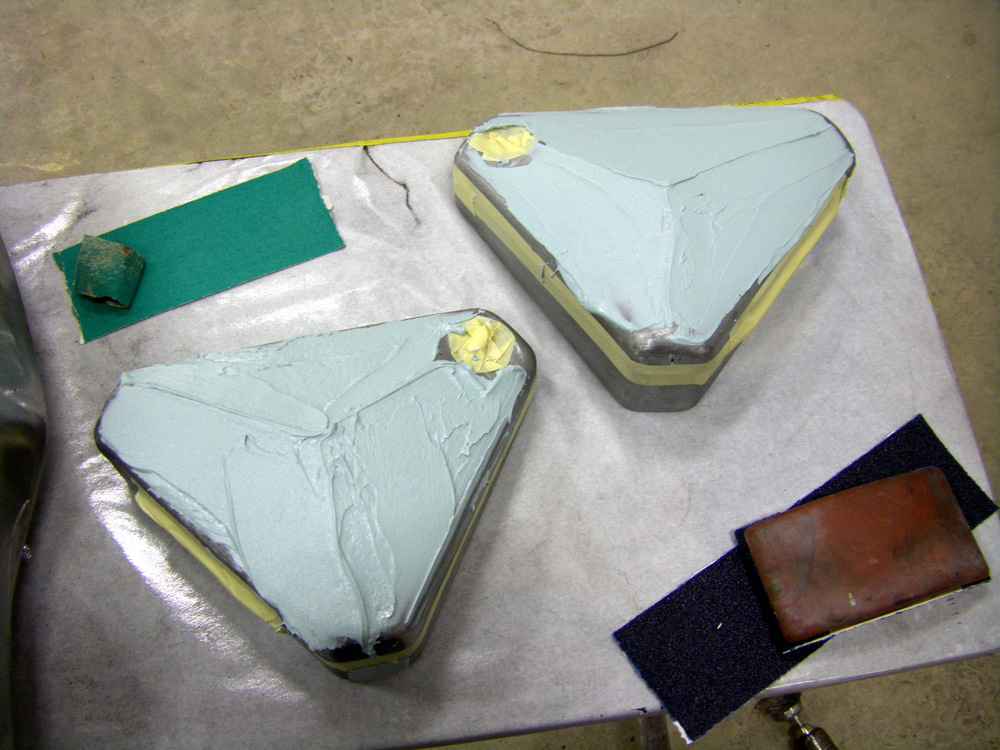
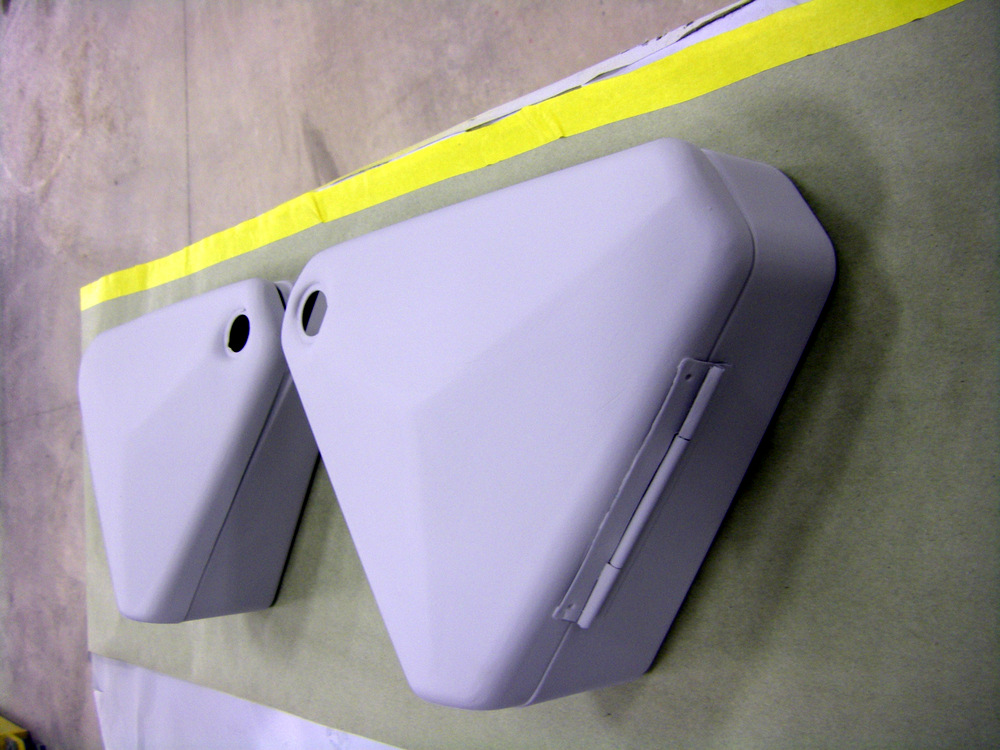
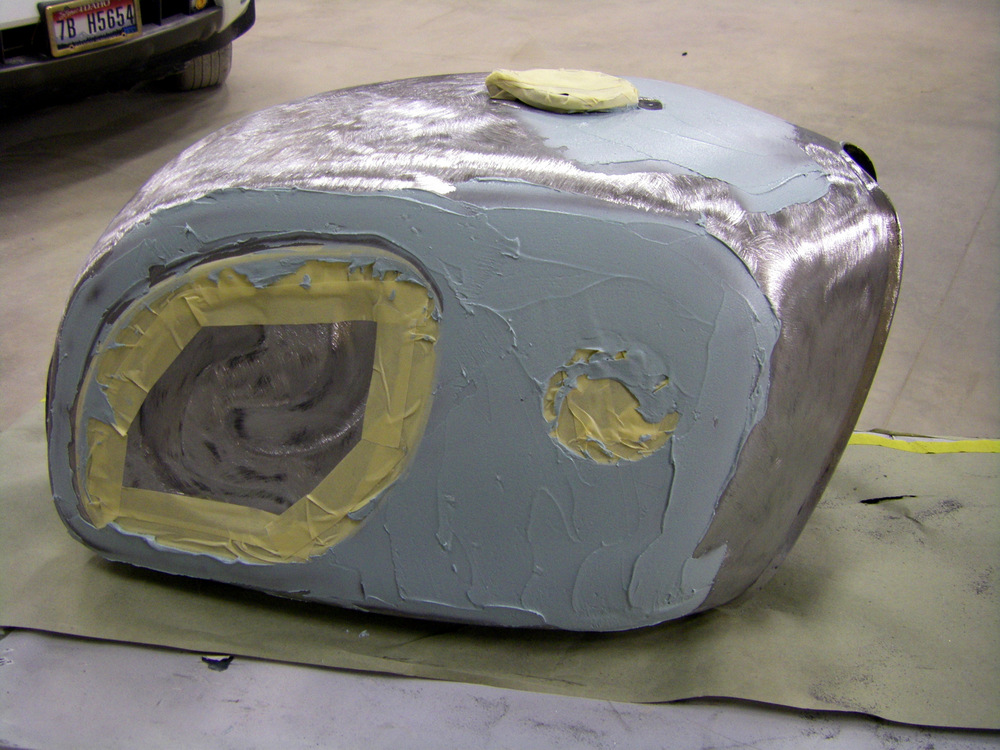
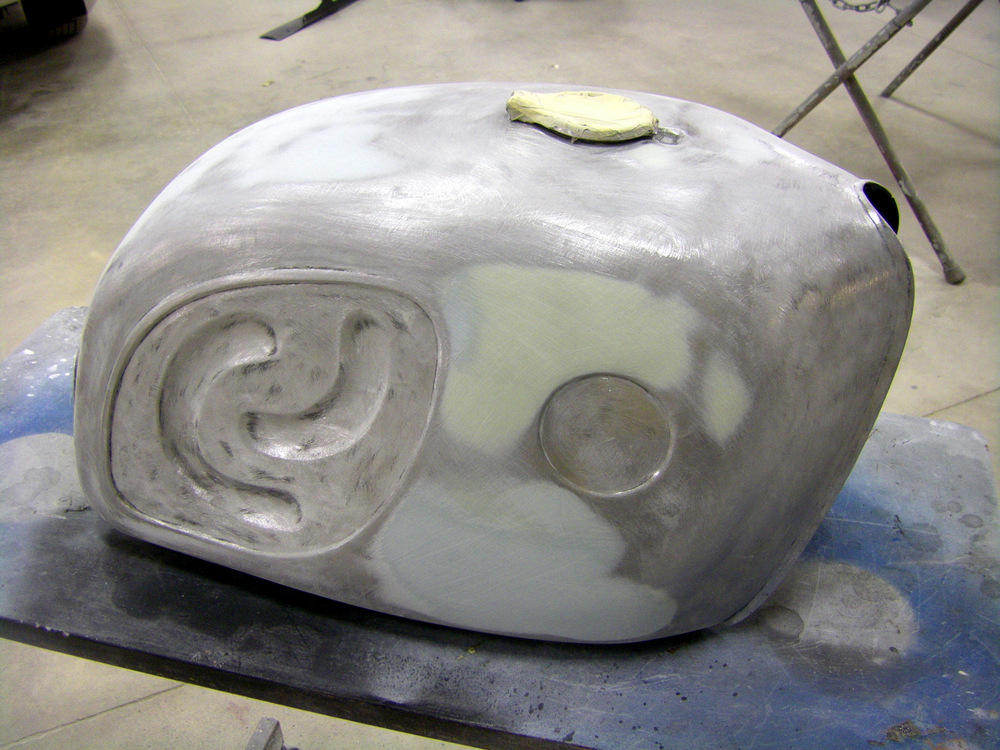
A little mud-slingin' to get the stock "Y" shape body lines again.

10 by Larry Pearson, on Flickr

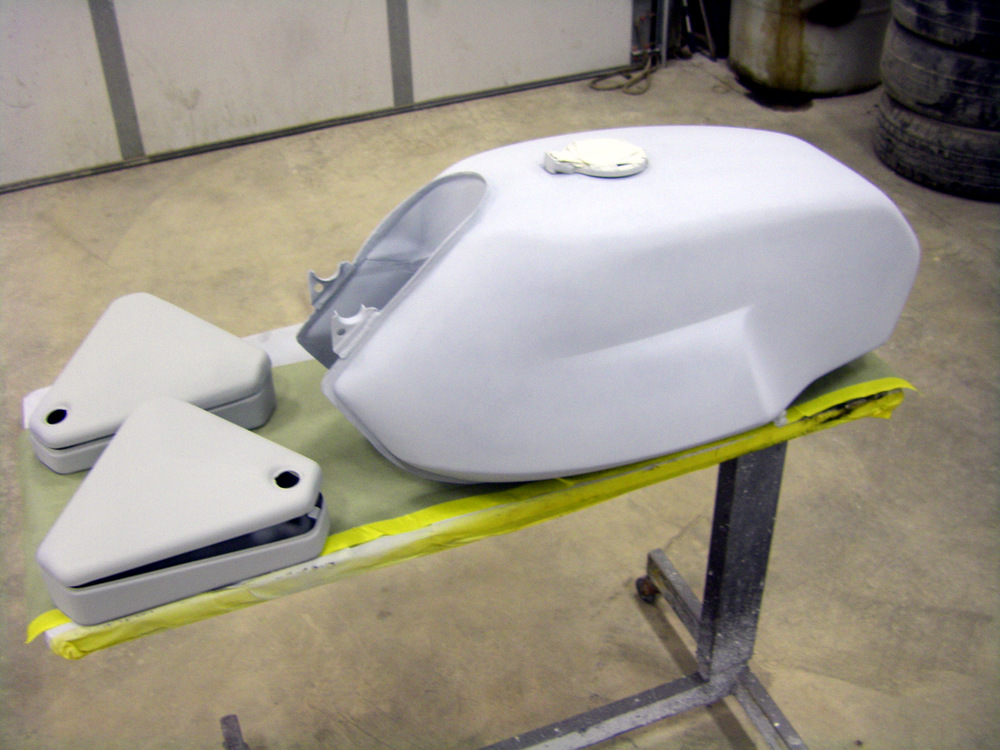
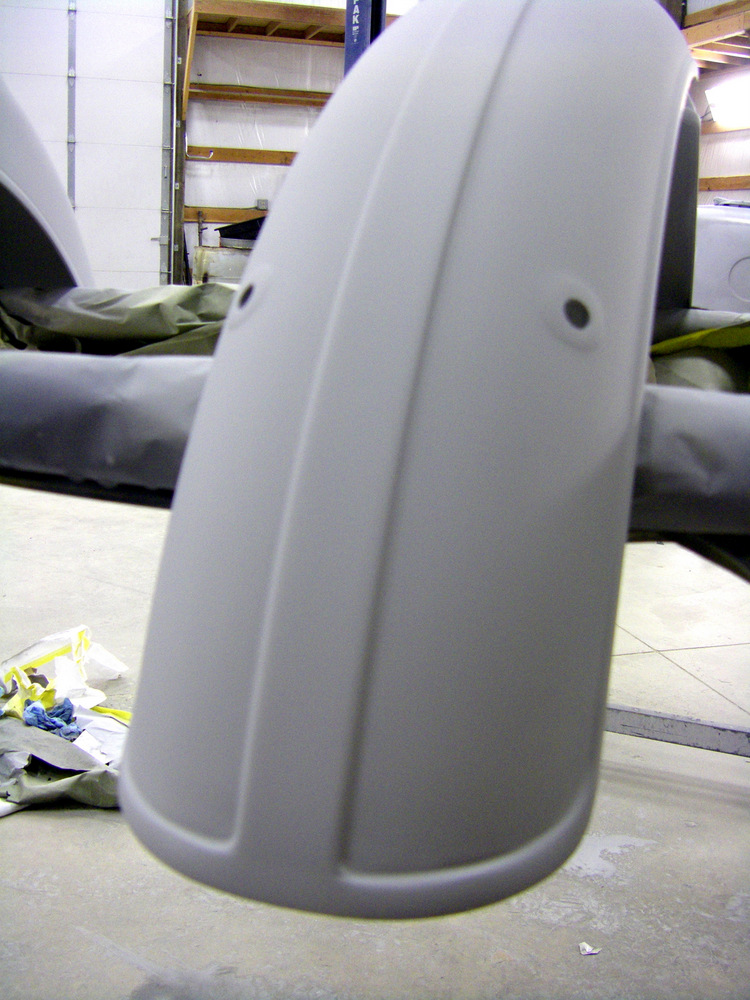
Looking much better.

12 by Larry Pearson, on Flickr
 
Last edited:
Some primer..

13 by Larry Pearson, on Flickr

Not bad for 5 hrs. of work. Next week block sanding and priming again.

14 by Larry Pearson, on Flickr

15 by Larry Pearson, on Flickr

This bike is going to be that really cool stock green they came in. A 2013 Kia Soul "Alien Green" is a very close match. I'll use that. $165 a pint..ouch. The Bimmer is going back to black with factory-style pin stripes. Wish I could hand-paint them like they did at the factory, but they'll look fine sprayed.
 
Metal body parts, what a novel concept.

Last year i visited a vintage BWM restorer near me and the pin-striping and paintwork was spectacular.
I wouldn't imagine the "smoke" on the R90S models can be easy?
 
Subscribed and trying to act like a sponge. I bet that Guzzi will be a real head turner.

Thanks for sharing with us.
 
Metal body parts, what a novel concept.

Last year i visited a vintage BWM restorer near me and the pin-striping and paintwork was spectacular.
I wouldn't imagine the "smoke" on the R90S models can be easy?[/Qcan

I painted an R90S once. It was a dark silver with the fogged black effects. It was scary because 1 mistake meant starting over. It looked so cool when it was done. I was really proud of it. Wish I would've taken pics, but it was a while back.
 
Tuning in for sure Larry, I like seeing your work in action. That's pretty funky the Guzzi side covers act as boxes as well, very handy!
 
Just for fun..imagine owning a 1983 Honda CX650 Turbo since new, and keeping it in pristine condition for 35 years..35,000 miles w/o a scratch. Go to take a ride on it, put it on the side stand on your course gravel driveway..walk away to open the gate, the side stand sinks into the gravel..and, well...

TurboThen by Larry Pearson, on Flickr

Exactly what happened to my best friend. Ouch. What a pi$$er. He's a certified Honda Tech and for years has gotten all my bikes (including the S) running for me. It was my pleasure to help him out. Maybe the most expensive pint of paint ever. The blue cost $300, the pearl white 2-stage was another $300. The red stripe (part of a $70 kit) is a factory decal..why Honda did it that way is a mystery. But it turned out beautiful. Whew. Such a cool bike, and it's worth a ton of money these days.

TurboNow by Larry Pearson, on Flickr
 
Last edited:
Wow Larry that would be a nightmare for any owner! Top job as always though!

That paint's expensive alright! I thought my PPG 13L Bright Silver Metallic wasn't cheap at $120 for 500mL's (a pint) but that ain't nothing...
 
Thanks, Pete. I continue to be blown away how much quality materials cost. The thing about this fairing was, it needed to blend into the stock factory finish of the rest of the bike..so no cut and buff. I was able to spray the clear in a way that still had a bit of orange peel to it and still be smooth. That's where having access to a downdraft booth (no dirt) and then a 150' baking process helped a lot. Along with matching the colors, it really has an "untouched" look to it, and that's what we both wanted.
 
All I can say is you did good Larry, that certainly does blend in, top job as always :)

A downdraft booth would be fantastic, but a bit beyond my abilities to do in my shed :D Mind you a fan setup with more CFM would be a 100% improvement over how it is at present.
 
I know what you mean, Pete. For years I have used a modified garage with a window fan. It wasn't until the last couple of years did I have a really nice heater. I'm so grateful to have this booth and this shop at my disposal. They laughed at me using an electric drill with a grinder pad. Jeez, Larry..use these air tools, dude. ;)
 
Larry..by the above post am I to make the leap and "assume" your back in the painting game regularly?? If so I would be happy to refer people to you again.
 
Thanks, Chuck. Yes and no. I still do an afternoon radio show 5 days a week. (95.3 KPND if anyone would like to listen to it streamed) I'm just doing very select work for friends and maybe an occasional project for people who can be very patient because I only work at the shop on Saturdays. I have 3 more projects lined up to do once these 2 are wrapped up, and that'll keep me busy for a couple of months. I just missed doing it more than anything else. Fun to get my hands dirty again.
 
Good stuff Larry, getting back to doing things you enjoy makes a huge difference to life. Even just one day a week can be a huge boost to morale :D
 
Yeah, Pete. I do enjoy doing this, it's very therapeutic..even though my body is feeling it a bit more these days. I go home pretty sore, but satisfied. Got quite a bit done in the 7 hrs. I was at the shop today.

This BMW tank had an ugly dent right above the emblem recess, going into it even. A stud gun pulled it right out. Look how nice that looks. Just a tiny bit low, and that's just what you want for a skim coat of plastic filler to make it perfect.

2b by Larry Pearson, on Flickr

Need to rough it up for body work. I'm always amazed that after many more steps, it will eventually be sanded with 2,000 grit and polished.

3b by Larry Pearson, on Flickr

Tape the recesses.

4b by Larry Pearson, on Flickr

Spread the plastic filler

5b by Larry Pearson, on Flickr

Pull the tape before it hardens..nothing worse then trying to sand filler out of those places.

6b by Larry Pearson, on Flickr

A trick I only learned about 10 yrs. ago was to start sanding the filler just as it's kicking off. You can easily sculpt the filler this way..and yes..it totally clogs the sand paper..but just have a wire brush handy to keep it cleaned off. SO much easier then waiting till it's hardened.

7b by Larry Pearson, on Flickr

Even though the top felt alright, just a skim coat to make sure.

8b by Larry Pearson, on Flickr

9b by Larry Pearson, on Flickr

10b by Larry Pearson, on Flickr

Glad I did the top, it did have a few low spots that filled with just skim coat. It's going black so it has to be perfect.

10bb by Larry Pearson, on Flickr
 
On to the fenders. I always want the bottoms to have a smooth surface to just spray some base coat over. Sand, Larry, sand..

11b by Larry Pearson, on Flickr

I spent several hrs. on the fenders to make sure they were perfect. These plastic fenders can also be sculpted. They'll look like steel when they're done. The lipped edges especially need to be taken down to bare plastic..if not, that'll be the first place the paint flakes off from.

12b by Larry Pearson, on Flickr

All the time spent sanding, though brutal, pays off. Look how crisp those lines are now. Love it.

13b by Larry Pearson, on Flickr

Hard to tell in this pic, but the decal looks a bit crooked to me..or is it straight when it's mounted on the bike and the cover tilted a bit..hmmm..:confused: I'll make the decals parallel to the body lines and hope that's correct.

14b by Larry Pearson, on Flickr

I also block sanded the Guzzi side covers and primed them again. The tank doesn't need anything more then another round of primer and a block before color begins.

15b by Larry Pearson, on Flickr

Speaking of tank primer..the BMW tank came out great. I'm totally happy with the results.

16b by Larry Pearson, on Flickr

17b by Larry Pearson, on Flickr

18b by Larry Pearson, on Flickr

Side covers are looking better, too.

19b by Larry Pearson, on Flickr

Everything nestled away waiting for next week's rounds of block sanding and primer.
 
Last edited:
Back
Top