Congratulations. Hopefully you'll be riding in a shorter time than it looks like I will.
-
Required reading for all forum users!!!
Welcome!
Register to access the full functionality of the GSResources forum. Until you register and activate your account you will not have full forum access, nor will you be able to post or reply to messages.A note to new registrants...
All new forum registrations must be activated via email before you have full access to the forum.A Special Note about Email accounts!
DO NOT SIGN UP USING hotmail, outlook, gmx, sbcglobal, att, bellsouth or email.com. They delete our forum signup emails.A note to old forum members...
I receive numerous requests from people who can no longer log in because their accounts were deleted. As mentioned in the forum FAQ, user accounts are deleted if you haven't logged in for the past 6 months. If you can't log in, then create a new forum account. If you don't get an error message, then check your email account for an activation message. If you get a message stating that the email address is already in use, then your account still exists so follow the instructions in the forum FAQ for resetting your password.Have you forgotten your password or have a new email address? Then read the forum FAQ for details on how to reset it.
Any email requests for "can't log in anymore" problems or "lost my password" problems will be deleted. Read the forum FAQ and follow the instructions there - that's what we have one for...
-
Returning Visitors
If you are a returning visitor who never received your confirmation email, then odds are your email provider is blockinig emails from our server. The only thing that can be done to get around this is you will have to try creating another forum account using an email address from another domain.
If you are a returning visitor to the forum and can't log in using your old forum name and password but used to be able to then chances are your account is deleted. Purges of the databases are done regularly. You will have to create a new forum account and you should be all set.
You are using an out of date browser. It may not display this or other websites correctly.
You should upgrade or use an alternative browser.
You should upgrade or use an alternative browser.
M
Motocrossx23
Guest
Looks very nice!
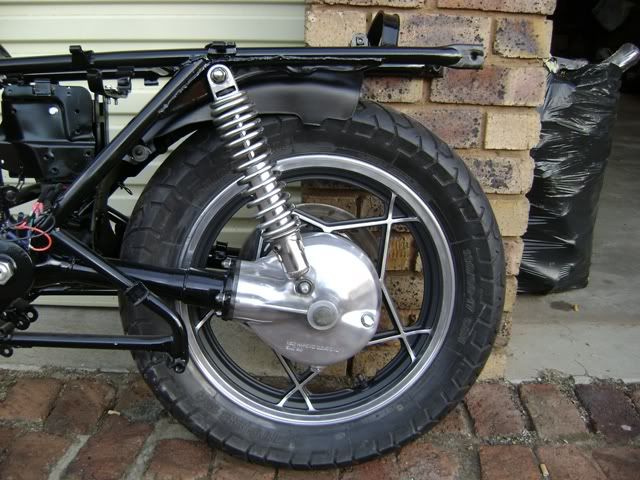
And of course Then I just had to, didn't I, seeing I got my new swingarm bearings in and the swing arm mounted yesterday, and I have been cleaning up my rear shocks,
Stan, I have no doubt after seeing the quality of your work so far, your painting of Jennifers new clothes will look as equally good.
Your striving towards perfection is making Her look gorgeous! and I, of all people, am very envious of your work. YOU Sir have raised the bar...
Great start Stan..Will be checking in from time to time. All my GSs are done so its moving on to the 76 Hondamatic.
F
Flyboy
Guest
many thanks for the kind words guys, I just try, thats all, without all of you to inspire me and push me on, well....
Although I must confess, I did forget a spacer, back wheel has to come off again but its ok, because the axle, spacers and the axle nut need to go in for plating anyway, you notice they are not shiny yet. Will do that this week.
Anyway, i was busy updating when the forum went down for maintenance, so without further muttering....
Ok, so like I said, been doing plenty prep work to get some paint down, sanding has been with 320 grit, some would say that I should have used 120 grit paper to speed things up, well I tried 120 at one stage, and let me tell you, the aggressiveness of it scared the crap out of me and I abandoned that idea pretty smartly and went back to 320 grit, I guess it takes a bit longer, but I feel better with it, call me a ninny.
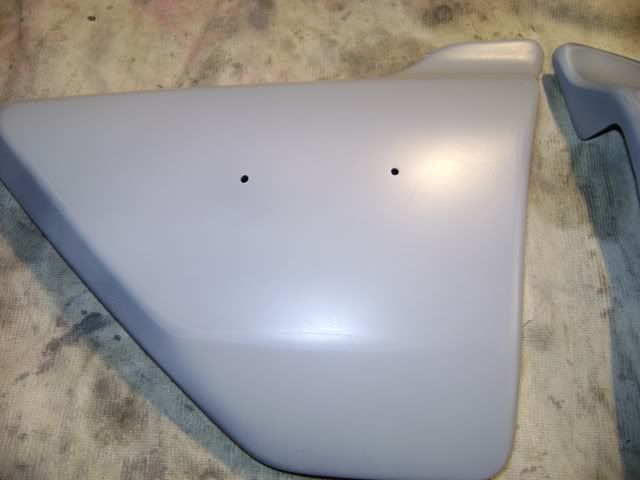
Anyway, side covers all done, ready for primer, or so I thought.....
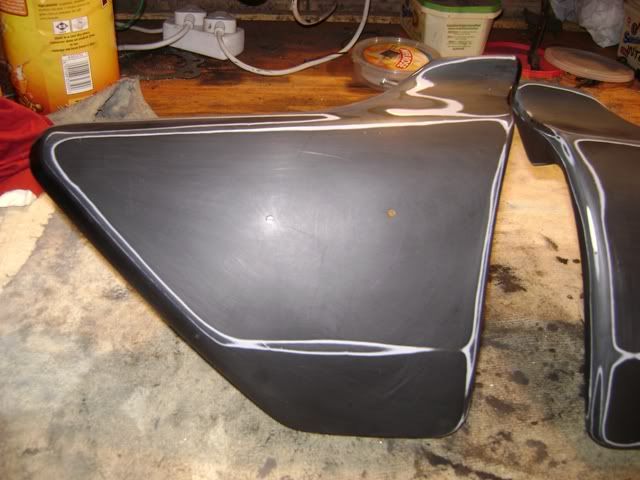
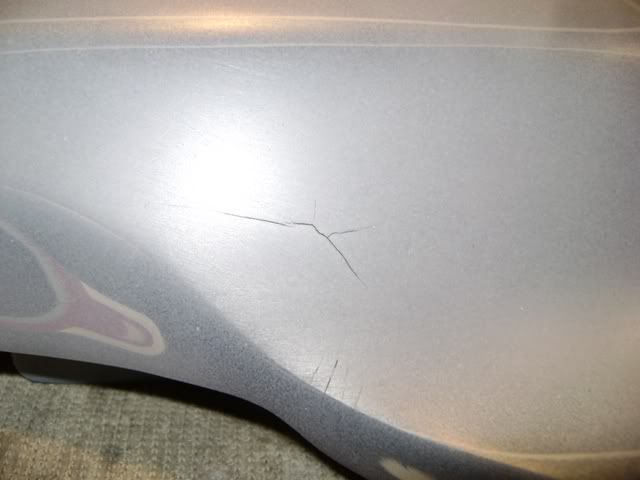
Laid down some primer and so far so good, or so it seemed....
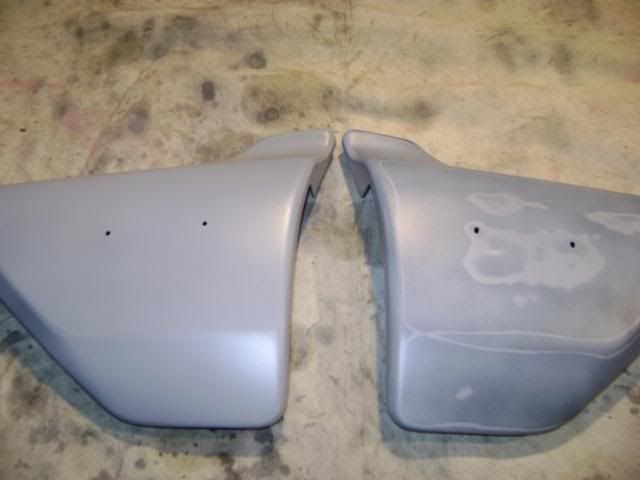
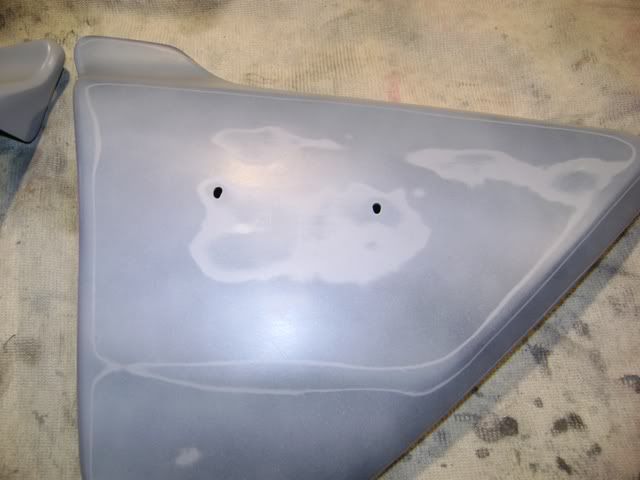
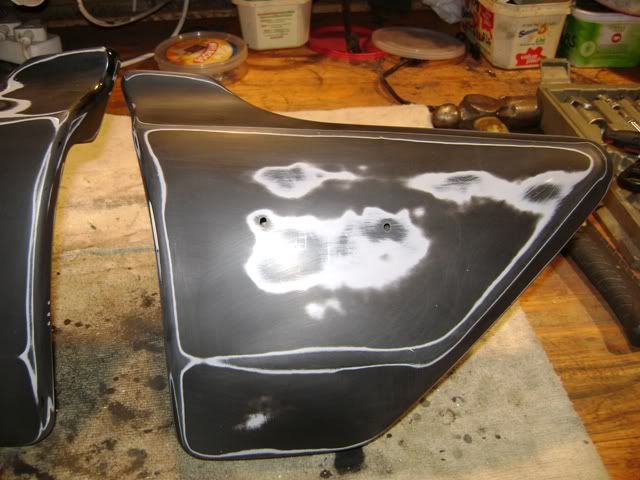
as soon as it dried, upon inspection straight away it was clear that all was not well.
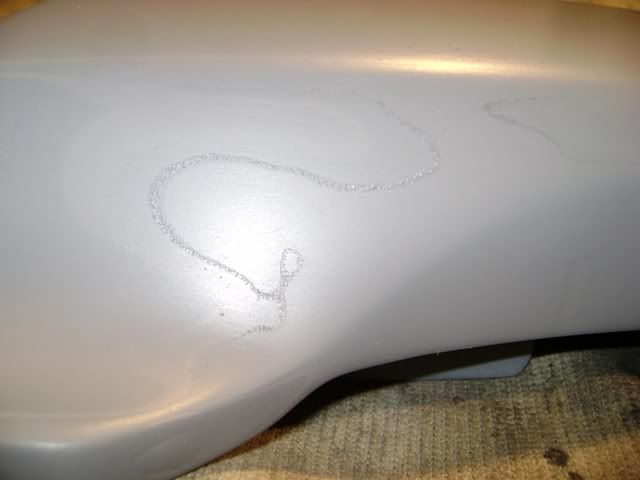
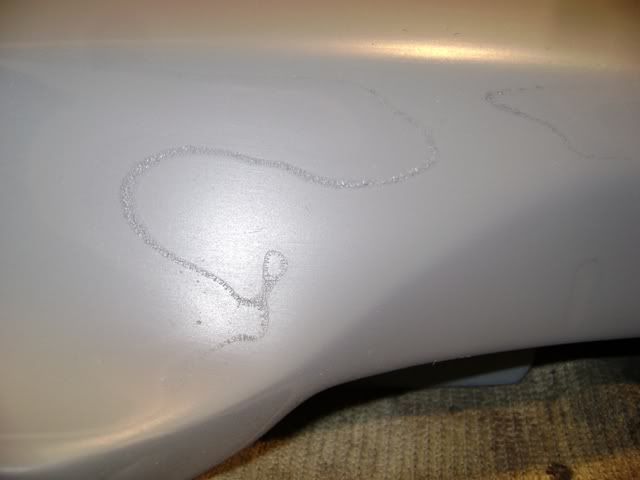
This one showed up after only one coat
Although I must confess, I did forget a spacer, back wheel has to come off again but its ok, because the axle, spacers and the axle nut need to go in for plating anyway, you notice they are not shiny yet. Will do that this week.
Anyway, i was busy updating when the forum went down for maintenance, so without further muttering....
Ok, so like I said, been doing plenty prep work to get some paint down, sanding has been with 320 grit, some would say that I should have used 120 grit paper to speed things up, well I tried 120 at one stage, and let me tell you, the aggressiveness of it scared the crap out of me and I abandoned that idea pretty smartly and went back to 320 grit, I guess it takes a bit longer, but I feel better with it, call me a ninny.
Anyway, side covers all done, ready for primer, or so I thought.....
Laid down some primer and so far so good, or so it seemed....
as soon as it dried, upon inspection straight away it was clear that all was not well.
This one showed up after only one coat
F
Flyboy
Guest
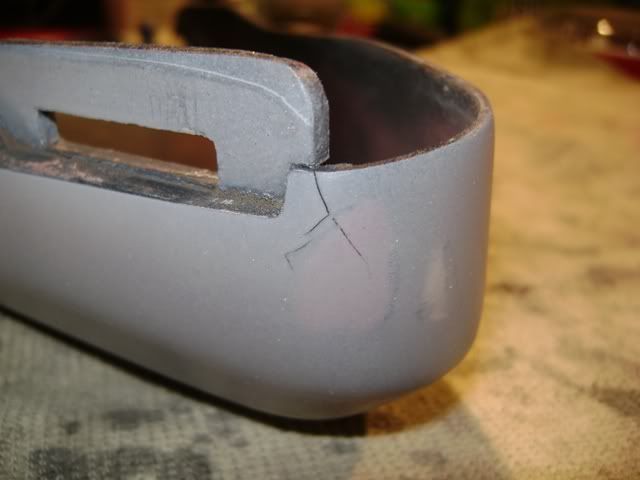
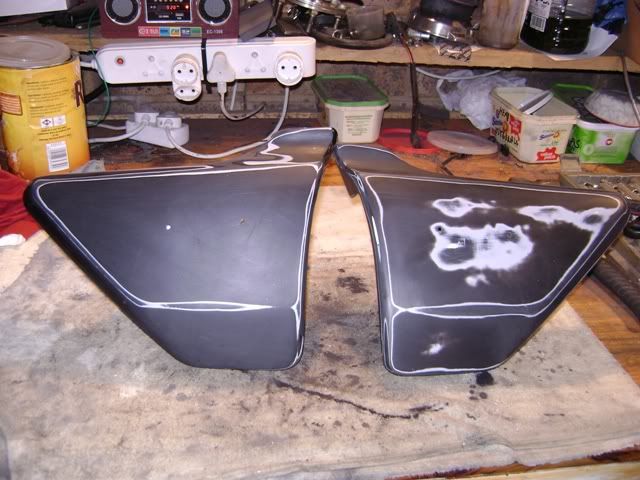
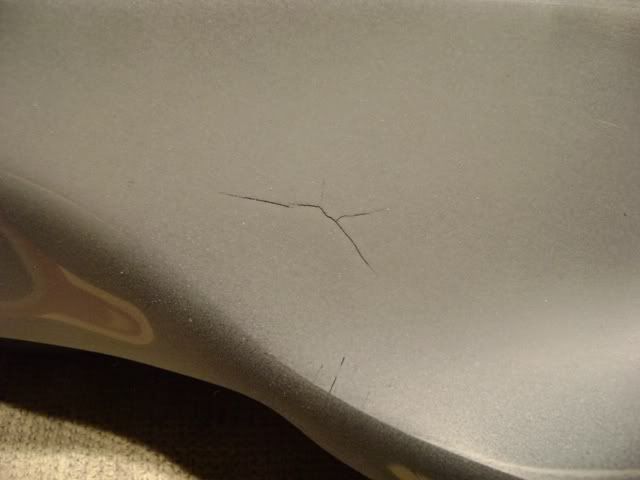
So fresh, clean water was put into the bucket, the 320 grit and sanding block were broken out and more sanding began.
thi process repeated it self six times through the course of today, as it stands now, I have one minor imperfection on each cover to sand.....again, but hopfully that will be the last time and the nest coat of primer will be fine.
It started raining and I ran out of daylight, so I called it quits.
Pity though the weather has been perfect all weekend for spraying, 32-33 degrees C very low humidity due to our altitude, but obviously when the thunderstorm came up, the humidity goes off the scale.
Hopefully have some pics of the colour on next weekend.
F
Flyboy
Guest
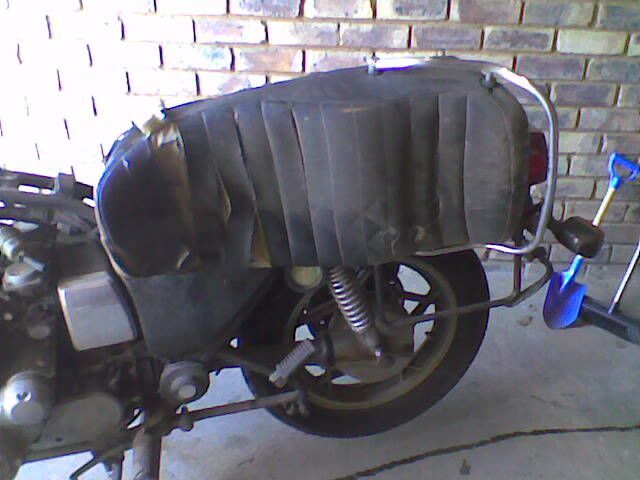
Oh yes, and I scored this for $50 on fleabay
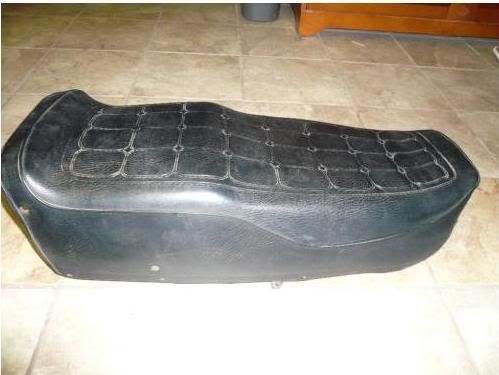
To replace this
It is on its way to my very good and kind friend in Michigan as we speak.
To replace this
It is on its way to my very good and kind friend in Michigan as we speak.
F
Flyboy
Guest
etcheberri said;
You know, although you are busy and getting things done, it really does not feel like you are making any headway untill you start bolting stuff back together, but I guess that is the name of the game.
Pete said;
cowboyup 3371 said;
Motocrossx23 said;
Stan, I have no doubt after seeing the quality of your work so far, your painting of Jennifers new clothes will look as equally good.
rustybronco said;
You are too kind, coming from you, that means a lot to me, I have seen your work, and it is always a thing of beauty and inspiration.
You good sir have no reason to be envious of anything I have done, you are far too modest.
If it were not for all your generous and unselfish help and guidance, i would be no where near where I am with this build right now, I have much to thank you for and am deeply indebted to you for all your help, I can only do my best as a sign of appriciation.
Now get all these weddings and things done with so we can see more updates on Penelope, I need more inspiration.
chuck hahn said;
Yes it is, after nearly a year and a half of cleaning and sanding and more cleaning of parts, it feels great to see some progress.very nice job!
i bet it s great to see her on 2 wheels again")
You know, although you are busy and getting things done, it really does not feel like you are making any headway untill you start bolting stuff back together, but I guess that is the name of the game.
Pete said;
Hahahaha, yes indeed, have to sit on her and make the obigatory revving noises, gotta find a set of bars first though, mine are bent from the last humpty dumpty episode, and I want to change the style anyway, have to find a nice set of 650 Katana bars, they are the best and most comfortable bars I have ever had on that bike.Wooohooo!!!! Nice work Stan!!!
Now you gotta put your 'bars on and roll around the garage... vroom vroom!:dancing::clap:
cowboyup 3371 said;
Thanks Scott, but not likely, still got a long way to go, I would guess, at least another year.Congratulations. Hopefully you'll be riding in a shorter time than it looks like I will.
Motocrossx23 said;
Thanks man, appriciate it, hey, I try, its all I can do, you want to see how much head scratching I d at times, people must think I have fleas.Looks very nice!
Stan, I have no doubt after seeing the quality of your work so far, your painting of Jennifers new clothes will look as equally good.
rustybronco said;
Ah, my good friend Dale, what do I say?Your striving towards perfection is making Her look gorgeous! and I, of all people, am very envious of your work. YOU Sir have raised the bar...
You are too kind, coming from you, that means a lot to me, I have seen your work, and it is always a thing of beauty and inspiration.
You good sir have no reason to be envious of anything I have done, you are far too modest.
If it were not for all your generous and unselfish help and guidance, i would be no where near where I am with this build right now, I have much to thank you for and am deeply indebted to you for all your help, I can only do my best as a sign of appriciation.
Now get all these weddings and things done with so we can see more updates on Penelope, I need more inspiration.
chuck hahn said;
Hey, Capt. Hahn, thanks for looking in, and the compliments, I followed your Skunk II build, and was very envious, so now will be looking for the Hondamatic build..... you are going to share it, right???Great start Stan..Will be checking in from time to time. All my GSs are done so its moving on to the 76 Hondamatic.
S
SVSooke
Guest
Got to figure some way other than $ I don't have to get the springs off the 1000's shocks.Good work man.Mine a little way's away from 2 wheels.
F
Flyboy
Guest
Thanks Greg, you should be overtaking me shortly, yes getting the springs off is a right royal pain in the butt, I gave up and just climed into the shocks with Cleen Green and steel wool, you can get it behind the springs and to the canister and everywhere.
I didn't see any use in removing the springs as I was not painting them and they can't be opened and rebuilt.
Took me about an hour on each one, pretty quick really, I thought, was expecting mre.
I didn't see any use in removing the springs as I was not painting them and they can't be opened and rebuilt.
Took me about an hour on each one, pretty quick really, I thought, was expecting mre.
G
Guest
Guest
That's all looking very good Fly !
F
Flyboy
Guest
Thanks Psy, I do try..........hey wait a minute, we got a poem going on hereThat's all looking very good Fly !
H
Hoosier Daddy
Guest
Great stuff! Your attention to the details is really paying off!
G
Guest
Guest
Hold on, there's a song about that...
Pretty fly for a white guy... ha!
Sorry, couldn't help myself
Pretty fly for a white guy... ha!
Sorry, couldn't help myself
M
md48377
Guest
Very, very nice job fly. I started reading this thread this morning and had to put it down to run some errands, got home and finished reading. The postitive of not having alot of money to have the job done or to speed it up is in the quality of the your work, you've had to take the time to do it right.
F
Flyboy
Guest
md48377, this is true enough, all the sanding, buffing, cleaning and generaly getting bits back to top notch condition keeps one busy between pay days without having to spend too much while you wait for the wallet to recharge a bit.
It also brings out the creative side, because if you have a part, you don't really want to chuck it, so it is amazing, the novel ways you can find to fix it up again for use, and it lookd like brand new.
Not having a garage full of equipment also means that 90% of the work is done by hand, so I guess when it is done eventually, one day, I can say, in all honesty, this bike is totally hand built.
Time is my other issue, I pretty much have one day a week to work on it, and I need to give a bunch of that to my six year old.
Thanks for stopping by to take a peek at what I am doing, and your kind words.
F
Flyboy
Guest
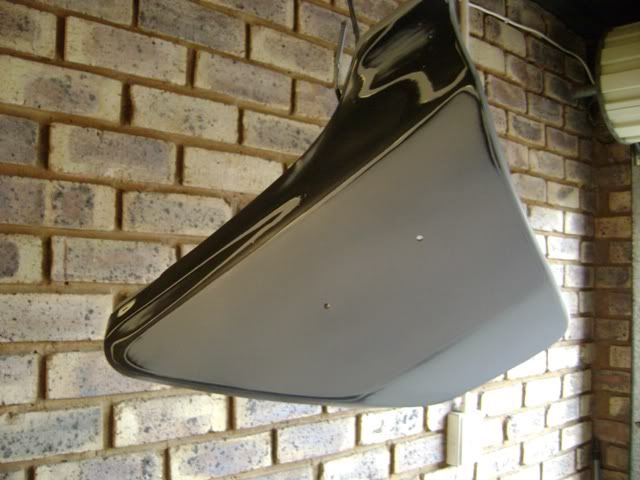
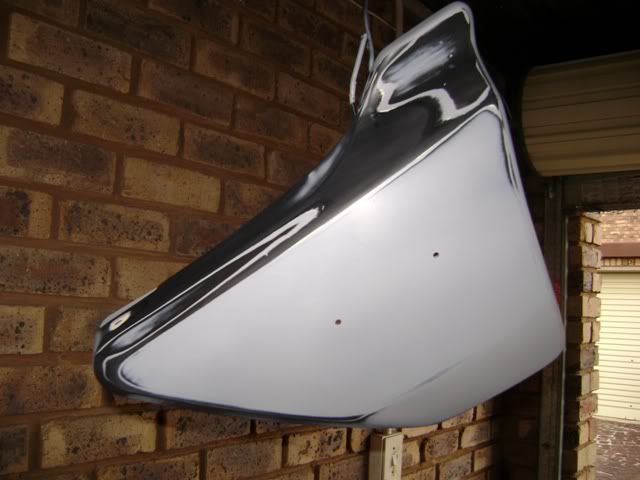
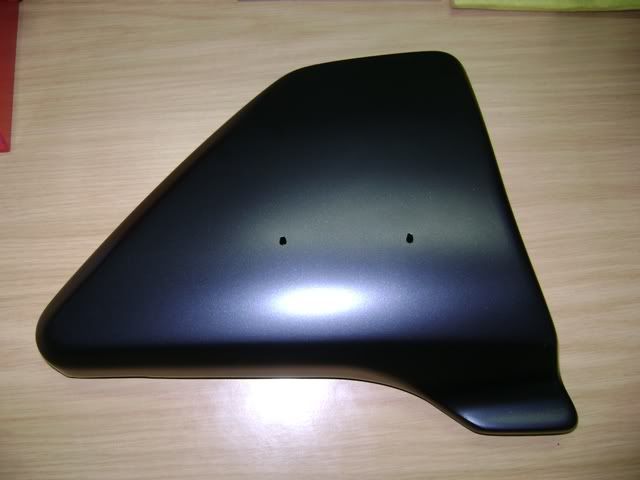
Ok, so I finally got some colour down on the side cover, not finished yet, but getting there, and I was just itching to see what it would look like.
So I decided to go for a black with a fine metal flake in it as opposed to the standard black that was used as OEM, just to jazz it up a teeny bit, but not stray too fat from stock.
So after getting the primer down and giving it a rub down with 320 grit, I washed the cover in clean green to remove any oil or residue, and rinsed in clean water under a running tap.
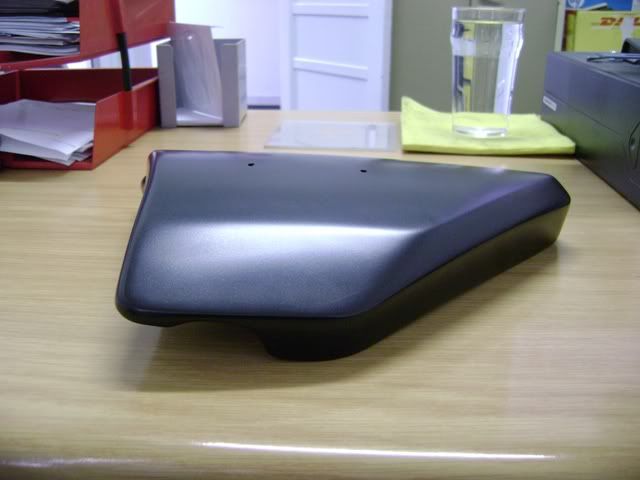
This is how it looks at the moment, after three light to medium coats, a wash in Clean Green and rinse in clean water, then one medium to heavy coat, and left to dry. I let the first three coats flash off for 10-15 mins between coats, it has been averaging 31 deg C here. Then let it dry for 24hrs and gave it a light going over with 1500 grit wet and put down the last coat.
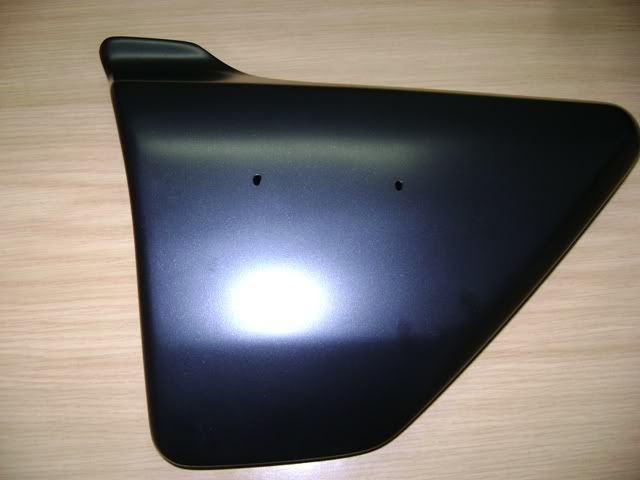
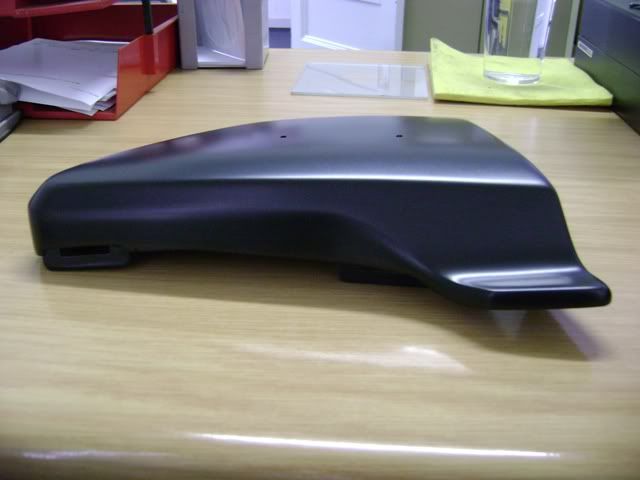
This is a base coat, so I am not expecting it to shine yet until the clear goes on, so the plan now is this;
Wash and rinse with Clean Green and water, lay down one more medium to heavy base coat, let it flash off for 20 min then lay down a coat of clear.
Let that dry for a day or more, mask and lay down the other two colours, followed by the clear coats, wet sand down to 2000 grit and polish.
The reason for putting one coat of clear before the other colour is that I have been promised by all that is sacred, that if I don't put the clear down within 24hrs of the colour, then my testicles will shrivel up and explode, and my crotch will be infested by the fleas of 1000 camels and my fingers will turn to fish hooks, and all such things unholy.
Your thoughts and opinions so far would be greatly appreciated, if it is going pear shaped, I want to know about it, you will spot something I don't, so lay it on.
So I decided to go for a black with a fine metal flake in it as opposed to the standard black that was used as OEM, just to jazz it up a teeny bit, but not stray too fat from stock.
So after getting the primer down and giving it a rub down with 320 grit, I washed the cover in clean green to remove any oil or residue, and rinsed in clean water under a running tap.
This is how it looks at the moment, after three light to medium coats, a wash in Clean Green and rinse in clean water, then one medium to heavy coat, and left to dry. I let the first three coats flash off for 10-15 mins between coats, it has been averaging 31 deg C here. Then let it dry for 24hrs and gave it a light going over with 1500 grit wet and put down the last coat.
This is a base coat, so I am not expecting it to shine yet until the clear goes on, so the plan now is this;
Wash and rinse with Clean Green and water, lay down one more medium to heavy base coat, let it flash off for 20 min then lay down a coat of clear.
Let that dry for a day or more, mask and lay down the other two colours, followed by the clear coats, wet sand down to 2000 grit and polish.
The reason for putting one coat of clear before the other colour is that I have been promised by all that is sacred, that if I don't put the clear down within 24hrs of the colour, then my testicles will shrivel up and explode, and my crotch will be infested by the fleas of 1000 camels and my fingers will turn to fish hooks, and all such things unholy.
Your thoughts and opinions so far would be greatly appreciated, if it is going pear shaped, I want to know about it, you will spot something I don't, so lay it on.
H
Hoosier Daddy
Guest
WOW! Talk about smooooooth! Metallic (poly) black will look super in the the sun. So what color are the metallic bits? I've seen silver, gold and even a rainbow of colors that when you look close is intense.
Oh and that's just a myth... your fingers wont turn to fish hooks.")
Oh and that's just a myth... your fingers wont turn to fish hooks.
G
Guest
Guest
Lookin' good Stan! That colour should work real well, wait til you get some clear on and get some polishing done though, then she'll sparkle
F
Flyboy
Guest
Thanks, yeah, it is a silver flake, it is a BMW colour called Sapphire Black, and that is right out of the can, no sanding, I tried giving it a light sand after the first three coats with 1500 wet, but it did some strange ass stuff to the flakes and I got what I thought was a blushing of sorts, hence the fourth coat to fix it up. Lesson learned, don't wet sand on the metallic, it disturbs the flakes.
So I just make sure there is no dust or bugs around when I spray.
So I just make sure there is no dust or bugs around when I spray.