• Required reading for all forum users!!!

    Welcome!
    Register to access the full functionality of the GSResources forum. Until you register and activate your account you will not have full forum access, nor will you be able to post or reply to messages.

    A note to new registrants...
    All new forum registrations must be activated via email before you have full access to the forum.

    A Special Note about Email accounts!
    DO NOT SIGN UP USING hotmail, outlook, gmx, sbcglobal, att, bellsouth or email.com. They delete our forum signup emails.

    A note to old forum members...
    I receive numerous requests from people who can no longer log in because their accounts were deleted. As mentioned in the forum FAQ, user accounts are deleted if you haven't logged in for the past 6 months. If you can't log in, then create a new forum account. If you don't get an error message, then check your email account for an activation message. If you get a message stating that the email address is already in use, then your account still exists so follow the instructions in the forum FAQ for resetting your password.

    Have you forgotten your password or have a new email address? Then read the forum FAQ for details on how to reset it.

    Any email requests for "can't log in anymore" problems or "lost my password" problems will be deleted. Read the forum FAQ and follow the instructions there - that's what we have one for...

  • Returning Visitors

    If you are a returning visitor who never received your confirmation email, then odds are your email provider is blockinig emails from our server. The only thing that can be done to get around this is you will have to try creating another forum account using an email address from another domain.

    If you are a returning visitor to the forum and can't log in using your old forum name and password but used to be able to then chances are your account is deleted. Purges of the databases are done regularly. You will have to create a new forum account and you should be all set.

Jennifer's Makeover

  • Thread starter Thread starter Flyboy
  • Start date Start date
Hey Psy, yes I am sure it is zinc. Still gotta put them under the wire wheel, to remove the residue, then they come uot super shiny, but I couldn't be bothered now, so I do them as I use them, or when I got nothing else to keep me busy.
 
Damn HD, now you tell me, I will need to work on my negotiation skills then.
Oh well a quick update, not all good I am afraid.
Ok pulled the back wheel off again, to fit the spacer I forgot and the one washer, which is ok, since I had to have the axle, nut and spacers plated anyway, so that is all good now and she is on her wheels with everything tightened up.

Excuse the wee pics, Photobucket is not co-operating today so I had to upload to my Google+ album.
DSC02489.JPG


Decided these little quick release clips were a bit more stylish than the trusty old split pin, so did a retrofit
DSC02491.JPG


DSC02494.JPG


Also got busy with the headlight bucket which had a fair amount of scratches and chips in it, as they tend to get, worked it over with some polyester spot putty and sanded down with 320 grit wet till it was baby smooth, should look better than new when the paint goes on.
DSC02486.JPG


Right, now ever since Pete started his painting melarchy on his 450 and put a bee in my bonnet, I have been itching to put Jennifer into her new clothes, so as you know, these last couple of weekends have been spent toiling away over hot sandpaper and a bucket of water, patiently prepping bits for paint.

So being without a compressor and knowing the body corporate wuld have a **** fit if I even thought about it, I have been using custom packed cans that I have made up at the local auotmotive refinishing supplies.

Here are the basecoats, BMW Cosmic Black and a custom made up red and orange that we sorta just eyeballed off pics.
DSC02480.JPG


And here is the 2k clear coat, I am actually very impressed, the stuff really lays on very nicely and the spray pattern is pretty much perfect.
You can see the two pary can with the plunger that you push in to pierce the diaphram to mix the hardner with the clear when you are ready to spray.
DSC02483.JPG


Got the primer issues on the one side cover sorted out and got colour down on both side covers, then I had to work like stink to get them masked and the second colour shot, masked again and the third colour down before my 24hr window expired to get he clear on.
so last night I was up until after midnight measuring and masking, thanks a million for the measurements Dale, and at 04h30 this morning I was in the garage laying the second colour down.

DSC02500.JPG


Added the pin stripping and was ready to shoot the clear a few hours ahead of the deadline, so without further delay, on it went

DSC02505.JPG


DSC02508.JPG


DSC02506.JPG
 
Last edited:
That is truly amazing......very nice work

I wonder who here in my neck of the woods would mix up paint in a can like that...

I was thinking of just doing all the prep work on my parts, and then take them to a body shop to have them sprayed. Kinda thinking if I did all the hard work, it wouldn't cost so much for them to just spray.

Thanks for the pics, they are an inspiration for me to work on my bike just as hard and with just as much dedication.
 
Man-o-man... that looks fantastic. Those colors together plus the clear coat looks like glass. Very well done!
 
Tried to get a shot of the metal flake in the black, but not easy with a 2$ camera, it looks better in real life than in the pics, but you get the idea
DSC02507.JPG


Hey Ma, look I can also paint trees and houses...
DSC02509.JPG


DSC02515.JPG


Not too shabby for for a first time try and straight out of the gun (can) considering that is only 3 coats clear and it still needs to be sanded and polished up. My plan is 9 coats clear for depth.

WRONG, it is a F#*&ing disaster, I am so bummed it is just not funny. :mad::mad:

Not being a painter of any kind by any stretch of the imagination, and this being my first serious paint job, I was happy with the results as I progressed, yes there were a few small imperfections I was willing to live with, but when I put the third coat of clear down, disaster struck.
The pin stripping under the clear started to bubble and lift.
ARRRRRRHHHHHHHH..................
DSC02510-1.jpg


So I pulled it off, no idea how I am going to fix this, I guess it is back to taking it all the way down again

DSC02512.JPG


DSC02513.JPG


DSC02514.JPG


DSC02511.JPG


Any advice is welcome, any idea why the ip stripping lifted and bubbled?
Any advice on how to stop it appening again, I really don't need a repeat performance.
 
Last edited:
Crap......the only thing I can think of is perhaps the first coat was not fully cured and allowed the subsequent coats to seep and start lifting the pin striping

just my thoughts, I sure as heck aint no paint expert
 
Ohhh Noooo! Here it was doing so well! I would think after the first couple of coats , if anything hadn't happened you were safe. But sometimes if you wait for subsiquent coats past the initial hour or so they need to completely de-gass before the next coat can be laid. Varies by paint and I am not familiar with the high tech clear you used.
Is it possible to wet sand the whole thing then put on slightly wider pinstripe to cover the screw-up then re-shoot the clear over that?
 
Thanks for the kind words, but yeah, I am at a pretty low point right now, I have no idea either so I will listen to any advise, I ain't no painter either, this is my first real try at a quality job.

Thanks HD, wish I knew where I went wrong though, I like the colour combination as well, but i am thinking maybe just do it one colour, black and call it done, but it is not what I want.
It may be, but I don't know what the implications of having clear on there is now.
 
I've just seen this thread and read it right through, My, you have been hard at it and it looks stunning, a tough break on the paint I can only think that the glue on the pin strip perhaps reacted with the paint or laquer.
What does your paint supplier say?
Did it happen on all the stripe or just that patch?
Stick with it, its a top drawer resto :)
 
Thanks Tatu
Dale has nailed it down, too much clear too early, should have sealed it up with lighter, drier coats layed down with more flash time in between, I put down pretty wet coats too soon after each other, the pin stripes don't like that.
What's done is done, my biggest concern now, is how to fix it.
I am hoping I can go with Hoosier D's suggestion and wet sand to smooth, apply wider pin stripping and re shoot the clear.
 
Stan, it's only time and money to fix it. nothing to get all drop jawed over.

keep in mind I'm no painter either. here is what I would do with it as I see it.

I would wait at least 3~4 days and wet sand it with 600 wet wrapped around a rubber sanding pad. you want to try and wet sand just the area the orange and red covers. if you can wet sand that area flat enough to level the paint and decal areas to the surrounding area without hitting the black metallic base coat, skuff up the clear over the black, tape it off for those two colors again and re-shoot them. when it's properly flashed off spray 2~3 coats of clear and forget about it until you get ready to stripe and apply the final top coats to the petrol tank.

do the same thing to the petrol tank; shoot your base coats, clear it and leave it set for 3~4 days.

when you are ready to apply the stripe and final clear coat, wet sand the clear, apply the stripes to the tank, side covers and tail piece and give it a fairly dry application of clear, then leave it set for 8 hours. after it's sat, apply one med wet coat of clear, let it set for an additional 8 hours and follow up with an additional two medium wet coats of clear.

hopefully then you'll have no more issues with the decals lifting.

p.s. I had planned on suggesting a wider decal as well, but decided against it.
 
Bugger Stan! That sidecover was looking real nice too.

I do feel your pain... you get to that point where you look at it and go yeah, cool, my first effort and it turned out well... then you realise it's all mottled and you didn't do that extra bit of research to say you need to be extra careful with your spray pattern when spraying pearl colours... :rolleyes:

Look at it this way, it's just one side cover and you don't have to start from scratch :)

I think you've done marvelous for a first time!

And with Dale's awesome advice and help you will succeed :D
 
Thanks for the kudos Pete, but I'm nothing more than a 'garage' painter.

Stan there are more ways to tackle the issue than what I suggested you do. the reason I suggested you do it that way was, if you still have problems with the clear affecting the stripe, all you have to do is sand the stripe and redo it.

you could just as easily , tape off and shoot the stripe saving you 'quite' a bit of time.
 
Thanks guys.
Dale, I will give it a shot as you suggest, sure beats having to take t all down again, and time I got plenty of.
The thing is, I just didn't want to waste clear, not having the luxuary of mixing up the quantities I need, once you activate the two part, you have to use it, I do not know how long it will last, but I doubt it is very long, before it goes hard and you need to throw the rest of the can away.
And it is pretty pricey stuff at 200 bucks a can.
I guess the only way forward then it to get everything base coated and then lay 2 to 3 coats clear over everything, hopefully, that will use up a full can.
Then stripe up and hope that after I lay a dry coat over everything that what is left in the can will last another 8 hours and then an additional 8 hours after applying the first med/wet coat to everthing.
I guess we will find out.
The can of clear clear I opened today is still half full, maybe more, and I was so disgusted and bummed out, I just shut the garage and called it quits for the day at about 9am, so I will see how long that lasts before it dries up, will give me an idea as to how to proceed. I am hoping that being in a can and not exposed to free air may just get me off the hook and it lasts for a while.

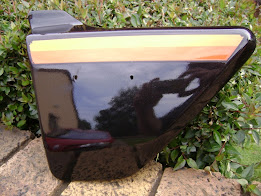
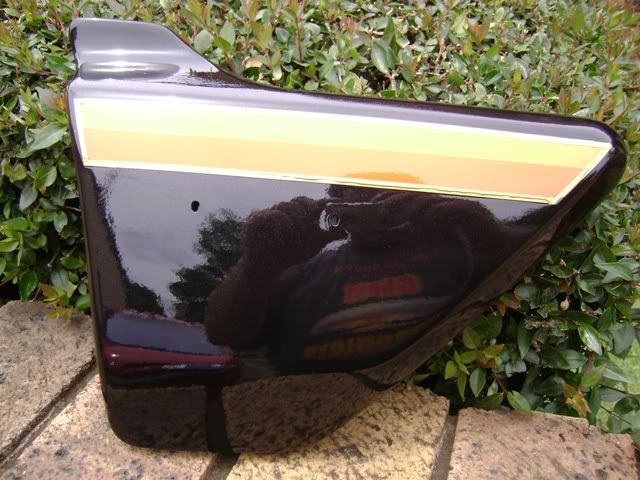
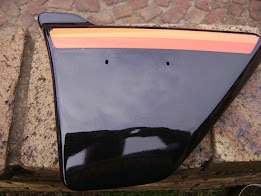
Pete, yeah. I was really feeling good, and it was really looking the part, I thought I had nailed it down, the paint was shining like a mirror and I knew I had something special going, all the research an hard work was paying off, then, bang.
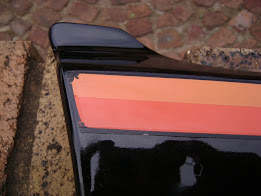
I felt shattered, I just felt like chucking it in, as you say, I learnt everything about painting, but nothing about painting over decals.
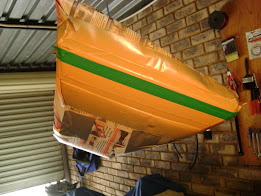
Oh, and its two side covers. ;)
 
That's a bummer Fly... I'm no paint expert so can't help there BUT whatever you do, please don't go for a single color only - that paint scheme you've got going is just too nice not to finish it up not that you've seen it laid down!

I had to walk away from my project in frustration a number of times, but on reflection... those moments fade from memory while the delight of the finished product is there to stay.

Good luck!
 
Thanks for the kudos Pete, but I'm nothing more than a 'garage' painter...

I know, you keep saying that :p

Your results speak of someone experienced who knows a thing or two about painting ;)

Stan, two side covers... yeah that's not so bad still :) At least you don't have to sand back the whole base coat... ha!

I think what you're saying about getting all the colour done then doing the clear in one go is a sensible idea and should work. At least it makes sense to me anyway.

That way you won't be rushing to get things done within 24 hours or whatever, and trust me you don't want to be doing that because you will make mistakes!

My paint job should've been done in three days, but it took six partly because I had no idea, partly because I made mistakes, but mainly because I made the decision a few times to just stop where I was and not push to get finished the same day as I knew I'd be rushing and I'd screw it up.

Don't stress, as much of a bummer as it is seeing that happen and probably watching your can of clear going to waste (ouch, yeah that hurts!), you've learnt something and you won't make that mistake again.

If I was to do my paint job again tomorrow, it would be 10 times better because now I know where I went wrong in some places and what to expect at different stages. Mind you I'd also buy a better gun but that's a different story ;)

Anyway, long story short, buck up and she'll be right mate ok? :D

Oh, and with Dale on your side you're all set... and if Larry and Johnny Drummond pop in you'll have the whole shootin' match ;)
 
Thanks Psy, yeah, I walk away in frustration as well, not too often, but rather that and cool down and think it though than do a half assed job.
Well it is not going to be easy to get it to look exactly like the original paint job, but we shall persevere.

Pete, ya Dale is a tome of knowledge, although he down plays it.
And I listen when he talks, I will just redo the covers but change a few things along the way, so no biggie, in the greater scheme of things it is a minor irritation, except the paint cost a bomb, oh well.
stopped in the garage as I left for work this morning and the clear coat was still good after 24hrs, so let see how long it lasts, certainly is opening up a lot more options already.
 
Stan, I would be a little bit leery using the clear after the products recommended times. it is a catalyzed product and the chemical hardening process started as soon as the two components were mixed. it may spray out of the can alright, but you don't know how much of its 'bite' into the other paint has been affected. you don't need to find out a few years later it wasn't a good idea after the paint starts coming off in sheets.

I'd be careful stretching the products recommended times.

http://www.plascon-automotive.co.za/upload/files/PTK_Topcoats.pdf
http://www.plascon-automotive.co.za/default.asp?id=1085

my offer to send the Astro still stands.
 
Arrrhhhhh, thanks Dale, so much for the greatest laid plans of mice and men:rolleyes:

Many many thanks for the offer Dale, but it really is not practical right now, as I said, it is not just the gun, it is the applicator behind the gun, and I am really happy with the product and the way it goes down is really great, so a top of the range gun ain't going to help me, anyway, i would need a compressor, and a booth etc etc.....

Bugger it, I am just going to rattle can the thing flat black and call it done.:mad:
 
Back
Top