• Required reading for all forum users!!!

    Welcome!
    Register to access the full functionality of the GSResources forum. Until you register and activate your account you will not have full forum access, nor will you be able to post or reply to messages.

    A note to new registrants...
    All new forum registrations must be activated via email before you have full access to the forum.

    A Special Note about Email accounts!
    DO NOT SIGN UP USING hotmail, outlook, gmx, sbcglobal, att, bellsouth or email.com. They delete our forum signup emails.

    A note to old forum members...
    I receive numerous requests from people who can no longer log in because their accounts were deleted. As mentioned in the forum FAQ, user accounts are deleted if you haven't logged in for the past 6 months. If you can't log in, then create a new forum account. If you don't get an error message, then check your email account for an activation message. If you get a message stating that the email address is already in use, then your account still exists so follow the instructions in the forum FAQ for resetting your password.

    Have you forgotten your password or have a new email address? Then read the forum FAQ for details on how to reset it.

    Any email requests for "can't log in anymore" problems or "lost my password" problems will be deleted. Read the forum FAQ and follow the instructions there - that's what we have one for...

  • Returning Visitors

    If you are a returning visitor who never received your confirmation email, then odds are your email provider is blockinig emails from our server. The only thing that can be done to get around this is you will have to try creating another forum account using an email address from another domain.

    If you are a returning visitor to the forum and can't log in using your old forum name and password but used to be able to then chances are your account is deleted. Purges of the databases are done regularly. You will have to create a new forum account and you should be all set.

tubeless valve stem

  • Thread starter Thread starter lurch12_2000
  • Start date Start date
L

lurch12_2000

Guest
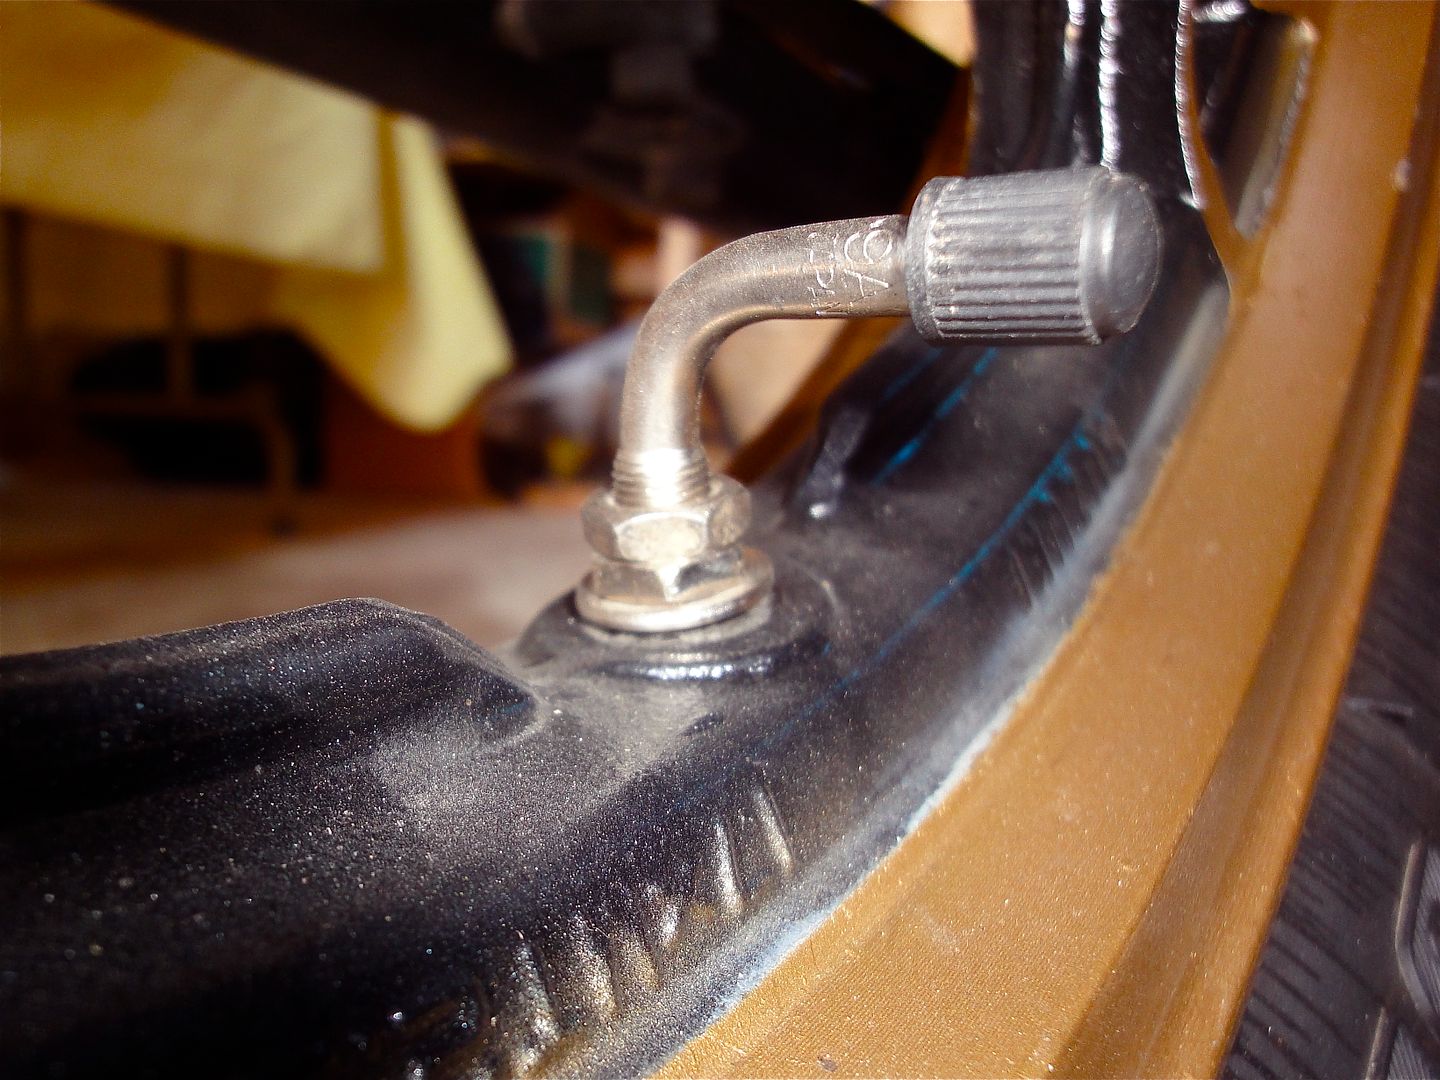
OK, you gurus of tire changing, I am switching back to tubeless and bought some metal valve stems. The bike dealer parts guy says the o-ring goes on the inside and the rubber washer on the outside of the rim. This didn't sound right but I did it his way and it's slow leaking around that washer upon assembly even if I tighten it more.
The questions is....should that rubber washer (marked by red arrow in pic) be on the inside of the rim along with the o-ring and only the metal washer and 2 locknuts on the outside of the rim? I don't have one lying around to compare and it's been awhile since changing a tubeless with my old GSes.:(
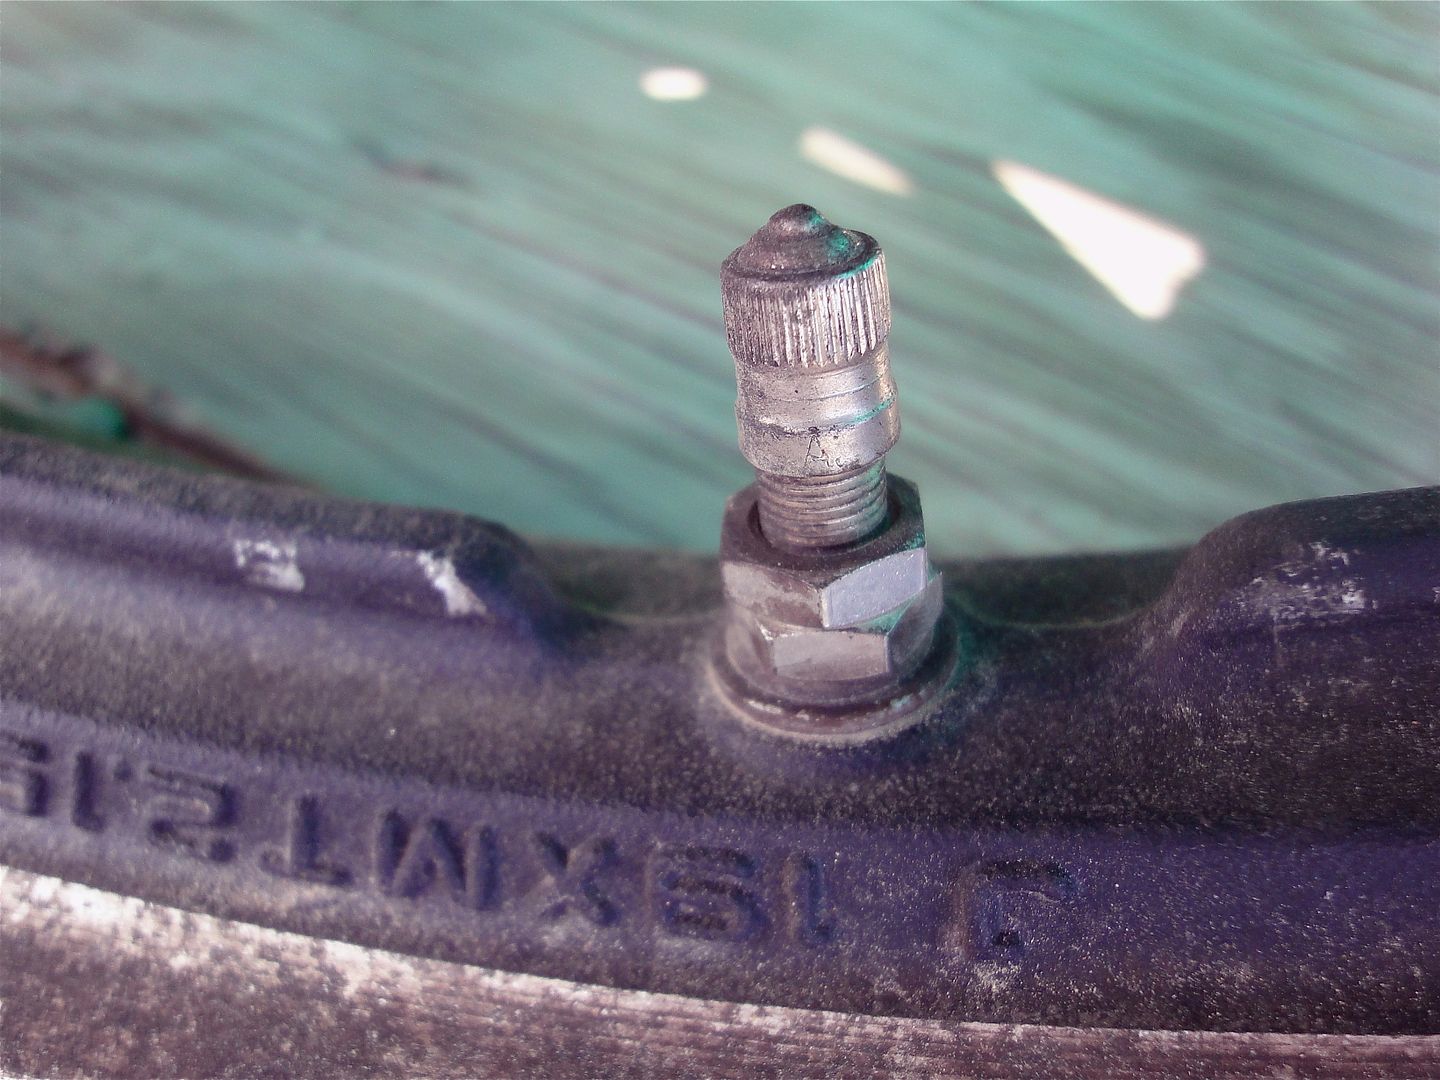
And don't worry the rim is marked tubeless tire applicable and the Bridgestone Spitfire is marked tubeless. My mistake for re-using and pinching a hole in the perfectly usable tube on the first time around. Thanks.
100_0091.jpg
 
Last edited:
Not for sure which one goes where, but you should have something rubber on each side of the hole.

.
 
Not for sure which one goes where, but you should have something rubber on each side of the hole.

.
Well, I bought 3 (one for the front too and a spare for future reference) of these metal valve stems at the Suzuki dealer and they are all the same, only one rubber washer and a small rubber o-ring on each valve stem as seen in the pic above.
 
Last edited:
This might help or confuse some more. :confused:
I just took some pic's of the bikes with tubeless tires/rims.
Suzuki's:

DSC03160.jpg


DSC03159.jpg


DSC03157.jpg


DSC03162.jpg


Aprilia:

DSC03161.jpg


Anyway, it appears that the Suzuki rims, have the large rubber grommet outside.
BTW, the 90% one is a whole lot EASIER to check/fill.

Daniel
 
big rubber inside.. Little rubber outside. Makes sense to me.

noooooooooooooooooo

The little oring sits inside snug against a cast/machined flat area that is in the wheel and the big rubber bascially is a safety seal that sits on the outside. tighten firmly and just use the 2nd nut as a locknut.
 
noooooooooooooooooo

The little oring sits inside snug against a cast/machined flat area that is in the wheel and the big rubber bascially is a safety seal that sits on the outside. tighten firmly and just use the 2nd nut as a locknut.

at

I did it ths way but even tightening down did not seal it, and there still was a slow leak. After trying it both ways, rubber washer on the outside with a definite leak, and then rubber washer on the inside (a few tiny, tiny bubbles and very slow leak) I wound up taking the big rubber washer off a spare stem and doing what Steve said, put the big rubber washer on the inside AND another one on the outside and it held 40psi overnight. Easy enough to do the third time without deflating or breaking the bead and having to get at the inside of the valve stem.....just took the 2 lock nuts off, slid the additional rubber washer on and carefully threaded the 2 nuts back on. The air pressure kept the stem in place. So I'll put the rear tire back on the bike today and go buy a couple more big rubber washers from the hardware store to use with the remaining 2 valve stems.
Final setup was the small o-ring and the rubber washer on the inside of the rim and a rubber washer, a metal washer, 2 locknuts on the outside.
 
Last edited:
Did it have a small clean flat area where the little oring can seat against inside the wheel? Should only need that little oring if its a clean flat area and the oring sits proud enough to seal properlly
 
Did it have a small clean flat area where the little oring can seat against inside the wheel? Should only need that little oring if its a clean flat area and the oring sits proud enough to seal properlly

Great point. I'm not sure what wheel you're installing these on but some wheels, especially narrow front wheels, do not have a large enough flat area for the o-ring to seal. Some GS wheels have a rounded channel in the center of the wheel and some have a squared-off channel. You can use a step drill (carefully) or a countersink bit to create a sufficient flat area. I have also used other types of valve stems that have just one thicker rubber washer used on the inside of the rim and have never had any problems.

Thanks,
Joe
 
As I recall, mine are installed as you were instructed. When I look at the photo of the parts, it looks as though there is not enough flat area on the bottom flange to seal the larger rubber gasket. Good luck with it. Ray
 
Yes, I cleaned the flat surface on the inside before putting the valve stem in place with an inside o-ring and tightening with the a rubber washer on the outside the first time. Had a slow leak(approx losing 5 lbs in an hour) so I took apart and put the rubber washer on the inside with the o-ring and it had a much slower leak(about 1 lb psi after 2 hrs). Either way it was blowing tiny bubbles upon checking with soapy solution. Then when I gave up and used 2 rubber washers, one inside and one outside along with the o-ring inside, it held the 40 psi overnight and the tire is back on bike ready for riding. This is the rear rim, it's marked tubeless tire applicable and the head of the stem fit in nicely without modification.
Maybe this is why the PO had a tube put in I assume many years ago judging by the age of the old tire....or they just subscribed to old school theory of always using tubes!:confused:
 
Last edited:
noooooooooooooooooo

The little oring sits inside snug against a cast/machined flat area that is in the wheel and the big rubber bascially is a safety seal that sits on the outside. tighten firmly and just use the 2nd nut as a locknut.


It makes absolutly no sense to me to put the little rubber on the inside of the rim.
 
It makes absolutly no sense to me to put the little rubber on the inside of the rim.

If you have the correct wheel and that stem you will see the oring sits proud in the groove where its sits. In a ideal world(new parts) it seals great and the larger seal basically acts as just dust/waterproof seal. I know it looks dodgy but that how it suppose to work. Same setup is behind your front sprocket on most Suzukis stopping oil leaking from between the steel sleeve and the outputshaft. Ive seen people use those stems in a hole that was meant for the rubber tubeless valve stems like Honda and you car might have. Not good.
 
In the end, I did both front and rear tires with the new tubeless valve stems and used the o-ring and rubber washer on the inside and also used a rubber washer on the outside. Holding pressure now. I must have been dreaming of other things when I originally mounted the tires last week, finding when removed that both tubes had a small pinch hole on the inner surface facing the rim. Both had held pressure after I let them sit for a few hours before putting back on bike, then my initial 10 mile test run and then after the bike sitting a few days before taking to work, the tire pressure was still good when I checked again. Even on the morning 35 mile commute to work reaching speeds on the highway exceeding the 85mph speedometer, still no issue. Then the front developed a slow leak while the back was quicker causing the roadside breakdown on the ride home from work. Never pinched a tube before and I was 2 for 2 on this bike...and I even found one of my homemade plastic rim protectors left in the front tire...couldn't remember if I had 3 or 4 of them, must have been 4? :-k
 
Last edited:
Back
Top