R
redstedman
Guest
hows it going neighbor? Lets ride !
Required reading for all forum users!!!
Welcome!
Register to access the full functionality of the GSResources forum. Until you register and activate your account you will not have full forum access, nor will you be able to post or reply to messages.
A note to new registrants...
All new forum registrations must be activated via email before you have full access to the forum.
A Special Note about Email accounts!
DO NOT SIGN UP USING hotmail, outlook, gmx, sbcglobal, att, bellsouth or email.com. They delete our forum signup emails.
A note to old forum members...
I receive numerous requests from people who can no longer log in because their accounts were deleted. As mentioned in the forum FAQ, user accounts are deleted if you haven't logged in for the past 6 months. If you can't log in, then create a new forum account. If you don't get an error message, then check your email account for an activation message. If you get a message stating that the email address is already in use, then your account still exists so follow the instructions in the forum FAQ for resetting your password.
Have you forgotten your password or have a new email address? Then read the forum FAQ for details on how to reset it.
Any email requests for "can't log in anymore" problems or "lost my password" problems will be deleted. Read the forum FAQ and follow the instructions there - that's what we have one for...
If you are a returning visitor who never received your confirmation email, then odds are your email provider is blockinig emails from our server. The only thing that can be done to get around this is you will have to try creating another forum account using an email address from another domain.
If you are a returning visitor to the forum and can't log in using your old forum name and password but used to be able to then chances are your account is deleted. Purges of the databases are done regularly. You will have to create a new forum account and you should be all set.
")
None of my 4 spark plug sockets were 18 mm, so had to get one.
And that not work, was to thick of sidewall for what little clearance there was around the spark plug. Had multi-day adventure at various part stores and even Harbor Fright. Did find deep well socket at Menards that looked like thiner sidewall (but not specified as such), and that worked.
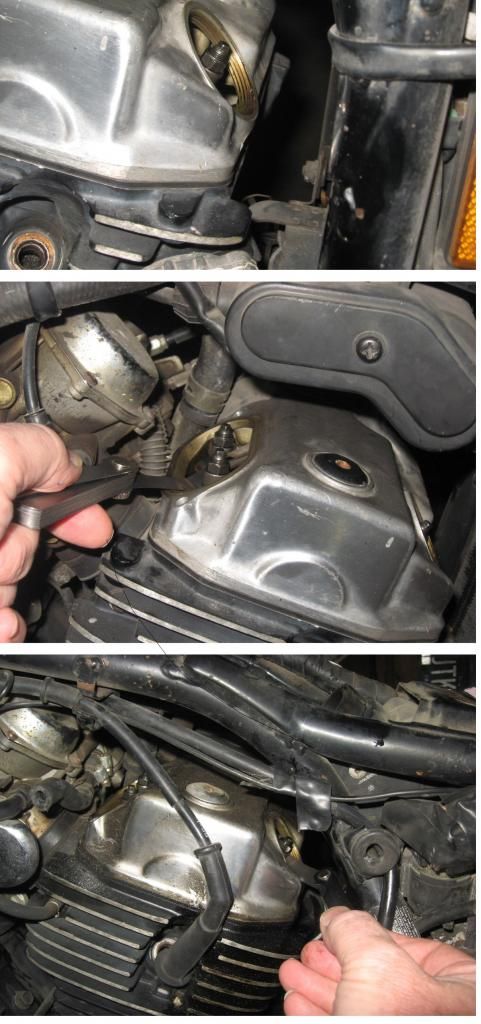
Next step was to remove the 4 valve clearance adjusmnet covers, 8mm bolt heads with awkward access. Was what looked like an air breather tube in the way, so thought I would remove that, and had coolant flowing all over -DOAH!
THen rounded off 2 of the bolts. But then took off more stuff than the manual suggested to get some some better access. Cut slots in them with hacksaw blade. THen used hammer impact to get out the bolts.
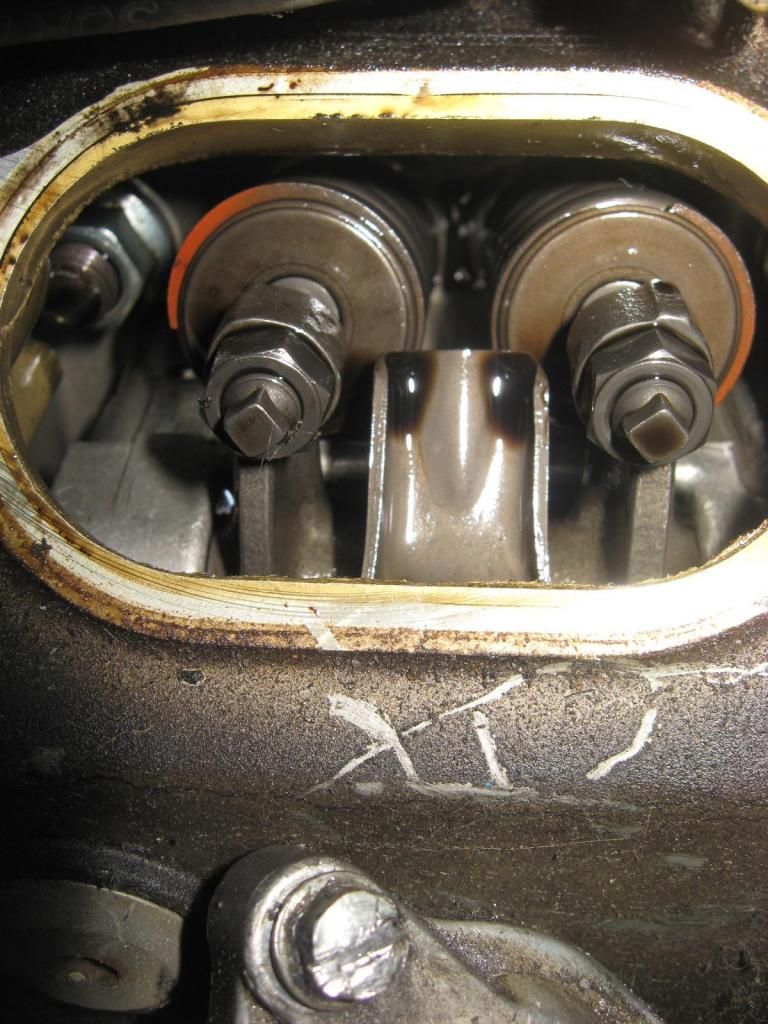
Got the inspection covers off
TO find like this (two intake valves operated by one cam/rocker)
With a box end wrench with offset can operate the lock nut, but not finding anything to operate that square part of the adjustment. Supose could use cressent wrench, but would rather have a socket.
THink I can find anything like that at tool store..?
Measures 4mm with caliper.
Find a 12-point socket that fits tight be it metric or SAE.
Got the inspection covers off
TO find like this (two intake valves operated by one cam/rocker)
With a box end wrench with offset can operate the lock nut, but not finding anything to operate that square part of the adjustment. Supose could use cressent wrench, but would rather have a socket.
THink I can find anything like that at tool store..?
Measures 4mm with caliper.
.
.
..

")