• Required reading for all forum users!!!

    Welcome!
    Register to access the full functionality of the GSResources forum. Until you register and activate your account you will not have full forum access, nor will you be able to post or reply to messages.

    A note to new registrants...
    All new forum registrations must be activated via email before you have full access to the forum.

    A Special Note about Email accounts!
    DO NOT SIGN UP USING hotmail, outlook, gmx, sbcglobal, att, bellsouth or email.com. They delete our forum signup emails.

    A note to old forum members...
    I receive numerous requests from people who can no longer log in because their accounts were deleted. As mentioned in the forum FAQ, user accounts are deleted if you haven't logged in for the past 6 months. If you can't log in, then create a new forum account. If you don't get an error message, then check your email account for an activation message. If you get a message stating that the email address is already in use, then your account still exists so follow the instructions in the forum FAQ for resetting your password.

    Have you forgotten your password or have a new email address? Then read the forum FAQ for details on how to reset it.

    Any email requests for "can't log in anymore" problems or "lost my password" problems will be deleted. Read the forum FAQ and follow the instructions there - that's what we have one for...

  • Returning Visitors

    If you are a returning visitor who never received your confirmation email, then odds are your email provider is blockinig emails from our server. The only thing that can be done to get around this is you will have to try creating another forum account using an email address from another domain.

    If you are a returning visitor to the forum and can't log in using your old forum name and password but used to be able to then chances are your account is deleted. Purges of the databases are done regularly. You will have to create a new forum account and you should be all set.

1978 GS750 Brat/? Build

  • Thread starter Thread starter clubfed11
  • Start date Start date
C

clubfed11

Guest
Hello All.
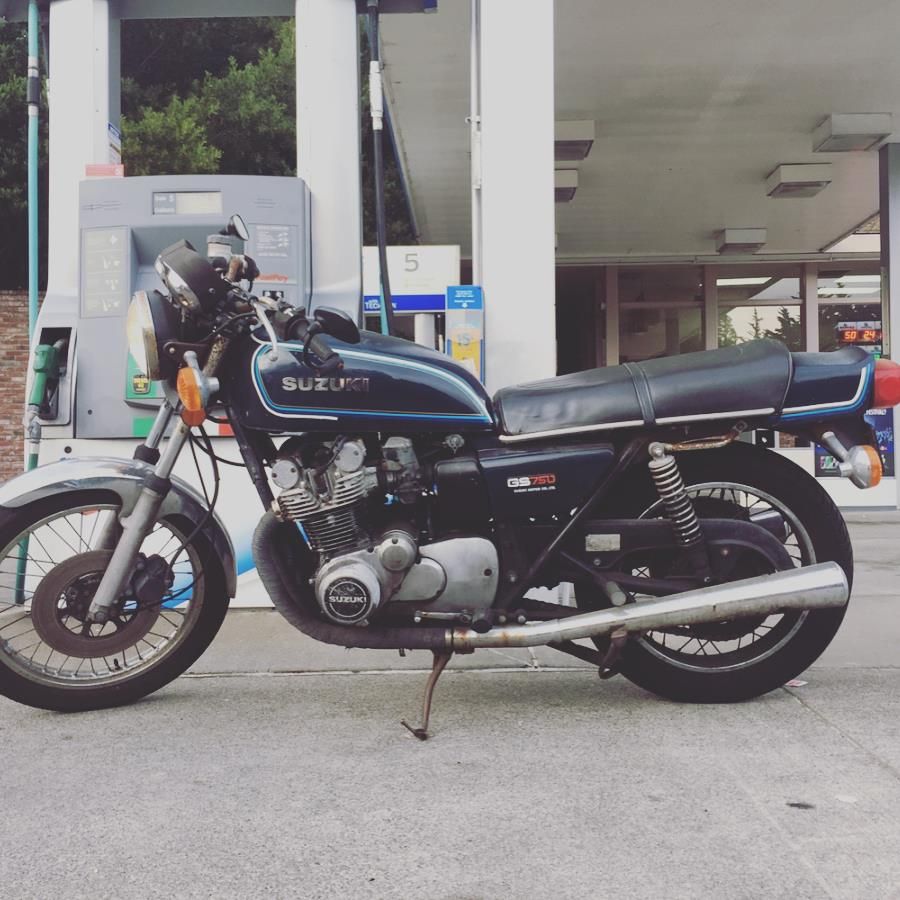
Thought I would start my build log in here and ask a couple questions. I picked up a 1978 GS750 from a friend who never rode it. It sat outside in the San Francisco fog for who knows how long so it has a ton of oxidation, rusting, ect ect. My plans are basically clean it up as best I can, get it running as best I can and minimize as much I can. If anyone needs parts that I won't be using be sure to let me know.
The bike is running but pretty rough, the throttle sticks and needs to be rolled back by hand, def an air leak somewhere, oil all over the place. Gotta trace these things down. My plan of attack is below:

Check compression-if all is well proceed, if not look into fixing.
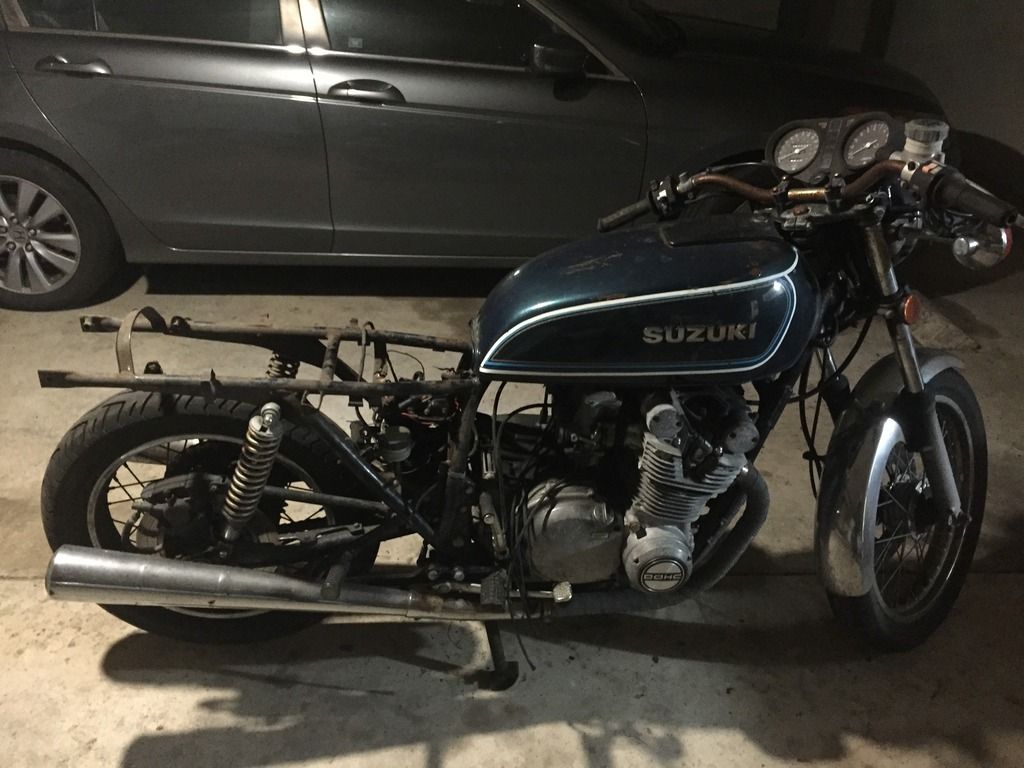
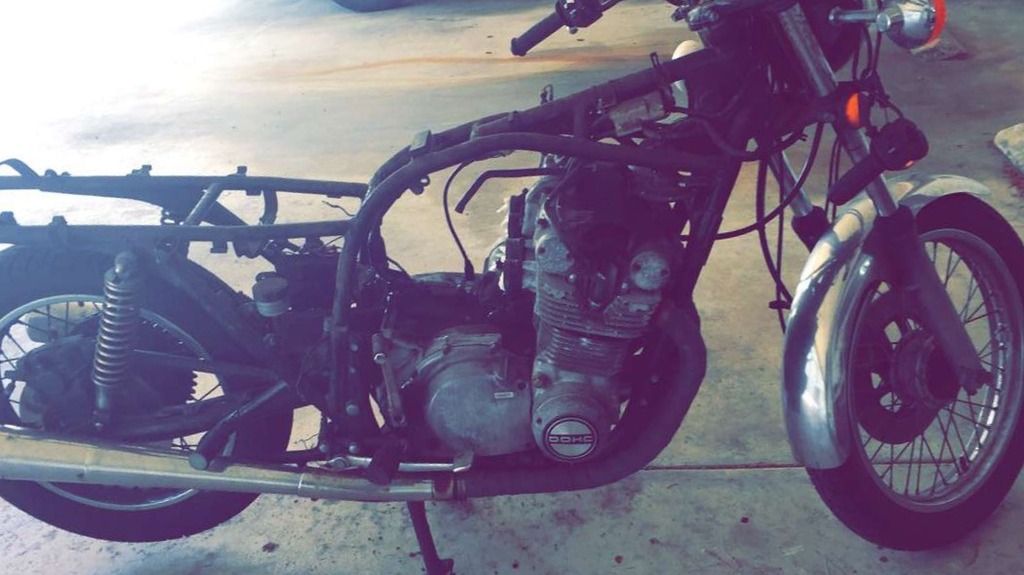
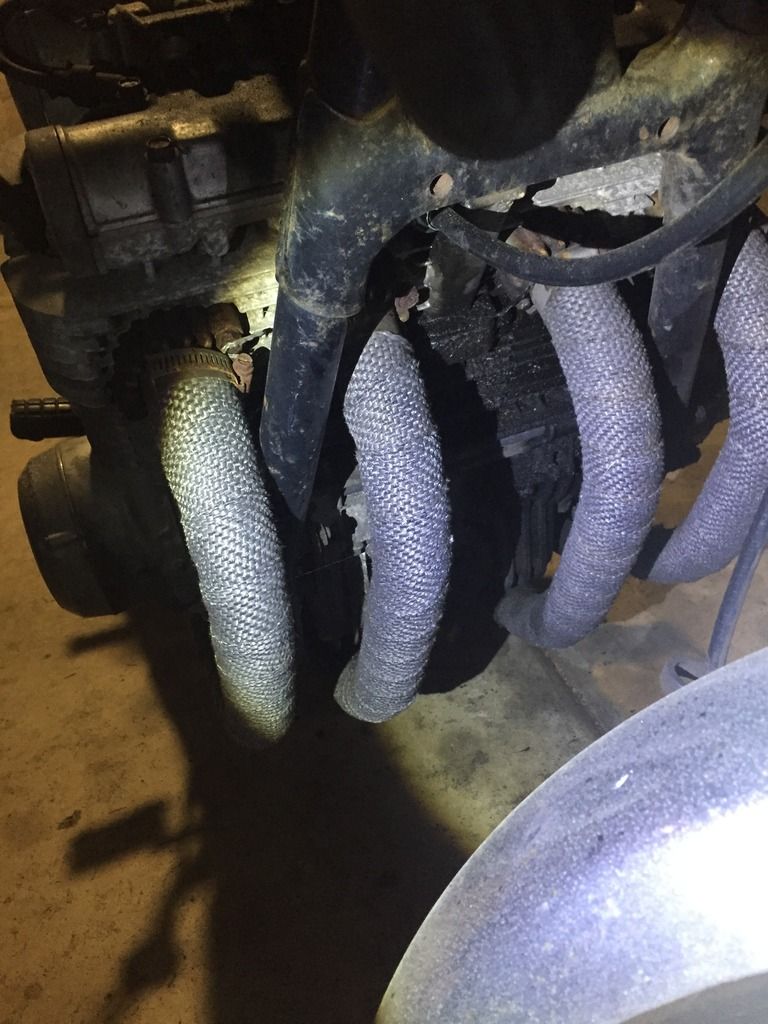
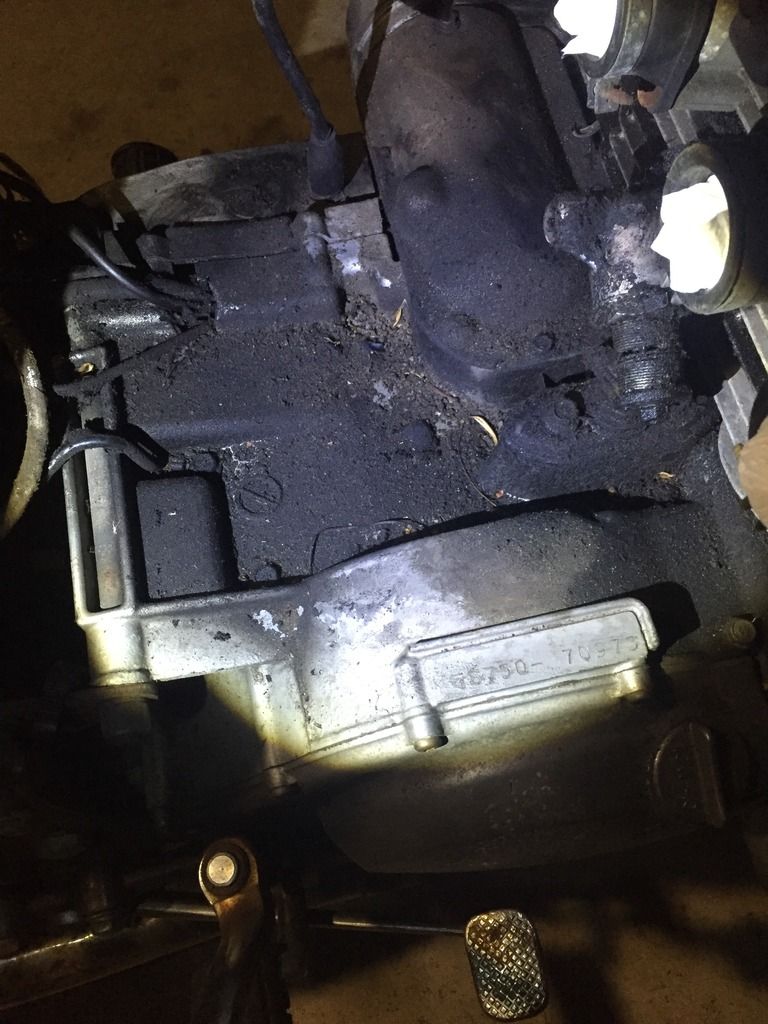
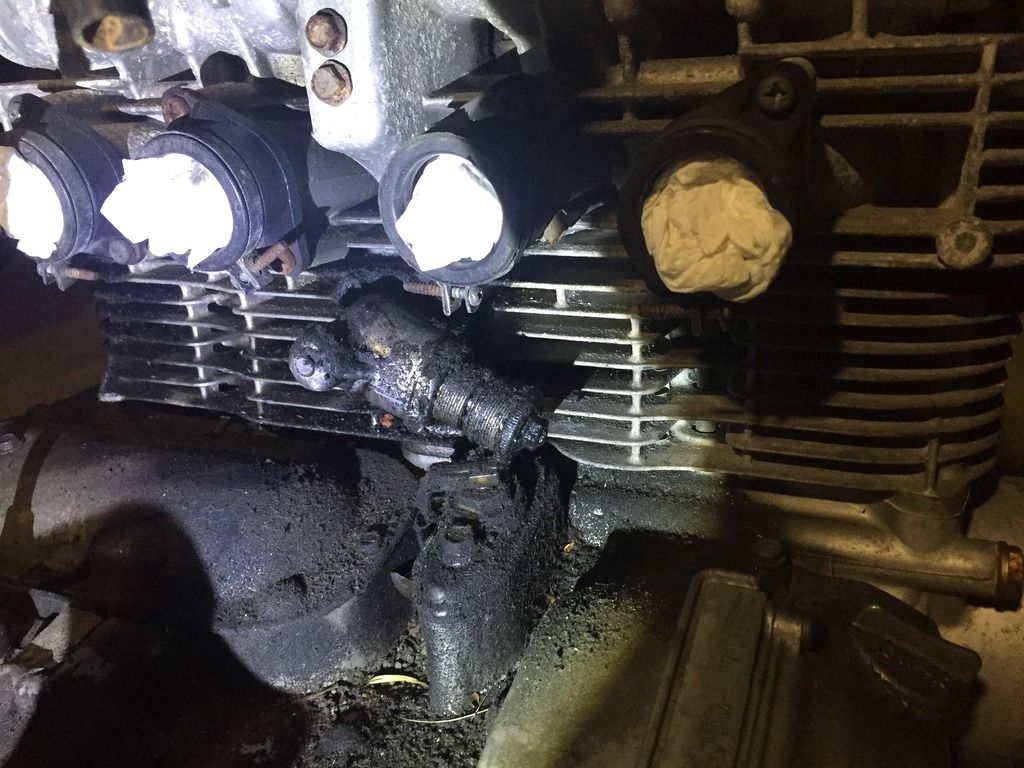
Clean engine case, I have a couple areas of junk/oil. One I believe is the CCT. (see pics below) will need to reseal that guy for sure. The other is the front of the engine below the exhaust pipes, I have this is just coming from the tach hole. The PO didn't have anything in there for awhile. Hoping it's not a cam cover gasket or something worse (thoughts?)

After I solve those minor problems it's onto the improvements:
break carbs completely down, replace o rings, gaskets, ect.
Valve adjustment, new valve cover gasket.
Inspect/replace carb intake boots. I read somewhere that my model may not have o-rings behind them? (thoughts?) they are hard as heck to get off so haven't investigate that yet.
Inspect/replace/seal air box, might also get an aftermarket air filter if it doesn't require me to change the jets (not pods! just the filter in the stock air box)
Replace exhaust gaskets and inspect exhaust for any leaks.
Tank seems pretty clean but will most likely rebuild the fuel petcock.
New fuel line and filter
New fluids all around:
Oil, Oil Filter, Brake Fluid, clean/lube chain, Fork oil, new spark plugs, inspect wires/caps.

That should get her into a great running state and then hopefully these mods will follow someday:
New stator
New R/R
Dyna Electronic Ignition
Dyna/ect coils and plugs
Possibly a motogadget M unit or something along those lines. I want to redo all the wiring and make it super simple.
Upgrade suspension all around
New headlight and blinkers
Bars, Grips, Controls, Ect. Trying to keep it super basic up front.

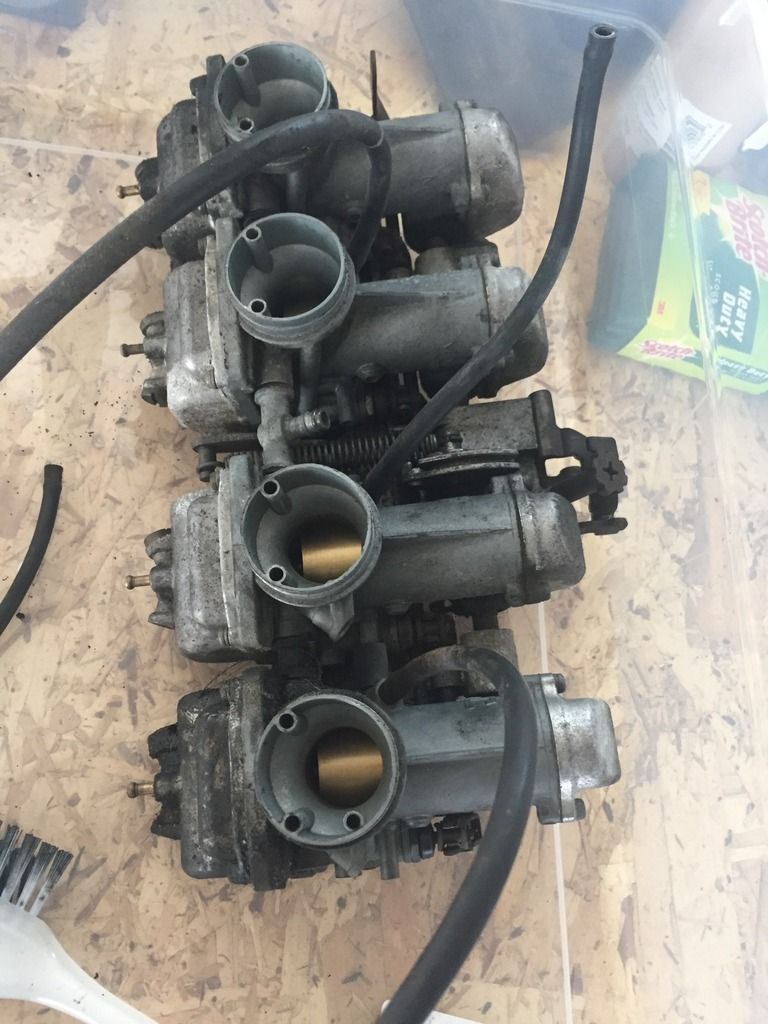
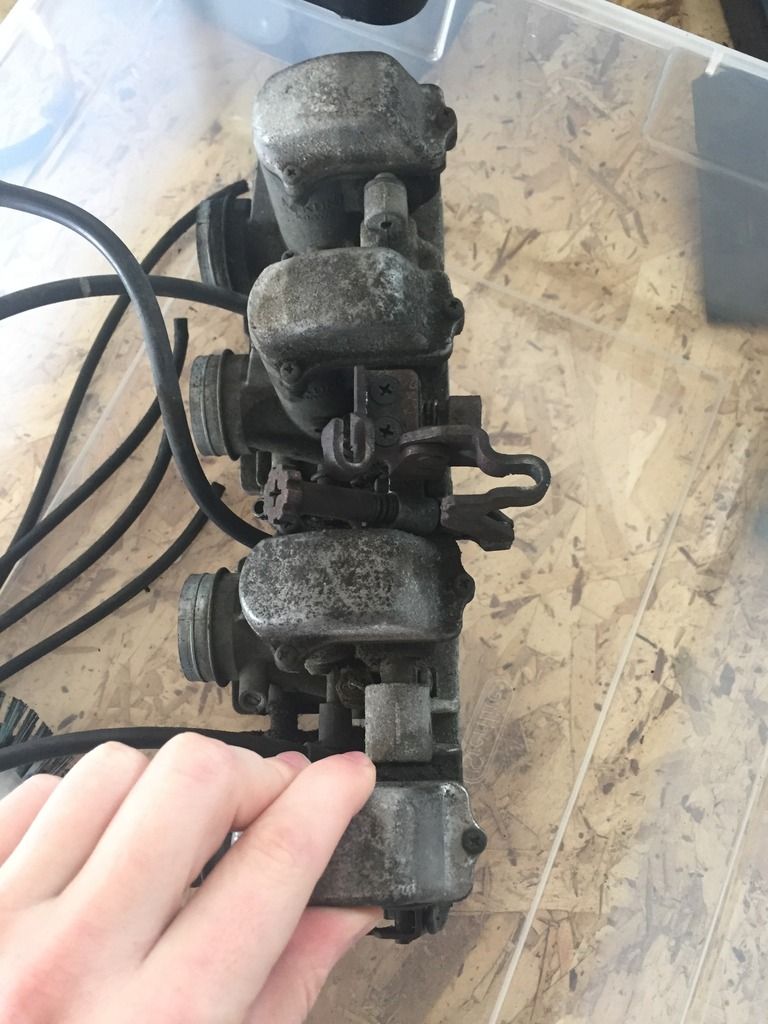
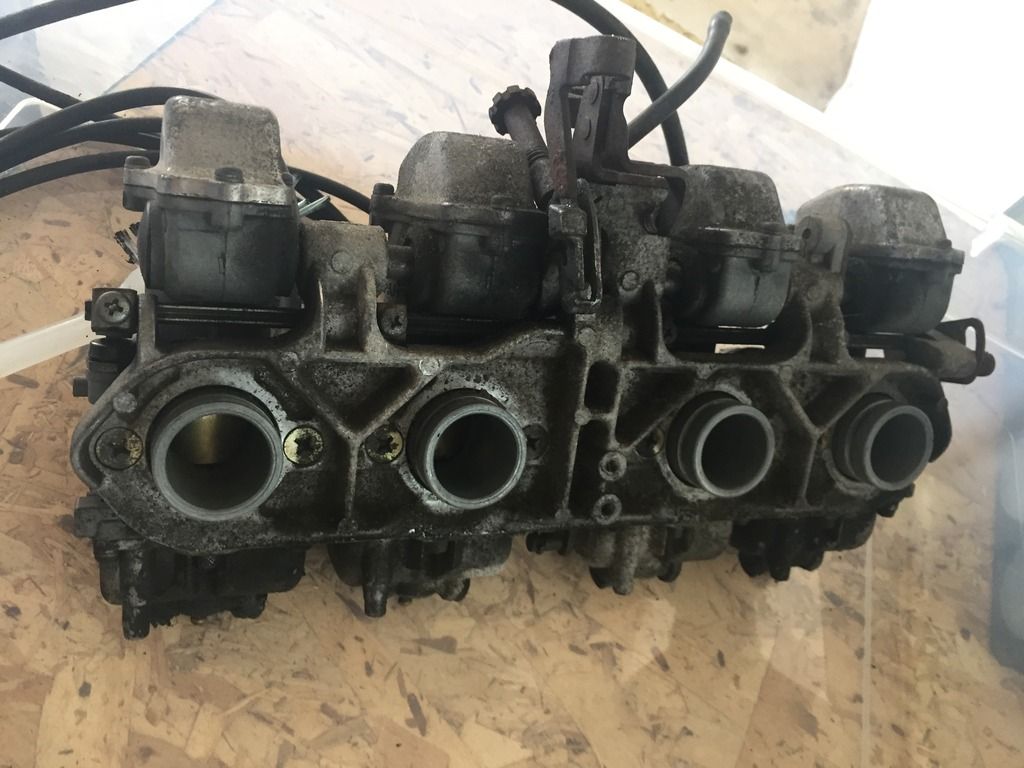
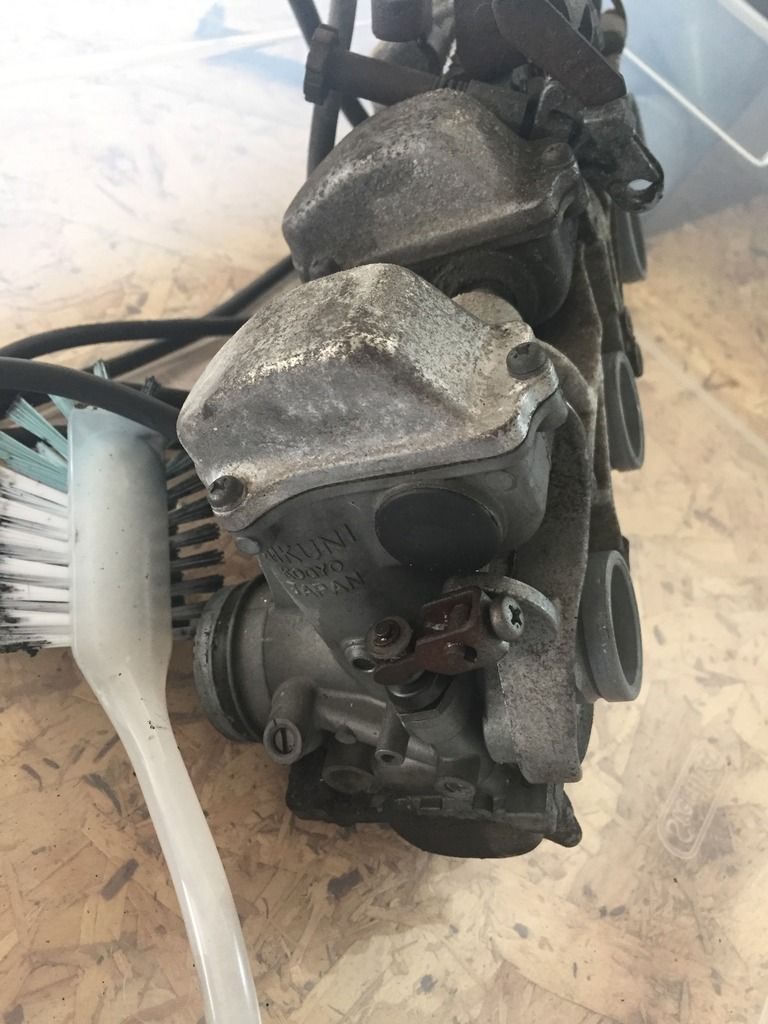
Pics below! Can anyone help me identify exactly which carbs I have? I will be ordering o-rings soon. CV or VM Carbs?


If you don't already have one, invest in a good impact screwdriver, you re going to need it!

I would have cracked the degreaser to it first, makes working on it a whole lot cleaner, and reduces dirt falling into places when you disassemble.

Better whack the penetrant to the exhaust for multiple days before attempting removal.

Best of luck....
 
Small update:
Parts ordering has been done....for now of course.
Things I got:
New fuel tank cap seal
petcock rebuild kit
new fuel line
new fuel filter
O ring kit for VM carbs from cycle o rings
new stainless steel screws for the carbs top and bottom
new float bowl gaskets
new top cap carb gaskets
viton o rings for the carb boot intakes
stainless steel screws for the carb boot intakes
new exhaust gaskets

Can't remember if I got these or not but I think I'll need new bolts for the exhaust mounts. Anyone know where to find those in a nice stainless steel allen head?
 
Tank is cleaned of any rust, I rebuild the petcock but must have done something wrong cuz it ain't working right. Going to just throw a manual valve in there for now till I work on it more. New tank cap seal.
Rebuilt the carbs, they are still dirty on the outside but ill deal with that later.
Got all but cylinder 2 of the carb boots done, replaced the o rings and screws. I cannot for the life of me get the number 2 one off. Suggestions? Screws are well stuck. Hard to get the impact in there, used socket extensions as well.
Going to leave the exhaust alone as the bolts are SUPER rusted and i'll prob end up breaking them all.
Did a valve clearance check and looks pretty bad. See below.

My current issue is removing the old valve cover gasket. It is a pain in the butt. It is literally fused to the head. I have to scrape it off bit by bit and am also dropping small fragments into the head. I need a solution, someone? I put goo gone over it, didn't seem to help break it down. I've heard of using a plastic putty scrapper, doubt that'll work. Using a razor blade right now at 90 degrees, trying my best not to f up the soft aluminum. Suggestions?!

I measured .03mm on all the valves as the smallest gauge I had was .04mm. Thoughts?
Valves:
exhaust
4: .03 2.75mm shim
3: .03 2.80mm shim
2: .03 2.80mm shim
1: .03 2.70mm shim

Intake:
4: .03 2.80mm shim
3: .03 2.90mm shim
2: .03 2.75mm shim
1: .03 2.80mm shim

My rough idea:
Current shims in the bike
1) 2.90-replace with 2.85mm (order/trade 1)
4) 2.80-replace with 2.75mm (order/trade 2)
2) 2.75-replace with 2.70mm (order/trade 1)
1) 2.70-replace with 2.65mm (order/trade 1)

This will drop everything .05mm give or take, plus the .03mm that I'm guessing is currently on the bike will give me around .08mm of clearance all around best case, worse case .05mm (hopefully not)
 
Last edited:
I measured .03mm on all the valves as the smallest gauge I had was .04mm. Thoughts?


How did you measure .03 if your smallest gauge is larger than that? That reading tells you that all of your clearances are <.04mm so are likely also less than .03mm. Do the buckets spin freely? If not then there is NO clearance.

To get a proper reading for valves that are too tight you need to use a shim that is several sizes smaller so you can at least get a shim in there. You can probably get away with using your 2.70 shim to do this with some of the valves that currently have larger shims but for the your #1 Exhaust you'll probably need to get a smaller shim to get a good reading.

I have a 2.40 shim to use whenever I'm in that situation. Also you probably already know this but don't spin the engine if any buckets don't have shims in em.
 
Last edited:
Thanks for that gasket scraper tool!
-The buckets spin freely. Let's say all the valves have .01, so regardless i'll need to put a smaller shim in all of them. If I'm dropping .05mm to all of them then I'll at least be at .05mm-.08mm which is in spec. Once I have the new shims I'll make sure all clearances are good. The guide I was following had the same thing happen, the smallest tool he had was .04mm so he assumed his clearances were .03mm or less.
 
okay guys I got all that crappy old gasket off finally! Def one of the more annoying things I've had to do on a bike. However there is pieces of it all over the place and in near the buckets. Best way to remove? Compressed air maybe? Shop vac? How bad is it if I miss a small piece? Will it destroy the engine? Any recommendations for prepping to install the new gasket? I heard some WD-40 on it?
I'll be moving onto fluid changes next and new bars, should be ready to fire her back up soon, make sure all is well and slowly start working on cosmetic stuff.
 
Ive got this exact bike (in burgundy)...great thread. Ill be following along
 
Can anyone recommend how to make sure most of the gasket crap is clear of the valves? I'll prob just take some compressed air to it and clean up the mess going slowly one by one. New shims finally arrived and new bars
 
Well. Problem. One bolt on the valve cover snapped off. I tried to extract it and now the extractor snapped off in the bolt. I don't mind the bolt missing but I put the bike back together and got it running and it leaks a lot of oil from that area. What do you guys recommend I do here? I haven't dealt with this sort of thing before so need advice. Please see the pics.


that's bad luck :(
Fortunately there's a good part of the bolt left to get a grip on.

I have had good results with a welding device, just put a small weld on top of the broken bolt to get heat in there if you have a welding device, otherwise apply heat with a torch.
The trick : while the bolt is still hot use a wire cutter with the beaks perpendicular to the thread on the bolt, the design with sharp beak and big lever action usually does the trick for me where normal pliers don't get enough grip.

wire-cutter.jpg
 
Last edited:
Hmm would have never thought of wire cutters. Also haven't seen the type you posted before.
I don't have any welding equipment but can pick up a torch. Just get the area nice and hot and grab the bolt with the cutters and hopefully should pop out? I'll give that a go. Thanks!
 
welcome.

also don't grip the bolt and just increase force trying to turn it loose,
but apply force loosening-fastening left-right which will hopefully wiggle dirt/rust free
between bolt and housing.
Good luck
 
Last edited:
Another method is to weld a nut to the piece of the bolt that's left. Put a wrench on it and go back and forth until it pops loose. I've had luck with heat and vise grips too, if there's enough of the bolt to grab. Only danger there is you might just break off the nub that's left and then you won't have any meat to weld a nut to if you need to...

Good luck

that's a good method.

LOL in this case it might not be a bad thing if the rest of the nub came off.
If the torch and wirecutter do not produce the desired result, carefully removing a few mm of the top of the remainder of the bolt may be a good option.
it would probably leave enough of the extractor exposed to get it out and maybe even remove the rest of the damaged bolt in doing so.
 
Last edited:
Back
Top