• Required reading for all forum users!!!

    Welcome!
    Register to access the full functionality of the GSResources forum. Until you register and activate your account you will not have full forum access, nor will you be able to post or reply to messages.

    A note to new registrants...
    All new forum registrations must be activated via email before you have full access to the forum.

    A Special Note about Email accounts!
    DO NOT SIGN UP USING hotmail, outlook, gmx, sbcglobal, att, bellsouth or email.com. They delete our forum signup emails.

    A note to old forum members...
    I receive numerous requests from people who can no longer log in because their accounts were deleted. As mentioned in the forum FAQ, user accounts are deleted if you haven't logged in for the past 6 months. If you can't log in, then create a new forum account. If you don't get an error message, then check your email account for an activation message. If you get a message stating that the email address is already in use, then your account still exists so follow the instructions in the forum FAQ for resetting your password.

    Have you forgotten your password or have a new email address? Then read the forum FAQ for details on how to reset it.

    Any email requests for "can't log in anymore" problems or "lost my password" problems will be deleted. Read the forum FAQ and follow the instructions there - that's what we have one for...

  • Returning Visitors

    If you are a returning visitor who never received your confirmation email, then odds are your email provider is blockinig emails from our server. The only thing that can be done to get around this is you will have to try creating another forum account using an email address from another domain.

    If you are a returning visitor to the forum and can't log in using your old forum name and password but used to be able to then chances are your account is deleted. Purges of the databases are done regularly. You will have to create a new forum account and you should be all set.

Building a KiwiKat

  • Thread starter Thread starter Anonymous
  • Start date Start date
Had a brainwave that I could temporarily up the HP on the project Kat. I have taken the engine out of another 1100 Kat that I have and installed it into the project bike. I have also fitted a set of 33mm smoothbores that I purchased a few years ago. I have made up a new front drive sprocket using 2 old sprokets that I machined the teeth off and welded to a new 532 x 18 tooth sprocket. (The offset for this bike is 15mm). Once it was welded I machined out the centre of the 18 tooth sprocket so that the mainshaft nut would fit and have plenty of thread to bite on. I used a rear axle nut of a gsxr1100 because it is the same thread and has a flange on one end of it. This flange will help stop the sprocket dancing around on the mainshaft. I have recessed the inside face of the flanged nut to allow for the small amount of spline poking into the inside of the nut. I am running 18 teeth at the front and a 47 tooth on the rear. This gives me a gear ratio of 2.611 which is exactly the same ratio as a standard Kat with 2.8:1 but with the smaller circumferance 180-55 x 17" tyre. The bike certainly has a lot more power and pulled up to 220 okay, but became a bit skittish in the front due to the forks being hard up on the stops under power. I will now concentrate on mounting in a steering damper to stabilise the front end a bit and possibly will need to soften the front springs. It is really surprising how much power this engine is developing compared to what it was doing in the standard Kat frame. I will need to weigh the machine and report back, but I am guessing this project bike is quite a bit lighter with the JMC rear arm, mono shock and the lighter wheels and forks etc.
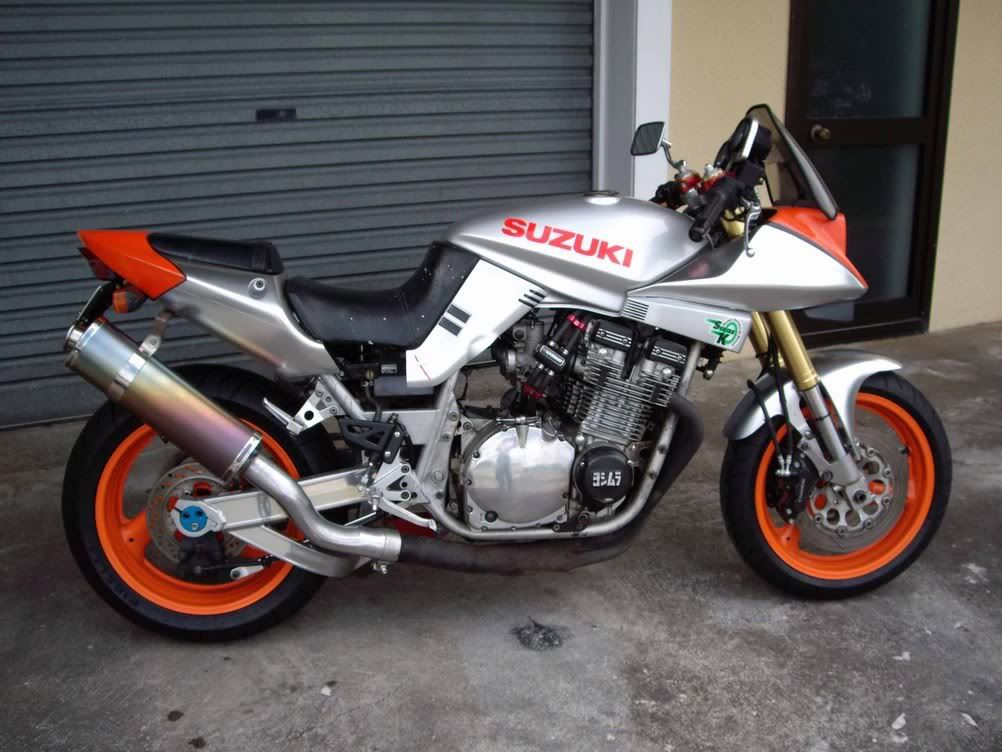
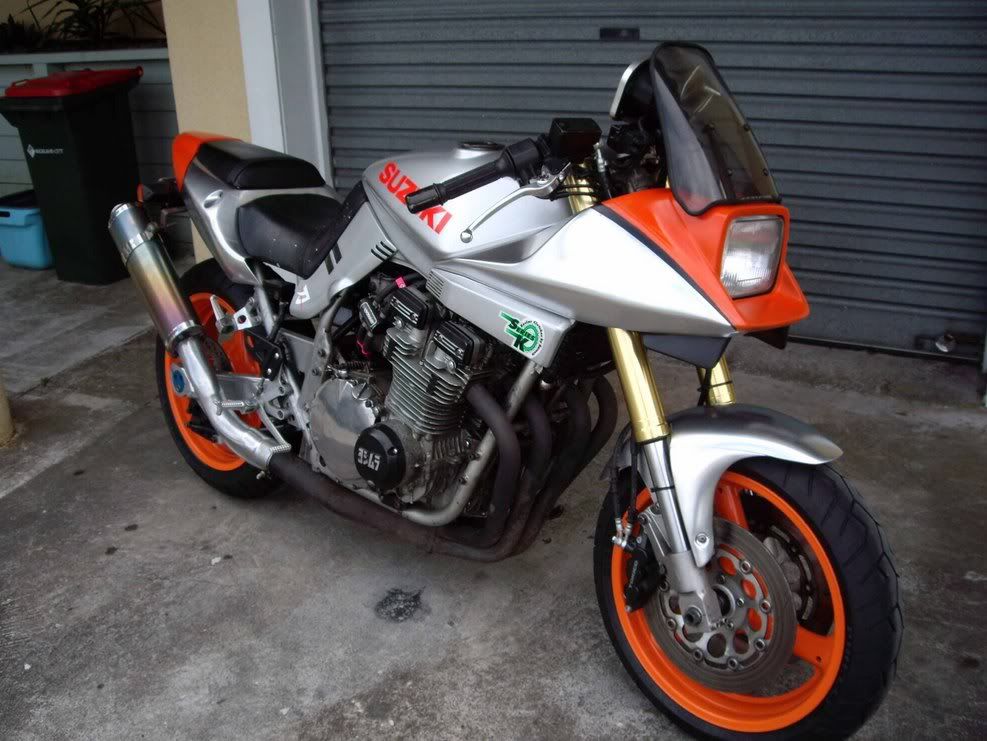
The front blinkers are temporary, as is the rear exhaust mount on the muffler.

Here is a shot with the (LOAN) 1100 engine in place.

Picture002.jpg
 
Mate that's looking good. Your re-routed exhaust looks just the ticket with the rear-end bodywork; you needed a 'high' muffler.

Any ideas what you'll use for indicators? Anything that minimises drag is good... ;-)

Mike.
 
great lookin ride. Sounds like it rolls as nice as it looks. I see a few key parts. yosh cover....nice and hard to find.

can you email me the wiring for the clocks? I have a set and may like to install with my kat harness??

great job M8.
 
Katman & KatanaKid,

Hope it's OK with you (and I can't imagine why it wouldn't be) but I have just added links to both your project threads here on the GS Resources, on the links page of my Kat website. I think the work by you guys is top-notch.

Mike.
 
Hi Katman. Glad you are okay and back in action after that nasty business with the cables. I have used a 91-92 GSXR1100 wiring loom. The switch gear for blinkers and lights etc is from a later water cooled WP/R/S. Unfortunately I ended up with male to male connectors between the switches and the loom plugs, so I had to find female plugs for the switchblocks, and repin and rewire them all. It really turned into a major piece of work with all of those pins! Next time I will use a GSXR1100 WP/R/S loom. The only changes that I had to make really was the shortening of the loom itself, and the matching of the 4 wires to the GSX ignitor (because the plugs are different). I had to splice the rev counter trigger wire (black with red trace) from the GSXR loom onto one of the ignitor trigger wires on the small GSX ignitor wires. I left the standard GSX rectifier in place and just linked 2 of the 3 alternator output wires together (to do away with the silly 90 volts to the headlight switch system of the early GSX's) wired in the RED out put wire from the rectifier/regulator straight into the RED input charging wire of the GSXR1100 wiring loom.
I noticed that most of the wiring on the original GSX loom and that on the GSXR1100 loom were mostly the same colour convention. So sorry Katman, I don't have a wiring diagram, but contact me if I can be of assistance.
 
I have been chasing one of those Yoshi points covers for about 10 years now, including writing to Yoshimura Japan, U.K and USA. They do come up occasionally on EBAY. Anyway I thought I had got lucky and finally bought one off EBAY. I paid US$100 for it plus about US$75 postage back to N.Z. (We really get tucked with postage from the States over here). The cover arrived after a few days, and I was feeling really pleased with myself. I unscrewed the existing cover and offered up the new beaut "Yoshi" cover onto my engine. Well..............it's about 4mm smaller in diameter than the original, no 2 holes lined up for the 3 bolts (I spent quite some time with a small rat tail file) and the offset tag at the bottom of the cover to engine case is out of rotation by about 5 degrees. Yes, unfortunately another cheap copy and rip off from some faceless B@#stad. The thickness of the alloy is no more than a standard cover too. I am not into slagging people off, but I am fuming a bit over this episode. So Guys, watch it with these covers.
 
Hey katanakid,
Great looking seat and suspension parts. I don't really like the way the exhaust runs now to be honset. Looks too ''fabricated'' with the strange curve in the linkpipe. But hey, it's your ride. I'd have choosen for a seatpipe but then for good ''flow''you would've needed to loose the monoshock and up the pipe through there. It'll look even better when the colors are matched!

Grtz, Marco.
 
I have finally found the time to have a go at making up a paint scheme. I sprayed it myself to see what it would look like. The wheels are powdercoated in Repsol orange. I still need to fit the braided lines to the front calipers and make up a proper rear exhaust mount. I will try and hang it off the rear peg mount.

IMGP02901.jpg


IMGP02871.jpg
 
Magnificent effort! I just love that rear end body work, best I've ever seen on a Kat I would say. And the paint job is well-thought out and very schmick. The Repsol Orange for the wheels is a master stroke; reminds me of those 'Dark' Ducati Monsters with their orange wheels. Top stuff.

Now is that an oil thermostat I spy on your oil cooler lines there? What brand? And what temp. is it set to divert the oil to the cooler?

Mike.
 
Hi Mike, yes it's a Lockhart unit i purchased with the rear adaptor. Temp is preset, but not sure at what degrees, sorry.
 
Very Awesome! I love the paint job, it's very classy. For heaven's sake though, find a new stainless header! It's definately the weak link in an otherwise totally sweet bike. Keep up the good work.
 
That is one HOT project you've got coming together!

Nicely executed!!

Look forward to seeing it when you proclaim it "finished!!!"

Steve 8)
 
OK, a few more questions/ suggestions, which I hope don't sound too picky because even if you left it as it is, it would be a great bike. But Katman, you don't seem like someone who's happy with 98%, so here goes:
1. What will you be doing with the space between the rear bodywork and the side-covers? Perhaps that gap needs filling... and if it does, you could 'mock-up' some bodywork with clay, and make fibre-glass extensions for the rear bodywork so that it meets the side-covers. Either that or find a way to make the rear bodywork look less 'chopped off' underneath the seat there.
2. The bracket that holds your muffler to the sub-frame... hmm... it would be much nicer if it was some sort of cast aluminium item. Or perhaps a bracket that visually matches the brackets you've got for the pillion footpegs.
3. Ditto the earlier post re. your exhaust headers. Chrome would be too shiny; but stainless would be round about right, I think.
4. Will you be going for pod filters or an airbox for the carbies?

Keep up the excellent work!

Mike.
 
Kkid, That is a really impressive bike. Terrific job, keep it up. Ray
 
I like it Katman. The only suggestion I have is give it to me! lol
 
Back
Top