• Required reading for all forum users!!!

    Welcome!
    Register to access the full functionality of the GSResources forum. Until you register and activate your account you will not have full forum access, nor will you be able to post or reply to messages.

    A note to new registrants...
    All new forum registrations must be activated via email before you have full access to the forum.

    A Special Note about Email accounts!
    DO NOT SIGN UP USING hotmail, outlook, gmx, sbcglobal, att, bellsouth or email.com. They delete our forum signup emails.

    A note to old forum members...
    I receive numerous requests from people who can no longer log in because their accounts were deleted. As mentioned in the forum FAQ, user accounts are deleted if you haven't logged in for the past 6 months. If you can't log in, then create a new forum account. If you don't get an error message, then check your email account for an activation message. If you get a message stating that the email address is already in use, then your account still exists so follow the instructions in the forum FAQ for resetting your password.

    Have you forgotten your password or have a new email address? Then read the forum FAQ for details on how to reset it.

    Any email requests for "can't log in anymore" problems or "lost my password" problems will be deleted. Read the forum FAQ and follow the instructions there - that's what we have one for...

  • Returning Visitors

    If you are a returning visitor who never received your confirmation email, then odds are your email provider is blockinig emails from our server. The only thing that can be done to get around this is you will have to try creating another forum account using an email address from another domain.

    If you are a returning visitor to the forum and can't log in using your old forum name and password but used to be able to then chances are your account is deleted. Purges of the databases are done regularly. You will have to create a new forum account and you should be all set.

here i go again.. project: 'too late to go back now'

  • Thread starter Thread starter 08rangerdan
  • Start date Start date
0

08rangerdan

Guest
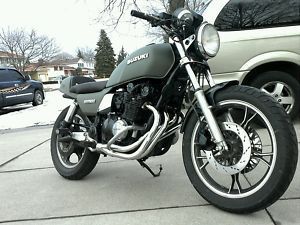
Hey everyone, im new to these forums.. I now have aquired a new to me 1982 suzuki gs850g. I recieved this machine in a trade for a 91 honda cr250r that i had just gone over and completely rebuilt/restored.. I must have had over $3000 into that machine as a "project" but there was no way in the heavens that machine would ever sell.. I ended up giving into this old zuke that impressed me. All of a sudden soon after the trade i had an urge to dismember this frame and head into a familiar position..

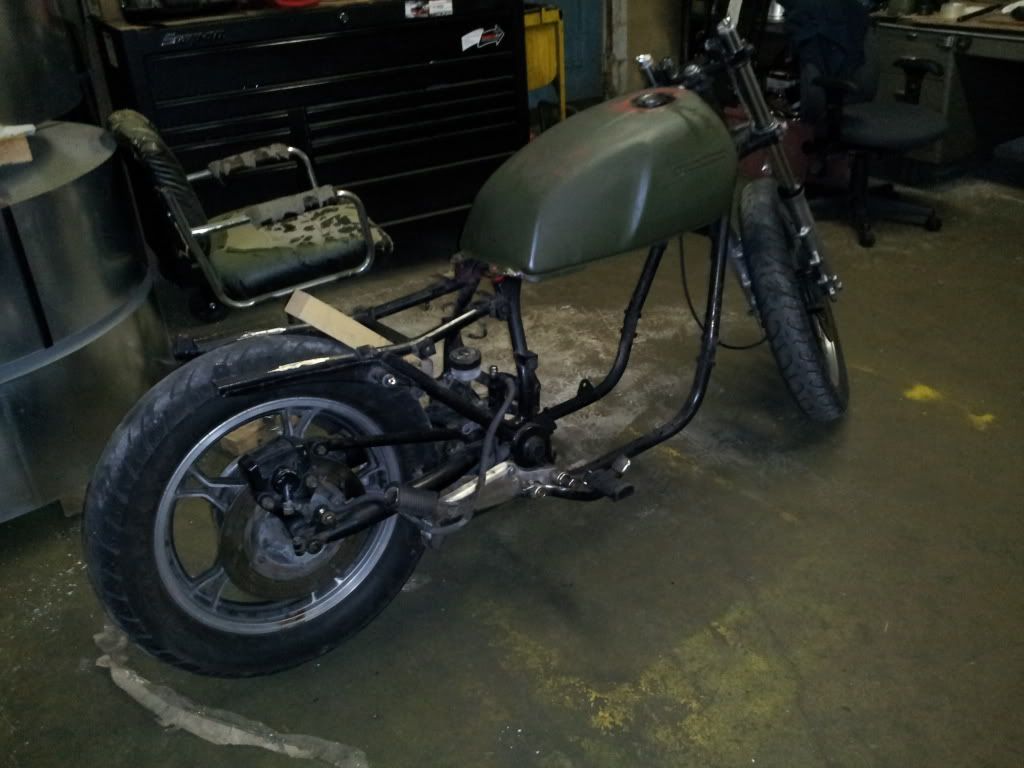
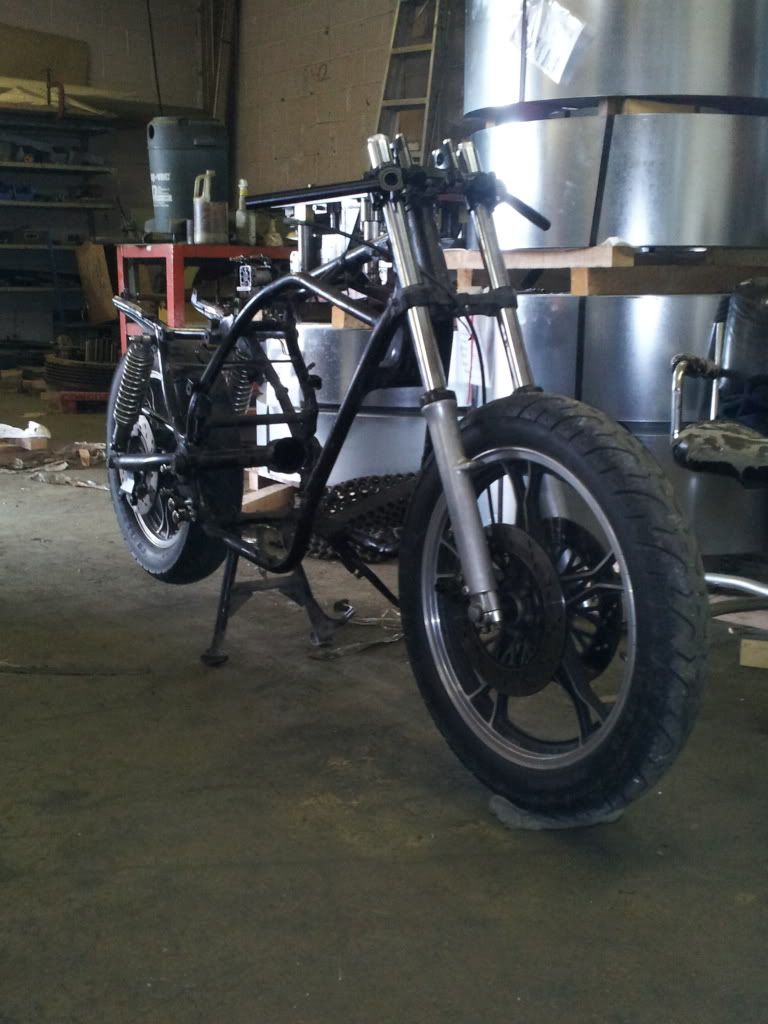
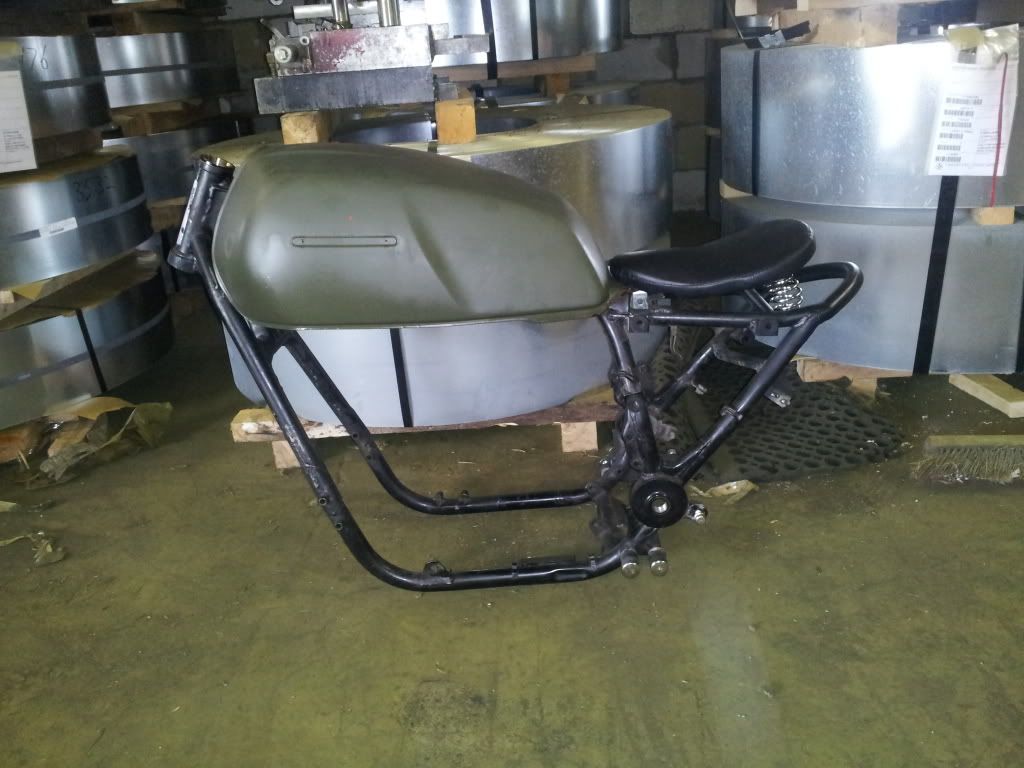
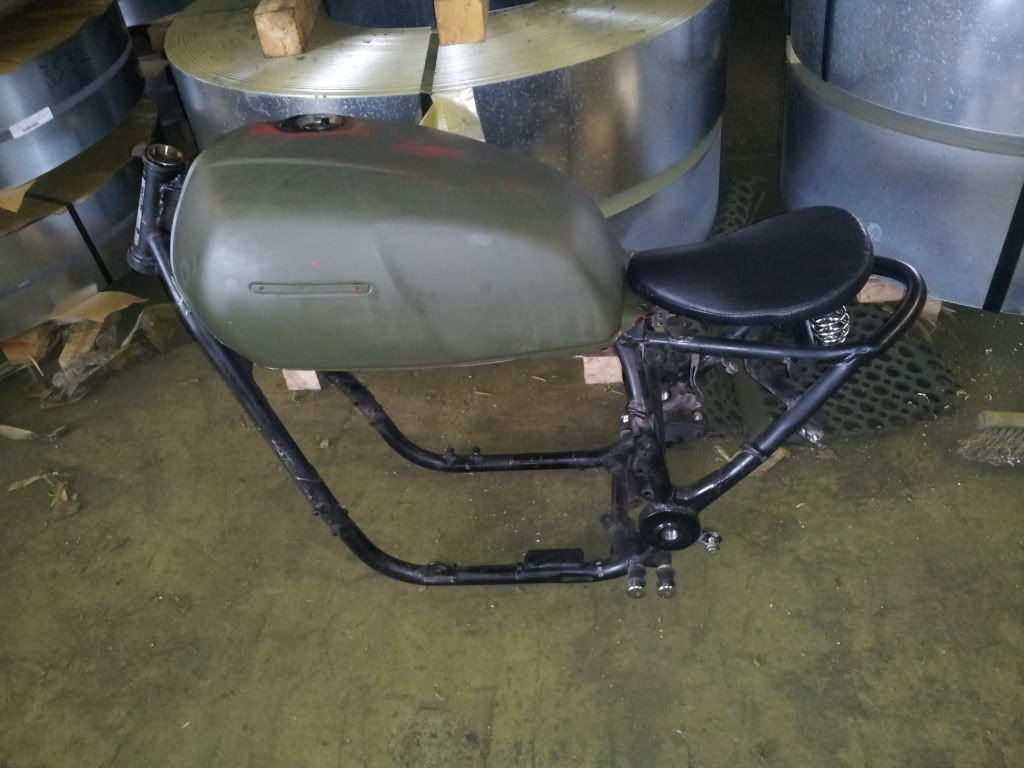
Here's what i started with..
_T2eC16NHJGYFFkn_pk3TBRsOU-_6Zg_48_20_zpsef171dfb.jpg


20130609_181551_zps06c98e45.jpg


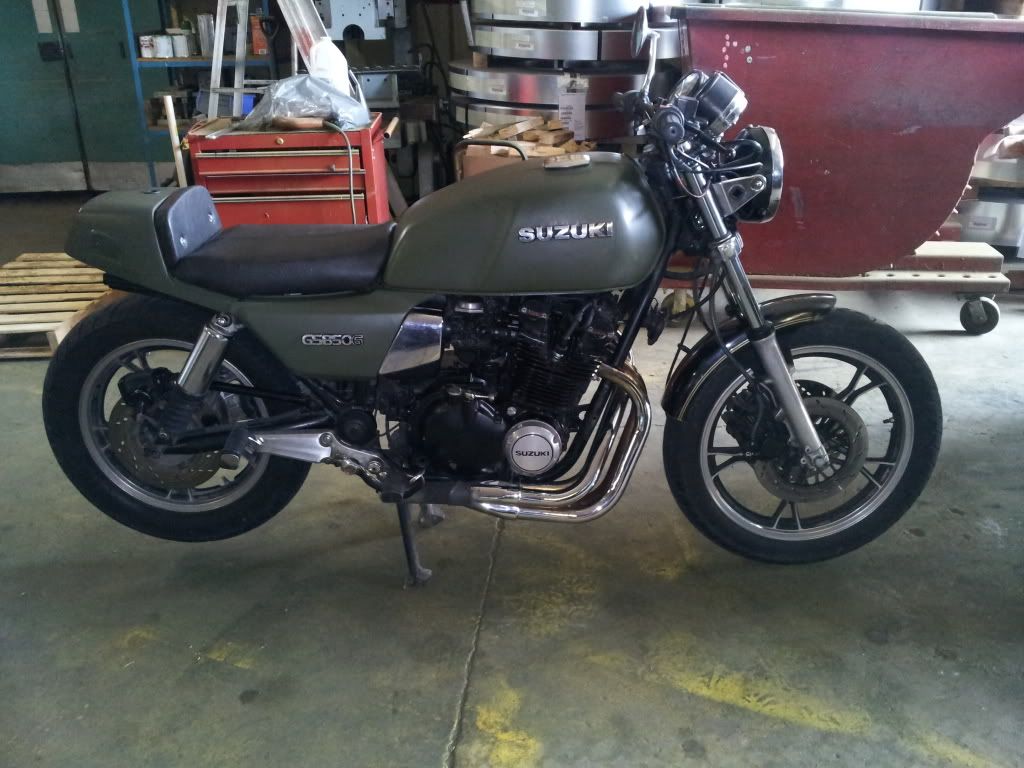
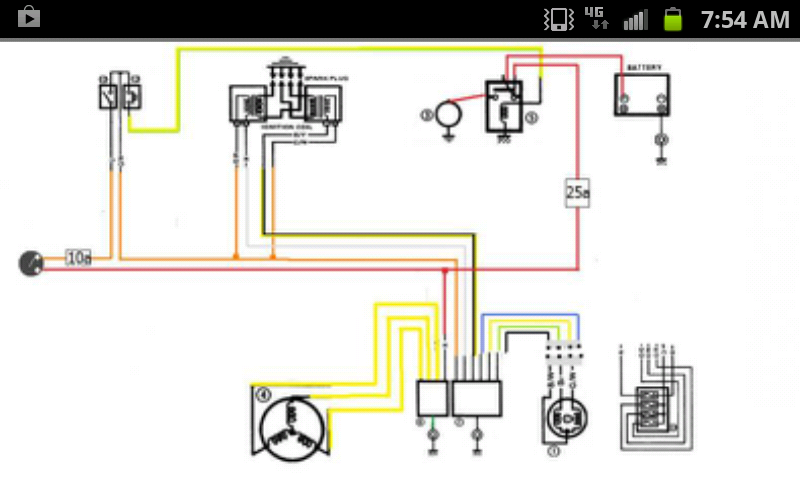
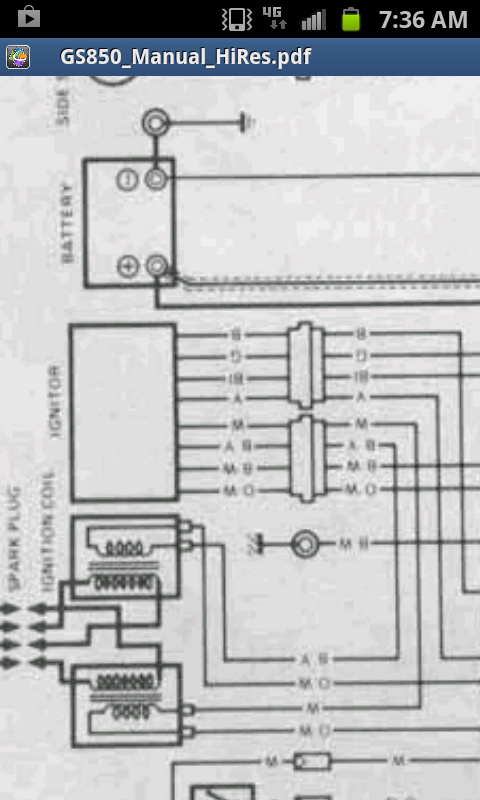
The goal to this project is to make a bike custom to my liking. Learn about 4 stroke operations and all the mechanical, electrical, and technical operations involved of creating a new machine.. I plan to simplify the wiring (ill need plenty of assistance), remove any plastic and finally lower the stance and create more of an eye turning cruiser with a very clean mechanical look to it.

When i recieved this machine, it was already headed in a custom direction. So dont think that i am cutting up a perfectly pristine machine. If i could restore it i would but i opted to keep going this route.

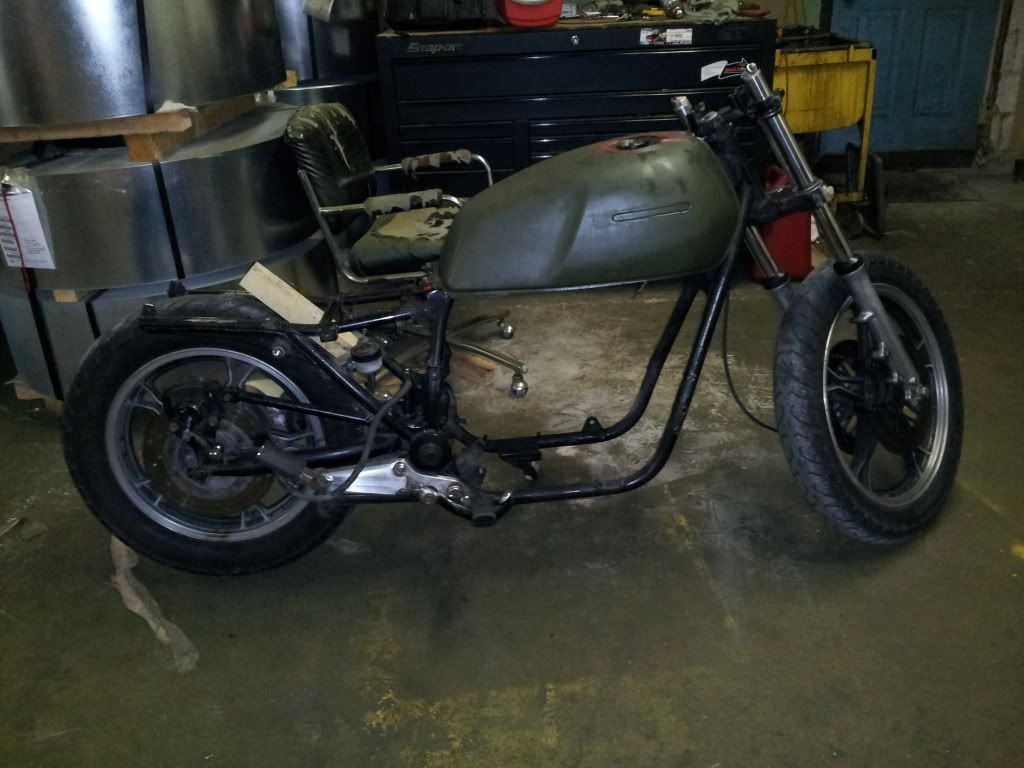
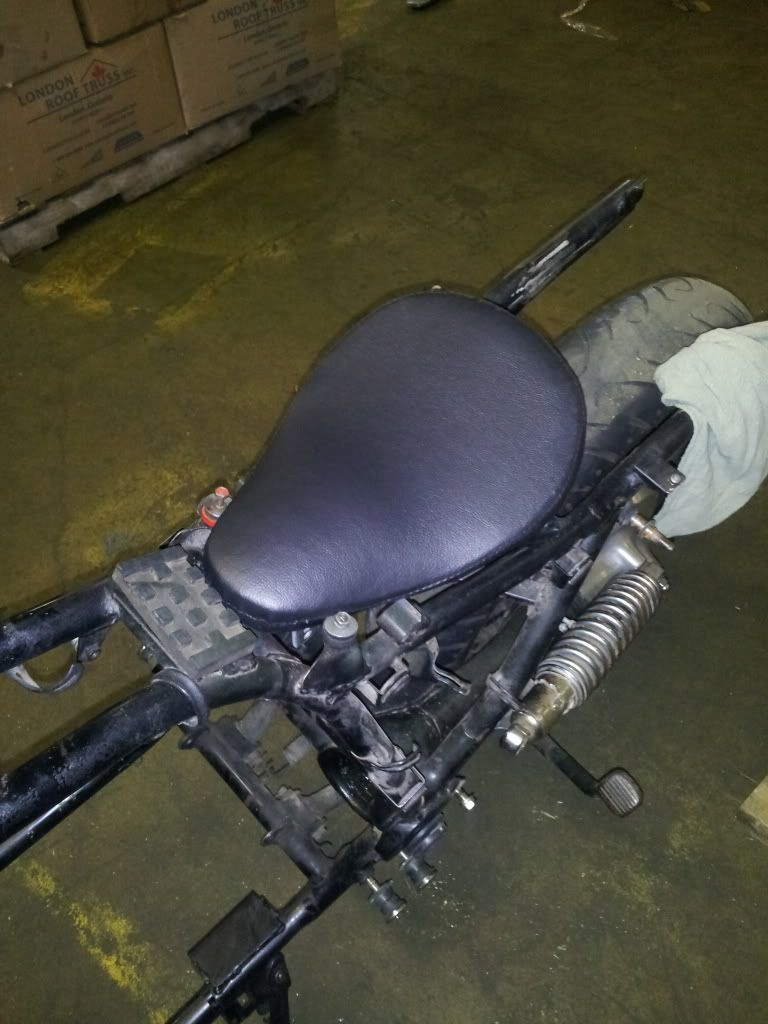
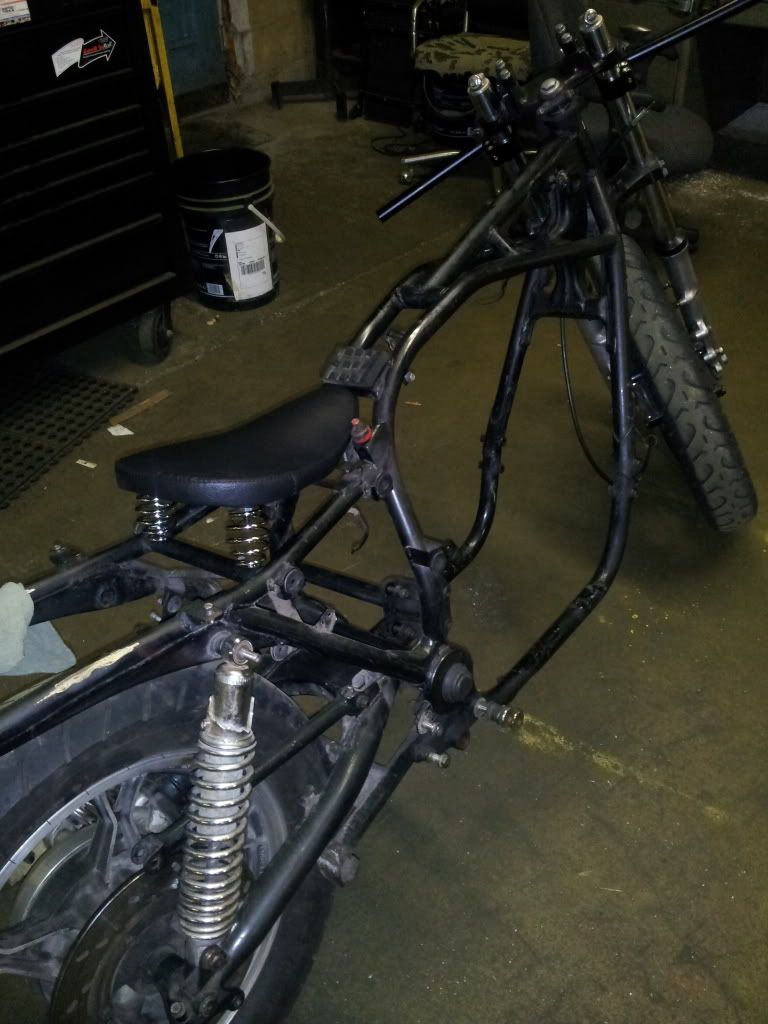
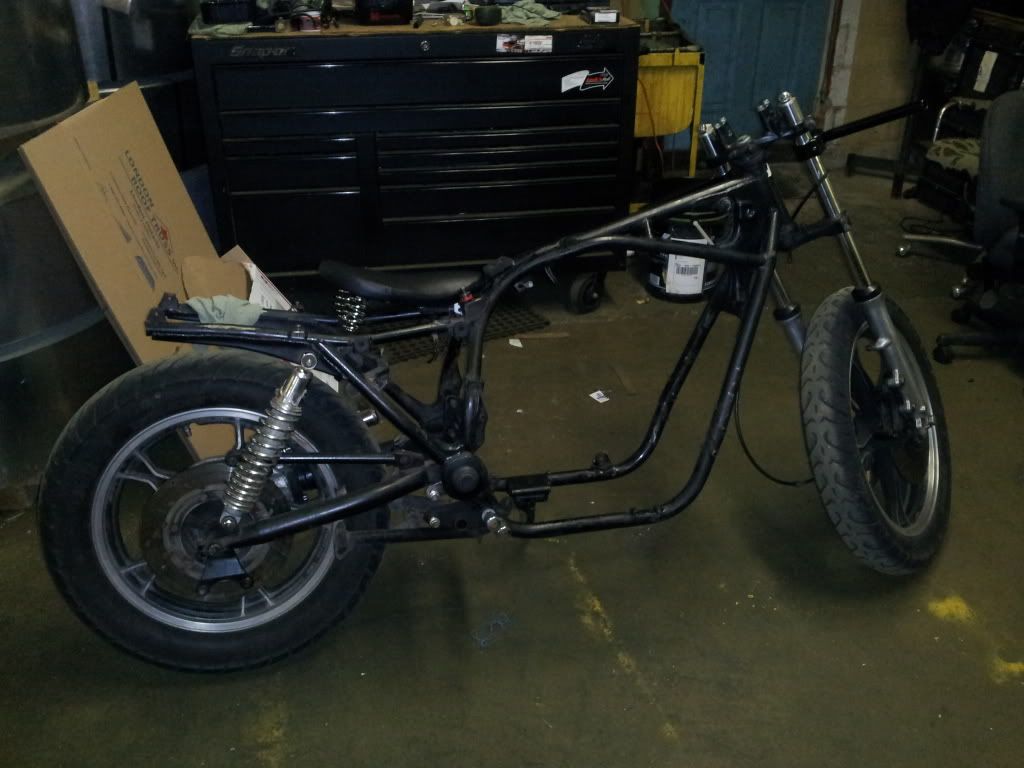
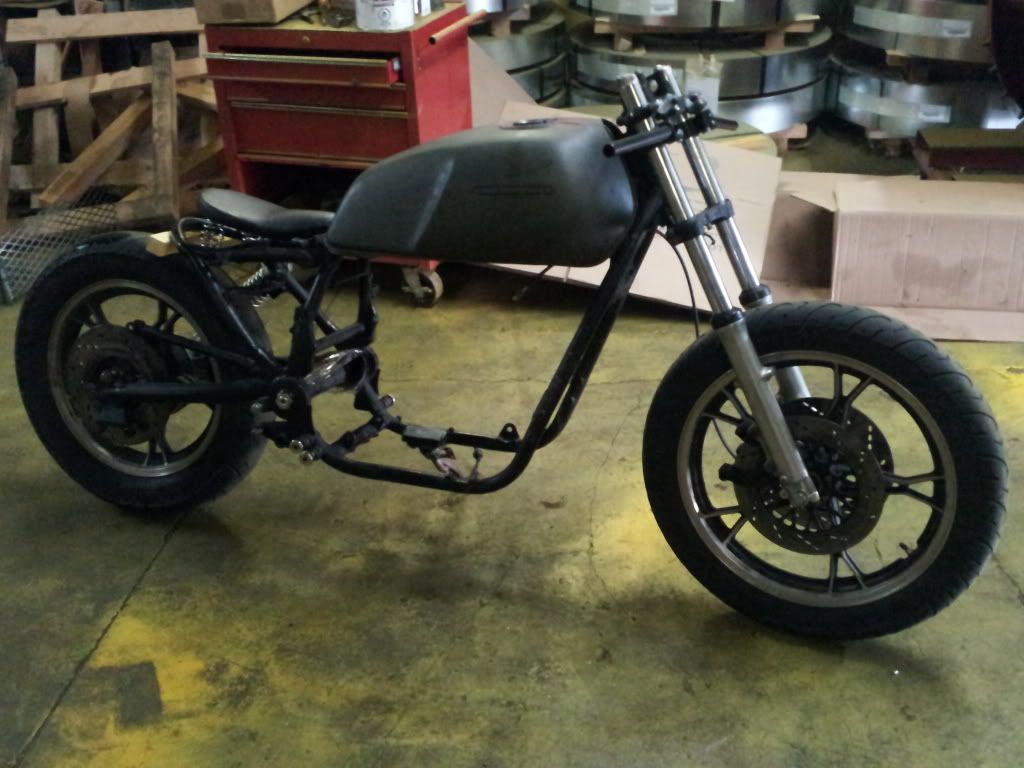
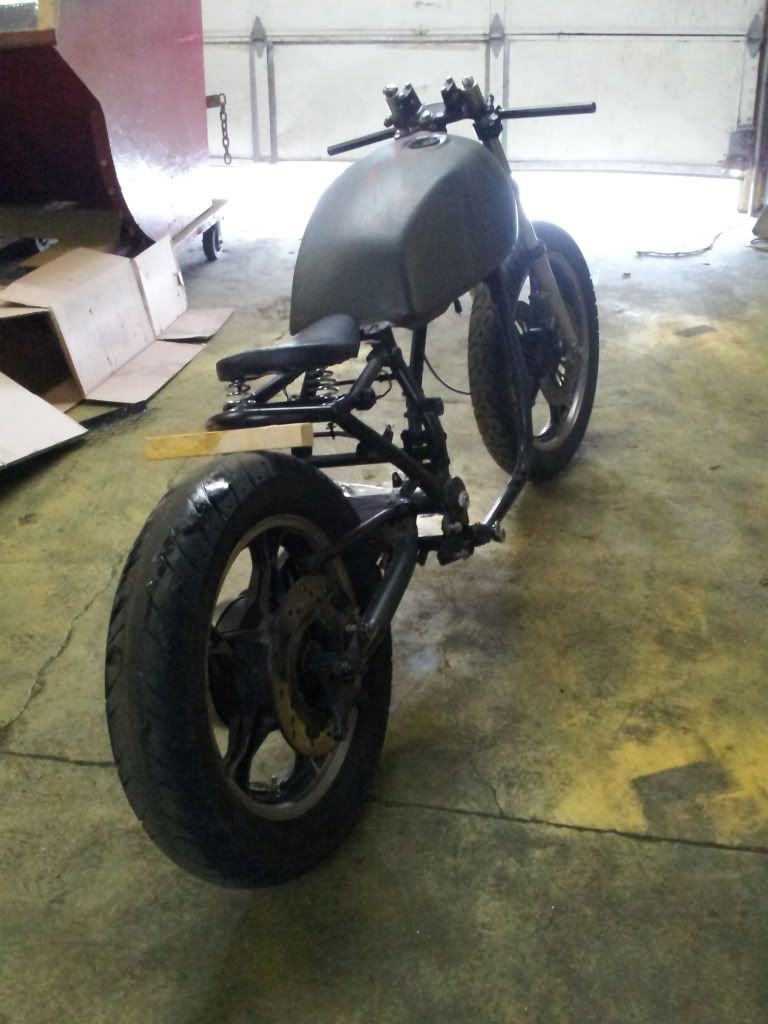
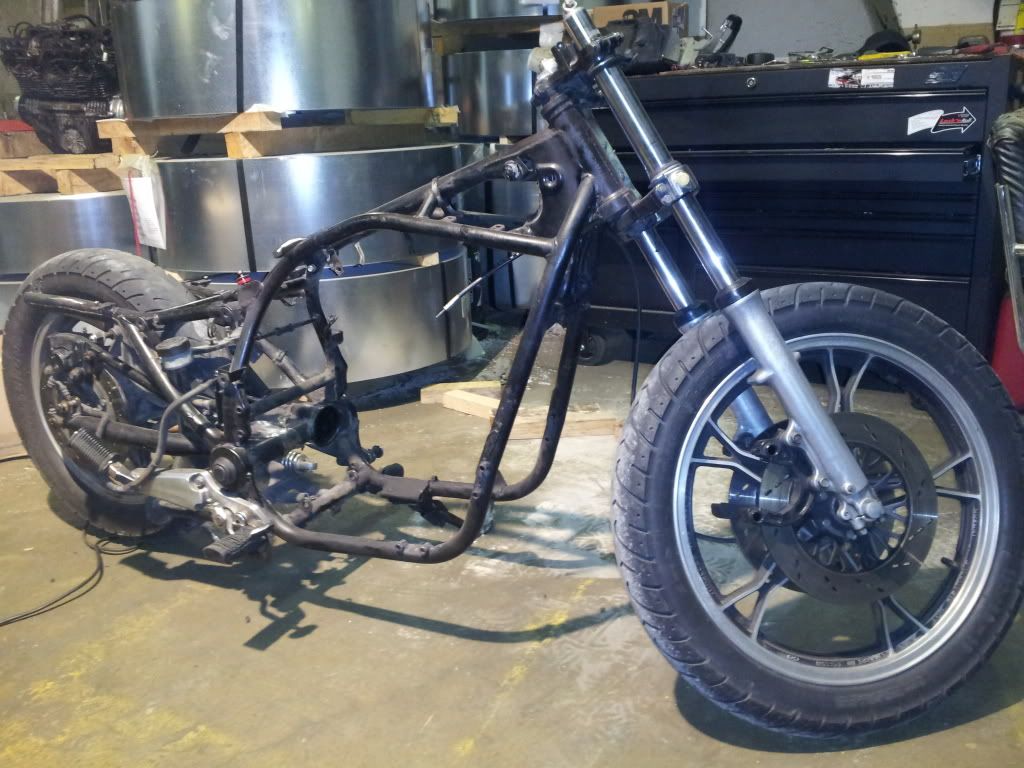
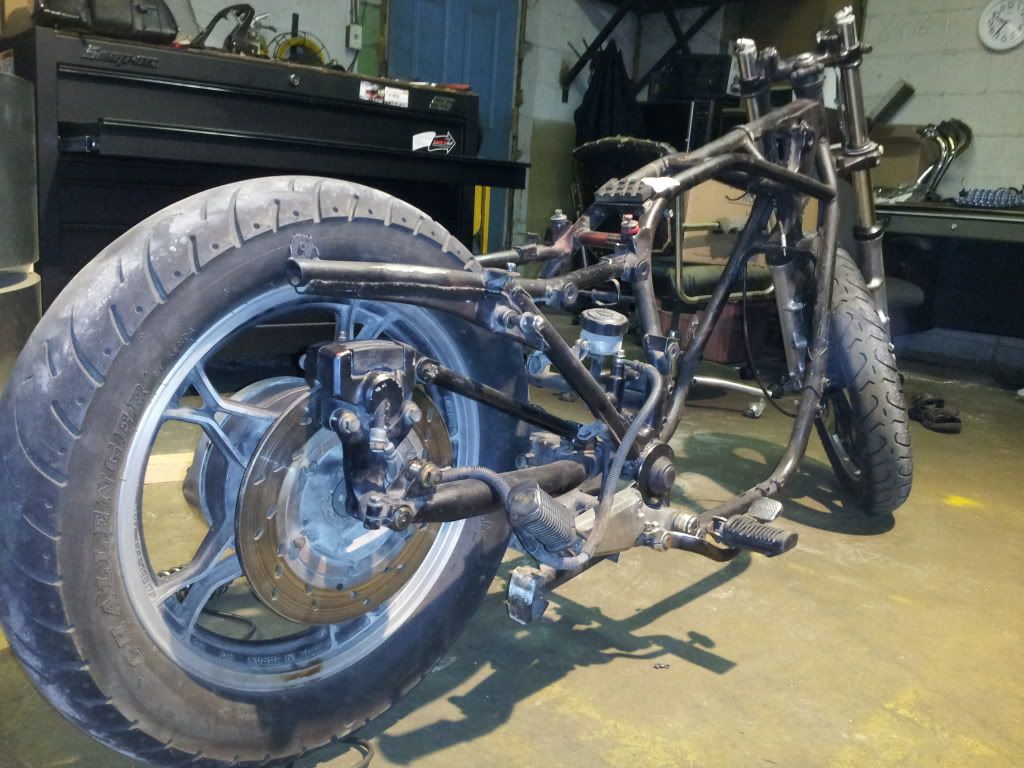
Here is where i am as of this June 19th......
20130619_213454_zps932d90ed.jpg


20130619_213546_zps696af8c6.jpg
 
Hello. Glad to have you aboard. Good luck on the rebuild and keep us posted with pictures.
 
What are your plans for the rear suspension?

If you are ditching the shocks, I might be interested in them.

.
 
Plans are to keep the nice air shocks on it but won't have much travel due to the drop.. Plans may change but i want to make some use of the soft tail. Bbeing 13 inch shocks may prove to be a little much.. 11 inch would be great. Not sure if i can limit the travel easily with these or not
 
Last edited:
A couple with tank.. The stock tank is growing on me, i was really set on a peanut or early style sportster tank. Something small and tall. What do you guys think when it comes down to tanks ?? Can't wait to get this frame out to blasting and powdercoat.. But alot more cutting and retrofitting to come

I've got some clip on bars for the forks. and a carb kit coming in sometime soon so i can get onto the motor detailing and maintainance.

20130620_101919_zpsbfe6ec6d.jpg


20130620_101948_zps4784fd1f.jpg
 
Last edited:
This makes me want to tear down my second bike...but I'm gonna enjoy reading your thread instead.


Ed
 
Haha sounds like a smart idea. If i ever figure out the wiring harness id be alot happier.. Many long nights trying to figure out what does what and how to break it all down. I really want 3 main harnesses. One for charge, one for ignition and main power, and one for the running lights and accessory lights,,horn etc..

Many connectors in the headlight got a little hot and melted. Also after i stripped all the sheath off of the main harness i found several strains with some good rub,, some down to bare copper and some other broken strands...
 
Last edited:
Plans are changing in my mind again. Im not going with the lower stance anymore! Im now looking to do more of a resto-mod on this frame.. Different seat, Bars, and some control components plus some visual trim changes and ighting changes. Just some slight alterations to already modified and damaged areas. Ill do some updates after my electrical is configured
 
Last edited:
Haha sounds like a smart idea. If i ever figure out the wiring harness id be alot happier.. Many long nights trying to figure out what does what and how to break it all down. I really want 3 main harnesses. One for charge, one for ignition and main power, and one for the running lights and accessory lights,,horn etc..

Many connectors in the headlight got a little hot and melted. Also after i stripped all the sheath off of the main harness i found several strains with some good rub,, some down to bare copper and some other broken strands...

Hey, your bike looks pretty good already (way better than mine anyways).
I am currently rebuilding an entire harness and "replanning" the whole system as well. I would almost say I have the wiring memorized (at least enough to be able to pass a test on it). My plan is to do much of what you want. When I'm done redrawing the diagram I can send it your way (I'm about 1/3 done and is turning into an obsession).

Good luck.

I'll be sure to follow this thread.
 
Thanks man! I really can't knock the bike too much. I got it on a trade and as soon as i got it, i rode it for a week straight and no real issues. Being open headers, may be a reason,, or hopefully THE reason it became buggy and slightly hesitant on higher rpms.. Complete carb kit and stage 3 from feebay should give me some help there.. Besides i intend to run pod filters also.

If you could send me some knowledge you have on the electrical, I would greatly appreciate it! Make it as easy as you can. I would love to break every circuit down to its basic routes and fully understand the whole bike.. but its time i just don't have. I've spent several long night just trying to plan out the ignition and charge systems, but i fear to create a loom and plug it all up until its been verified for proper order.. Worst thing to do would be to create some new wiring and somehow blow vital electronics because of a misplaced fuse or power.

It also doesn't help following these coloured wire diagrams when very few of the critical colours from my harness match anybody else's schematics.!? Its hard to find someone running the same ignitor unit with a simplified diagram.

I've come down to the tedious task of repairing all the overheated connectors and wires from my harness and keeping it intact.. I haven't been able to find much help on it so far..

Here was my 'rough' ignition and charge diagram sorry no labels. I kept it very simple but its colour coded to my particular ignitor. When i figure out lighting ill work it in too..

SC20130626-075409_zpsa21f764b.png


I did find a diagram using my ignitor!!

** i believe this is the source i found the un-molested manual for the 850 in pdf file**
http://www.electronicsandbooks.com/...rbike/Motorbike/Suzuki/GS850_Manual_HiRes.pdf

Order of colours from top to bottom are : blue, green, black, yellow, (to signal generator)
and on another plug its : white (to coil), black/yellow (to other coil), black white (to ground), orange/white (I've simply routed it as orange , and cuts into both coils after the kill switch)

SC20130626-073631_zpscff07761.png
 
Last edited:
Ah well dang it all! Fee bay issues strike again.. I didn't realize a carb repair kit would be so useless.. For the price i got them at i expected everything needed but now Im having to source the o rings from here .. http://cycleorings.com/


20130703_212456_zpsa5547cde.jpg


20130703_214752_zpsf46d19d8.jpg


Looking rough.. Good to have all those needles new!

20130703_215702_zps0ed4ffce.jpg


20130703_220241_zpsf912f59f.jpg


20130703_232434_zps1e2e1210.jpg


Kits came to my mail box tonight and i eagerly got into tearing my first pod apart. Not very much to it. I followed the online dissasembly for parts i wasn't sure about. Now Im looking for a chem dip to try out on my first stripped body.. I left the butterfly installed like the online walk through ..I HOPE THERE IS NO ORINGS OR OTHER MATTER IN THERE that will get melted by the dip that ill try to get from napa here in canada.. Im still awaiting a stage 3 dyna kit in the mail before i get these all done. Gives me time to get the carbs pretty.

On another note clip ons came in! Here's a preview of what Im looking to do for the bars.. Im not sure about milling the bar bungs off yet.. May be usefully for a gauge mount but i don't want to remove them incase i decide to run normal bars again..

20130702_120801_zps044bcec4.jpg


20130702_121556_zpsd465dcc7.jpg
 
Last edited:
Hi there mate, good to hear you're doing the resto route, she looked good in those first few pictures.

On the carbs I'd use Simple Green and water or kerosene. Use a toothbrush and q tips, scrub what you can and tear her down to get to all the passages or you'll forever have problems. Don't just try and dip her, it doesn't work as well and you'll regret it.

Make suite the jets are free whilst you're at it. 4-1 exhaust and pods will have you looking at around a #130 Mikuni main jet, large round style. That shoiuild get you real close too start with, aloing with the air screws around 2.25 turns out from lightly seated. Adjust to a smooth idle and take the needles up two steps and you'll have a very strong running 850, should pull like a V8 from 2000rpm and then go ballistic north of 6000 or so.

That was the recipe for my last one, and will be again for the current as well.

All the best - boingk

EDIT: The old bar mount can be filled with a tube holding custom warning lights. Looks schmick and is easily reversed, cleans up the dash nicely if you're mounting new instruments. I'd go, from left to right, left indicator, oil, high beam, neutral, right indicator.
 
Last edited:
I decided to try a variant of simple green but a little tougher. Its called ex-plus. it just an industrial degreaser. I mixed with part water and tossed it in the sonic cleaner. Ill post the results later on.

20130704_065302_zps9e7f7172.jpg
 
Didn't take hardly any time at all.. Metal was slightly altered though, all shiny bores are no longer shiny.. Coatings from the bowl and vacuum cover were stripped and anything else not coated with a yellow chromate are now a spotty flat aluminum colour. Not overly excited about that, but it is really clean. Im hoping i can polish the covers later.

20130704_075003_zpsb6437eb6.jpg


20130704_075027_zps8dae5305.jpg


20130704_075047_zps5246f176.jpg
 
Lookin' good! Time to get the buffer and put a shine to them...or lots of elbow grease!

Thanks for the update.


Ed
 
Here's a quick dremel polish with mothers compound.. Already looking sharp

20130704_133342_zpscbb7fcb2.jpg


20130704_133405_zps045d6e31.jpg
 
Looks great!

I also favour Mothers as a polishing compound, cheap, available anywhere and works well.

Cheers - boingk
 
Double bonus delivery today. I was home for lunch walking the dog as the mail man rode up... Seat, springs and jets! Time to get dirty soon

20130708_133351_zps9a960b88.jpg


20130708_133427_zpsaeb60b4e.jpg


20130708_134354_zps0268b00b.jpg


20130708_122727_zpsbf8b8bb6.jpg


20130708_122735_zps7c07a195.jpg
 
Beginning some frame alterations. Tubed in the rear and removed some extra brackets.. Its a start.

20130710_215847_zps79013370.jpg


20130710_084103_zps4b0f4394.jpg


20130710_084055_zpsbc054398.jpg


20130711_134837_zps4f8278d0.jpg


20130711_134823_zps74ffeadc.jpg
 
Last edited:
Back
Top