• Required reading for all forum users!!!

    Welcome!
    Register to access the full functionality of the GSResources forum. Until you register and activate your account you will not have full forum access, nor will you be able to post or reply to messages.

    A note to new registrants...
    All new forum registrations must be activated via email before you have full access to the forum.

    A Special Note about Email accounts!
    DO NOT SIGN UP USING hotmail, outlook, gmx, sbcglobal, att, bellsouth or email.com. They delete our forum signup emails.

    A note to old forum members...
    I receive numerous requests from people who can no longer log in because their accounts were deleted. As mentioned in the forum FAQ, user accounts are deleted if you haven't logged in for the past 6 months. If you can't log in, then create a new forum account. If you don't get an error message, then check your email account for an activation message. If you get a message stating that the email address is already in use, then your account still exists so follow the instructions in the forum FAQ for resetting your password.

    Have you forgotten your password or have a new email address? Then read the forum FAQ for details on how to reset it.

    Any email requests for "can't log in anymore" problems or "lost my password" problems will be deleted. Read the forum FAQ and follow the instructions there - that's what we have one for...

  • Returning Visitors

    If you are a returning visitor who never received your confirmation email, then odds are your email provider is blockinig emails from our server. The only thing that can be done to get around this is you will have to try creating another forum account using an email address from another domain.

    If you are a returning visitor to the forum and can't log in using your old forum name and password but used to be able to then chances are your account is deleted. Purges of the databases are done regularly. You will have to create a new forum account and you should be all set.

  • In order to help others find info on a particular bike, be sure to put the year, make or model of bike that you are asking a question about, in the Topic Title. This will allow people to pass by posts they have no interest in.

Kiwi Canuck's 1981 Honda CT 110 Restore

Kiwi Canuck

Forum Mentor
Past Site Supporter
So I've decided it would be a good thing to document my little project on this forum as I go along.

I picked up this bike last week and got myself a project for the fall.

I have a few pictures of the bike partly disassembled, as I was so excited to get going on cleaning up the bike I forgot to get any photo's before I started.

The bike looked in pretty good condition when I bought it but on closer inspection I noticed a few items that needed attention.

I always like to pull things apart to get a feel for how they work and it's a good way to get a bike really clean by disassembling the parts to do a proper job.

The good things about this bike far outway the not so good, but there were still many items which surprised me.

I know if I was buying another CT110 I would know what to look at more thoughly next time.

Here's a few random pictures of parts of the bike. (my apoligies if the pictures are not so great, they are from my phone, as I'd left my camera at work)

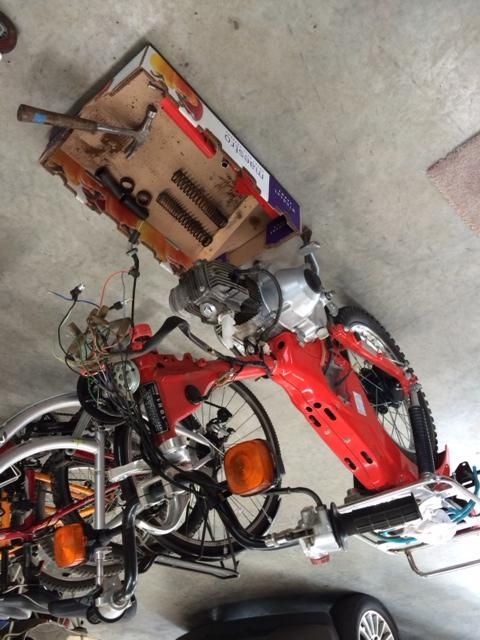
Here's what's left of the bike after I removed a few parts for "cleaning"


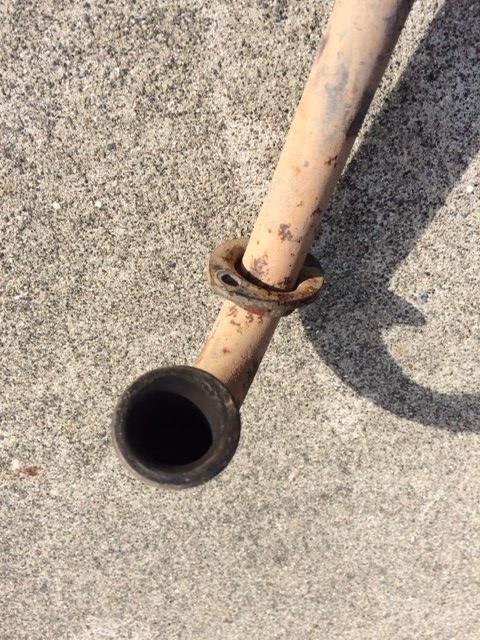
Here's a shot of the exhaust header before cleaning and painting.\


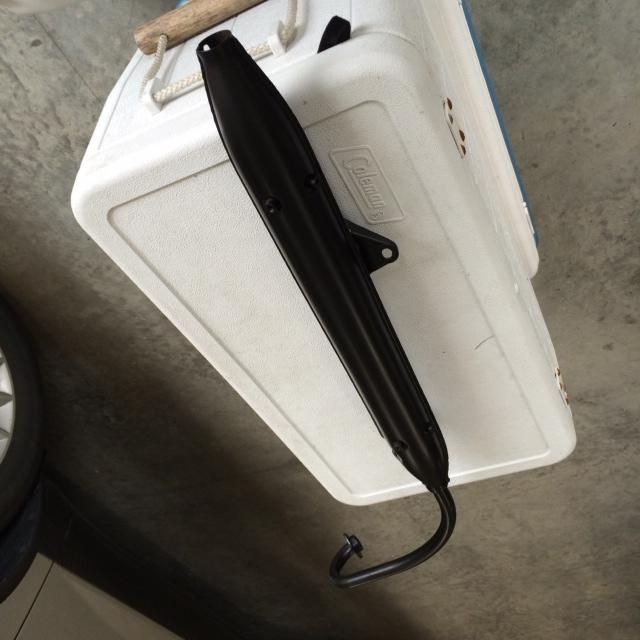
Here's the "after" shot of the entire exhaust. (I do have the baffle, I removed it for cleaning and painting separately)


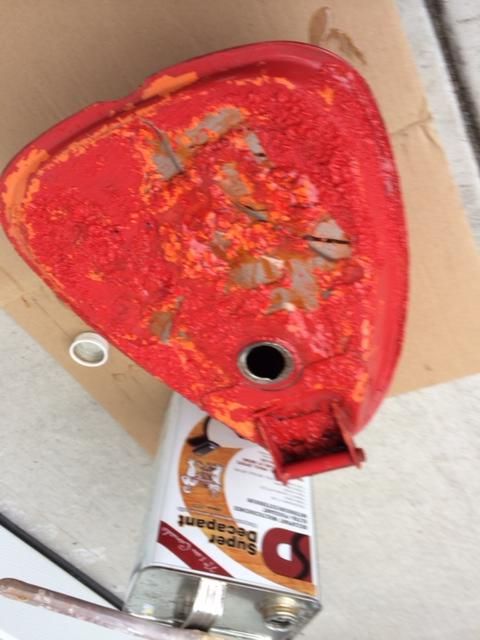
The tank appears to have been changed at some point and had a horrible paint job on it, I decided to try my hand at repainting it, I'm certianly not so great at painting but hopefully it will be better than the previous job.


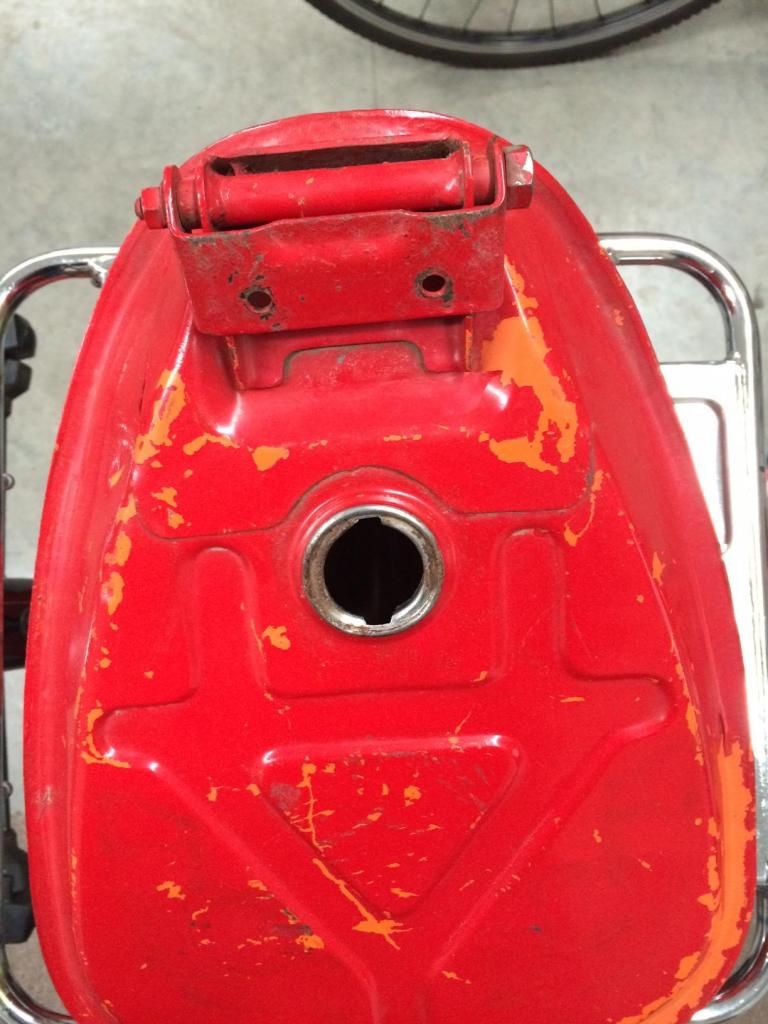
Here's the tank after a session with the stripper.


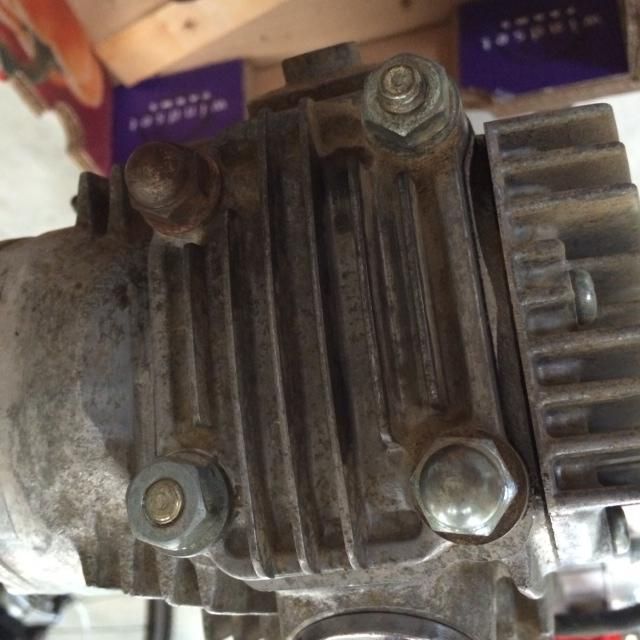
Here's a shot of the engine, why do they install 2 acorn nuts and 2 regular nuts? what's the logic or reason for that? Can I just change them all the Acorn nuts?


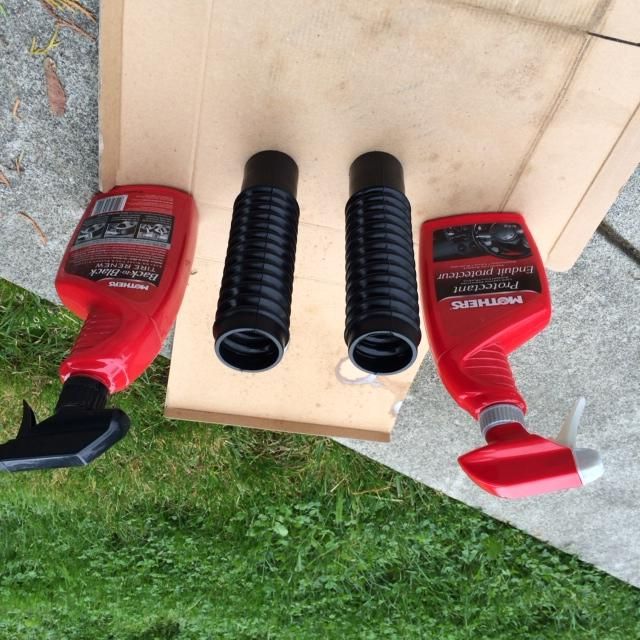
The rubber fork gaiters were a mess and I considered getting a new set until I saw they are $17 each, so I cleaned them in hot soapy water to remove the baked on crud, the insides were full of rust, then I used these Mothers products (Back to Black and some Protectant) to clean the rubber and then condition it.
They came up really well, I was pleased.


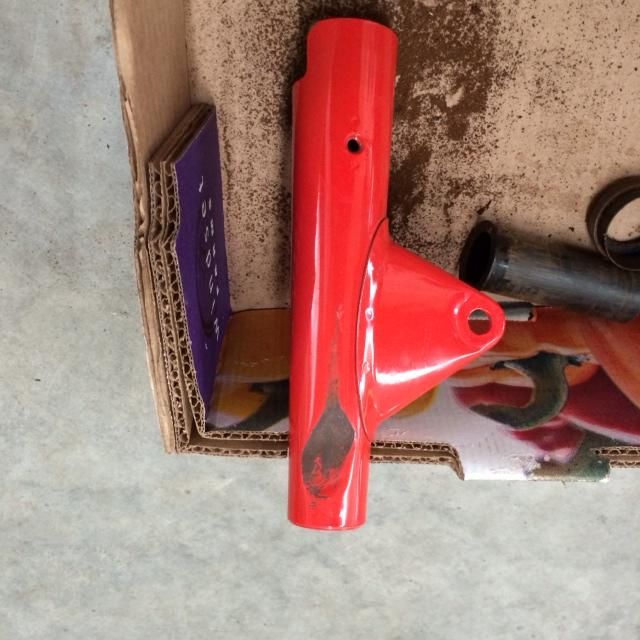
The fork ear was damaged and I'm not sure I could fix this dent myself as it's difficult to get at it from the inside to beat out the dent, so I ordered a new one, at $29.00 painted in Tahitian Red seemed like a deal.


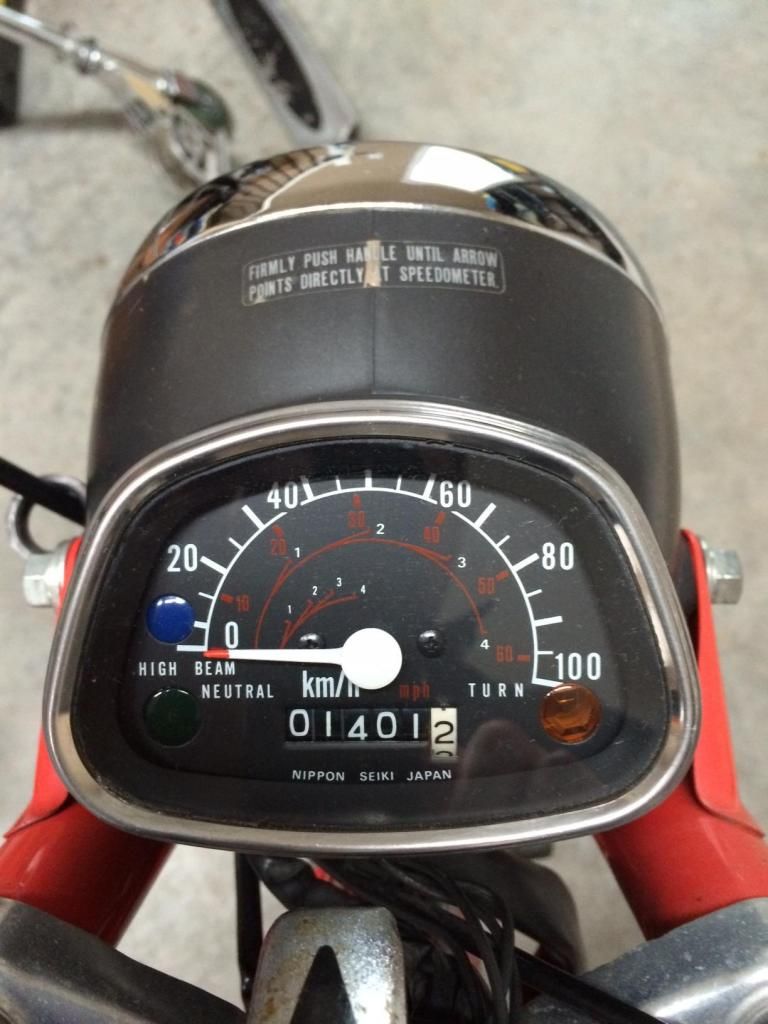
Here's a shot of the Speedometer 1,400KM, not likely, but I was fooled at first, probably more like 5,000 but that's another story.


I dropped off the foot rest assembly and the rear tail light license plate holder as both had been bent pretty good and needed some professional assistance that I was not able to do, straightening the footrest bracket and straightening and welding the rear tail light housing.

I really dislike foot pegs that are not straight, it bugs me so I always get them fixed or replaced, same with ripped seats, but this bikes seat is nice so no issues there.

More to follow.

David
 
Last edited:
I got the parts back from Wally who took care of the foot rest and the rear bracket, here's the rear bracket all straightened and re-welded.


I also got onto the forks tonight, cleaned them up and got a coat of paint onto them.
here's a comparasion between the new and old. (I'll post a better picture once I get them fitted up with the boots)

I used VHT SP127 Universal Aluminum, and will either just cure it as is, or I may add a clear coat, I have used satin and gloss before, I think factory finish is gloss but with a rebuild I sometimes prefer satin as it hides the defects a little better.
I will make that decison in a week as I didn't get the clear on within an hour of painting as the humity was already at 60% and climbing, by the time I was ready to put the clear on it was over 65% so I packed up and moved everything inside for the night.


I dropped the tank and a few more parts off with Wally to have them blasted and cleaned up for painting.


My orders from Beatrice Cycles are finally on the way, so hopefully will have them by the middle of next week.

Cheers,

David
 
Who/where is Wally? I used someone else for the 650G painting, and all in all I am happy, but I have a couple of smaller jobs that could use some attention, some requiring blasting.

The fork gaitors are nice. I'll have to keep the Back to Black in mind when touching up the airbox on the 650.

P.S. what a great little project you've picked up. The CT110 must have been one of the first motorized bikes I ever rode.

Hello Derrick, Yes, I'm having fun with this little bike.
I found a dealer in the US that has lots of CT parts in stock, Beatrice Cycles, helps too that they are very reasonably priced and you only need one of each, not 4 of each as with the GS.

The Wally I referred to is Wally Routledge in Langley, he's ours and you can't have him. :)

Actually he does a lot of the engine work for the local bike shops, heads and re-bores etc., has a frame straightening jig and can do media blasting and powder coating, also has a very nice mill and a large lathe.

Does not do finish painting other than powder on frames.

It's more economical to have him blast parts for me than renting time at Ublast.

PM me if you need his number, or you can Google Routledge Enterprises in Langley.

He's really reasonable and has helped me with 3-4 rebuilds over the last few years.

Cheers,

David.
 
Thanks, David. I've been looking for blasting/powder coating options in our area, and I was shocked at the relative unavailability of the service. When I did find a shop, it seemed like if you weren't semi-industrial, the costs were prohibitive. I did find a shop a little further out towards Chilliwack, but I'd really rather approach someone with more motorcycle-specific experience.

I'll find his info on Google.

That's a good point about one cylinder vs four. The Rebel is the same way. A much simpler (and cheaper) machine to work on, but still plenty of fun as a city bike.
 
Wasting no time on this one! Looks like a cool project and I am looking forward to watching your progress.
 
That speedo/headlight shell looks to be in great condition.
Although i don't think i would want to hit 100kmh on the bike.
A nice resto to follow.
 
One of those was the first motorcycle I rode, a mini bike with a three hp. Clinton before that. They CT110's will do 100km, down hill, tail wind and the pose for speed. At 14 that was really pinning your ears back.

Cheers
 
Wasting no time on this one! Looks like a cool project and I am looking forward to watching your progress.

Thanks for your comments Rich, I'm having fun with this one, but I just keep ordering parts :eek: I wonder how much it would cost to build a bike like this from all NOS parts?
Not that I'm going to find out, but I have to stay disciplined to keep the budget reasonable.

Should have another update in a day or 2.
 
Steve and BBJumper, thanks for your comments, I've heard that these bikes will do 90 -100KM flat out with no wind and the 42T rear sprocket, (maybe a bit of a tail wind) but realistically 80-85KM is probably more likely the top end of the speed curve with the stock 45T sprocket.

Cheers.

David
 
I was delaying pulling apart the steering head as I didn't think I could track any more parts without losing the plot.

But I sort of ran out of things to do because the humidity been in the 90's the last 2 days and no painting, so I got into them last tonight.

I was surprised to see that someone has been in there before me as the top steering stem nut was a bit mangled and on very tightly, I struggled with it for a good 5 minutes and was about to get out my propane torch and use a bit of heat when it finally started to move.

The steering had a nice notch right at 12 O'clock and it was lumpy all the way around, so I did need to take care of this, it actually didn't feel too bad when I still had the handle bars on, but as soon as I removed the handle bars I really noticed it was in need of a good service or full rebuild.

Not sure if I'll stay with the stock ball bearings or go with a set of tapered bearings from All Balls or some other quality brand.

If I do stay with the stock setup I'm going to need a dozen or so new ball bearings (maybe all 42) as a few of them are not quite round anymore.

Now that I've discovered this with the steering head, I guess I better look at the swing arm bushings as that's probably needing service as well.

I got the fork boots back on and they look really good with the newly painted lowers, just waiting on a set of new springs to arrive from Gizmo ( a member from the CT 90-110 forum) and I can tick that off the list as complete.

Pictures and another update coming in a day or so.

Cheers.
 
Last edited:
Bondo and Beer

Bondo and Beer

Did a bit of work on a few parts last night and got a little painting done today as the humidity was around 60% which is at the upper limit but OK for the paints I am using.

Forks came up pretty nice.


I officially suck at bondo work, not sure what's the deal but I just keep at it and it goes from almost OK to s**t in no time, I have been at this for 2-3 hours and I'm no closer to it being acceptable.


Maybe I need more of this.


I bought out my new Eastwood hammer to remove a few dents from the front fender, had 4-5 areas that needed attention, got most of them pretty good but I went too far on one of them so I will need to test myself again with the bondo.


I did get these parts finished, the foot rest and the exhaust baffle, I also polished up the screw, who new it was chromed, looks sharp.


Hopefully I will get some more done this coming weekend as it's the Canadian Thanks Giving long weekend.

Enjoy your Turkey Canucks.

Cheers,

David.
 
I got the steering head races out, top one came out quite easily but the bottom one kept tilting when I hit it and then it would get jammed, finally got frustrated and took to it with a very large screwdriver and a hammer and wacked it until it flew out.


Here's to bottom one, got a little damaged on the way out, opps.


I have not figured out how to get the bottom race off the triple tree stem, but will probably drop it by Wally's to have him remove it and install the new one.


The weather ended up clearing and a beautiful day was too good to waste, so I pulled the VStrom out and went out with my youngest son Alexander for an hour and a half, what a great ride around the back roads of Langely and Abbotsford.

And because the weather was awesome it was another paint day, I was showing my son John how to spray paint and he painted a few pieces that wouldn't matter if they weren't perfect, the lower exhaust guards and the little metal do-hickies that are under the rubber foot pegs, he did a very nice job considering it was his first time.

So I showed him how to paint the rear license plate holder and wouldn't you know it, I made a run right on the only surface that shows, man I hate it when that happens, just trying to get the perfect wet coverage on the 3rd coat.

Once it runs there'e nothing can be done, just wait till it can be sanded and give it another final final coat.

The lower exhaust cover after very fine sand blasting to get rid if the old paint and rust.


The big run right in the middle


Hardly noticable in this view.


Which brings me to my tank, I primed it today after filling a few minor dents and it looks like I took bubble gum and squished it on there, not sure what's the deal with filler but I'm either using too little or too much, not sure what but I really struggle with it.

I'm at a loss as to why it always looks like a patch and it doesn't blend or feather in to the surrounding metal, I've tried to photograph it and it looks OK in the photo but when the light hits it the "patch" is all there in it's glory for all to see.


I'm going to give it a few more tries and if it doesn't look good I'm going to have the filler removed and I'll just paint it as is, in fact I should have just done that after Wally blasted it with glass bead.

I gave the engine a bit more of a clean and used a very fine stainless steel mini brush on the inside cases and the underside of the engine, it's starting to look OK and I'm quite pleased with how it's coming up.

I found out on a previous restore that brass bristel brushes tranfer the brass onto the aluminum and it looks a bit yellowish so that's why I only use stainless or nylon brushes now.

Also discovered how these horizontal engines like to catch stones and pebbles, I must have pried out 10 or more from the top fins just below where the carb sits.

I was going to disassemble the engine to get the pieces blasted, but I may not have to as they are looking much better now and why pull it apart if I don't need to.

I tried polishing the cam lobe cover, not sure if it's the right look, a little too shiny maybe.

 
I did a mock-up with the exhaust tonight.

It gives me an idea of how it fits in with the original unrestored parts or is it going to look out of place being so shiny.

I like to do this as I make progress, just to see where I'm at with it.


That's about all for tonight.

Cheers,

David
 
DECALS and other stuff

Yesterday was Thanks Giving here and I didn't get much done on the bike as we had the big family turkey dinner, but I did get a chance to order some decals from Beatrice Cycles.

I have dealt with Reproduction Decals before but they only sold the full set and I didn't need it, as I only needed a few of them.

I'm going to paint the headlight bucket and will need the little transparent warning label and I need to clean up the handle bar locking lever as it's pretty rusty and will replace the arrow.

Also ordered the label for the aux fuel tank as well, as I may paint that but I'm not certain yet, but at least I'll have it if needed.

I was looking at what else I may need to replace and decided to order the HONDA frame downtube decals just in case I paint the plastic cover as the paint is quite worn on top.

While on the Beatrice Cycles website I noticed that they have a new plastic downtube in Tahitian Red with the decals on them for $92 IIRC,

I realised that the decals on the one in the picture were different than mine (they are from a 1980 model) so I started to research the different decals, appears almost every year has a different decal.

I had removed my downtube cover and stashed it under the workbench for safe keeping and never really paid it much attention till yesterday.

So I finally clued in that I have a down tube from a 1979 CT90 on my bike.


Here's what I should have to make it model correct.

http://ts1.mm.bing.net/th?&id=HN.607994969443666875&w=300&h=300&c=0&pid=1.9&rs=0&p=0

Wish I new the story behind the bike, it's a mystery how a bike that's got low mileage and is generally in very good condition could have a fuel tank from a much older bike and a downtube from a bike 2 years older.

I'm wondering what else I may find as I learn more about these bikes, at least I know the frame and engine appear to be original as they came from the factory.

Most of the bolts, screws and fasteners appear untouched, except the steering head nut was damaged and the funky business with the speedo cable being rerouted under the rubber fender protector rather than over it. (maybe it was put under there to hold it in place while it was ridden with it disconnected from the front hub)

So I'll carry on and maybe the mysteries will just stay that way.

I do have one clue that I'll follow up with, the 2 original keys supplied with the bike have a dealer keyfob and they are still in business, I know someone that works there and I'll go visit them and see if they have any service history from this bike. (it's a long shot but worth trying)

Back to the garage.

David
 
Last edited:
Front Fender original or not?

The thing that has really puzzled me about this bike was some parts looked pristine but then other parts pointed to a much higher mileage bike.

I'm learning as I go and I think I've found another item that is not original, the front fender, it's never looked correct for the mileage and that's what got me baffled from the start.

When I was looking at getting all my fastners cleaned up and sorted for reinstalling the license plate holder, I noticed the underside of the rear fender was really nice underneath, no rust and surprisingly clean.

I double checked the front fender and realise it has probably been changed as well as it's really rusted underneath and certainly showing much more use than the mileage shown on this bike.

Take a look at these pictures, the top was showing bad pitting in the paint surface, (the sanded area) yet there is no other signs of rust like this anywhere else on the bike.


Now the underside of the rear fender, if you can make it out.


I think that makes a lot more sense, that this bike has had a few parts replaced for some unknown reason, and the remainder of the bike is original and the milage may infact be close to what it shows
 
I got my new All Balls steering head bearings installed tonight, and yes they feel like a world of difference compared to the stock ones.

I dropped by Routledge Enterprises, (Wally's) and had him remove the bottom race with his handy dandy bearing puller he modified for use on M/C steering heads and he had the old one off and the new one pressed into place in minutes while I waited.

Here's a few photos of the assembly process, I lubed everything with grease and installed the triple tree in the headstock, I hand tightened the top nut until it was still turning but with a fair amount of resistance, then I slipped the fork legs up through the lower triple tree and installed the cinch bolt just enough to hold them in place.
I then slipped the top yoke on and tightened the nut enought to hold it in place and used that as a guide to determine the correct height of each fork leg, once I got each one to its proper height I torgued the cinch bolts to 18 ft lbs (recommended value 13-18.1 ft lbs)

Oh, I almost forgot, hidden under those nicely cleanup fork boots are Gizmo's new springs which also feel very nice. (Gizmo is a member on the CT90 -110 forum and lives in Princeton BC)


Here is the 2nd one installed


Now to align the top yoke up, once completed I can then remove the top yoke to install the fork ears and continue with the assembly.
I have ordered a new fork ear and am still waiting for that shipment, hopefully I will recieve it before the weekend.

 
Last edited:
I officially suck at bondo work, not sure what's the deal but I just keep at it and it goes from almost OK to s**t in no time, I have been at this for 2-3 hours and I'm no closer to it being acceptable.


This looks to me, like you're sanding away too much of the filler. When it doesn't feather into the surrounding metal like that, it's still low. The dents may have crowns around them. Try taking a hammer and punch and lightly tapping down the edges of the dent a bit and refill the areas and sand again. You'll also be surprised how much of that will be taken care of with a quality high-build primer. Stay at it, it'll look way better then removing the filler and just re-spraying it.

Great little bike. Who amongst us didn't grow up around the 90's and 110's..?
 
At the stage that the bondo is in that pic I would switch to a polyester glazing putty to finish it off. There will be fewer pinholes and it will feather much better than regular filler and with a much finer grit paper. I did bodywork in Vegas for a few years and learned to love glazing putty.
 
Thanks Never2old and Shadow, I had a guy come by who knows a bit more than me about this and he told me what to buy and I've been making better progress with the new tools and a can of standard bondo.
I was using the thin glazing putty stuff and it would setup so fast I couldn't get it smoothed out before it started to get hard.

Seems I was using too little and sanding it too much as Larry suggested.
 
Back
Top