• Required reading for all forum users!!!

    Welcome!
    Register to access the full functionality of the GSResources forum. Until you register and activate your account you will not have full forum access, nor will you be able to post or reply to messages.

    A note to new registrants...
    All new forum registrations must be activated via email before you have full access to the forum.

    A Special Note about Email accounts!
    DO NOT SIGN UP USING hotmail, outlook, gmx, sbcglobal, att, bellsouth or email.com. They delete our forum signup emails.

    A note to old forum members...
    I receive numerous requests from people who can no longer log in because their accounts were deleted. As mentioned in the forum FAQ, user accounts are deleted if you haven't logged in for the past 6 months. If you can't log in, then create a new forum account. If you don't get an error message, then check your email account for an activation message. If you get a message stating that the email address is already in use, then your account still exists so follow the instructions in the forum FAQ for resetting your password.

    Have you forgotten your password or have a new email address? Then read the forum FAQ for details on how to reset it.

    Any email requests for "can't log in anymore" problems or "lost my password" problems will be deleted. Read the forum FAQ and follow the instructions there - that's what we have one for...

  • Returning Visitors

    If you are a returning visitor who never received your confirmation email, then odds are your email provider is blockinig emails from our server. The only thing that can be done to get around this is you will have to try creating another forum account using an email address from another domain.

    If you are a returning visitor to the forum and can't log in using your old forum name and password but used to be able to then chances are your account is deleted. Purges of the databases are done regularly. You will have to create a new forum account and you should be all set.

  • In order to help others find info on a particular bike, be sure to put the year, make or model of bike that you are asking a question about, in the Topic Title. This will allow people to pass by posts they have no interest in.

Kiwi Canuck's 1981 Honda CT 110 Restore

Not a lot to report from the weekend but I did get the carb back together, but not fitted yet, will hopefully get that done in the next few days.

Also just remembered after bolting the exhaust system back together and about to reinstall the bash plate that I forgot to change the exhaust gasket, so I'll get that done as well.

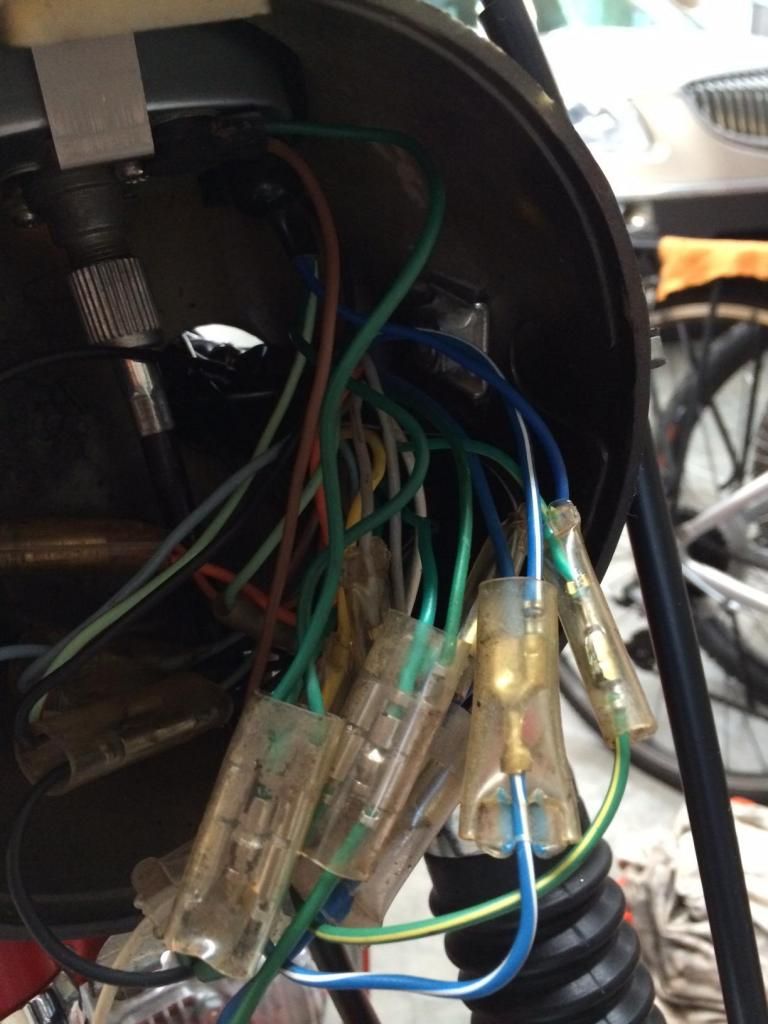
I cleaned up a lot of the electrical connectors and the wiring harness as well, just hot soapy water and a rag for the clear insulators and the harness and I used a contact cleaner on the brass connections.

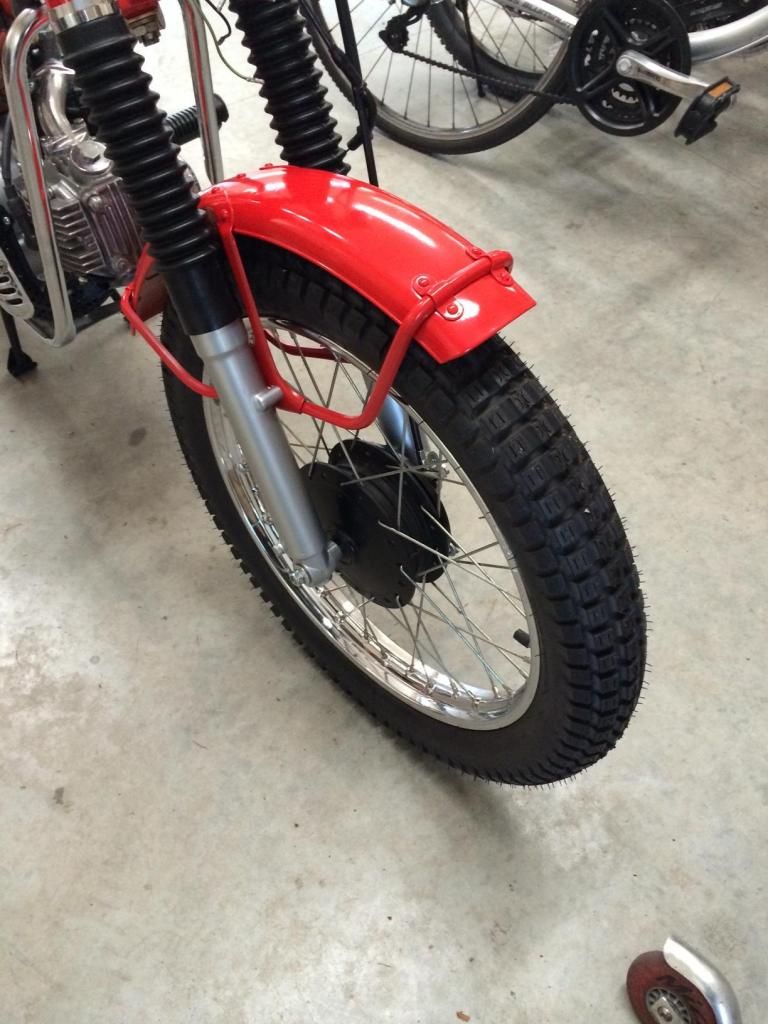
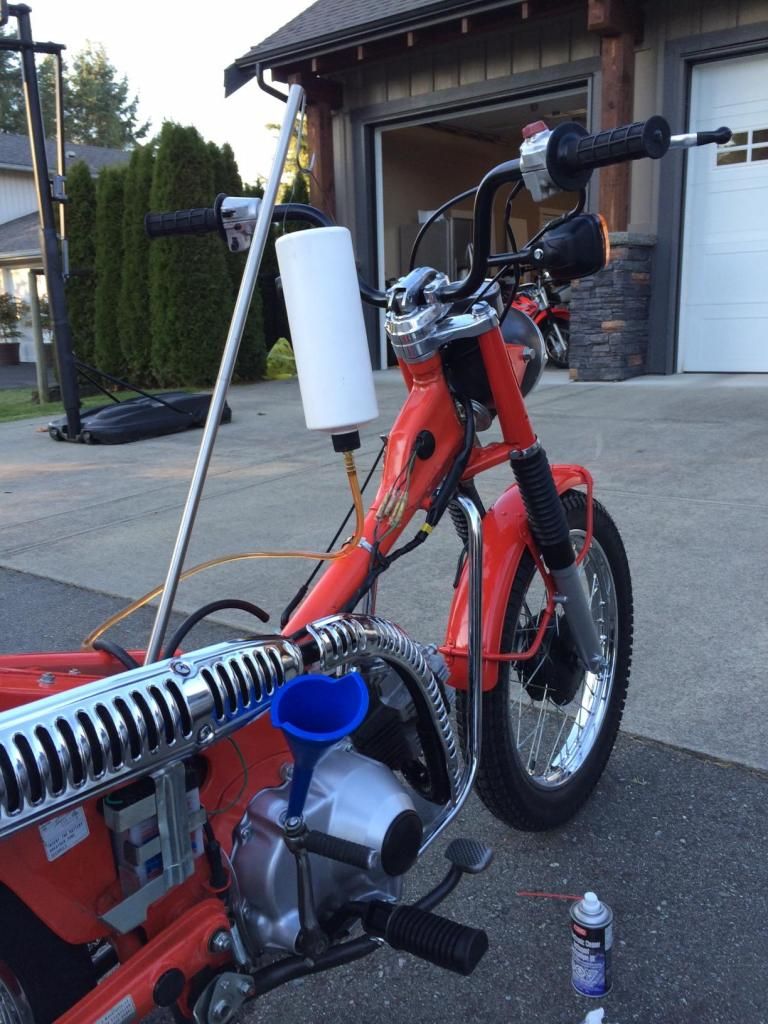
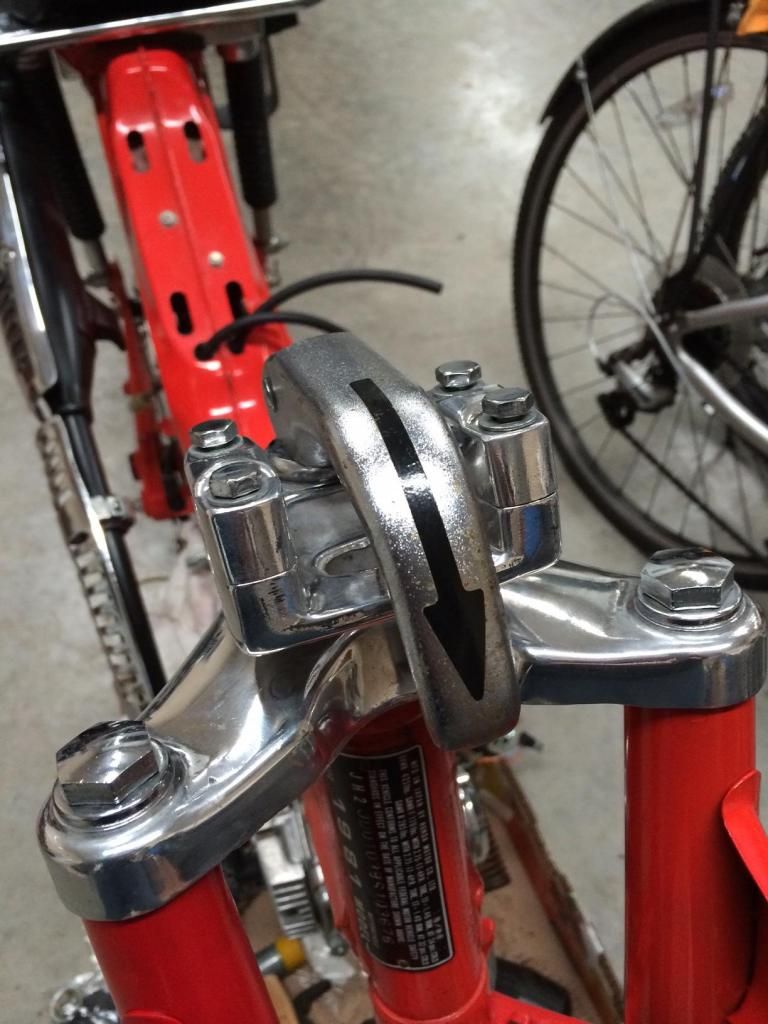
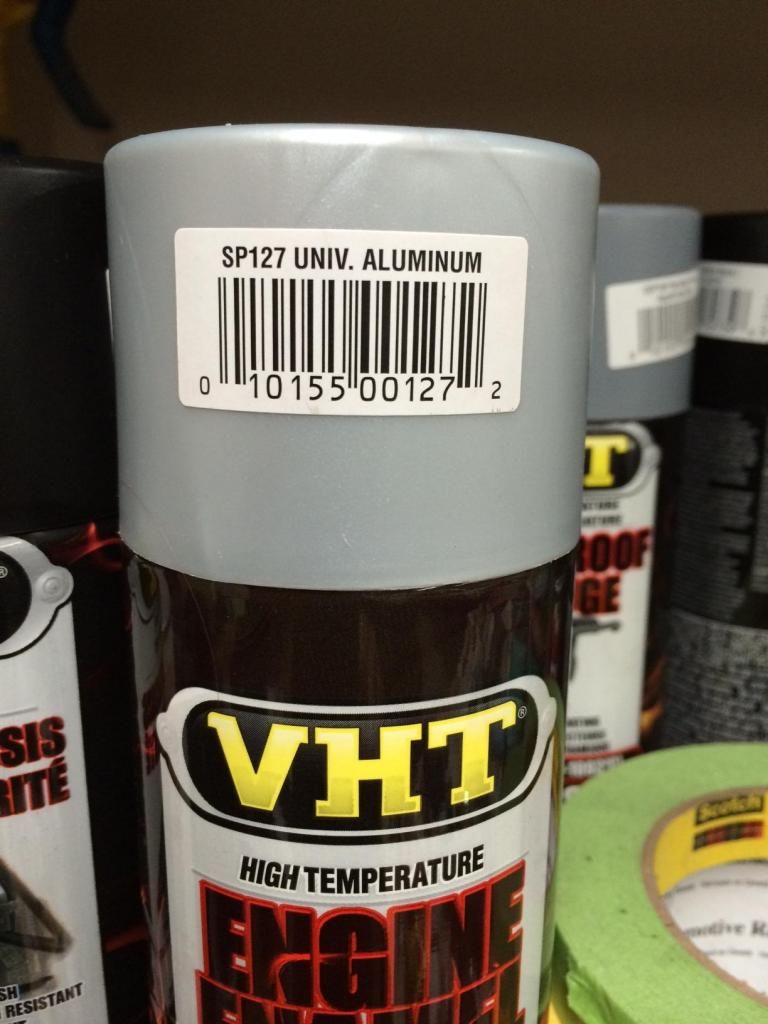
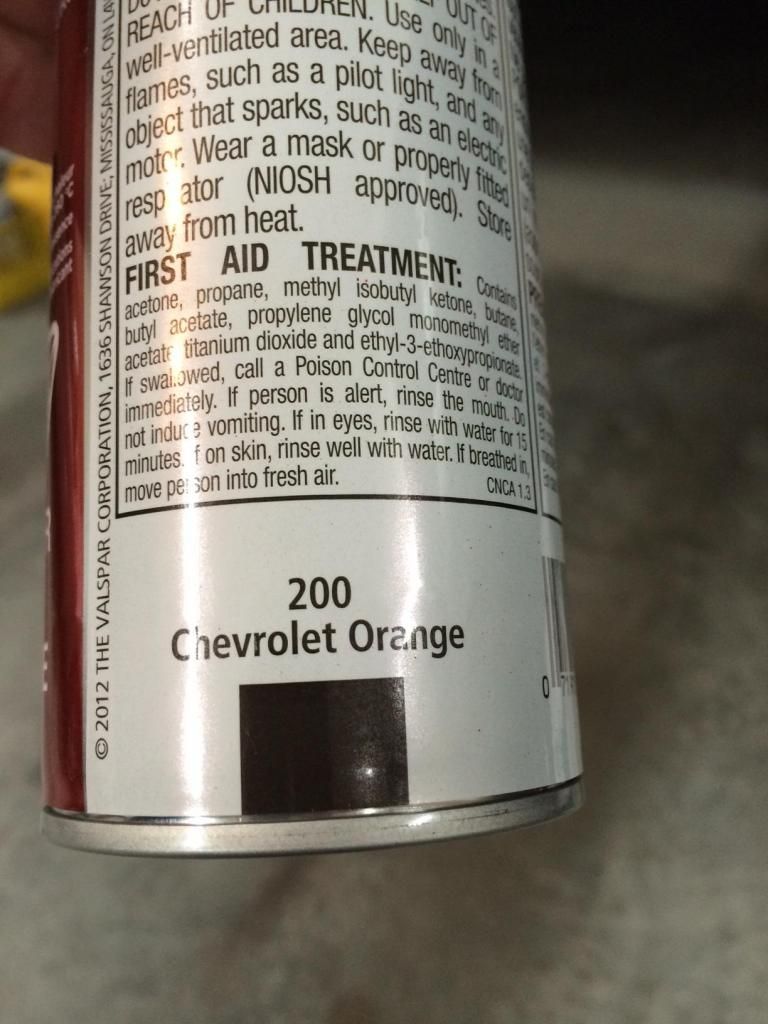
I don't want to sound like a broken record on the body work, but this restore has been very challenging in that department, not sure what's going on but the very expensive colour factory matched paint is not even close, I tested an area to see how it looked and it looks more like the Monza Red rather than Tahitian Red. I double checked the can and the label shows the correct Honda Colour for the 1981 CT110, but the paint is very different from the paint on the new fork ear just purchased in Tahitian Red.

Check out the right fork ear (left one in the picture) painted with the new paint from DrATV and the factory colour from the newly purchased fork ear on the left, (right one in the picture)


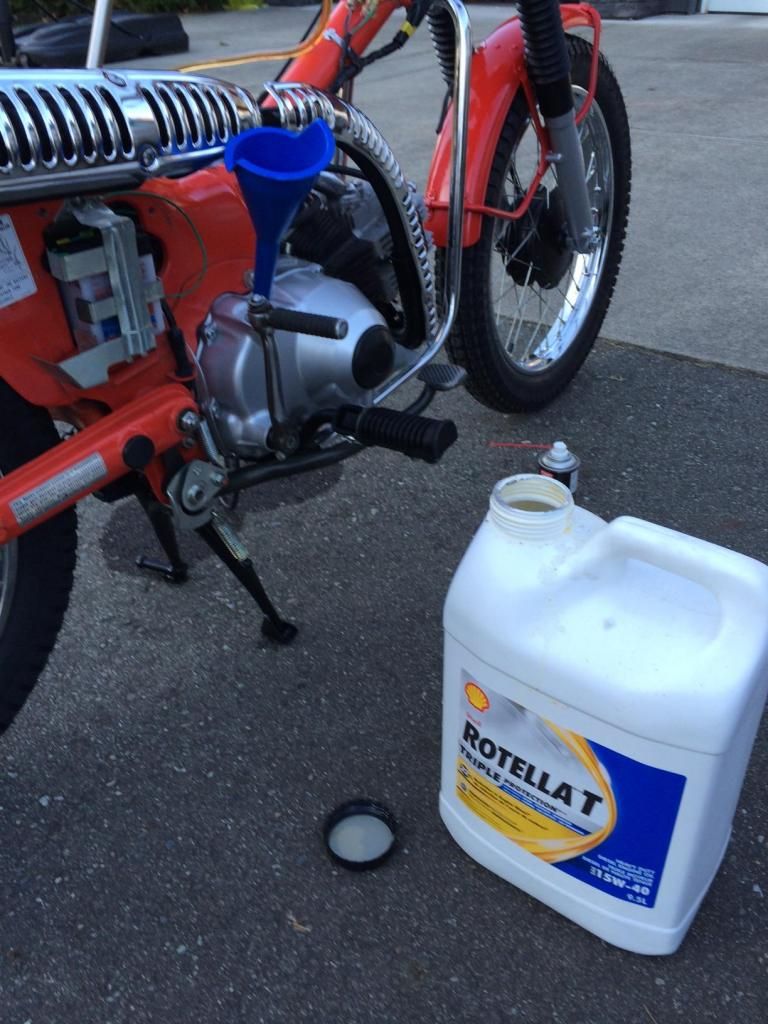
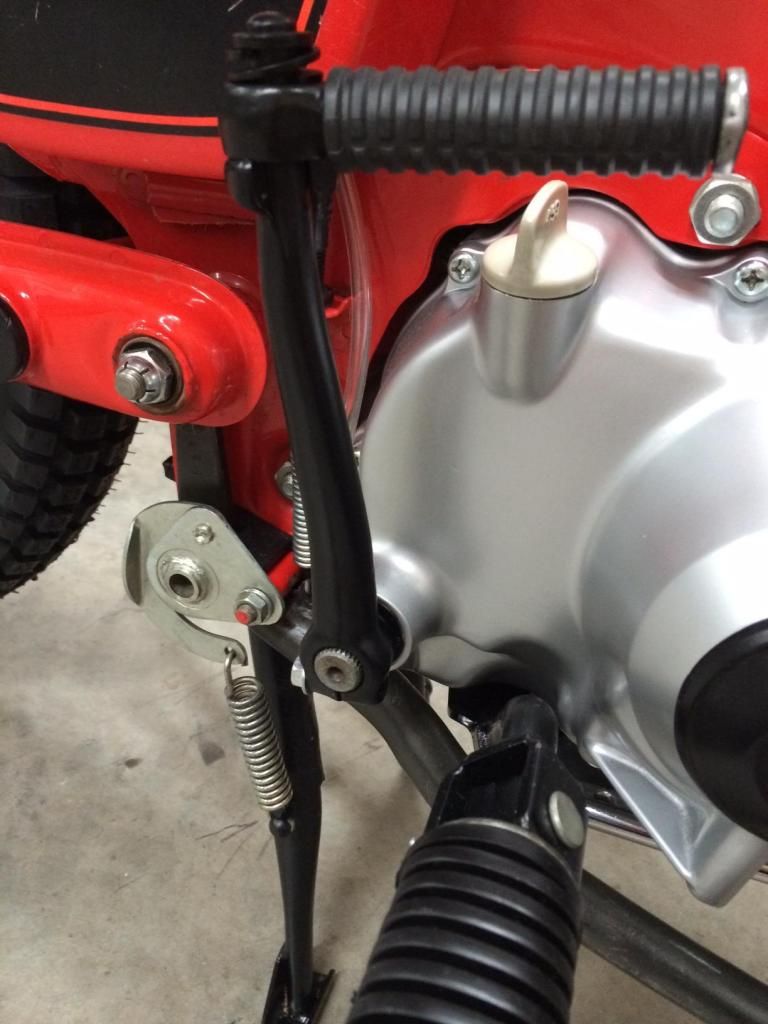
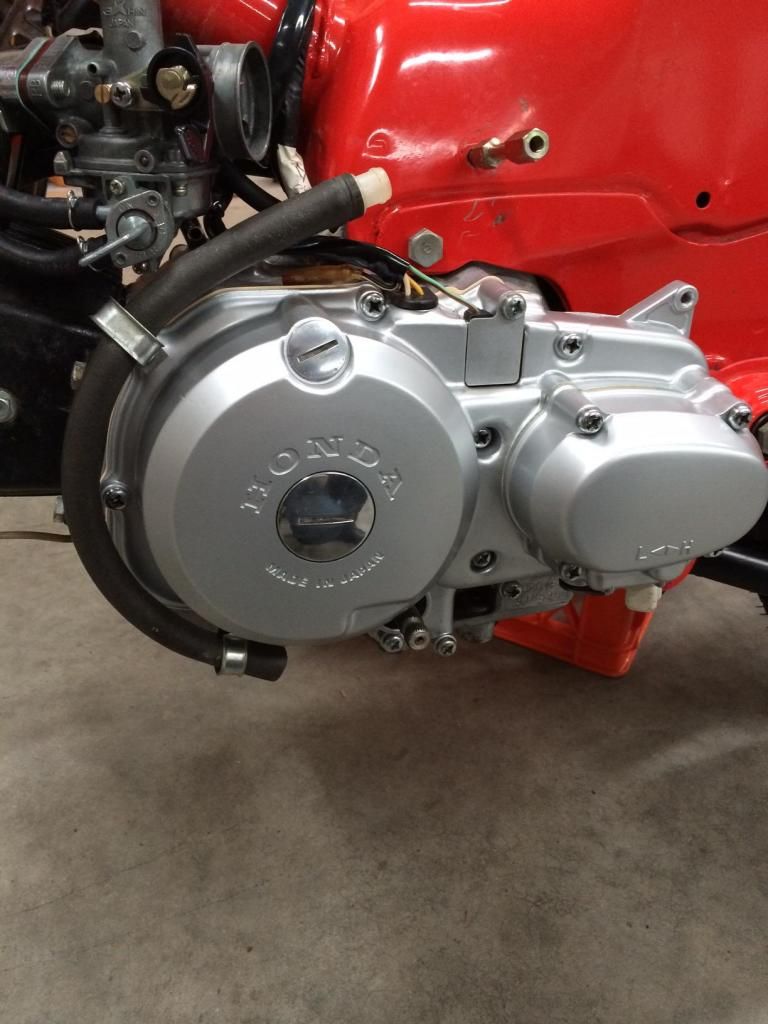
Here's the newly polished up intake manifold reinstalled awaiting the carb to be installed.


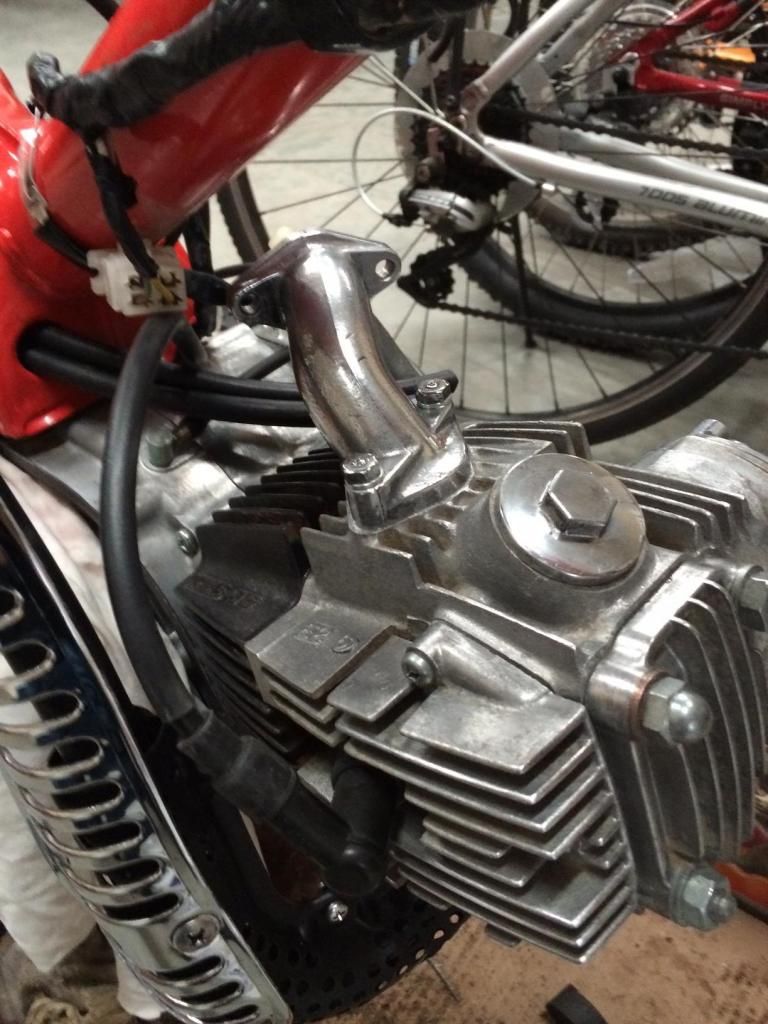
All new gaskets and rubber parts installed, so hopefully that will help me get this bike running a lot better than when I purchased it.
 
I picked up my new tires today and installed them both in about an hour or so, just used my motorcycle boots to press them on, it works great and no chance of pinching a tube with a tire iron.

I had already cleaned up the front wheel and had the old tire off already, but the rear was really messy and the axel was a bit corroded so it needed a bit of persuasion to come out.

Both rims had a few minor rust spots on the inside so I used a stainless steel wire brush to clean up the rust and then used a chrome polish to protect the area.

The tires look great installed and really suit the bike, I had been offered everything including the Shinko SR244's and some other brand, Duro I believe, but I really wanted these so I was willing to wait until they ordered them in.


I will need to do a bit of cleanup around the rear wheel and the sprocket area as it looks like it was stored while it was still wet and the brakes need a little attention before I reassemble it all back together.

I have about 1/4" of free play in the sprocket, when I rotate it back and forth, I know this is not normal but not sure if it's too much.

The rubber dampers look in good shape are not hard but at $35 for a set I might try to get a bit more mileage out of these.


Also got the carb finished and reinstalled.

 
While I was at my local Suzuki Dealer in Vancouver, Modern Motorcycles, they offered me some NOS brake shoes made by Vesrah for Honda.

There were 2 sets per box for $10.00, looks like they will fit the front only of my CT 110.

They have about 50 boxes of them in stock, If anyone wants a volume buy I'm sure they would be open to some sort of a deal.

I'm not sure if they're all the same as these or if they have sets that will fit the rear of the CT 110, I will check on that next time I'm in there.

A few pictures if anyone interested.


I decided to deal with the issue of the rear sprocket rubber dampers like a good bush mechanic would, so I cut up some inner tube and glued a piece to each side of the square opening.

It appears to be exactly the right thickness to make the sprocket fit tightly.

Just want to get the back end of the bike together without waiting for parts in the mail, which seems to be a reoccurring theme on most of my rebuilds.


Should have the rear wheel back together and all cleaned up shortly ready for reinstalling which should be interesting by myself.
 
Well I got the rear wheel reinstalled which was actually easier than expected, I keep forgetting how light these bikes are to man handle by myself.

The only drama came when I couldn't get the circlip that retains the sprocket back on, my circlip pliers were not able to spread the clip wide enough.

They are strong little beggers but I got creative and used 2 small punches to put in the holes and used needle nose pliers in reverse and pressed out against the punches just enough to slip the circlip on.

Must get me some larger circlip pliers if I'm going to be servicing the sprocket on this bike in the future.

The sprocket is nice and firm now, so it seems my temporary fix has worked.
 
Got a little time in the garage today to work on the CT, it was also a pretty good day so I was able to get a few items painted.

I had come to a point that I couldn't do much with a few of the critical parts still awaiting paint, so today I got a couple of those pieces done.

The right side clutch cover came up really nicely, I used VHT universal Alum, SP127. I guess I am now going to have to paint the left side as it's just not going to be right unless I do.

I have no idea what's under that cover, and if parts are going to come flying out in all directions, when I remove it.

Here's the cover. (pictures are from my iphone so not great quality, to lazy to use my Canon)


Another issue I was struggling with was the Tahitian Red paint colour, I had ordered a can of the Color-rite Tahitian Red paint from DrATV and also a new Fork Ear in Tahitian Red, well they were not even close, I thought it may have been Monza Red labelled incorrectly.
I was pretty disappointed and didn't know what to do until today.

I checked the new Fork Ear against the frame colour from under the tank area and it was not very close, so I took the fork ear that I painted with the Color rite paint and it was closer to the existing frame colour.
Really bizarre but it's what it is, so I repainted the new fork ear with the new paint, now I have those pieces matching and I'll paint the fender and tank with that paint and call it a day. I just hope I have enough to paint all the pieces.

Here's the Fork Ears.


I have them in my storage room where the boiler and hot water tanks are, it's nice and warm and humidity is around 50% so a perfect place to put parts to dry.

Another piece of the puzzle is the handle bars, which I also got done, I used VHT Roll bar & Chassis, Black Satin SP671, I found the gloss is a bit too much and it shows all the minor defects, I can shine the satin up a bit more by buffing it with a cloth if it needs it, looks really good as it is though.

I was having a bit of orange peel on the first 2 coats, so I applied the 3rd coat a bit heavier and it seems to have worked out as no orange peel on the final coat.

I'm looking forward to getting some parts bolted back on to the bike.

The rear rack looked pretty good and I knew it has a bit of rust underneath but I wasn't prepared to see how bad it was once I removed it yesterday, it was pretty darn bad, and quite a few dings that I didn't notice from the top.

I soaked it in my bin of Evaporust but it hardly improved anything after 12 hours, I think it's starting to lose it effectiveness as it's been used quite a bit over the last year.

I will consider a new rack as they are probably cheaper than getting my one repaired and replated, but I'll clean it up the best I can and then reinstall it and see how it looks with the rest of the bike once it's complete.

Placed another order with DrATV this morning, and still forgot something, gas cap gasket, so I guess I'll be ordering again pretty soon.
 
Worked on the bike for a few hours today after my weekly coffee meet up with the BC Classic M/C Club members at a local coffee shop, good turn out today, about 15 members showed up.

I got the clutch cover on and got it buttoned up, I took the suggestion from Allen Pierce and laid the bike on its side before popping the cover on, worked like a charm and I believe all the pieces are in the correct place.


Look, I even got an orange milk crate to prop the bike up with, almost colour co-ordinated.


This is why I love my set of JIS Vessel screw drivers, they fit these screws so well the screw driver will hold in the screw head and not fall out and these screws have been taken out and re-installed, I doubt my standard Phillips screw drivers would do that.


I hope I got the clutch adjustment set up correctly but was only getting about 1 revolution (or less) of the screw before I felt resistance in either direction, I was expecting to be able to turn it more but that's all she moved so I followed the instructions to set it.


Also tackled the handle bars today, reinstalling the wiring went well and was no problem, I taped a piece of 18AWG wire to the bundle of wires and threaded the wired through first and then feed the cable through while carefully pulling on the wire, both sides went in very easily.

When reinstalling the handle bar clamp I noticed the top left bolt hole was stripped, so I installed a 6mm helicoil.


I have a full set from 5MM all the way to 14mm which come in very handy for situations like this.

It's a pretty standard procedure, the instruction show what size drill bit to use for each size and if it?s an oddball size then they usually supply the drill bit as well.

I drilled out the stripped hole with a 1/4" bit, tapped it with the supplied tap, inserted the helicoil into insert tool and wound it in.


Once the insert was in about 1/2 a revolution below the surface, I remove the insert tool by unwinding it and then I used a punch to snap of the tang in the bottom.


Also removed the center stand and rear brake assembly, the center bolt was dry and needed a bit of help in removing it with a socket and a soft faced mallet.

I know the center stand is not a show piece but the one on this bike looks like they gave it to the rookie welder, it's a mess, weld splatter everwhere and even some welding wire left on the welds.

I may need to take it in to get bead blasted as the fibre wheel is not cleaning it up very well, it's got rust in places the wheel won't reach.

I'm still waiting on the Bright Beauty paint for the rear brake and gear shift lever, I hope to have that next week as I had to order it from the US as I could not find it locally, so those parts are on hold for now.

Still looking for paint for the headlight bucket, I thought I found some but once I got it home, realized it was not right so I'm still looking.
 
I got the parts back from Wally Routledge today, I was impressed with how the rear rack came up, the underside was very rusty, mostly surface rust but it was pretty bad in some spots and he got it looking very respectable.

I repaired some of the damage to the rack, looks like someone used ratchet tie downs and damaged the rack by tightening too much, I was able to straighten out some of the parts with a cresent wrench and a soft faced mallet.


The center stand was stripped to bare metal and I got him to glass bead just the inside of the front fender, total was $25.00 which was very reasonable considering I would have had a few skinned knuckles and a few hours to clean those parts.


I removed the left side cover to check out what's under there and to allow me to fix a gash in the cover and repaint it.

I did consider trying to paint it in situ, but it would probably take almost as long and I thought it a worth while challenge to remove it and do the job properly.

The little dual speed ratio cover was very stubbon, and I needed the impact driver on two of the screws but it required a lot of coaxing to loosen. (hammering)

The main cover came off easily once the smaller one was removed, both gaskests were destroyed, so I will put new gaskets in, also noticed the gear shift oil seal was in need of replacement. (need to order that)


Thankfully I have the service manual for this bike otherwise putting this back together would be near imposssible.

 
I got the centerstand on after a bit of fenagling, it was a challenge to get the rear brake return spring on while trying to align the axel, took me more than a few tries but finally got it sorted.

Here I have a can holding the stand up in place to install the return spring on the center stand.


I used a tie strap to help with the installation of the spring, it keeps the fingers a safe distance from the parts that bite.

 
Picture of the completed side cover, quite a lot of work but glad I did it, now I know what lurks under that cover and if I need to fix anything there I'll feel more comfortable opening it up if needed.

I also got to replace the gear lever shaft oil seal, as it had been weeping and showed cracking on the seal.


photo182_zpsf3d1fa3a.jpg


I used VHT Universal Aluminum, SP127 on the cover and it looks like a pretty close match to the original paint, the little square cover that goes over the neutral switch plug, (top middle) didn't get repainted and it looks almost identical to the new paint.

photo192_zps512aa712.jpg
 
Last edited:
Didn't get a lot done on the bike today, service on the lawn mower took up most the day, oil and filter change, drop the deck and cleanout all the old grass and sharpen the blades.


After that we mowed the lawn and cleaned up and it was almost dark.


I managed to get a few minutes to get an under coat and then the first colour coat on the fender.


Used the Plastikote paint in Chevrolet Orange 200,

photo187_zpsbf84c3c5.jpg


photo188_zps106bd02d.jpg
 
Got the first coat of Colorite R23 Tahitain Red on the front fender, at this rate I'll be out of paint before I get to the tank, let alone the down tube cover.


I will now need to wait a few days to get the final coat on as I need it to harden off for minimum 2 days before the next coat can be applied without risking some wrinkling or a flat finish.

Learned my lesson on a few previous projects, I always read and follow the directions on the can and have had very few issues since.
 
Nifty project! Love it! Keep up the good work.:D I live 6 miles from work and a bike like this one would be a perfect commuter.
 
Nifty project! Love it! Keep up the good work.:D I live 6 miles from work and a bike like this one would be a perfect commuter.

Thanks Ed, I plan on using it for putting around the neigbourhood visiting people and collecting mushrooms when they are in season. (we had an awesome fall this year and had just the perfect conditions for a real nice crop that lasted for about 6 weeks)

I may try a trip on it one day but I'll need to stay clear of the freeways as it only gets about 80- 90KMhr (50-55MPH) in the best conditions, any headwind and I'm in trouble.

Cheers,
 
Last edited:
I have been a bit occupied the last week and haven't done much on the CT, having a very stiff lower back hasn't helped either in motivating me to get out into the garage after work.

I've put a few pieces back on the bike including the newly painted front fender and I got to say I'm not too impressed with my paint job on that, just OK but not quite up to my standards. (good from 5-10 ft)

photo222_zps4dbec244.jpg


photo223_zps71fd0624.jpg


As far as the colour of the new paint which I really like, it's just not close enough to the factory Tahitain Red and it still bothers me enough to do further research on it, so I dropped by a professional painter who has done work for me before, for advice.

He suggested it would be cheaper to just buy the parts already painted if they are available, which I thought about but they are not all available, he is booked solid for 2-3 months and at $600 -$700 to paint 6 pieces not including the frame seemed a bit much and any prep work would be extra.

So I went out and checked around for other options.

I went to my local auto parts store Lordco, who can scan an existing piece and give me paint to match, I believe it will only match it to a known paint code and give a number as to how close a match to the original.

The first piece I took in was the back of the air box as the paint on the bottom looked good and unfaded, they came up with a Chrysler Red with a match of 19, they are looking for something under 10 and under 5 is best, I tried the chain guard but the result didn't get any better.

I found out about VMR paints on another thread and they show a Tahitian Red as available, so I can buy a kit from them for about $200.00 which includes 16 OZ of both base coat and clear which should be enough to paint the entire bike if I wanted to. http://vmrpaints.com/

So I went out and found a small HVLP paint gun kit from Devilbiss http://www.eastwood.com/devilbiss-auto-paint-and-touch-up-system.html this should allow me to paint motorcycle parts to a higher standard and allow me to paint the tank with a paint that will resist fuel spills, as most rattle cans do not include a suitable hardner except the very expensive 2K or Besa cans.

Nothing is easy when it comes to painting as it seems my compressor is too small to run the gun for very long, I have a 20 gallon Snap On compressor that produces maybe 5 CFM at 30 PSI and I need about 10 PSI to run it for sustained periods, I have researched a bit but I'm undecided if a new compressor is on my christmas list.

I believe I can paint while the compressor is at pressure and once it cycles on I should stop until the compressor turns off again.

I also purchased a Campbell & Hausfeld air dryer and filter unit.

Lots to learn about this topic and I have been on Youtube watching a few videos to learn about the basics.

I'll post an update on my progress on this topic.
 
I got my new chain installed, I needed to cut off 6 links as I bought the 110 link chain and needed only 104, I used my chain breaker I bought on Amazon a while back and it worked great on this 428 chain, not so good on the 630 chain that's on my GS1000S though.

IMG_2239_zps87b54a8a.jpg


Should have put the chain on before I reinstalled the side cover, I used a piece of wire and fished it around the front sprocket and then attached the chain and pulled it around the front sprocket.

photo221_zps12a820a6.jpg
 
Got a bit more done on the bike, installed the throttle cable, air filter housing, adjusted the chain and checked the wheel alignment.
Then I went over the bike and double checked and torqued all the bolts and screws I had left loose waiting for the final parts to show up.

I used anti sieze on the exhaust flange nuts and blue loctite on almost everything else.

Found this blue lipstick loctite which works really well, on my previous builds I used the liquid type and it always dribbled everywhere as it was very liquid and I always got too much on the threads, the lipstick type works well and no waste.


photo224_zps9248a5b5.jpg


I spent an hour or so reading up on compressors and found this really handy guide.

https://www.kmstools.com/blog/wp-content/images/compressorBuyingGuide.pdf
 
Got the bike ready to run today, I spent about 20 minutes hooking up the wiring in the headlight which was pretty uneventful, except I have the turn signals on the front switched around as I flipped them to hide a bit of damage on one of them and forgot to switch the wires.

All the other lights and electrics worked as they should, which is nice as I replaced all but one of the instrument bulbs as they were burned out.

I filled up the oil with my standard 15W-40 Shell Rotella.

photo226_zps26a6e63e.jpg


While waiting for the oil to drain from the funnel before removing it, I hooked up my home made auxiallary fuel bottle and gave it a splash of fuel and immediately had fuel running all over my nicely painted engine, I had not installed the drain hoses so I went running for some clean rags.

Fortunately it didn't bother the VHT paint at all which was a relief.

photo227_zps49528677.jpg


I pulled the carb and checked the float valve needle and the float but it looked OK, so I ditched the new needle and reinstalled the original one as it was slightly different than the one in the rebuild kit I got from Beatrice, seems to have resolved the issue.


photo225_zpsc4c82e0f.jpg


After about a 20 minute delay to check the carb and install the drain hoses, I re-installed the carb.

Now I was finally ready to start the bike and I gave the starter a good firm kick, nothing, not even a pop, I tried a few more times and then checked the spark plug for spark and got nothing.

After a bit of head scratching I remembered the wire from the points was not hooked up, luckly I was by myself and no-one got to see or hear me being a rookie.

After that bit of fun, I finally was ready for the first startup of this bike since it was torn apart about 6-8 weeks ago.

It started on the first kick. (not counting the other first kicks)

That was a very welcome sound and it never gets old, starting a bike after a rebuild, even though this was a fairly minor rebuild, it ran quite well but would not idle for very long and it dies after about 1-2 minutes of idling.

It will run well at a high idle but will not run if I have it lower than maybe 1200 RPM, I don't have a tach but just guessing on the RPM's.

I packed it up and put it in the garage for the night after it used up all the fuel in the aux. tank.

Felt like a pretty good day
 
I've been enjoying a break from working on any bikes this last week.

I did more research about setting myself up to be able to spray paint at home and came to the conclusion that to do it right and be able to produce consistently good results I would need to spend quite a lot more money and effort than I'm willing to invest right now.

Without going into too much detail, I found out that I would need to buy a new compressor and to do it right would need a 220V 5 HP machine minimum, that would mean installing 220V plugs in the garage which is another big job as the garage is drywalled.

But two issues that ended up being the deciding factors was the time required to set up and cleanup after painting compared to what I currently do and the toxicity of commercial paints, specifically the hardeners, which require full on breathing gear to protect myself from serious health risks.

Rattle can paint requires about 10 mins of prep and 2 mins to cleanup assuming the parts are ready to go, now I know they don't compare in quality but unless I'm doing body parts I'm quite happy with the results from rattle can for black parts and engine parts.

I also usually paint pieces as I go rather than stripping everything and then painting everything at once.

If I had 2-3 bikes I was restoring and all required a full paint job, I could see myself investing in the equipment, and getting the proper safety equipment and a place to paint rather than just down the side of the garage as I currently do.

I got the turn signal wires switched around in the headlight and snapped a picture of the cleaned up connections, they were a mess before and really dusty, I guess because the headlight bucket has no grommets to keep the dust out, I must order some of those on my next parts order.

photo233_zps2b12e4c7.jpg


Today I got the kick starter and gear lever painted with the Bright Beauty paint I specially ordered, I ordered the satin finish as I thought the gloss maybe too shiny, will find out soon once they are cured if I got it right, I was going to order one of each as they are pretty cheap but didn't for some reason.

I will post some photos of the parts once they are dry and I can handle them.

photo230_zpsf9b87917.jpg


photo229_zpsefde6cec.jpg


I purchased a new kick starter rubber as they are so reasonable, but they are not reasonable to install, the new one looks like it’s way too small to fit over the end flange.


photo228_zps775456c3.jpg


I got the mirrors installed today and finally figured out where the spring went that was left over, it belongs at the bottom of the front brake cable to assist with releasing the brakes, It felt fine without it but I put it back in where it belongs.


photo234_zps9118011c.jpg


Just one piece left to complete, can you guess what it is?
Edit, actually 2 parts and they both require painting, the tank and the down tube cover, I'll see how today goes, if time allows I will tackle the bondo again and see if I can master it.
 
Last edited:
Here are a few photos of the finished parts, I took these with the iphone so a bit hard to see the actual finish.

I'm very happy with the look, the satin finish is actually really nice, hard to show in the photos but they look great to me.

The kick start rubber was a real tough one to get on and I damaged the paint on the end flange of the kicker, so I buffed it off, looks like I'm going to touch that up as it looks a bit out of place being polished rather than painted.

photo235_zps1a3318dc.jpg


photo236_zpsc0fccb0b.jpg


photo238_zps2c5df66f.jpg


photo237_zpsff3ec5bc.jpg
 
Back
Top