-
Required reading for all forum users!!!
Welcome!
Register to access the full functionality of the GSResources forum. Until you register and activate your account you will not have full forum access, nor will you be able to post or reply to messages.A note to new registrants...
All new forum registrations must be activated via email before you have full access to the forum.A Special Note about Email accounts!
DO NOT SIGN UP USING hotmail, outlook, gmx, sbcglobal, att, bellsouth or email.com. They delete our forum signup emails.A note to old forum members...
I receive numerous requests from people who can no longer log in because their accounts were deleted. As mentioned in the forum FAQ, user accounts are deleted if you haven't logged in for the past 6 months. If you can't log in, then create a new forum account. If you don't get an error message, then check your email account for an activation message. If you get a message stating that the email address is already in use, then your account still exists so follow the instructions in the forum FAQ for resetting your password.Have you forgotten your password or have a new email address? Then read the forum FAQ for details on how to reset it.
Any email requests for "can't log in anymore" problems or "lost my password" problems will be deleted. Read the forum FAQ and follow the instructions there - that's what we have one for...
-
Returning Visitors
If you are a returning visitor who never received your confirmation email, then odds are your email provider is blockinig emails from our server. The only thing that can be done to get around this is you will have to try creating another forum account using an email address from another domain.
If you are a returning visitor to the forum and can't log in using your old forum name and password but used to be able to then chances are your account is deleted. Purges of the databases are done regularly. You will have to create a new forum account and you should be all set.
You should upgrade or use an alternative browser.
what did you wrench on today??
- Thread starter chuck hahn
- Start date
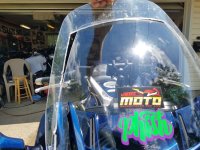
DAMN GOOD TIP!!! Can use that for sport bike fairings. There's also some black epoxy in the glue section of the hardware store.My fairing developed a crack right above the adjuster for the headlight. I don't know what that little hole was put there for, but this is the second one I've had crack in that spot. Last time it was irreparable though.
Id like to thank Steve for the idea of dissolving some ABS pipe pieces in acetone and making a slurry mixture. I had a roll of thick fiberglass tape used to reinforce joints in cement board which will hopefully prevent it from spreading.

I'll let it dry the rest of the day and sand it a bit to flatten it out. Maybe next time mix it a little thinner.


Guest
Guest
Paid my idiot mechanic tax today.
Long story:
Earlier in the spring, got the kinks worked out on my GS's carbs, ran some test runs, changed the oil, and was ready for the spring. But then, it sat in the garage for a couple weeks due to rain. During that period, my wife (who is not good about checking her gas gauge) let me know that she was running on fumes and didn't have enough to get to the gas station. I siphoned a gallon out of my GS tank, and sent her on her way.
Fast-forward to yesterday: beautiful May afternoon, I fire up the GS. Check the tank, see fuel, though the gauge is fluctuating (in its usual way) between 1/4 and 1/2 tank. I figure I have enough for a quick run, and plan to refill when I have more time.
Out on the road, before it's fully warmed up, it starts to sputter, and dies. "I've got plenty of gas", says I, wondering if my carb demons have returned. I start it back up, and it runs, so I get started again. A few minutes later, it sputters and dies again. This time, I figure, "well, maybe I should put it on reserve". Start it up, and head back home.
A couple hours later, I come back out to the garage, only to find gasoline dripping out of the airbox. Yep... I hadn't set it to reserve, it was on prime.
Today, pulled the air filter (damp with gas), drained the oil (still looking pretty fresh, but smelling a little gassy), re-sealed the airbox, cleaned and re-oiled the filter, put it all back together. Refilled the tank, and gave it a good run.
Duh.
Hayabuser
Forum Mentor
What exactly did you do?
Aircraft mechanic.
DAMN GOOD TIP!!! Can use that for sport bike fairings. There's also some black epoxy in the glue section of the hardware store.
Good question. I've only burned a half tank of gas so far so it may be too soon to tell how good of a job I did on this, but haven't seen the crack reappear. I went down a fairly rough dirt road in Placitas, NM the other day and gave it a good rattle. So far so good.
Last night I found a sticker inside the Windjammer recommending this Hotcha repair kit. It's a bit more expensive (ahem like 33,900 times more give or take) than the scrap pipe, 1/4 cup of acetone and mesh tape I had on hand, but looks a heck of a lot stronger. If I had some irreplaceable piece of moto history I would consider that kit, but let's face it I could dredge up an unwanted Windjammer on just about any online get-rid-of-old-stuff-quickly website for half the cost of that kit.
If I do this repair again I would like to follow the steps listed in that repair more closely though. About the only prep I did was similar to gluing ABS pipe together. Clean, apply adhesive, and wait....and wait....and wait! Yeah, I put it on so thick it was soft for two days!
Since it dries so slowly, it leveled out quite nicely though. I'd definitely say to get the repair area as close to level as you can.
Had two gear position indicators, one with a melted connector, and the other with a busted tab.
Now I have one good one. Fun little things to take apart.


Two days, wow, mo-betta use black epoxy.Good question. I've only burned a half tank of gas so far so it may be too soon to tell how good of a job I did on this, but haven't seen the crack reappear. I went down a fairly rough dirt road in Placitas, NM the other day and gave it a good rattle. So far so good.
Last night I found a sticker inside the Windjammer recommending this Hotcha repair kit. It's a bit more expensive (ahem like 33,900 times more give or take) than the scrap pipe, 1/4 cup of acetone and mesh tape I had on hand, but looks a heck of a lot stronger. If I had some irreplaceable piece of moto history I would consider that kit, but let's face it I could dredge up an unwanted Windjammer on just about any online get-rid-of-old-stuff-quickly website for half the cost of that kit.
If I do this repair again I would like to follow the steps listed in that repair more closely though. About the only prep I did was similar to gluing ABS pipe together. Clean, apply adhesive, and wait....and wait....and wait! Yeah, I put it on so thick it was soft for two days!
Since it dries so slowly, it leveled out quite nicely though. I'd definitely say to get the repair area as close to level as you can.
That Hotcha-(we gotcha) repair kit, looks like mostly it's got a few pieces of aluminum flat bar, find that in the hardware store too, cut to fit yu sef…EZ.
Two days, wow, mo-betta use black epoxy.
That Hotcha-(we gotcha) repair kit, looks like mostly it's got a few pieces of aluminum flat bar, find that in the hardware store too, cut to fit yu sef?EZ.
Maybe a slight exaggeration on the dry time, but like Steve told me, don't get in a hurry with it.

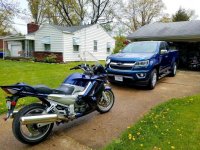
Also, I picked up a tail trunk for free on cracklist. I like it, but not sure if I'll make it permanent yet. The rack underneath is useful for a drybag and such, but I like the looks of the trunk, especially the bright brake light.


nvr2old
Forum Sage
When I first bought this bike, back in '05, all four were broken.
Someone had tried to epoxy them before, but poorly, and the whole thing was held together with zip ties.

After I got the zip ties, old epoxy, peeling paint, dirt, and whatnot off the parts, I "tacked" them in place with a small amount of epoxy.
I carefully measured the location and angles off a good tailpiece I have (in champagne color), as the originals were missing quite a bit of material.

I laced the pieces together with some wire and spent three days building up layers of metal reinforced epoxy.
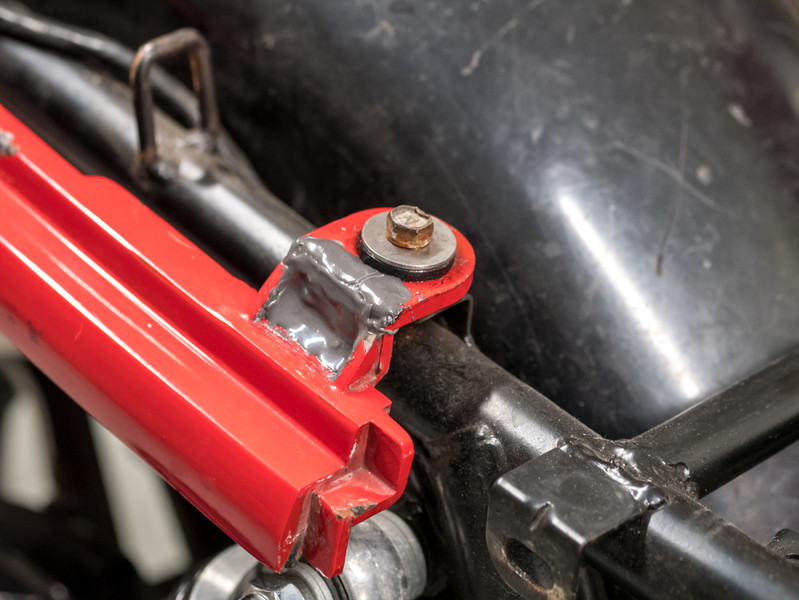
Not the prettiest thing, but I think it should hold....
Now the seat sits as it should and the tailpiece isn't rattling around.
Almost ready for Brown County....
Finally made a stab at fixing the broken tabs on my tail piece....
When I first bought this bike, back in '05, all four were broken.
Someone had tried to epoxy them before, but poorly, and the whole thing was held together with zip ties.
After I got the zip ties, old epoxy, peeling paint, dirt, and whatnot off the parts, I "tacked" them in place with a small amount of epoxy.
I carefully measured the location and angles off a good tailpiece I have (in champagne color), as the originals were missing quite a bit of material.
I laced the pieces together with some wire and spent three days building up layers of metal reinforced epoxy.
Not the prettiest thing, but I think it should hold....
Now the seat sits as it should and the tailpiece isn't rattling around.
Almost ready for Brown County....
Bob, that ain't gonna hold for long. Epoxy has to be reinforced with layers of fiberglass cloth, or for that fitting, some sheet steel.
Or wire stitching similar to rebar? Which I did....Bob, that ain't gonna hold for long. Epoxy has to be reinforced with layers of fiberglass cloth, or for that fitting, some sheet steel.

I knew it was not "for sure" fix, but so what? after 14 years of zip ties, I am not scared of failure...
I have fiberglass cloth if I need to revisit this....
First try-out of the non-slip treatment of the ply ramp. Absolutely ace.
- Thick coat of cheap red undercoat / red lead, anything you like.
- Liberally spinkle some oven-dried coarse sand over it while still sopping wet.
- Let it dry, then another coat of cheap red on top.
- Let it dry and harden off for a week.
- Have a glass of cheap red. Sod it, have a bottle.

While these guys don't present the headache of dealing with that H-shaped cam cover gasket, there's about 2 hours of shenanigans to get them torn down just to this level. Body parts all over my garage, like Dexter.
No matter how diligent I am in reassembly, there's always a nagging doubt, and it's still a relief to hear the bike light up instantly and idle like a watch, with no leaks or disturbing noises or other signs of distress...
So now, it's on to the other machine; the Goldwing needs a look-see at its valves too. Three times the number of cylinders, yet half as many cams and far less disassembly involved. Can't wait.
a


Guest
Guest
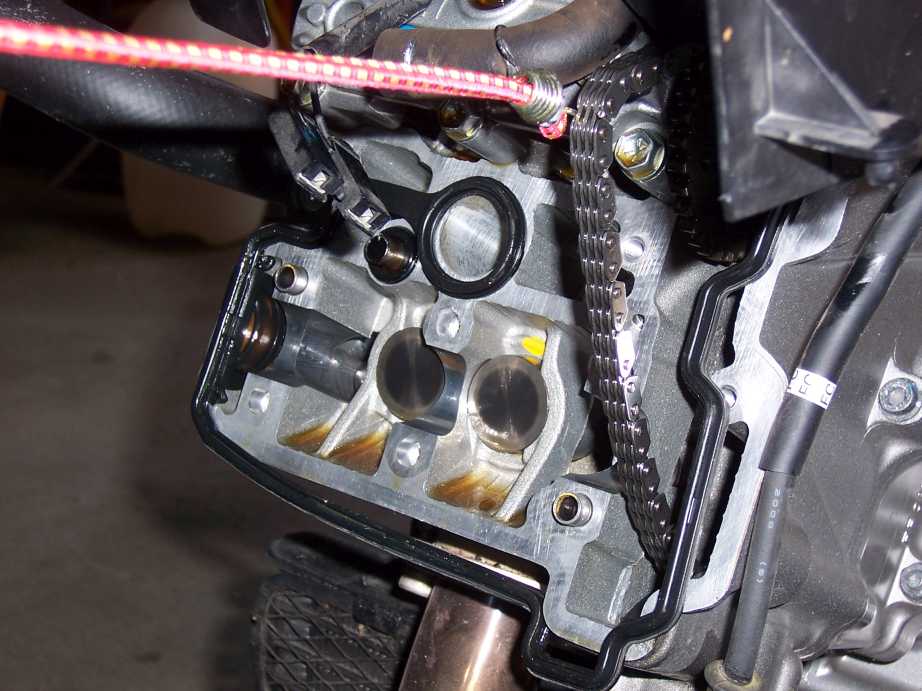
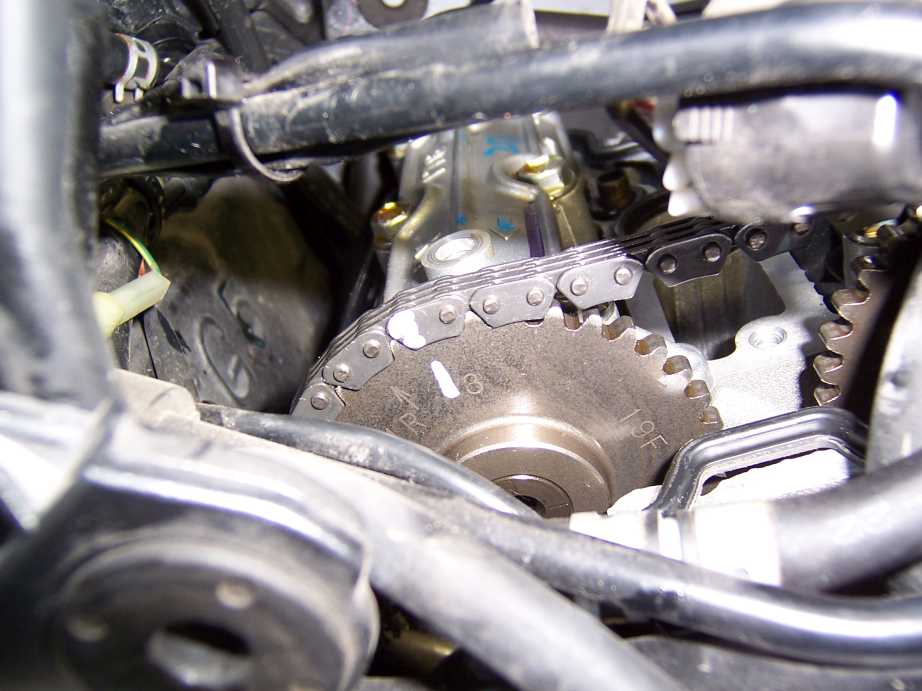
From time to time, even water-cooled guys have to get in there and wrestle with the intestines, and monsoon season is as good a time as any. These are the guts of a V-Strom. It's shim-under-bucket, so I had to pull all 4 cams (lucky me), but an oil-based paint pen made reassembly a little more certain. I'm 1,000 miles early for this maintenance, but all 4 exhaust valves were two steps too tight. Eeek!
While these guys don't present the headache of dealing with that H-shaped cam cover gasket, there's about 2 hours of shenanigans to get them torn down just to this level. Body parts all over my garage, like Dexter.
No matter how diligent I am in reassembly, there's always a nagging doubt, and it's still a relief to hear the bike light up instantly and idle like a watch, with no leaks or disturbing noises or other signs of distress...
So now, it's on to the other machine; the Goldwing needs a look-see at its valves too. Three times the number of cylinders, yet half as many cams and far less disassembly involved. Can't wait.
a
a
Boy, that looks clean inside! Please tell me about your "oil based pen".
My Wee Strom has 10K on it, and has probably never had valves checked or coolant changed. I sort of dread the body parts, as I've had trouble putting things back together for previous maintenance.