• Required reading for all forum users!!!

    Welcome!
    Register to access the full functionality of the GSResources forum. Until you register and activate your account you will not have full forum access, nor will you be able to post or reply to messages.

    A note to new registrants...
    All new forum registrations must be activated via email before you have full access to the forum.

    A Special Note about Email accounts!
    DO NOT SIGN UP USING hotmail, outlook, gmx, sbcglobal, att, bellsouth or email.com. They delete our forum signup emails.

    A note to old forum members...
    I receive numerous requests from people who can no longer log in because their accounts were deleted. As mentioned in the forum FAQ, user accounts are deleted if you haven't logged in for the past 6 months. If you can't log in, then create a new forum account. If you don't get an error message, then check your email account for an activation message. If you get a message stating that the email address is already in use, then your account still exists so follow the instructions in the forum FAQ for resetting your password.

    Have you forgotten your password or have a new email address? Then read the forum FAQ for details on how to reset it.

    Any email requests for "can't log in anymore" problems or "lost my password" problems will be deleted. Read the forum FAQ and follow the instructions there - that's what we have one for...

  • Returning Visitors

    If you are a returning visitor who never received your confirmation email, then odds are your email provider is blockinig emails from our server. The only thing that can be done to get around this is you will have to try creating another forum account using an email address from another domain.

    If you are a returning visitor to the forum and can't log in using your old forum name and password but used to be able to then chances are your account is deleted. Purges of the databases are done regularly. You will have to create a new forum account and you should be all set.

1983_GS750E - Rebuild

  • Thread starter Thread starter GateKeeper
  • Start date Start date
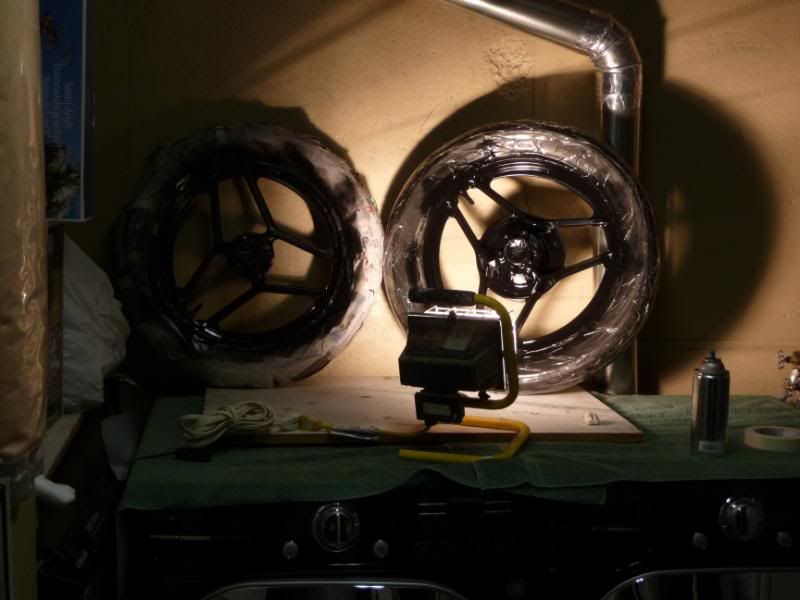
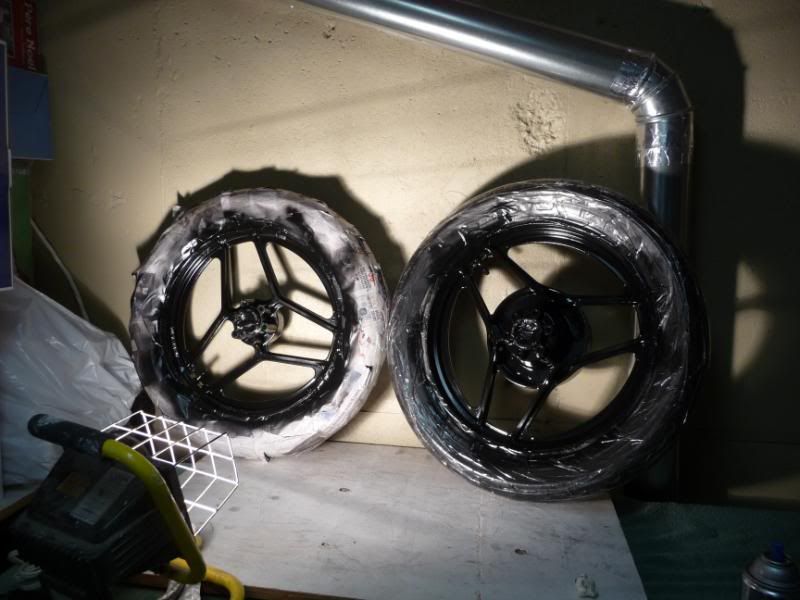
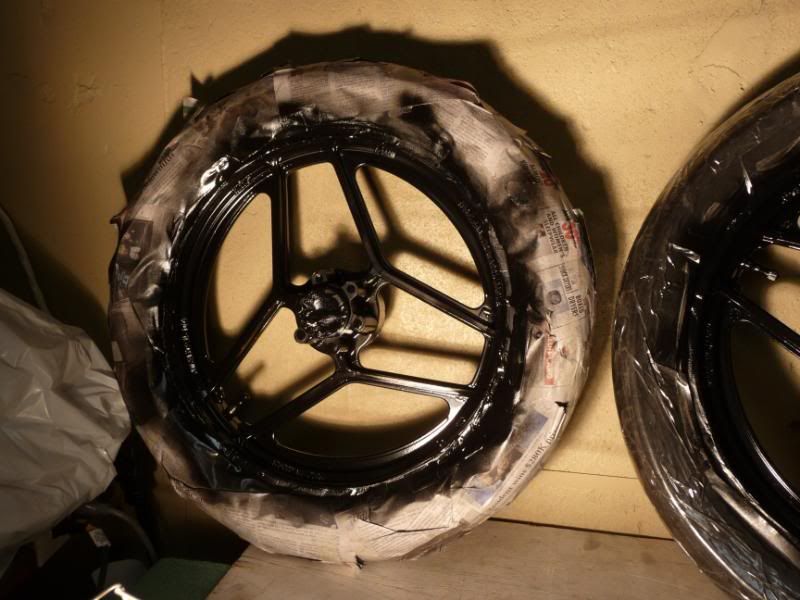
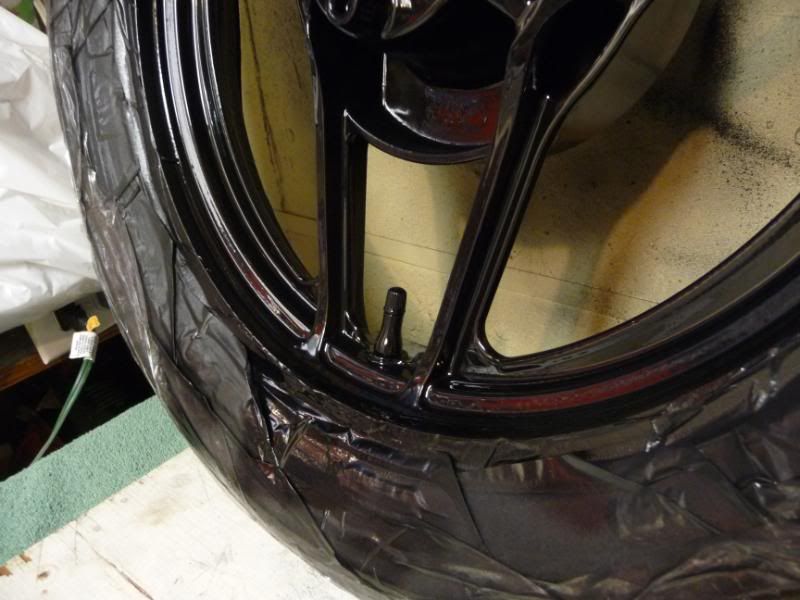
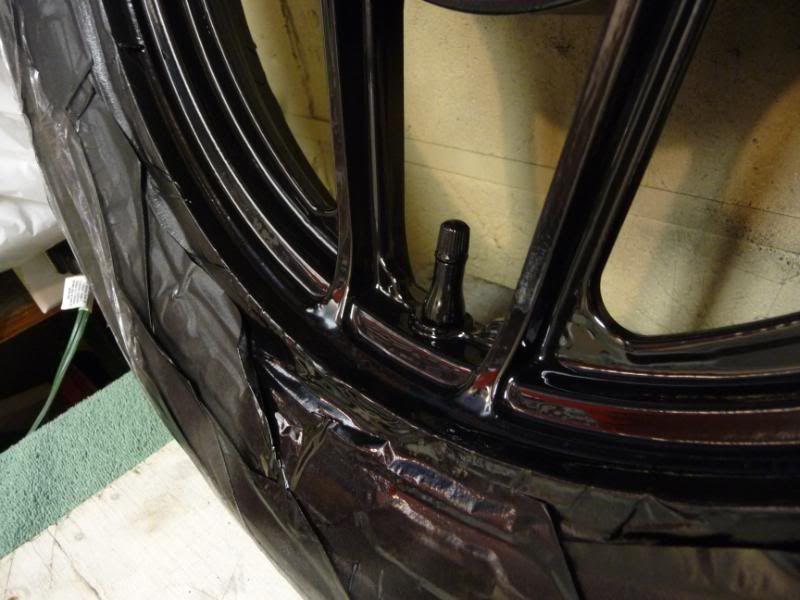
Yes just polished the non painted portions of the rims, the lip and the spokes.

Started with a good cleaning, then used 400 grit, waterproof sandpaper, under running water, keeping it wet all the time, then a good rinse.

then got a wire wheel a very fine one, and a well used one, to polish up a bit

next was a polishing bit, and black compound, then a new bit and used the red compound

between those 2 , I cleaned everything with paint thinner and rubbing alcohol

last was a whole lot of rubbing and elbow grease with a terry cloth and micro fiber cloth, and a product called Blue Magic Metal Polish, but you can use what ever you have available, this stuff is a really fine polish, but will turn your cloths black really fast, so keep changing so your not rubbing in the black stuff back onto the rim.

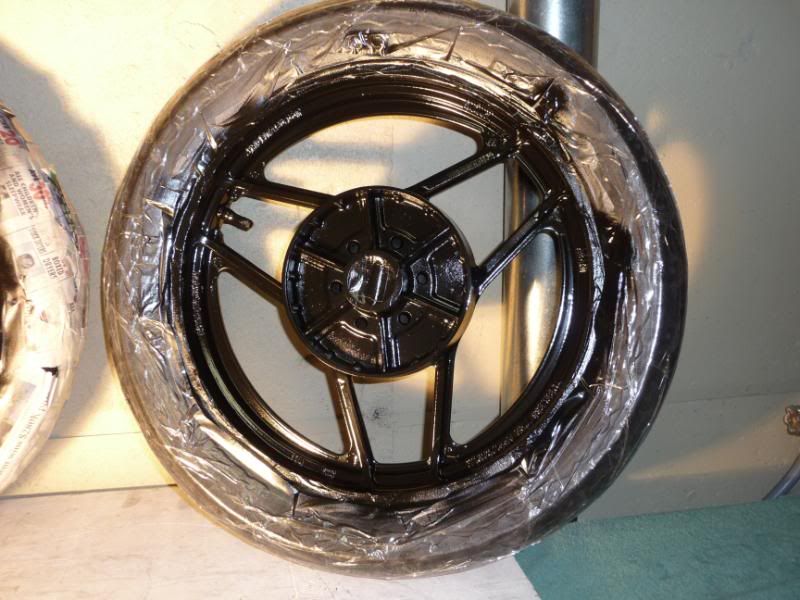
One final rub down with the microfiber cloth and rubbing alcohol, and then I did the taping.

The metal polish has a silica residue or something like that it leaves behind on the metal to protect it, looks like good stuff, first time I have used this product

I only wish I had some larger buffing wheel/pads that fit my drill, would have made it easier and a faster process
 
Sweet indeed!

And +1 on the JB Weld comments earlier too, I definitely wouldn't trust it.

Hopefully your holes aren't too big and a helicoil will sort you out...
 
Am I Wacked or what....

Am I Wacked or what....

So I was thinking about paint on the bike, and somehow, white came to mind.....

Grabbed a picture I had handy, used MS Paint, and went at it.....

Ya I know it sucks in a sense of how bad the work is, but does the scheme look good ? is the bigger question......

Really I am ashamed to put this up, but, just looking for some feedback

good or bad :D:D:D

I really should leave this type of work to my son, and use Photoshop, to make a better pic, but hey it's a start.....right.....LOL


whitebike.jpg


.
 
Last edited:
OK, a bit of a better pic, not my bike, and not really the same as what I envision, but close


WhiteSuzuki-GS750E-1983_2.jpg
 
Last edited:
painted the rims

painted the rims

Well I did it..........hopefully they turn out, and if not, back to stripping, and we can do it all over again, I think there is one run, but maybe my eyes are seeing something that is not there or the run is on the taped portion

It's been a long time since I sprayed anything with a rattle can, and man o man the stuff comes out quick and lots of it, so I tried to do light coats but a lot of them, I will know better tomorrow, once it dries a bit harder.....

I used the engine enamel paint, same thing I will use for the engine, so lets see how it lays and shines......

Yes Flyboy I went the shiny route, might be tacky, might not, we shall see, I can always hit it with some clear satin varathane to dull it down a bit

well here are a few pics

almost like a crime scene

P1070211.jpg


and letting them dry, don't have a heat lamp, but this contractor lamp gets things warm as well

P1070216.jpg


P1070225.jpg


P1070232.jpg


P1070234.jpg
 
Paint is dry to the touch, but I am not a happy camper......

I see spots that are not shiny, but rather dull and matte, as though the shine was never there, it is painted, just not shiny.....probably my painting skills for sure, so tomorrow I will have to grab another can, and do some touch up I guess.....

Just not sure if I should hit all of it with some very fine paper, and spray everything, or, just the parts that don't have the shine to them, ahhhhh I hate it when I don't know enough, but I am learning......maybe I sprayed it on too thick or not thick enough, I just hope I can remedy the issue..........
 
I would just go over it with another coat. More in the areas where it needs more paint. You want to spray the entire wheel again. If not the paint can look different.
 
bakirkwold is right, you want to give a full coat, not just touch ups, sounds like what you have is "blushing" where you have got a patchy appearance, some shiny and some dull.
Main cause of that is humidity, if there is too much moisture in the air this is the result, you need to pick your day for spraying when the humidity is low, unfortunately you guys are in the dead of winter now, and I would imagine it is pretty damp this time of year.
I forget the figures now, but I seem to recall that you need to have a humidity lower than 75% or something, hopefully Pete will chip in and correct me, I remember he had to sit on his hands a day or two waiting for dry weather when he painted the 450. I think he became the best 7 day forecaster in Australia.
Another thing that will give you a dull finish, is the paint going on too dry, maybe try moving the can in a little closer, give the paint time to settle on the rim before it starts drying, give slightly wetter coats.
I know that it is a greater risk of runs, but such is the beast, it is a balancing act between a wet enough coat to lay down the shine and not too wet as to run. Just practice, you will get the hang of it, we have all sanded runs, plenty of them, so don't feel bad about it, welcome to the club with a membership of millions.
I recon it is easier to sand the odd run and touch up than fix a bad coat anyway.
Keep at it, it will come out well in the end.

Hahaha yeah somethin' like that Stan... spent 6 (non)working days watching the weather forecast like a hawk and seeing just how inaccurate it was compared to what was actually in the sky :rolleyes:

After advice from Larry it looked like 70% was the max humidity before any issues, and at one point I beat rain literally by about 15 minutes but it was ok as that was just after flash off time.

You really do want as low humidity as you can get when painting... if it's snowing or raining outside then just don't do it, wait until it's all finished and watch some sort of accurate weather source for the actual humidity...

One thing I learnt while spraying is that there is definitely a technique to it, and with practise you can get a good technique going for a nice even flow of paint.

Not sure how much that will help but hopefully it will help some...
 
Thanks for the tips guys.....

I don't think it was humidity (I could be wrong) we are in winter season right now, it was cold last night, but painting was done in the house (garage) have heat in there as well, I think but will have to check the meter, humidity level in the house was around 40% (need to double check) we have very dry winters, so a humidifier is on during the winter months, plus I have one that adjusts itself automatically and maintains a set level for the house.

I think what Flyboy said (bring the paint closer to the part) might have been the problem, and I wasn't close enough, even though I thought I went and sprayed over each area more than once.

Ahhh no big deal, I will see if the directions say to sand between coats, and if so a light sanding just to take the shine off, cleanup/wipe down and spray again....

come to think of it maybe the rim was dirty in those few areas and adhesion to the rim was not right...hmmmm, maybe that as well

just thinking back, my rotors came out perfectly coated, all nice and shiny, everywhere.....

I shall try again, probably tonight.
 
I just live down the road from you in the Hammer, have the exact same bike and have painted several times in my unheated garage. The trick to it, I found was to heat the part and paint up first to room temperature in the house. Spray the part in the garage, then bring it back inside to cure. Alternatively, I have cured items in the cold garage by putting them under my halogen work lights. May take a wee bit longer but it does work. Just don't get the lights too close as they do put off a lot of heat and you can blister the paint.

For small parts, I use my not yet patented "Easy Bake Oven" (I think it might still be in the archives) which is essentially an old computer case lined with aluminum foil reflectors. I hang the part inside and focus the halogen lights on it. Works slick as butter.

You are doing a fine job on this project and she will look super when done. I'm not sure of the white however. I never liked the burgundy either so I did mine black:
Blackbooty.jpg

Its not a perfect job just enough to be presentable as she's my daily rider. My Kat project bike I did in white with silver lettering and frame. Now in my mind its suits it but the 750 not so much.

Well you still have a few things to sort out before paint so no rush there. The frame booboo should be easy enough to sort and I think any competent welder could patch it for you, and it shouldn't cost that much. There should be a few small shops in you neighbourhood.

As far as the exhaust bolt, I think the only way to do this right is to have the hole filled with weld and retapped. Perhaps the welder you get could do them both and cut you a deal. The engine is too heavy to cart around but the head comes off easily enough and it doesn't hurt to have a shuftie at the valves once you have it off.

With that bolt in the case I would have thought you could get a set of vicegrips on it. A touch of heat and a squirt of penetrating fluid and it should ease on out. Failing that, if there is still enough protruding the welder should be able to weld on another bolt that you could get a wrench on.

Those are annoying problems you have there but are, of course, fixable.

I find, in this game, when something doesn't go right or worse, gets fudged up then its best to leave it for awhile and go on to something else. By the time you come back to it a solution will present itself.

Keep at it, slow and steady wins the race. You'll be riding come the spring.

cheers,
spyug
 
I forgot to mention, humidity here in winter is not an issue. At the height of the summer in August, then I'd be concerned but like Pete, I have painted in 70+% humidity with no issues. The concern then is only with compressor driven equipment but as long as you have filters/water traps on your airline then you should be fine.

More than humidity, be concerned about traces of oil or other lubes on the surface, especially oils from your hands. When prepping the surfaces just before paint, you should wear vinyl or latex gloves and wipe the surfaces with a paint thinner ( I use mineral spirits) and lint free rags ( I like the blue shop towels from Crappy tire). Good prep is always the key to decent paint jobs.

Cheers,
spyug
 
I just live down the road from you in the Hammer, have the exact same bike and have painted several times in my unheated garage. The trick to it, I found was to heat the part and paint up first to room temperature in the house. Spray the part in the garage, then bring it back inside to cure. Alternatively, I have cured items in the cold garage by putting them under my halogen work lights. May take a wee bit longer but it does work. Just don't get the lights too close as they do put off a lot of heat and you can blister the paint.

spyug

Hey spyug....

Yup your close by for sure, had family out your way but they have now moved to Bolton, go figure, from one end to the other end of where I am.

anyways, I did more or less exactly as you mention above, rims were in the basement, I even rand hot water on the paint can to warm it up as well, the contents that is, laid out the tarp, got everything ready before hand, took rims and paint to garage, and started spraying, after spraying, brought them back into the basement, leaned them up and hit them with the light to warm them up.

Ohhh well crap happens, and for some reason, it came out with a few blotches....

no biggie, I will redo the rims, and hope for the best on the second go around....

By the way, the garage is heated as well, not as warm as the basement, but warm enough, the dog lives in the garage, so he gets heat, and even AC in the summer....lol

Going to hit the Motorcycle show this weekend, gonna see if anyone is around to do the frame work and help me out on the 2 holes as well, maybe find some competent fabricator at the show, if not there is a place not far away, my brother has used for welding and fabrication on other things, and the guys are really good, will hit them after the show if I need to.


and your correct on your statements here

I find, in this game, when something doesn't go right or worse, gets fudged up then its best to leave it for awhile and go on to something else. By the time you come back to it a solution will present itself.

Keep at it, slow and steady wins the race. You'll be riding come the spring.

Your bike looks really good for a daily commuter.....

The white is an idea, still far from applying paint, so lots of time to make up my mind.... :D
 
Sorry I hadn't read the post where you showed the painting of the rims. I think you are correct in that there was some residual contimenant on the parts where the paint didn't come out right. No biggy, as you say. A little light sanding with 600+ (I like 1000/1500) wet/dry, wipe down with thinners, let it dry and shoot again just as you did.

As far as finding welders, I agree that it would be advantageous to find a guy into bikes but just be aware that there are some so called "experts" that shouldn't be let loose anywhere near welding equipment. You might try asking the local bike shops for a referral.

The other thought I had is checking on the GTA Motorcycle site:
http://www.gtamotorcycle.com/vbforum/index.php which is the best local site. A good bunch of characters and lots of practical help locally. I'm sure there are some welders represented there ( and I know there are good mechanics and painters).

Would there be any welding schools in your area or even highschools with an autoshop? Often they would take on projects like these just for the practice. The instructors would always insure the work is up to snuff. Worth looking into.

Anyway, enjoy the show. I was hoping to go but the boss is hot to trot on a room painting project this weekend so I guess I'll miss out, unless.....
"Honey, I'm just stepping out to get some fresh brushes/tape/rollers etc.":D. It takes her half a day when she goes out for anything so why not me?

Cheers,
spyug
 
Thanks spyug, I checked out the site mentioned, and I will see who is at the show this Saturday as well, maybe between the 2 I can find someone to help me out on this....
 
Second attempt at painting the rims

Second attempt at painting the rims

Well, I did some light sanding, enough to take off the shine of the old paint (old ya right it was on since yesterday....:D) anyways scuffed it up, cleaned it with rubbing alcohol let it dry, kept them in the basement to stay same temp, as the paint I bought today, once I was ready, took it all to the garage, and went at it......

A little while latter they were back in the laundry room under the light, must say it seems they turned out better this time, so far I don't see any matte areas so I might have hit it really well this time.....I will take a closer inspection tomorrow...

Anyways as always a few pics....

Ohh ya I also found some matte bumper paint, and painted the chain guard and the air box, they look shiny but still wet, as they are drying it's turning to a matte finish...

the spokes do have a polished finish, but the paint on the tape makes it look good as well, almost a polished black....never knew tape could look so good.....

P1070252.jpg


P1070254.jpg


P1070275.jpg


P1070276.jpg


P1070277.jpg


P1070278.jpg
 
Eh, it's just black lol.


I too am going black on my rims GK but I'm doing the whole rim in black. No polished lines. I think it looks better IMHO. And yeah, I've done a ton of rattle can. For gloss paint, the trick is to get enough material on. Most folks go too light and that will make it look matte. A fine balance between enough and too much causing runs comes with experience.

Or, you could just Powder coat 'em haha.

Are you gonna use regular clear over the black or use that 2K stuff that's supposed to be like auto paint?

Regardless, your looking good and getting quite a bit done. Looking forward to seeing the final pics.

Sci85
 
Oh, and I like white too. Looks real good when done right so I say go for it.
sci85
 
Back
Top