• Required reading for all forum users!!!

    Welcome!
    Register to access the full functionality of the GSResources forum. Until you register and activate your account you will not have full forum access, nor will you be able to post or reply to messages.

    A note to new registrants...
    All new forum registrations must be activated via email before you have full access to the forum.

    A Special Note about Email accounts!
    DO NOT SIGN UP USING hotmail, outlook, gmx, sbcglobal, att, bellsouth or email.com. They delete our forum signup emails.

    A note to old forum members...
    I receive numerous requests from people who can no longer log in because their accounts were deleted. As mentioned in the forum FAQ, user accounts are deleted if you haven't logged in for the past 6 months. If you can't log in, then create a new forum account. If you don't get an error message, then check your email account for an activation message. If you get a message stating that the email address is already in use, then your account still exists so follow the instructions in the forum FAQ for resetting your password.

    Have you forgotten your password or have a new email address? Then read the forum FAQ for details on how to reset it.

    Any email requests for "can't log in anymore" problems or "lost my password" problems will be deleted. Read the forum FAQ and follow the instructions there - that's what we have one for...

  • Returning Visitors

    If you are a returning visitor who never received your confirmation email, then odds are your email provider is blockinig emails from our server. The only thing that can be done to get around this is you will have to try creating another forum account using an email address from another domain.

    If you are a returning visitor to the forum and can't log in using your old forum name and password but used to be able to then chances are your account is deleted. Purges of the databases are done regularly. You will have to create a new forum account and you should be all set.

1983_GS750E - Rebuild

  • Thread starter Thread starter GateKeeper
  • Start date Start date
Thanks Flyboy, I did look them up before, and I did not see my seat cover on their site, however I have now sent them an email, lets see what they say.

I also would need to put this on myself, this might not be so easy, I don't have tools for this sort of thing. Also there is shipping of 20 bucks, 90 for the seat, any tax or duty, and I am up to 120 to 130 bucks, plus I need it installed, let say 50 bucks, I am back at the same cost as what the local shop is charging, OK it's not the same as an original type/style.

So I really don't know what to do here,,,,let's see what PitReplica comes back with...


@jwhelan65, I like the Carbon as well, but it just might be a bit too modern of a print for an older bike, but it could be a good contrast and an upgrade to something newer
 
If that's the only tear. Why not ask them about a repair ?

I did, but because it's on a corner, and at a stretch point, the repair would never hold up, it would end up coming apart sooner or latter.

I don't mind recovering the seat, the original is very well smoothed out, and has many shiny spots on it, plus the hole and also some paint stain that I can't seem to get out....

Perhaps the Carbon fiber would be the best way to go, it will give an old bike a modern accent....

Decisions, decisions.....
 
it is out......

it is out......

Well tonight was the night, the engine is out, and the frame is free and we are ready to start making it new once again.

It really was a pain in the arse to get the engine out, I mean really, I undid everything I could, removed everything I could, turned her on her side and still a royal pain to get that frame away from that engine, even the air box was creating a headache as it wouldn't get out either at first. Well with the help of the wife tonight (son is at work already) we managed to get it done....

here are a few pics

actually first here is the chain, I soaked in kerosene for a few hours, took the wire wheel to it, then soaked it again, then dried and put on some chain lube,,,look s to be OK, I will measure it just to make sure but I think it will be good to go...

P1060696.jpg


P1060697.jpg


and now the fun began.....

removed all of this

P1060750.jpg


from here

P1060729.jpg


to get this out

P1060736.jpg


P1060739.jpg


and we ended up with this

P1060735.jpg


and a quick shot of the parts that are scattered all over the place, including the coolers, and plastic rubber maid box...

P1060748.jpg


Well that's it for now, as the next phase is to clean, scrub, polish, and paint....I will take pics as items get done, just to show the progress and to keep this thread alive....

Thanks to all for the great support so far....
 
Wow, all done, one bare frame to go, would you like that with fries?
Although getting the motor out was a PIA, trust me, it is better than trying to grab it an man handle it out, that will bugger your back up for life, ask me how I know.:rolleyes:
Now what are your plans for sripping the frame? A word of advise, use paint stripper, and not the namby, pamby water based green concious stuff, I am talking the strong, vile, chemical stuff, that would have bunny huggers running and screaming in panic.
Lather the frame with it, and you watch the paint just fall off.
I used a combination of paint stripper and a wire wheel on mine, and the wire wheel was a right PIA, took forever, was as messy as all heck and I went through about three of them, I will never use them again to strip a frame.
Looking forward to the updates.
 
Hey,I think I seen something like that before.Wonder where it was?:rolleyes::D

All that is missing, is your frame holder....I am sure I will come up with something just as creative :D
 
Last edited:
Wow, all done, one bare frame to go, would you like that with fries?
Although getting the motor out was a PIA, trust me, it is better than trying to grab it an man handle it out, that will bugger your back up for life, ask me how I know.:rolleyes:
Now what are your plans for stripping the frame? A word of advise, use paint stripper, and not the namby, pamby water based green concious stuff, I am talking the strong, vile, chemical stuff, that would have bunny huggers running and screaming in panic.
Lather the frame with it, and you watch the paint just fall off.
I used a combination of paint stripper and a wire wheel on mine, and the wire wheel was a right PIA, took forever, was as messy as all heck and I went through about three of them, I will never use them again to strip a frame.
Looking forward to the updates.

I don't even want to think about how hard it's going to be to put the thing back in.....

As for stripping, was not really sure if I needed to go down to bare metal, I was thinking of just a wire wheel, and take off as much crud as possible, give the whole frame a good sanding to roughen it up a bit, some finer sand paper to get rid of any scars, primer it and then paint, with a rattle can....

I thought leaving some of the original paint would be a good thing

Or do you recommend stripping down to bare metal ? then prime and paint
 
Strip down to bare metal, coats of self etching primer, and then any epoxy based paint.
 
Depends how far you going with this, I took mine to the metal, laid primer and then painted it with a 2K for durability, I was going to powder coat, but that was too expensive, and the 2K is hard as nails, easier to repair little nick to.
If you are going for top quality finish, that is what I would do.
But yes, you can give it a going over and lay your primer and paint on top, after all the paint that does not come off, ain't coming off, it's been on there 30 years and if it it still does not come off, its ot going anywhere, you pretty safe.
 
I was going to do powder coating as well, and as you said it's expensive.

I keep hearing about the 2K, but I don't yet know what that is ? I was going to use the Appliance enamel that SVSooke did his frame with, he is happy with the results and it seems to be good as well, and it appears to hold up.

I only thought if I go bare metal, and I don't have a good paint applied, it will just be a wasted effort, it will flake off, or chip easy.

you ask how far I was going to go with this,,,,,it started as a simple oil change, to get the son exposed to a bit of wrenching,,,,,now look where I am....LOL

I wasn't planning on doing a expensive rebuild, but it seems if I am going to cut corners on certain things, it's gong to be a wasted effort over all, and as they say one has to start with a good base.............so I will try to do as best of a job I can, without breaking the bank, and if I can't afford it now, perhaps I will have to stop and wait until the funds are available, I do have all winter to do this....

Thanks for the input guys.....
 
No problem going with what SVS said, go with the appliance epoxy if it is cheaper, I just don't know the stuff, that is why I didn't comment on it.
It sure sounds tough and up to the job, and a few beautiful creations have rolled out of that garage.
And yes, he is right, go over the frame closely and you will see plenty imprfections and welding spatter from the factory, I spent the time taking it all off mine.

it started as a simple oil change, to get the son exposed to a bit of wrenching,,,,,now look where I am....LOL

hahahaha, ain't that just the truth, mine started as a stator cover replacement.
 
@Flyboy, I am taking all comments, so I can make the best decision on how to do this and what to do it with. This is why this place is great one gets all kinds of input, and so far it's all been great.....

I guess it boils down to what I want to do, how much I can spend, and how picky I want to be.....

But I will clean it up good that is for sure, I noticed the welding splatter, this will be removed for sure....
 
but this dent, is my biggest concern at the moment, this has to be fixed, repaired, replaced, I have a local shop in the area, gong to see what they think is the best course of action would be....


P1060735.jpg
 
OK I deleted that post.I had a choice,get fussy and clean every weld so it looked good.I would still be fussing with the frame if I did that:eek:
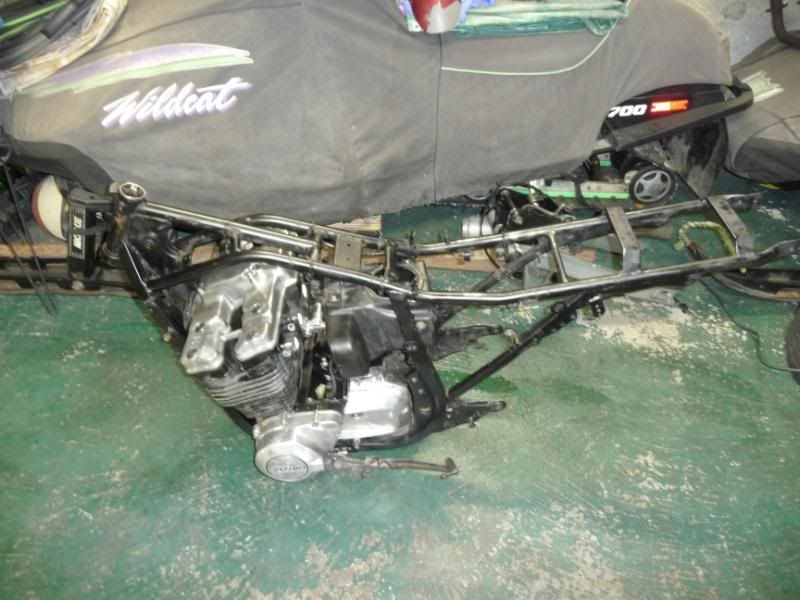
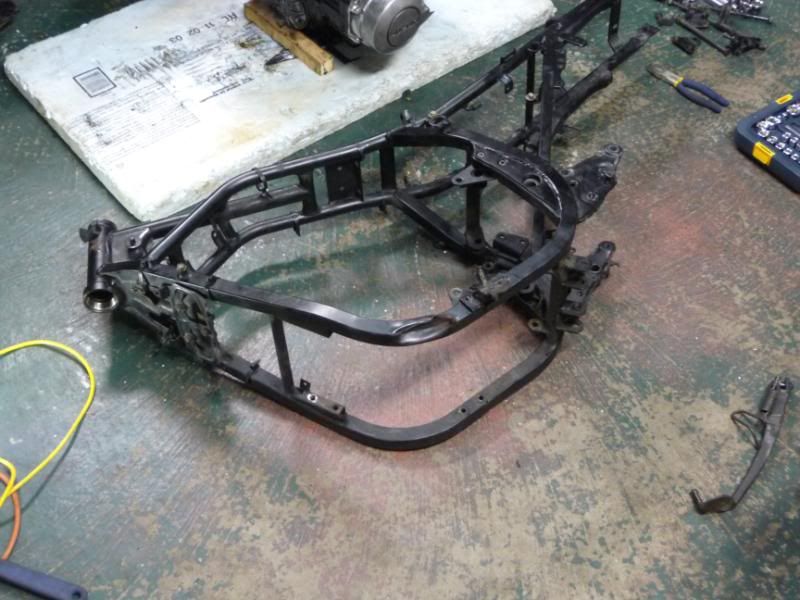
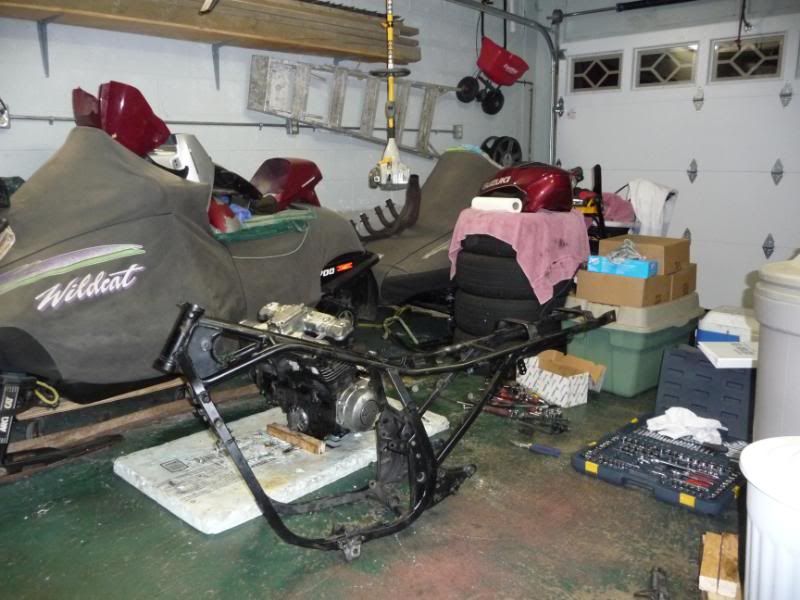
The early machine welds are horrible on these frames.The 1000 frame is way nicer,obviously done by human hands.That appliance "epoxy" is pretty tough,not 2K tough but scratches are easily retouched.BTW Old Yeller is the first bike out of my "garage"
2009_09050008.jpg
:eek:
 
Old Yeller is the first bike out of my "garage"
Looking at the workmanship and attention to deatil, you would never say so.
That's a seriously cool man cave.
 
Well not a lot to report........

Spent the last few evenings, just sanding the frame, I think we went a bit overboard, we are down to bare metal in some places, but all and any rust is now gone, and the frame is as smooth as a babies bum, I removed as much of the welding splatter I could find, and it's probably getting close to getting primed, and then painted, I have decided to give it a light coat of primer, check for any deformations, and then hit her with a nice coat of shiny black.....

At the same time, went to the local Canadian Tire store, picked up a hand wire brush, another wire wheel brush for the drill, some Simple Green cleaner, and a couple of bottle cleaners, to get in between the fins.

Sprayed down the engine, let the Simple Green sit for a bit, used the various brushes to agitate and loosen up the grime, old hard oil's and so on, then got the hose out (power washer is to noisy at 10 p.m.) and gave it a rinse......still some crud, but a few more scrubs, and even the engine will be ready for a fresh coat of paint. Going to try and find some VHT high heat paint, I think this is what you guys are using, but I will double check some of the old posts, unless some here posts before I do my search.

Going to paint while all the covers are on, then I will remove the covers, and polish them up, and then replace....by the way,,,any gaskets that are mandatory to replace once a cover is taken off ??

Still have to remove the broken bolt out of the exhaust port, and that big dent in the frame has to be looked at, all in good time, and well before painting....

Going to drop off my old brake lines at http://www.rennsportautoparts.com/Default.asp and they are going to make up a kit for me for all the lines, hopefully they can use this as a template and have a kit available for anyone else wanting to get some SS Brake lines, price's seem to be reasonable, but I won't know until I get the final bill.

I will try to post a few pictures of the current state of everything, just to keep it interesting and visual......

Project might take a bit longer than expected, son got into an accident with the car, some SOB cut him off, it was wet and raining, and he hit the curb, lots of front end damage, busted rim/tire, control arms, bearings, and so on.....Son is OK, no hurts on him other than his pride, and I was not pleased but hey it happens, he is paying for the repair, but I am sure we will help out....bike budget is gonna take a hit.....ohhh well.

Anyways just a small update, pics up maybe tonight....

Cheers
 
Sounds like you are coming along nicely, can't wait to see pics of all the work.
That dent in the frame is a nasty one, right on a bend, I recon you could get most of it out with a stud gun and sliding hammer, not sure if you have access to one?
Yes, VHT is pretty much what everybody around here uses, and with good results.
Really sorry to hear about your son's accident, well he is ok and that is important, cars can be fixed and replaced, loved ones, not so much.
I know the feeling when life takes a chunk out of your budget.
A month or two ago, the GF's grocery getter got reversed into by another woman, not looking where she was going, and turns out, has not paid her insurance for about three months, so you know what happened to that claim, cost me 500 bucks and I repaired it.
A week later it blows a head gasket, another three and a half grand later.:mad:
So don't feel alone.
 
clean engine

clean engine

Well, after buying the cleaning products, wire wheel 4 inch one, wire brush, and so on it was time to get down and dirty....

Yesterday I only used the wire brush, bottle brush (kinda useless) the Simple Green cleaner, my garden hose to rinse everything off, and finally my leaf blower to air dry as much as possible, I then patted the engine down to dry it off as much as possible, and sprayed some silicone lube, on some of the metal parts where the gear shift lever is, just for a bit of prevention of rust...

Tonight we used the 4 inch wire wheel, and a bit of the wire brush, some paper towel to wipe it down, and that's it for now, going to use something prior to painting to wash it down and make sure no oils or grease are left on the parts that are going to be painted.

the whole engine was given a run down with the wire wheel, including all covers, to get as much off as possible, heck some of the covers came out semi polished, won't take much to get them really nice, once they are off and hit them with the buffing wheel. The top cover needs some more work, still has some of the clear coat on it, but this will be done once it's off, as well as the rest of the covers, going to leave them on, until I paint the engine, then remove them and polish....

The frame, some wire wheel work, and then hand sanding, and it came out really good I think, won't really know until I hit it with at least some primer, but all that is after the big dent is repaired....

So here are the pics of my effort, I think it will be OK to go ahead and paint now, I really don't think there is really more that I could get at and clean, and any nook or cranny that is not done, well so be it, but I think I got to them all....

The Engine

P1060757.jpg


P1060763.jpg


P1060767.jpg


P1060768.jpg


P1060770.jpg


P1060772.jpg
 
Back
Top