• Required reading for all forum users!!!

    Welcome!
    Register to access the full functionality of the GSResources forum. Until you register and activate your account you will not have full forum access, nor will you be able to post or reply to messages.

    A note to new registrants...
    All new forum registrations must be activated via email before you have full access to the forum.

    A Special Note about Email accounts!
    DO NOT SIGN UP USING hotmail, outlook, gmx, sbcglobal, att, bellsouth or email.com. They delete our forum signup emails.

    A note to old forum members...
    I receive numerous requests from people who can no longer log in because their accounts were deleted. As mentioned in the forum FAQ, user accounts are deleted if you haven't logged in for the past 6 months. If you can't log in, then create a new forum account. If you don't get an error message, then check your email account for an activation message. If you get a message stating that the email address is already in use, then your account still exists so follow the instructions in the forum FAQ for resetting your password.

    Have you forgotten your password or have a new email address? Then read the forum FAQ for details on how to reset it.

    Any email requests for "can't log in anymore" problems or "lost my password" problems will be deleted. Read the forum FAQ and follow the instructions there - that's what we have one for...

  • Returning Visitors

    If you are a returning visitor who never received your confirmation email, then odds are your email provider is blockinig emails from our server. The only thing that can be done to get around this is you will have to try creating another forum account using an email address from another domain.

    If you are a returning visitor to the forum and can't log in using your old forum name and password but used to be able to then chances are your account is deleted. Purges of the databases are done regularly. You will have to create a new forum account and you should be all set.

1984 Katana 7/11

  • Thread starter Thread starter Guest
  • Start date Start date
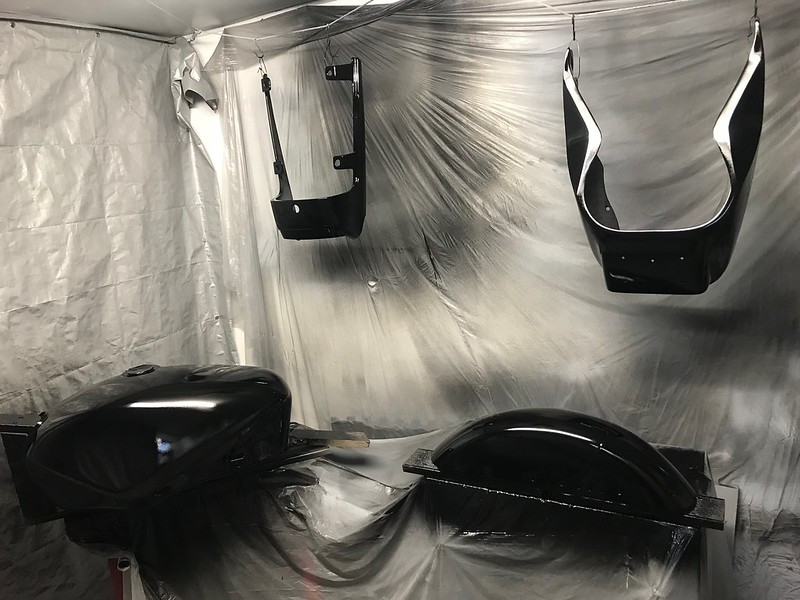
Cheers Larry, it looks like it should be strong enough with the fibreglass reinforcing underneath.
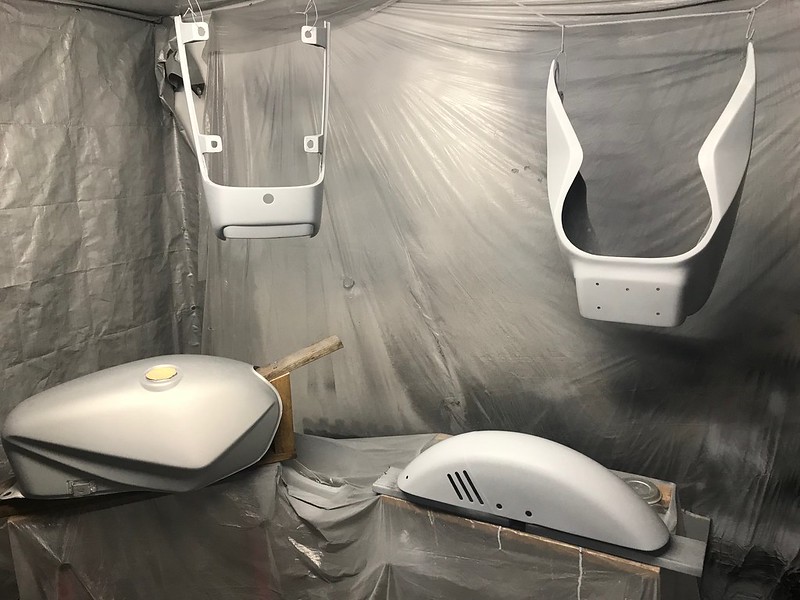
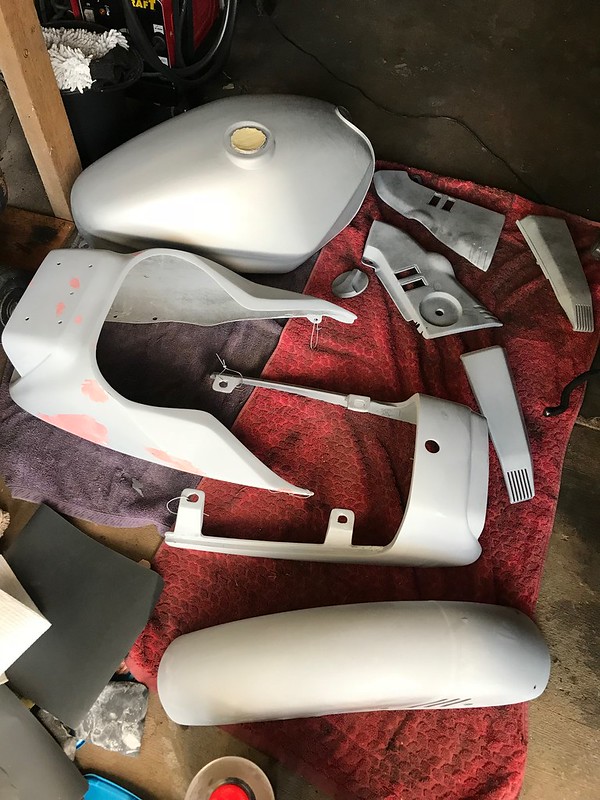
You're right, I'm sick of sanding :D But I don't want to take shortcuts on this so I really should've done the guide coat. I'll aim to get that done before I duck out to the gym this morning so it's ready to sand later today if I get some time.

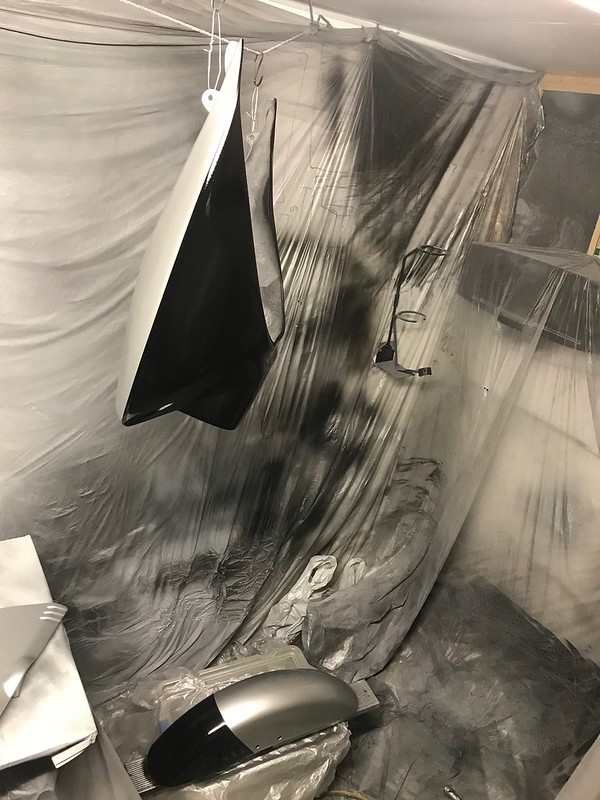
I'm hopeful I can get the black done tomorrow pending the results of this round of sanding.
 
Anyone sick of seeing bodywork in primer? I know I am :D

I was hoping to get the black done tomorrow but not gonna happen, definitely need more primer on the front cowl.

Basically everywhere I've broken through to bare fibreglass at some point has developed pin pricks, which I can only assume are little air pockets in the fibreglass due to me not sealing it after repairing it and sanding the original gelcoat back. I'm thinking they're too deep for the high build primer to fill but too fine for the body filler to get into properly. Lesson learnt for next time I guess.

Anyway, I sanded it back with 400 grit today and broke out the blade putty to try to seal all those air pockets up. I did my best to force it into all the little holes so fingers crossed one more go with primer will be enough to sort it out.

The good news is the tail piece, front mudguard, and the one side cover I did with 600 grit are all ready for colour. The other side covers and choke lever will get sanded tomorrow, but no reason to think they will need more primer.

I also did what felt like committing sacrilege and sanded back that shiny new tank and its perfect paint.

Untitled by starpoint73, on Flickr
 
You're doing exactly what you need to be doing. Taking care of stuff that would ruin the final paint. Fiberglass is such a finicky medium. It can be really easy to work compared to steel, and then such a pain when it comes to pinholes and other irregularities. In an earlier post I mentioned spraying the first round of primer really thick and literally rubbing it into the pinholes with your fingers. That's what I learned from a very experienced painter years ago to combat the very problem you're facing. I thought he was crazy, until I tired it. Unfortunately I didn't mention it to you until you had already sprayed your first round. It's all a learning curve, and you've really come a long way with this bike, Pete. The blade putty should take care of it. I wouldn't even be afraid to use 180 on those spots so you can cut it quickly and cleanly followed by another 3-4 coats of primer sanded back with 400 then a final scuffing of 600. You also did the right thing with the tank. It's strange to sand back perfect paint, but it's absolutely what's needed. You'll be blown away at how nice the new base coats sits down on that finish. The other parts are right where they need to be and look real nice. Think back on all the work you've done to get that front cowl even to this stage. It was UGLY for a long time, and you've brought it back, man. :cool:
 
Cheers Larry, yeah some of these parts had a hard life, but that front cowl sure took a beating! I knew I could fix it, just didn't realise quite what was involved until I jumped in. Like you say, it's all a learning curve!

I remember you saying rubbing it in with your fingers, yeah that does seem weird but I can now see why you got and passed on that advice, that's a great idea! Especially if it saves encountering these pinholes later on. Hopefully I got them all sufficiently covered with the putty.

I'll rub it back this morning and keep an eye out for anything else I find, then aim for another round of primer as early as possible this morning so I can rub that back this afternoon. Hopefully the weather stays as predicted and i can hang it out in some sun for a bit as well.

As I won't get the black done today, I'll have to give the other bits a quick rub over with a grey scotchbrite pad prior to the colour as they'll have been sitting for more than 24 hours by then.

I had a good Google around at the 84/85 Kat colour schemes last night and I'm now pretty comfortable how I need to mask the tank and cowl off to get the silver and black in the right combination too.

As tedious as this priming/sanding has been, I'm getting excited!
 
I got what I hope is the final round of primer done today, although it may work out that I've caused myself a fair bit more work..

I laid down four pretty thick coats in the hopes of filling any of those little pin pricks that the putty may not have taken care of. I even took Larry's tip and stuck my fingers in those areas... whether that was a good idea or not at this stage is a different story of course. And yep, was wearing gloves so no finger grease :)

The down side is I managed to get some nice runs happening but at this stage I'd rather have a bit extra to rub back than be breaking through to the fibreglass again. See what happens when I sand in the morning.

Fingers crossed it's good to go and the weather cooperates so I can get the black done.

Given I had to mix up more primer than I needed, I figured I'd give the front fork brace a go as I'd just degreased it the other day and it needed some paint. It got primed then three coats of aersol satin black acrylic. It's not seen but I want it neat and protected from rusting.

Untitled by starpoint73, on Flickr

Untitled by starpoint73, on Flickr
 
No pic's tonight, seems a little pointless when all I'd be showing is the front cowl in primer and guide coat again.

I rubbed it back this morning and while the runs didn't cause me any grief there were still a few little pin pricks that showed their ugly little selves again. Nowhere near as bad at least so between the putty and sticking my fingers in it there's been a definite improvement.

I took a different tact today by mixing up some primer without thinner and used a very small brush to dab it right into those areas with the pin pricks and the few places I broke back through the primer again.

Rubbed that back with 400 grit and it's now had three more coats of primer and a guide coat.

I looked real close before the guide coat and the only things I can see is a couple of high spots from the brush work today that I didn't quite get levelled out, no pin pricks or other issues I could see.

On the upside, if I didn't have to do that today I wouldn't have been able to paint anyway as it was raining on and off the vast majority of the day. I just managed to get the primer done late this afternoon after it had finally cleared.

Fingers crossed it rubs back nicely with the 600 grit in the morning and I can get the black done.
 
Finally! That last effort worked a charm and the cowl came up nice after a rub back with the 600 grit this morning, all ready for colour.

Untitled by starpoint73, on Flickr

And despite the weather's best efforts to stymie me again (heavy shower just as I was about to mix the black), I finally managed to get the black done. I really wanted to get it out into the sun but there were too many clouds about threatening more showers and I just wasn't game.

Anyway, reasonably happy with the result although I did manage to get a little run on one side of the tank, so I'll very gently rub that back in the morning. That spot is getting covered with silver so no need to worry about re-coating.

Untitled by starpoint73, on Flickr

So in the morning it's take care of that run, scuff it all up with the grey scotchbrite pad, mask the bits up, then silver time.

I'll let them sit for an hour or so before taking the masking off and doing the clear.

Any tips on spraying the metallic silver aside from just using a steady hand and keeping an even distance from the parts? I'll try to wind the fluid back a bit for a slightly drier coat too.
 
:) persistence paying off. I'm looking forward to seeing it come together. I can only imagine how much you are.
 
Base dries pretty fast Pete. Personally I avoid dry coats, I prefer at least a medium coat, let flash then a wet coat, in a perpendicular pattern to the last when it comes to metallics.


Wait and see what Larry has to offer first though!:D

Dont Rush now!
 
Great feeling getting to put on some color, eh, Pete? Way to go. I agree with Fjbj40, he knows what he's talking about, too.

My old painting mentor used to say.."getting a run is just one step..beyond..the perfect application.." It's easy to understand wanting to get smooth wet coats on for the base coat, but it's really not necessary, though. Just getting the color on evenly at this stage is the most important..especially the silver. I wouldn't worry too much about changing the fluid adjustment on your gun. You still want it to have some volume. Continually change up your spray pattern (as you're shooting) ninety degrees back and forth in all directions to lay the metallic evenly. Getting it too wet will cause stripes so be careful about that. The clear is what brings it all together and makes it pop. It's looking real nice, Pete. :D
 
Cheers guys! I like your mentor's quote Larry :D

I'll leave the fluid where it was, no worries there, and your suggestions of the 90 degree spray pattern makes sense to help too.

I recall having issues with mottling on the 450 and the pearl colour I was using because I didn't know how to spray it, so trying to avoid the same results here, and I don't want striping either of course :)

I'm aiming for four coats of the silver, mainly to make sure it gets good coverage over the black. The area is really quite minimal compared to the black though as it's only the bottom edge of the cowl and not much more on the tank, and just the rear of the mudguard.

Anyway, I'm all keyed up for it so I'll finish my coffee while I wait for the sun to properly rise then it's off to take care of the runs and scuff it all back ready for masking.
 
Once you get to the clear, Pete..lay the first couple of coats kinda dry, so it doesn't melt the metallic you've just laid down. Patiently wait for it to flash, then bury that sh-t in wet coats. Oh Boy! Can't wait to see it.
 
Cheers Larry, was that email come through today in time, not sure how well I did with the dry-ish coats but I didn't see any issues with clearing over the silver so I don't think I did too bad... and...

It's done at last!

I had some issues along the way and forgot just how long it takes to mask bits off properly, but I think it all turned out ok.

I had the tank and cowl on the bike to get the masking line right, hopefully it's all straight and lines up properly. It looks a little off in the photo as the cowl's not screwed on, I had to hold it in place to make sure the alignment with the tank was right.

Untitled by starpoint73, on Flickr

Then I got four coats of silver on, and geez that PPG Deltron is good paint! It went on so nice despite my dodgy gun. No issues with striping, made sure I did perpendicular spray patterns with lots of overlap and kept the paint swirling around in the gun so the metallic bits didn't settle at the bottom.

The only issue I encountered was some funkiness on the right side cover, no idea what happened there but obviously a reaction with something. I rubbed it back with 600 grit and re-sprayed it and it's all fine now.

Untitled by starpoint73, on Flickr

Then got the clear done finally... took 'til just after 7pm tonight after having to re-spray the side cover.

I ended up with five coats of clear, hopefully all good. The only issue I discovered too late is that the inlet filter on my recirculation box was completely clogged by then so there was way too much overspray floating around during the clear coat, so that will likely need some sort of attention. Really high grit wet sand maybe? Dunno, have to wait and see once I can get it out into the sun for a proper look.

Anyway, here's some dodgy photos in the shed for now...

Untitled by starpoint73, on Flickr

Untitled by starpoint73, on Flickr

Untitled by starpoint73, on Flickr

With any luck I can get them in the sun on Sunday for a proper look see.
 
Way to go, Pete! Strange how it pinched up on the side cover, but good on you for knowing how to fix it. Maybe an 1/8" red pinstripe (tape) to separate the colors and to tie it all into the frame and seat..(?)

On your way to having a very unique looking Kat. Congrats, my friend.
 
Cheers guys! Hopefully it still looks that good tomorrow out in the sun, but so far I'm a happy chappy indeed with how it turned out.

Yep Larry, red pinstripe is the plan, I picked this tape up a little while back and held it between an engine bracket and the frame and it seems good, just hope it's not too matte to fit in properly.

I really struggled to find a good red to suit it (pinstripe tapes seem to be rare these days) and ended up finding it in my local auto store.

Untitled by starpoint73, on Flickr
 
Of those two, I like the 1/4" shiny red the best. My old-man brain forgot you had already planned on a red stripe..doh.. It really will bring it all together, as you already know (he chuckles, embarrassed, to himself).
 
Of those two, I like the 1/4" shiny red the best. My old-man brain forgot you had already planned on a red stripe..doh.. It really will bring it all together, as you already know (he chuckles, embarrassed, to himself).

Cosign on the shiny red for the pin stripe...

Looking good. Can't wait to see it on the bike.
 
hey guys, I may be wrong but that shiny red object he is holding looks like a piece of something he has painted. Doesn't look like tape to me.
 
Back
Top