• Required reading for all forum users!!!

    Welcome!
    Register to access the full functionality of the GSResources forum. Until you register and activate your account you will not have full forum access, nor will you be able to post or reply to messages.

    A note to new registrants...
    All new forum registrations must be activated via email before you have full access to the forum.

    A Special Note about Email accounts!
    DO NOT SIGN UP USING hotmail, outlook, gmx, sbcglobal, att, bellsouth or email.com. They delete our forum signup emails.

    A note to old forum members...
    I receive numerous requests from people who can no longer log in because their accounts were deleted. As mentioned in the forum FAQ, user accounts are deleted if you haven't logged in for the past 6 months. If you can't log in, then create a new forum account. If you don't get an error message, then check your email account for an activation message. If you get a message stating that the email address is already in use, then your account still exists so follow the instructions in the forum FAQ for resetting your password.

    Have you forgotten your password or have a new email address? Then read the forum FAQ for details on how to reset it.

    Any email requests for "can't log in anymore" problems or "lost my password" problems will be deleted. Read the forum FAQ and follow the instructions there - that's what we have one for...

  • Returning Visitors

    If you are a returning visitor who never received your confirmation email, then odds are your email provider is blockinig emails from our server. The only thing that can be done to get around this is you will have to try creating another forum account using an email address from another domain.

    If you are a returning visitor to the forum and can't log in using your old forum name and password but used to be able to then chances are your account is deleted. Purges of the databases are done regularly. You will have to create a new forum account and you should be all set.

DIY C-Clamp Bead Breaker Tool

93Bandit

Forum Mentor
I changed the tires on my 850L over the last week, along with some other maintenance items. I replaced the rear tire first with two tire spoons from harbor freight. Breaking the bead was the hardest part. I tried the floor jack method, a hammer and large blunt punch, and finally a few C-Clamps. Needless to say, it was a pain and took way too long to do. I searched the internet for more ideas and couldn't find anything that I would be able to purchase or make in a short amount of time, so I started thinking....

The C-Clamp worked the best, but it's hard to turn by hand and the clamp surface area on the tire isn't large enough to break the bead efficiently. Also, the 6" clamp was a bit small for the rear. Ok, these three issues are something I think I can solve relatively easily, so I got to work.

First I went to Harbor Freight and bought a large 8" c-clamp for ~$7 and some change. Then I went to Home Depot and bought a 3' piece of 1/2" square tubing for ~$5, then headed home. I marked 4 lines each an inch apart on the square tubing and put it in the vice at each line, bending the tubing slightly. Once I reached the last line, I cut the 4" section off and repeated these steps to make a second curved piece. I did the best I could to match the radius of the rim.

Next I tack welded the two curved pieces to the C-clamp, one on the frame portion and the other on the threaded portion. Ok, I solved the small clamping footprint issue with the two "shoes." But how do I make this easier to turn, rather than doing it by hand?

Then I had another idea, why not use a drill or impact to turn the C-Clamp? So I tack welded the sliding handle centered in place so that it won't slide back and forth, then took an extra 3/8 drive socket I had and slotted it so that it would fit over the end of the handle. Now all I have to do is use my 3/8 drive adapter in my drill and it should work.

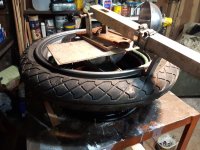
I had some time to change the front tire today so I built the tool in about an hour and tested it on the front tire. It worked GREAT! I'm pleased with the outcome. I've made many things before, but rarely do they work as intended, especially on the first attempt!

Here's a link to a picture of the finished product. Please excuse the horrific "welds." I can't weld, but I occasionally get lucky and can get two pieces of metal stick together. It didn't help that the frame of the clamp is cast iron and the tubing is steel. That further complicates things, but the welds didn't break which I was expecting them too, so I'm happy with it. Hopefully itll make the next tire change job more enjoyable.

Just thought I'd share my small moment of success with you guys, and maybe help someone else who's got the ability to make one for themselves.

 
Last edited:
Necessity is the mother of invention. Nice one!
I'll bet you could use it to help squish the new tire down into the center of the wheel while you work your way around with the spoons.

I tried laying my wheel under the back bumper of my truck and using a 2x4 with some blocks. It worked but what a pain. The HF tire changer has a bead breaker that I use now.
 
good for you! I also have used c-clamps and as they come, they are difficult. Normally, I inserted blocks of wood between clamp and tire but it got pretty awkward with blocks popping out and all which yours won't.

bead removal-very tough-2-2017-07-14.jpg
 
good for you! I also have used c-clamps and as they come, they are difficult. Normally, I inserted blocks of wood between clamp and tire but it got pretty awkward with blocks popping out and all which yours won't.

Oh, that's a good idea too. The benefit of using wood blocks is there is no chance of scratching the rim.

I had to be careful not to contact the rim with mine, being that the jaws/shoes are made of steel tubing. I think I'm going to cut some pieces of plastic out of a detergent jug and lightly heat them to form them around the steel jaws, and glue them in place. This should help prevent rim damage and allow me to work faster with less worry.

I'm considering doing something similar with my tire spoons to prevent rim damage. I used an old T-shirt and it was finicky and didn't do the best job. I ended up scratching the rim in a few places. :( But, the rim's weren't in the best shape to begin with, so I'll survive.
 
Yes, I found the hardest part of changing tires is breaking the bead. Here is my homemade job. I haven't used it yet, but getting ready to. I used wood to try to help prevent scratches.
 
Yes, I found the hardest part of changing tires is breaking the bead. Here is my homemade job. I haven't used it yet, but getting ready to. I used wood to try to help prevent scratches.

That looks great! My first plan was to build something similar to that, but my problem is storage. I don't have anywhere to store something that big for the few times I'll use it. I figured if I could get a c-clamp to work, I could just put it in my toolbox or on a shelf.
 
Nice work.
The most unexpected bead breaker I saw was a spade and a piece of 4x2. Lay the wheel on the ground next to a wall, put the blade of the spade into the bead, insert the 4x2 into a handy hole in the wall, so it's resting on the shoulder of the spade and simply lever it downwards. Worked like a charm.
 
black pvc piping is easily molded with heat...it might work on your "jaws" but safety sam sez watch out for the fumes-don't get it smoking...I think it'll need more heat than boiling...a Heatgun has become one of my very favourite tools but of course a stove or a torch can do to carefully.

I'm considering doing something similar with my tire spoons to prevent rim damage
DO report back! One wonders why they don't come with a wrapping...so perhaps you will find out why. Or someone here will know why.

I use cut-up plastic oil bottles under the irons...it works ok -they are nice and thin-but they can slip away in the wrong moments..a heat gun or something similar might mold these into sleeves perhaps...I find pieces do wear out but only after several tires so you'd want something easily made and easily swapped in......while thicker plastic lasts much longer, I find as RIM protectors , the thickness gets in the way. I'm Not sure about how thicker plastic would be on the actual iron ...
 
Last edited:
I've got one of these somewhere... it's pretty good when the bead is stubborn but a bit awkward any other time.

https://www.happy-trail.com/p-happy...3XTQ6_Xfp8khi_CoeOX2ku2E0HfPKkrhoCwBIQAvD_BwE

I carry these on the bike & they work pretty good.

https://www.revzilla.com/motorcycle...u5v8ksiMy5RF8ZcTBmP3vZiq7LdNK_MhoCHvAQAvD_BwE

I've also used some 2x4 with another piece fixed to it & levered using my car rocker plate to stabilise the other end. That got the "been there for 20 years" beads broken. :)

Also of note... the harbor freight tyre tool is stupidly cheap. Even if you only use the bead breaker part of it

That first link is similar to what I was thinking of in my mind. I didn't realize it actually exists.

The breaker in the second leak is a tool I was considering buying but I never got around to ordering one, and under current circumstances I figured it would take a while to arrive if I ordered it this week.

Lastly, which harbor freight bead breaker are you speaking of? They have a couple different ones. The one available at my local store is just the iron one, and I didn't think it looked like it would work with a motorcycle tire.
 
well, I don't want to steer your thread too far, 93bandit- the c-clamp is the smallest, cheapest, and dare-I-say toughest tool for this. But, I can't resist this:DeBeadwithDustriders_Hoist_9-500x500.jpg

I actually made myself one of these (tube in sections for storage in abag) but using it as tire-debeader is new. So I tried it on a nasty old tire stuck on a nasty rim. It didn't work as shown-it'd want a longer lever on the ratchet, but for a tubed tire (shown here) or a tire put on in the last 5 years, it'd probably work.
The age of the tire removed seems to make a difference- when it's been on the rim since 1981 ,it's REALLY on there and I've never had a strong C-clamp fail albeit with "troubles". I can't use the shed wall-lever because the whole wall lifts! A heavy car or trailer comBined with a bumper jack Has worked but you really want to watch that the rim is very well supported. When they get REALLY tough, I fear that I'll bend the rim...
 
Yes, I found the hardest part of changing tires is breaking the bead. Here is my homemade job. I haven't used it yet, but getting ready to. I used wood to try to help prevent scratches.

I'm using a similar setup but I suspect you will want a much longer lever if the tire has been on there a while...
 

Attachments

  • Tire_DeBeader-2_20200122.jpg
    Tire_DeBeader-2_20200122.jpg
    88.7 KB · Views: 0
Nice work.
The most unexpected bead breaker I saw was a spade and a piece of 4x2. Lay the wheel on the ground next to a wall, put the blade of the spade into the bead, insert the 4x2 into a handy hole in the wall, so it's resting on the shoulder of the spade and simply lever it downwards. Worked like a charm.

From a mechanical standpoint this is really close to the Harbor Freight thing I use.

https://www.harborfreight.com/manual-tire-changer-69686.html

https://www.thegsresources.com/_forum/showthread.php?251786-Tire-changer
 
I was talking about the above linked stuff.. A friend of mine just bought the MOJO stuff for one so it'll be interesting to try it out... :)
 
Following are my detailed instructions for the easiest, fastest, safest way to break a bead on any motorcycle tire.

I'm always surprised that more riders don't know how to do this.

You can break any motorcycle tire bead quickly with three short tire irons, with no damage to the tire or rim, no excessive force, no jumping, and no farting around with exotic devices, kickstands, giant levers, titanic forces, and disaster. This works on any tire, tubed or tubeless, car or motorcycle.

1) Deflate tire completely, if that hasn't already been handled for you by, uh, external factors.

2) Stick the small curved tip of one tire iron between the tire bead and the rim with the curve at the tip facing UP. Wiggle and weasel it in there until the tip is touching the rim, or as close as you can get.

3) About two inches away, do the same with tire iron #2.

4) With one hand, push DOWN on both tire irons.

5) Take tire iron #3 in your other hand, turn the tip so it’s facing DOWN. then weasel it into the middle between the other two tire irons. Yes, this is a little awkward.

6) Work the tip of the third tire iron in as far as you can. The idea is to use the tip to dig into the rubber a bit to push the bead down by pulling UP on this tire iron while pushing DOWN on the other two.

7) After some pushing and wiggling, you'll get a little motion, but you normally won’t completely break the bead on the first push.

8) Move a few inches to one side and repeat the procedure and you'll get a little more motion.

9) If the bead hasn’t broken at that point, move a few inches to the other side of your original bead attack spot and try a third time.

10) Enjoy the astonished looks all around.

Once you get a little experience with this trick, it's faster than just about anything else. It's also possible to damage the inside of the rim slightly the first few run-throughs by weaseling too enthusiastically, so take it easy and don’t get in a hurry. Move a few inches and repeat; the crustiest, most stuck-on bead WILL start moving.

The tire irons I prefer are sold under a few different names. The ones I have are marketed by Rocky Mountain ATV/MC under the Tusk name, and are extremely strong, smooth, and slim:
Tusk Ultra-Lite Tire Iron
https://www.rockymountainatvmc.com/parts/tusk-ultra-lite-tire-iron-p

The tips are nice and smooth, so they don't damage rims or tires. (And if you know what you're doing, you can change any tire with three of these, although having one long lever can speed things up a bit.)

The Motion Pro tool works on the exact same principle, but it costs a LOT more and is more bulky and heaver than three short alloy tire irons.
 
Last edited:
Sounds great and I don't doubt you! But...maybe my tire irons are not shaped correctly...that might be the secret? Mine are cheap-steel, and I had to grind them down to make them work at all..but trying very similar iterations of what you describe they slip out, fly around the shop and running three in place is going to take practise...My BIG screwdriver Might be better in the middle which I didn't try..and, I'll have to hold the tire down because it lifts too.

Also, I'm looking at an old tire to practise on and these come off with a certain amount of tire rubber stuck to the rim. previous experience informs me these are much harder than replacing tires I've worn out ...say on for a mere 7 years...
 
93Bandit! Look-great minds think alike!
bb1056-500x500.jpg


http://www2.tyrepliers.com.au/index.php?route=product/product&path=59&product_id=66

and then there's this which is interesting... using a floorjack and ratchetstrap Easy and safe way to break a tire bead - YouTube
 
Following are my detailed instructions for the easiest, fastest, safest way to break a bead on any motorcycle tire.
.......................................................The tire irons I prefer are sold under a few different names. The ones I have are marketed by Rocky Mountain ATV/MC under the Tusk name, and are extremely strong, smooth, and slim:
Tusk Ultra-Lite Tire Iron
https://www.rockymountainatvmc.com/parts/tusk-ultra-lite-tire-iron-p

..................................

You mean I could have this job done with only three easy payments of $3.49? Sheesh! Probably wouldn't have pulled a muscle in my back either...

I still like 93Bandit's diy breaker though. There's just something very satisfying about successfully using a tool the you made.
 
93Bandit! Look-great minds think alike!
bb1056-500x500.jpg


http://www2.tyrepliers.com.au/index.php?route=product/product&path=59&product_id=66

and then there's this which is interesting... using a floorjack and ratchetstrap Easy and safe way to break a tire bead - YouTube

That's the floor Jack method I mentioned in the OP. It didn't work for me. Also, that tool looks easier to use than mine. The only issue with mine is the end on the threaded rod flops around while using it, which makes it tricky to line up at first, but once its snug on the tire it works well.
 
You mean I could have this job done with only three easy payments of $3.49? Sheesh! Probably wouldn't have pulled a muscle in my back either...

I still like 93Bandit's diy breaker though. There's just something very satisfying about successfully using a tool the you made.

Thank you for the kind words. Its definitely satisfying.
 
Back
Top