-
Required reading for all forum users!!!
Welcome!
Register to access the full functionality of the GSResources forum. Until you register and activate your account you will not have full forum access, nor will you be able to post or reply to messages.A note to new registrants...
All new forum registrations must be activated via email before you have full access to the forum.A Special Note about Email accounts!
DO NOT SIGN UP USING hotmail, outlook, gmx, sbcglobal, att, bellsouth or email.com. They delete our forum signup emails.A note to old forum members...
I receive numerous requests from people who can no longer log in because their accounts were deleted. As mentioned in the forum FAQ, user accounts are deleted if you haven't logged in for the past 6 months. If you can't log in, then create a new forum account. If you don't get an error message, then check your email account for an activation message. If you get a message stating that the email address is already in use, then your account still exists so follow the instructions in the forum FAQ for resetting your password.Have you forgotten your password or have a new email address? Then read the forum FAQ for details on how to reset it.
Any email requests for "can't log in anymore" problems or "lost my password" problems will be deleted. Read the forum FAQ and follow the instructions there - that's what we have one for...
-
Returning Visitors
If you are a returning visitor who never received your confirmation email, then odds are your email provider is blockinig emails from our server. The only thing that can be done to get around this is you will have to try creating another forum account using an email address from another domain.
If you are a returning visitor to the forum and can't log in using your old forum name and password but used to be able to then chances are your account is deleted. Purges of the databases are done regularly. You will have to create a new forum account and you should be all set.
You should upgrade or use an alternative browser.
1981 gs750 (gs750e) Retro Racer project
- Thread starter LarsKroghStea
- Start date
LarsKroghStea
Forum Mentor
Best to double check individual tire manufacturers reccomendations per tire model for fitment.
I run a 140 & 150 on DID & Sun 3.50 rims. 140 has every bit as much contact patch and weighs less, as installed on a 3.50. 150/70 fits good, 140 fits best.
Will do
")
If swapping modern forks, try to stick with 41mm RSU tubes so you can run GS1100GK triples or Honda PC800 triples with the steering stops modified to work with a GS frame.
CBR600F4 forks are great in VMAX 1200 43mm (93 or 94+ models 43mm tubes) triples but may require slight milling the backsides of the calipers for more spoke to caliper clearance.
GS1000 dual disc fork legs are the easiest swap on most big gs's, Sonic Springs and Racetech Gold Valves or Ricor Intiminators and you're home free with the tire diameter and shock length changes. Much better steering, 37mm stiffer fork legs as well. I have pushed my 35mm 650 forks on a 750 to the limits as well. I noticed some flex at high speeds and aggressive cornering, but the bike handled wonderfully with fork spring and valving g upgrades, Tarozzi fork brace, piggyback shocks sprung and valved for the bike. Of course going to RF900R (shorter version of Bandit forks) cartridge forks may have me seeing what I didn't know I was missing out on, but the 35's modified did the job pretty well.
LarsKroghStea
Forum Mentor
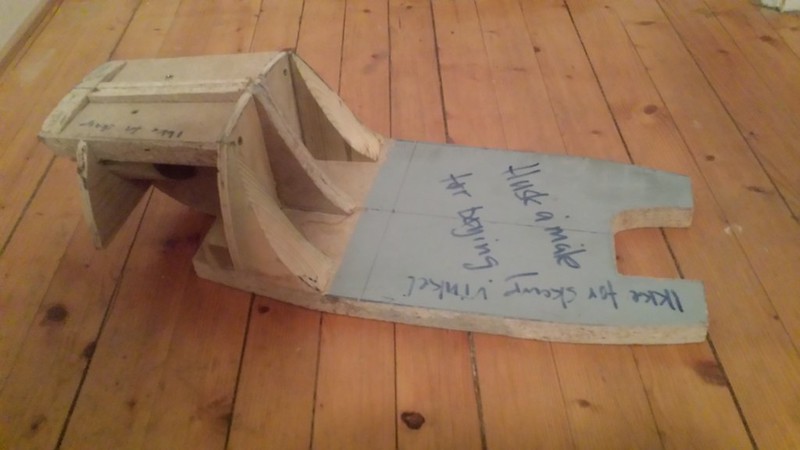
Today I made a prototype for the top clamp:

I have couple of questions though.. It was quite hard to get the measurements right. Does anyone know the spacing between the big (35mm) holes and how much offset the small hole is from the two others? I also noticed that the center hole is drilled at an angle, anyone know what angle this is? The long hole is for fitting a Motogadget Motoscope Mini:

Here's also a video of the milling process:
LarsKroghStea
Forum Mentor
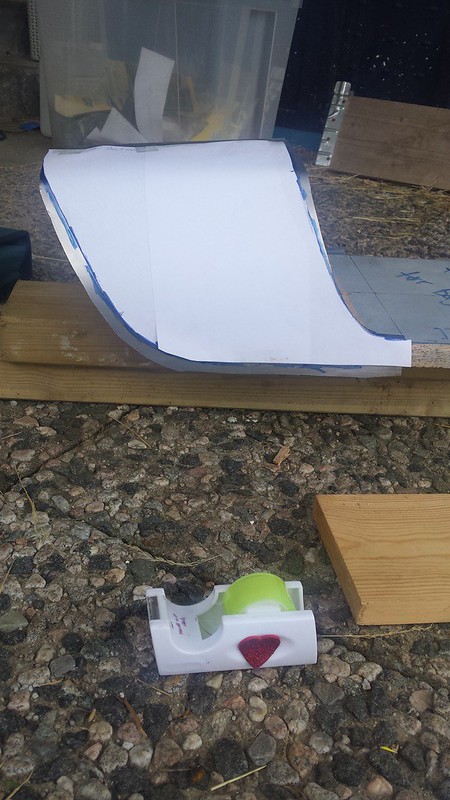
First I checked the proportions and measurements in Gimp:

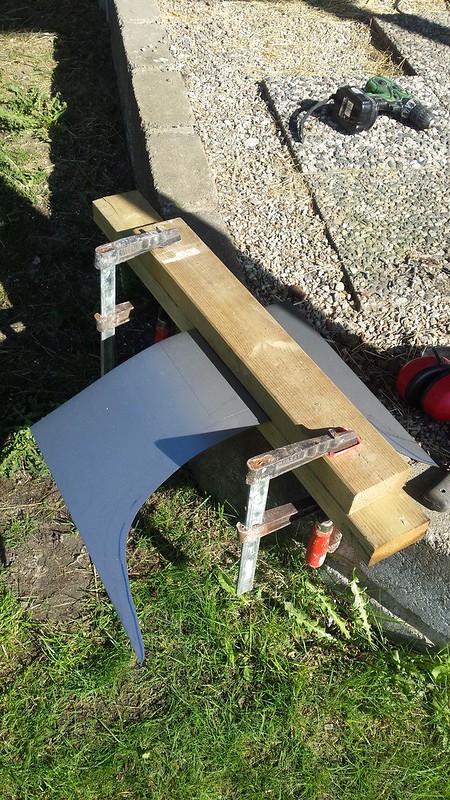
When I had all the coordinates I drew the seat up in three planes:

Tomorrow I'll try to make the framework somehow. The plan was to cut it out in MDF-wood and glue/screw the pieces together, but I see people also weld together a wireframe first, then weld the sheet metal to the frame. I'll spend some time with Google and see what I come up with.
LarsKroghStea
Forum Mentor


LarsKroghStea
Forum Mentor


LarsKroghStea
Forum Mentor
HOLY CRAP!!! You have too much free time!!! LOL!!!
Ray.
Haha
") Not really, just needed something to do on the computer while the wife was watching Sons of Anarchy
Not really, just needed something to do on the computer while the wife was watching Sons of Anarchy  The bikebuilding is as important as the riding and I like learning new stuff and new ways to do things
 Guest
Guest
Thanks for all the info
I have couple of questions though.. It was quite hard to get the measurements right.
I just measured my top clamp, and I used a straight piece of rod and did a lot of adding/subtracting. With the clamp installed and the fork tubes raised above it, I laid a piece of drill rod across the tubes and used calipers to measure from it to the start of the middle hole. Knowing the diameter of the fork tube, the drill rod, and the steering stem hole, you can determine the offset.
Heck, if that mill you used has a DRO, couldn't you just use that?
That thing is sweet.Excited to see where this build goes!
LarsKroghStea
Forum Mentor
I just measured my top clamp, and I used a straight piece of rod and did a lot of adding/subtracting. With the clamp installed and the fork tubes raised above it, I laid a piece of drill rod across the tubes and used calipers to measure from it to the start of the middle hole. Knowing the diameter of the fork tube, the drill rod, and the steering stem hole, you can determine the offset.
Heck, if that mill you used has a DRO, couldn't you just use that?
Excited to see where this build goes!
Will do it as you decribe the manual way. The drill is mainly used for making signs and do not have DRO.
-Lars
Guest
Guest
LarsKroghStea
Forum Mentor
 20160529_194812_zpsc9rkobar by Lars Krogh-Stea, on Flickr
Hard to bend the metalplates by hand, but I'm not going for the perfect look anyway. The result is okay by my standard.
Bendingtool no 1:
 20160525_174046_zpsq6sclfem by Lars Krogh-Stea, on Flickr
Bendingtool no 2:
 20160525_174040_zpssrtje3v8 by Lars Krogh-Stea, on Flickr
Bendingtool no 3:
 20160525_171654_zpsnjxyx8cd by Lars Krogh-Stea, on Flickr
Result ready for final adjustement. Taped a stencil on the top along the middle to so that I could flip it back and forth and get both sides equal:
 20160529_155158_zpslwvsr8q0 by Lars Krogh-Stea, on Flickr
LarsKroghStea
Forum Mentor
 Snapchat-8854658473716042179_zpsjeazhfri by Lars Krogh-Stea, on Flickr
Rensdw
Guest
LarsKroghStea
Forum Mentor
Man, how you are making that seat just gave me the confidence to go and make my own like that, thanks a lot!
Thanks
Looking forward to the result. Will post a picure of mine when the welding is done.LarsKroghStea
Forum Mentor
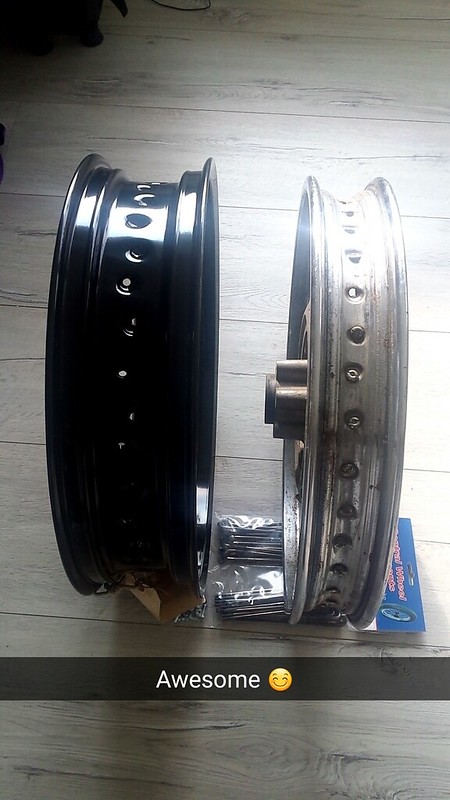
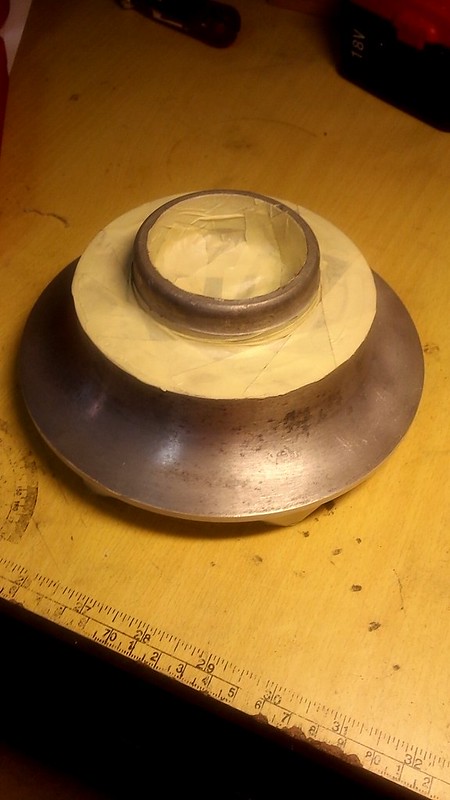 Snapchat-8548424895810138590_zpshz6x3crk by Lars Krogh-Stea, on Flickr
 Snapchat-5750727464801896914_zps9h60mojs by Lars Krogh-Stea, on Flickr
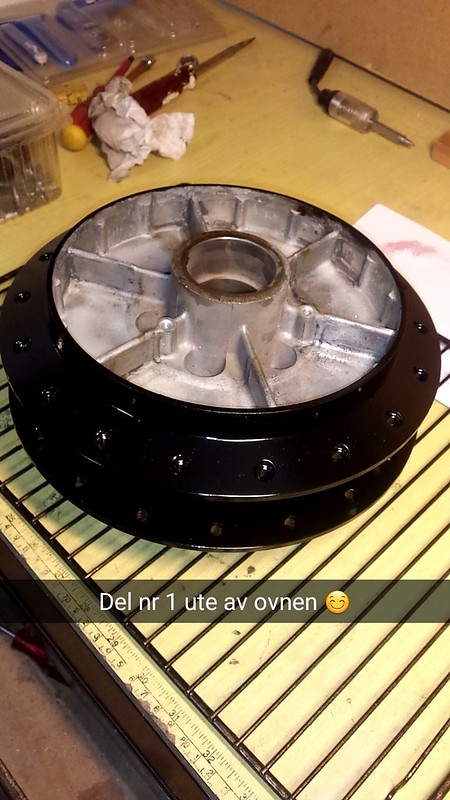 Snapchat-3550012378084688016_zpshtswbcoz by Lars Krogh-Stea, on Flickr
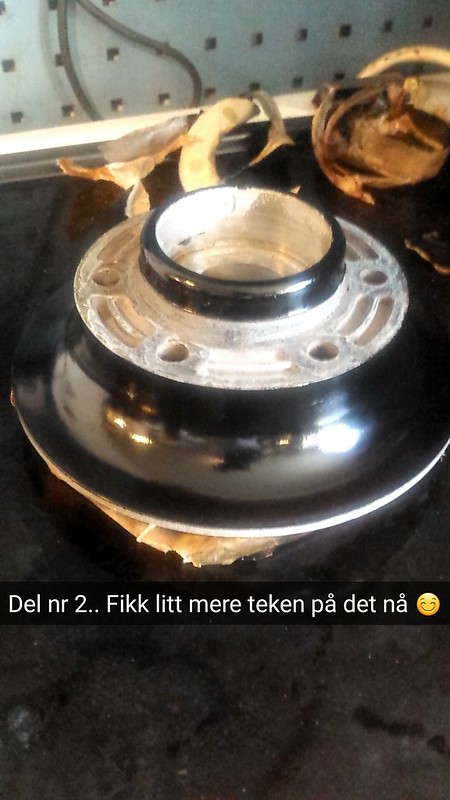 Snapchat-207582542816693880_zpszzjh0kdu by Lars Krogh-Stea, on Flickr
LarsKroghStea
Forum Mentor
Anyway, here are the pictures:
 20160707_133821_zpsx0ns4jgx by Lars Krogh-Stea, on Flickr
 20160707_145214_zpsppwflcp1 by Lars Krogh-Stea, on Flickr
 20160707_212122_zpsp8rix6ty by Lars Krogh-Stea, on Flickr
Nice work, Lars.