Looks very good, original. The number on there, no but it would be acceptable if it designated the model year.
-
Required reading for all forum users!!!
Welcome!
Register to access the full functionality of the GSResources forum. Until you register and activate your account you will not have full forum access, nor will you be able to post or reply to messages.A note to new registrants...
All new forum registrations must be activated via email before you have full access to the forum.A Special Note about Email accounts!
DO NOT SIGN UP USING hotmail, outlook, gmx, sbcglobal, att, bellsouth or email.com. They delete our forum signup emails.A note to old forum members...
I receive numerous requests from people who can no longer log in because their accounts were deleted. As mentioned in the forum FAQ, user accounts are deleted if you haven't logged in for the past 6 months. If you can't log in, then create a new forum account. If you don't get an error message, then check your email account for an activation message. If you get a message stating that the email address is already in use, then your account still exists so follow the instructions in the forum FAQ for resetting your password.Have you forgotten your password or have a new email address? Then read the forum FAQ for details on how to reset it.
Any email requests for "can't log in anymore" problems or "lost my password" problems will be deleted. Read the forum FAQ and follow the instructions there - that's what we have one for...
-
Returning Visitors
If you are a returning visitor who never received your confirmation email, then odds are your email provider is blockinig emails from our server. The only thing that can be done to get around this is you will have to try creating another forum account using an email address from another domain.
If you are a returning visitor to the forum and can't log in using your old forum name and password but used to be able to then chances are your account is deleted. Purges of the databases are done regularly. You will have to create a new forum account and you should be all set.
You are using an out of date browser. It may not display this or other websites correctly.
You should upgrade or use an alternative browser.
You should upgrade or use an alternative browser.
1981 gs750 (gs750e) Retro Racer project
- Thread starter LarsKroghStea
- Start date
LarsKroghStea
Forum Mentor
Got the fuel problems sorted today ") Firstly, there was a slight kink in the fuelhose. Secondly, and more important, the fuel cap venting mekanism wasn't letting air in and out of the tank. Fascinating how fast the vacuum stops the flow of gas. Now it runs as smooth as it did with the small plastic tank I used for the test run. The petcock is still too tall (can't get the tank to sit low enough and line up with the seat), so I'll have to change it out one day. I'll save this for task for later.
Firstly, there was a slight kink in the fuelhose. Secondly, and more important, the fuel cap venting mekanism wasn't letting air in and out of the tank. Fascinating how fast the vacuum stops the flow of gas. Now it runs as smooth as it did with the small plastic tank I used for the test run. The petcock is still too tall (can't get the tank to sit low enough and line up with the seat), so I'll have to change it out one day. I'll save this for task for later.
Firstly, there was a slight kink in the fuelhose. Secondly, and more important, the fuel cap venting mekanism wasn't letting air in and out of the tank. Fascinating how fast the vacuum stops the flow of gas. Now it runs as smooth as it did with the small plastic tank I used for the test run. The petcock is still too tall (can't get the tank to sit low enough and line up with the seat), so I'll have to change it out one day. I'll save this for task for later.LarsKroghStea
Forum Mentor
Also got the first sidecover done (not with the final paint..). I've had those perforated stainless steel sheets laying around forever and finally got around to use them. I wanted to be able to remove them easily and for that reason I've kept the original mountingpoints on the frame.
First I fired up the lathe and made a "push-button" for the bottom mountingpoint:
Then I made a cardboard template and cut the perforated steel into a loose fit:
 P?ska by Lars Krogh-Stea, on Flickr
 P?ska by Lars Krogh-Stea, on Flickr
I'll line the edge with an edge protection profile like this:
 96520-K1367-Kantenschutzprofile-Edge-protection-profiles-Form-C by Lars Krogh-Stea, on Flickr
I used the same profile to line the backingplate for the licenceplate:
 P?ska by Lars Krogh-Stea, on Flickr
I shaped two pices of the same perforated steel to the back of the sidecover and pop riveted them in place, also drillet and riveted the "pushbutton" fastener:
 P?ska by Lars Krogh-Stea, on Flickr
Did a quick "paint-job" and mounted the cover. The fit is prettyr tight and there is very little room for vibration. I'll go over the edges and fine trim them when i get the edgeprotection profiles:
 P?ska by Lars Krogh-Stea, on Flickr
Next weekend it's time to fit he speedomoter, and then I'll get to drive it home. That will hopefully speed up the process significantly

First I fired up the lathe and made a "push-button" for the bottom mountingpoint:
Then I made a cardboard template and cut the perforated steel into a loose fit:
P?ska by Lars Krogh-Stea, on FlickrP?ska by Lars Krogh-Stea, on FlickrI'll line the edge with an edge protection profile like this:
96520-K1367-Kantenschutzprofile-Edge-protection-profiles-Form-C by Lars Krogh-Stea, on FlickrI used the same profile to line the backingplate for the licenceplate:
P?ska by Lars Krogh-Stea, on FlickrI shaped two pices of the same perforated steel to the back of the sidecover and pop riveted them in place, also drillet and riveted the "pushbutton" fastener:
P?ska by Lars Krogh-Stea, on FlickrDid a quick "paint-job" and mounted the cover. The fit is prettyr tight and there is very little room for vibration. I'll go over the edges and fine trim them when i get the edgeprotection profiles:
P?ska by Lars Krogh-Stea, on FlickrNext weekend it's time to fit he speedomoter, and then I'll get to drive it home. That will hopefully speed up the process significantly
LarsKroghStea
Forum Mentor
And here's the back side of the cover. The two "pockets don't look pretty, but the holes line up with the cover and they're hard to see through the small holes:
 P?ska by Lars Krogh-Stea, on Flickr
P?ska by Lars Krogh-Stea, on FlickrLarsKroghStea
Forum Mentor
Today I measured the "speedo A/D converter" and redesigned the housing to not be so bulky. I saved a lot of space by flattening the inside of the housing so it only builds 1mm from the forkleg. Top pictures are the old ones, bottom two is the file I sent to my friend for printing:
 Speedogearhus_huset v3_4 by Lars Krogh-Stea, on Flickr
 Speedogearhus_huset v3_3 by Lars Krogh-Stea, on Flickr
 Speedogearhus_huset_kort v3_5 by Lars Krogh-Stea, on Flickr
 Speedogearhus_huset_kort v3_2 by Lars Krogh-Stea, on Flickr
Speedogearhus_huset v3_4 by Lars Krogh-Stea, on FlickrSpeedogearhus_huset v3_3 by Lars Krogh-Stea, on FlickrSpeedogearhus_huset_kort v3_5 by Lars Krogh-Stea, on FlickrSpeedogearhus_huset_kort v3_2 by Lars Krogh-Stea, on FlickrLarsKroghStea
Forum Mentor
So, I went to pick up the last 3D-printed part. It was a little bit skewed, but I don't mind as I'm going to sand and paint the parts anyway. I think the whole setup looks awesome, and I'm a little bit proud to have designed my own 3D-printed parts (I know I'm a little bit biased ") ). Anyhow, I present to you the analog to digital speedometer converter
). Anyhow, I present to you the analog to digital speedometer converter
 IMG_20200416_204315 by Lars Krogh-Stea, on Flickr
 IMG_20200416_223222 by Lars Krogh-Stea, on Flickr
 IMG_20200416_223337 by Lars Krogh-Stea, on Flickr
). Anyhow, I present to you the analog to digital speedometer converter IMG_20200416_204315 by Lars Krogh-Stea, on FlickrIMG_20200416_223222 by Lars Krogh-Stea, on FlickrIMG_20200416_223337 by Lars Krogh-Stea, on Flickr
Last edited:
LarsKroghStea
Forum Mentor
Thanx
Installed the speedoconverter and tested it yesterday. Worked almost as I hoped. It was a bit shallow and I had to shim the lid a bit to get it working. The worst thing though was that the hexagonal holes that were intended to keep the nuts from spinning wasn't working properly. I think at this small size, the holes and nuts would need to be square to keep the nuts from spinning.
As a signal pickup though, it worked flawlessly, and I'm going to make a revised housing at a later date.
Throwing in a couple of pictures as usual. The first one is from the finished left sidecover (now with rubber edge protection) and one of me and the bike just before I rode it home. About an hour long journey. It still runs as it gets to little fuel, and I blame the petcock. Will test other solutions to this problem, as it must be sorted before I take another trip. First I'll take a short test run with the small white plastic tank to verify that it indeed is the petcock. The third photo is just for fun
 IMG_20200418_190938 by Lars Krogh-Stea, on Flickr
 F?rste tur (2) by Lars Krogh-Stea, on Flickr
 IMG_20200418_201004 by Lars Krogh-Stea, on Flickr
Installed the speedoconverter and tested it yesterday. Worked almost as I hoped. It was a bit shallow and I had to shim the lid a bit to get it working. The worst thing though was that the hexagonal holes that were intended to keep the nuts from spinning wasn't working properly. I think at this small size, the holes and nuts would need to be square to keep the nuts from spinning.
As a signal pickup though, it worked flawlessly, and I'm going to make a revised housing at a later date.
Throwing in a couple of pictures as usual. The first one is from the finished left sidecover (now with rubber edge protection) and one of me and the bike just before I rode it home. About an hour long journey. It still runs as it gets to little fuel, and I blame the petcock. Will test other solutions to this problem, as it must be sorted before I take another trip. First I'll take a short test run with the small white plastic tank to verify that it indeed is the petcock. The third photo is just for fun
IMG_20200418_190938 by Lars Krogh-Stea, on FlickrF?rste tur (2) by Lars Krogh-Stea, on FlickrIMG_20200418_201004 by Lars Krogh-Stea, on FlickrLarsKroghStea
Forum Mentor
[FONT="]Well.. I've done a couple of comparisons with regards to flow of fuel. I'm starting with three pictures. You can see the combinations of filter+hose/hose/no hose. Time to flow is 30 seconds and measurements are in milliliter. The reason is this; when I tested the bike last fall with the little one liter fueltank (last picture) it took off like a rocket. Ever since that I've not managed to get it to run properly. I'm guessing it runs lean, but I didn't think it would need that much fuel or be that sensitive to variations in fuel hight (I'm guessing). Anyway, here are the flow tests:[/FONT]
[FONT="]
[/FONT]
[FONT="]Hose and filter (90ml in 30 sec):[/FONT]
[FONT="] IMG_20200419_190656 by Lars Krogh-Stea, on Flickr[/FONT]
[FONT="]
[/FONT]
[FONT="]Only hose (110 ml in 30 sec):[/FONT]
[FONT="] IMG_20200419_191027 by Lars Krogh-Stea, on Flickr[/FONT]
[FONT="]
[/FONT]
[FONT="]Only petcock (110 ml in 30 sec, same as with hose. I'm not holding it completely upright)[/FONT]
[FONT="] IMG_20200419_191409 by Lars Krogh-Stea, on Flickr[/FONT]
[FONT="]
[/FONT]
[FONT="]This is obviously not enough flow. I havent changed anything else since the test run, and I'm running new white paper filter and have new intake boots between plenum and carburettors. All tests are done whith tank lid off, so there's no vacuum that hinders flow. Tanklid on/off only differs 5ml or so.[/FONT]
[FONT="]
[/FONT]
[FONT="]This is the small test tank I used last year:[/FONT]
[FONT="] IMG_20200420_184926 by Lars Krogh-Stea, on Flickr[/FONT]
[FONT="]
[/FONT]
[FONT="]As you can see, it flows over 2.5 times as much as with the hose and filter:[/FONT]
[FONT="] IMG_20200420_184910 by Lars Krogh-Stea, on Flickr[/FONT]
[FONT="]
[/FONT]
[FONT="]I blame the petcock for this. It's a repro Honda cx500 petcock to fit the cx500 tank. AFAIK the xc500 has two carburettors, and maybe thats the reason it copes with lesser flow. Or maybe the repro-petcock is crap.. I have one more petcock. Also repro but different design. I've drilled out the rivets on this one, and will try to modify it for better flow.[/FONT]
[FONT="]
[/FONT]
[FONT="]What do you guys think? Anyone know how much the petcock wil need to flow per minute to keep up with full throttle? [/FONT]
[FONT="]
[/FONT]
[FONT="]Hose and filter (90ml in 30 sec):[/FONT]
[FONT="]
IMG_20200419_190656 by Lars Krogh-Stea, on Flickr[/FONT][FONT="]
[/FONT]
[FONT="]Only hose (110 ml in 30 sec):[/FONT]
[FONT="]
IMG_20200419_191027 by Lars Krogh-Stea, on Flickr[/FONT][FONT="]
[/FONT]
[FONT="]Only petcock (110 ml in 30 sec, same as with hose. I'm not holding it completely upright)[/FONT]
[FONT="]
IMG_20200419_191409 by Lars Krogh-Stea, on Flickr[/FONT][FONT="]
[/FONT]
[FONT="]This is obviously not enough flow. I havent changed anything else since the test run, and I'm running new white paper filter and have new intake boots between plenum and carburettors. All tests are done whith tank lid off, so there's no vacuum that hinders flow. Tanklid on/off only differs 5ml or so.[/FONT]
[FONT="]
[/FONT]
[FONT="]This is the small test tank I used last year:[/FONT]
[FONT="]
IMG_20200420_184926 by Lars Krogh-Stea, on Flickr[/FONT][FONT="]
[/FONT]
[FONT="]As you can see, it flows over 2.5 times as much as with the hose and filter:[/FONT]
[FONT="]
IMG_20200420_184910 by Lars Krogh-Stea, on Flickr[/FONT][FONT="]
[/FONT]
[FONT="]I blame the petcock for this. It's a repro Honda cx500 petcock to fit the cx500 tank. AFAIK the xc500 has two carburettors, and maybe thats the reason it copes with lesser flow. Or maybe the repro-petcock is crap.. I have one more petcock. Also repro but different design. I've drilled out the rivets on this one, and will try to modify it for better flow.[/FONT]
[FONT="]
[/FONT]
[FONT="]What do you guys think? Anyone know how much the petcock wil need to flow per minute to keep up with full throttle? [/FONT]
Rough rule of thumb is about half a pound of fuel per horsepower per hour and that will provide a comfortable figure to work within.
Or, if you want to get metric on its ass...
https://en.wikipedia.org/wiki/Brake-specific_fuel_consumption
Or, if you want to get metric on its ass...
https://en.wikipedia.org/wiki/Brake-specific_fuel_consumption
LarsKroghStea
Forum Mentor
Rough rule of thumb is about half a pound of fuel per horsepower per hour and that will provide a comfortable figure to work within.
Or, if you want to get metric on its ass...
https://en.wikipedia.org/wiki/Brake-specific_fuel_consumption
Awesome! If my calculations are correct, that amounts to 0,44liter/minute. I managed to fix the biggest petcock, and when I flow tested it, I got 170ml/30sec with fuel filter and 230ml/30sec without filter. It's an easy choice then to ditch the filter. Now that I'm getting 0,46 liter fuel/minute I'm taking it out for a ride tomorrow
Here's a comparison of the petcocks. I didn't realise the difference before I opened them.
 IMG_20200421_171648 by Lars Krogh-Stea, on Flickr
 IMG_20200421_171922 by Lars Krogh-Stea, on Flickr
I sanded down the gasket and the bakside of the valve, flipped the gasket with the sanded surface in (opposite to the picture) and drilled holes for nuts/bolts. Now it works as intended
 IMG_20200421_163650 by Lars Krogh-Stea, on Flickr
Excellent. I'll be fitting a replacement petcock shortly and haven't been too impressed by the size of the outlets of the ones I've seen.
That, and filters. I've always had a filter, but they've been car-sized ones, as I've got plenty of room to fit them, having the single carb. Even so, it pays to check fuel flow every so often just to make sure they're delivering what they should.
That, and filters. I've always had a filter, but they've been car-sized ones, as I've got plenty of room to fit them, having the single carb. Even so, it pays to check fuel flow every so often just to make sure they're delivering what they should.
LarsKroghStea
Forum Mentor
Excellent. I'll be fitting a replacement petcock shortly and haven't been too impressed by the size of the outlets of the ones I've seen.
That, and filters. I've always had a filter, but they've been car-sized ones, as I've got plenty of room to fit them, having the single carb. Even so, it pays to check fuel flow every so often just to make sure they're delivering what they should.
Maybe I'll install an empty glass filter, just so I can visually inspect the flow..
LarsKroghStea
Forum Mentor
Did a short test run yesterday, and the bike pulls good through the gears. Didnt' get the engine fully warm I think, because there was a "scoffing" sound in the front wheel. Couldn't se anything, so it might be brakes, but I'm leaning towards bearings. I think I ordered an Allballs set a couple of years ago, but I can't remember if did the switch..
Next task anyway, is to make make fastners for the seat.
Next task anyway, is to make make fastners for the seat.
Well, I learned a few things this week. Very useful info about fuel flow. :applouse: :encouragement:
I like your side cover work too. :encouragement:
I like your side cover work too. :encouragement:
LarsKroghStea
Forum Mentor
Well, I learned a few things this week. Very useful info about fuel flow. :applouse: :encouragement:
I like your side cover work too. :encouragement:
Thanks man
And I really like this forum for all the helpful people and all the good ideas I've picked up.LarsKroghStea
Forum Mentor
Today I'll also throw in a picture of a great deal. I have and old (2007) Shark carbon Composite helmet. It fits me perfectly and I haven't found any other helmet I'd rather use. It was quite expensive, but I got a good deal on it as I bought it, and a full Goretex outfit plus boots and gloves, together with a used Kawasaki ZX7R. Okay, I'll post a picture of that too:
 1909837_22450845914_8814_n by Lars Krogh-Stea, on Flickr
At the time I thought that was the coolest bike you could have. Much cooler than the new ZX10R. It was large, pretty heavy for what it was (about 200kg) with about 120 hp. But the sound was like a racing car, and everything was making rattling or metal noises. That was when I realised that I'm never going to buy a new fuelinjected smooth riding bike. I wanted the rawness. But, I digress.. The point is, that I only had the black visor for my helmet. Someone (that's an even longer story) scratched up the clear one. The black visor is not road legal and impossible to see through at night or in tunnels. A new original visor costs about a 100$. Yesterday I found that a chainstore nearby sold some low cost helmets from a manufacturer that had copied the snap-on visor attachment that Shark uses. And they were selling out the rest of the spare visors. I bought two clear ones and two gold/mirror for about 10$. Both are awesome. The gold mirror gives good visibility, but it's impossible to see in through the visor. They look like this:
 Snapchat-1984076064 by Lars Krogh-Stea, on Flickr
Next part of the project is to buy a set of car hood latches and use them to make a fastening mechanism for the rear seat:
 Panserl?s by Lars Krogh-Stea, on Flickr
1909837_22450845914_8814_n by Lars Krogh-Stea, on FlickrAt the time I thought that was the coolest bike you could have. Much cooler than the new ZX10R. It was large, pretty heavy for what it was (about 200kg) with about 120 hp. But the sound was like a racing car, and everything was making rattling or metal noises. That was when I realised that I'm never going to buy a new fuelinjected smooth riding bike. I wanted the rawness. But, I digress.. The point is, that I only had the black visor for my helmet. Someone (that's an even longer story) scratched up the clear one. The black visor is not road legal and impossible to see through at night or in tunnels. A new original visor costs about a 100$. Yesterday I found that a chainstore nearby sold some low cost helmets from a manufacturer that had copied the snap-on visor attachment that Shark uses. And they were selling out the rest of the spare visors. I bought two clear ones and two gold/mirror for about 10$. Both are awesome. The gold mirror gives good visibility, but it's impossible to see in through the visor. They look like this:
Snapchat-1984076064 by Lars Krogh-Stea, on FlickrNext part of the project is to buy a set of car hood latches and use them to make a fastening mechanism for the rear seat:
Panserl?s by Lars Krogh-Stea, on FlickrLarsKroghStea
Forum Mentor
Spendt most of the day gardening and working on my home gym.. both me and my sons miss going to the gym in these Corona-times. Did get the time to buy the hood-locks though. Here are some pictures of how i envision the fastening device for the rear seat. I'm putting some rubber between the seat and the frame to prevent vibration and to put the hood-lock under tension so it won't rattle. I will also have to test which position is best.. I'll either drill and tap the square tubing or drill two metal pieces to clamp over the square tubing. We'll see.
 Setefeste by Lars Krogh-Stea, on Flickr
 Setefeste by Lars Krogh-Stea, on Flickr
Setefeste by Lars Krogh-Stea, on FlickrSetefeste by Lars Krogh-Stea, on FlickrLarsKroghStea
Forum Mentor
I guess it's when you start riding that the errors you've done come back to bite you.. I thought the ride was extremely harsh, and when I went out yesterday to bounce the shocks.. this happened.
I thought the hash ride was because of the thick oil and the cold weather, but I could just as well ridden with steel rods for shocks
I feared the worst..
that I had to buy new ones.
I took them apart to see what was wrong. Apparently the vibrations from running with thick cold oil rattled loose the end screw (1m) from the rod (3). Don't mind the arrows. That made the whole valve sink to the bottom and the spring pulled the rod through part 1c, wich is what it bottoms out on when I bounce the bike. 1c rests on 2a and that tube rests on the shim 2c on the bottom of the shock body. The only part with som visible damage was on 2c on one of the shocks. Some markings and it's bendt, but very little. I'm reusing it as it doesn't have much valving function.
 Dempere by Lars Krogh-Stea, on Flickr
The internals, washed and end screw torqued to spec with a dab of blue locktite. Filled up the shock with new SAE 5 oil.
 Dempere by Lars Krogh-Stea, on Flickr
The cool thing about having built a home gym, is that I've apparently also built a pretty safe and easy way to compress springs
 Dempere by Lars Krogh-Stea, on Flickr
 Dempere by Lars Krogh-Stea, on Flickr
I thought the hash ride was because of the thick oil and the cold weather, but I could just as well ridden with steel rods for shocks
I feared the worst..
that I had to buy new ones.
I took them apart to see what was wrong. Apparently the vibrations from running with thick cold oil rattled loose the end screw (1m) from the rod (3). Don't mind the arrows. That made the whole valve sink to the bottom and the spring pulled the rod through part 1c, wich is what it bottoms out on when I bounce the bike. 1c rests on 2a and that tube rests on the shim 2c on the bottom of the shock body. The only part with som visible damage was on 2c on one of the shocks. Some markings and it's bendt, but very little. I'm reusing it as it doesn't have much valving function.
Dempere by Lars Krogh-Stea, on FlickrThe internals, washed and end screw torqued to spec with a dab of blue locktite. Filled up the shock with new SAE 5 oil.
Dempere by Lars Krogh-Stea, on FlickrThe cool thing about having built a home gym, is that I've apparently also built a pretty safe and easy way to compress springs
Dempere by Lars Krogh-Stea, on FlickrDempere by Lars Krogh-Stea, on FlickrLarsKroghStea
Forum Mentor
[FONT="]The shocks are back in working order Next up is safetywiring of the rotors and rear sprocket. Some of the safety tabs are in bad shape and one of the screws in the front disc came loose. Before i do anymore testdriving I'll have to go over the whole bike and refit the screws with with correct torque and loctite per manual. There's been too much jumping back and forth over several years and I have clearly forgot where i've test-fitted parts and where I've done them up correctly. Safety first (from now on)![/FONT]
Next up is safetywiring of the rotors and rear sprocket. Some of the safety tabs are in bad shape and one of the screws in the front disc came loose. Before i do anymore testdriving I'll have to go over the whole bike and refit the screws with with correct torque and loctite per manual. There's been too much jumping back and forth over several years and I have clearly forgot where i've test-fitted parts and where I've done them up correctly. Safety first (from now on)![/FONT]LarsKroghStea
Forum Mentor
Not much wrenching today, but I've been at my dad's and picked up the rest of the parts and some tools. He also handed me down an old pillar drill:
 IMG_20200506_213845 by Lars Krogh-Stea, on Flickr
I'll use that to drill holes for the safetywire.
 IMG_20200506_220255 by Lars Krogh-Stea, on Flickr
I also got my safetywire pliars:
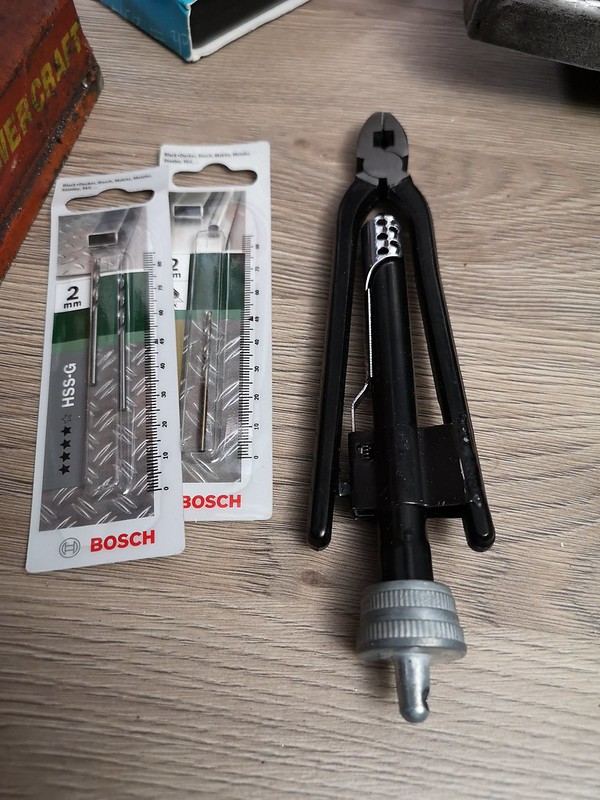 IMG_20200506_220245 by Lars Krogh-Stea, on Flickr
And my smaller torquwrenches:
 IMG_20200506_220303 by Lars Krogh-Stea, on Flickr
IMG_20200506_213845 by Lars Krogh-Stea, on FlickrI'll use that to drill holes for the safetywire.
IMG_20200506_220255 by Lars Krogh-Stea, on FlickrI also got my safetywire pliars:
IMG_20200506_220245 by Lars Krogh-Stea, on FlickrAnd my smaller torquwrenches:
IMG_20200506_220303 by Lars Krogh-Stea, on Flickr